










Handmade Garden Gift: DIY Crystal Pouring Watering Can Idea
The Magic of Handmade Garden Gifts
There is something truly special about receiving a gift that someone has made with their own hands. In a world saturated with mass-produced items, a handmade garden gift carries an emotional weight and personal charm that simply cannot be replicated by anything purchased off a shelf. The DIY crystal pouring watering can idea has become one of the most enchanting and creative garden gift concepts circulating among craft enthusiasts, combining the functional beauty of a classic watering can with the shimmering elegance of crystals and decorative resin pours.
Garden gifts occupy a unique space in the world of handmade crafting. They serve a dual purpose — they are both decorative and deeply personal, often reflecting the recipient’s love of nature, plants, and outdoor spaces. When you add the visual drama of a crystal pour effect, where iridescent or resin-coated streams of color appear to cascade from the spout of the watering can, you elevate a simple gardening tool into a genuine work of art. This project has captured the hearts of DIY creators on platforms like Pinterest precisely because it looks breathtakingly complex while remaining achievable with the right guidance and materials.
Whether you are crafting this piece as a birthday gift for a friend who tends a beloved garden, a Mother’s Day surprise, a housewarming token, or simply as a decorative accent for your own outdoor space, the crystal pouring watering can concept adapts beautifully to any occasion. The versatility of the design — from the choice of colors to the type of embellishments used — means that no two finished pieces will ever look exactly alike, making each one a genuinely one-of-a-kind creation worth treasuring for years to come.
Why This Project Has Gone Viral
The DIY crystal watering can has taken social media by storm largely because of its visual impact. The combination of a rustic or vintage watering can, cascading faux crystal streams, and shimmering gemstone embellishments creates an image so striking that it almost looks surreal. When photographed against a garden backdrop or beside blooming flowers, the finished piece has an almost fairytale quality that resonates deeply with people who love both crafting and nature. It photographs beautifully, which makes it ideal for sharing on visually-driven platforms.
Beyond its aesthetic appeal, this project has also gained traction because it is genuinely accessible. Unlike some elaborate DIY endeavors that require expensive equipment or advanced skills, the crystal pouring watering can can be approached at various levels of complexity. Beginners can create a stunning result using simple craft store supplies, while more experienced crafters can incorporate advanced resin work, genuine gemstone clusters, or intricate wire wrapping to push the design into truly professional territory. This wide accessibility range means the project appeals to an unusually broad audience.
Materials You Will Need
Gathering the right materials before you begin is one of the most important steps in ensuring your crystal pouring watering can project goes smoothly. The foundation of the project is, of course, the watering can itself. Vintage metal watering cans with a classic teardrop shape tend to photograph most beautifully and hold embellishments most effectively, but galvanized steel cans, copper-finished cans, and even simple plastic watering cans can all serve as a wonderful base depending on your preferred aesthetic and budget. Thrift stores and flea markets are excellent sources for finding cans with interesting patina and character.
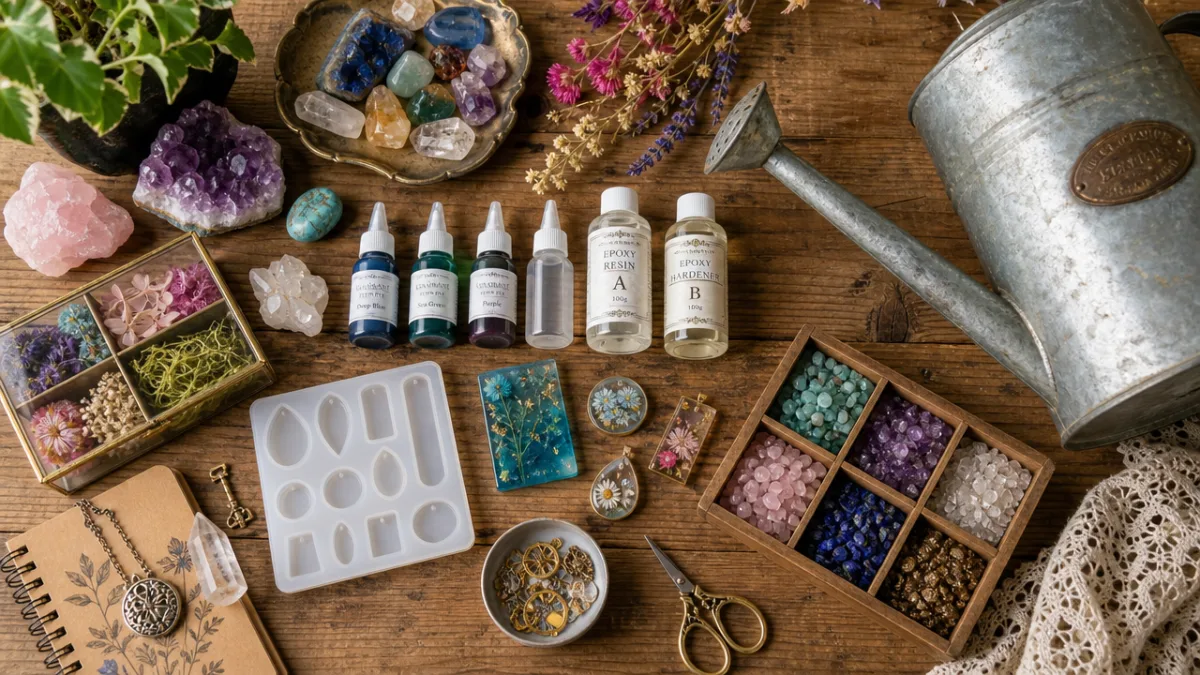
The crystal and gem elements are where you will spend the most creative energy in terms of selection. Acrylic crystal gems in a range of sizes — from tiny 5mm stones to large 30mm focal pieces — create the impression of an abundant, overflowing treasure. Resin craft supplies, including UV resin or two-part epoxy resin, allow you to create the illusion of a flowing, frozen stream pouring from the spout. You will also want to consider iridescent glitter, mica powder in jewel tones like amethyst purple, aquamarine, or golden amber, and clear casting resin to build up the flowing pour effect that makes this project so visually dramatic.
Additional supplies worth having on hand include a strong craft adhesive or E6000 glue for securing crystal embellishments, wire in gold or silver tones for adding delicate wrapped details, floral wire if you plan to create cascading trails of gems that arc through the air, and a heat gun or butane torch for removing bubbles from resin pours. Protective gloves and a well-ventilated workspace are also essential when working with resin. Metallic spray paint in gold, copper, or antique bronze can transform a plain watering can into something that looks like it belongs in an enchanted garden.
- Vintage or galvanized metal watering can (or plastic alternative)
- Acrylic crystal gems in assorted sizes and colors
- UV resin or two-part epoxy resin
- Mica powder or iridescent glitter in jewel tones
- E6000 craft adhesive or similar strong-bond glue
- Gold, silver, or copper craft wire
- Metallic spray paint for base coating
- Heat gun or butane torch for resin bubbles
- Protective gloves and silicone work mat
- Clear casting resin for stream effect
Choosing Your Color Palette
One of the most enjoyable decisions in this project is selecting a cohesive color palette that will guide your choice of crystals, resin tints, and base paint. The most popular palettes tend to lean into jewel tones — deep amethyst purples paired with silver, rich aqua blues blended with gold, or warm rose quartz pinks alongside copper. These combinations evoke the natural beauty of real gemstones and create a sense of luxury that elevates the finished piece. However, there are no strict rules, and seasonal palettes — like soft pastels for spring or warm autumnal tones — can be equally beautiful.
Consider the garden or home environment where the piece will ultimately be displayed when making your palette decision. A watering can destined for a lush green garden surrounded by flowering plants might benefit from a palette that complements or contrasts with the natural greenery — think deep jewel purples, bright turquoise, or vibrant coral. A piece intended as an indoor decorative object might call for more neutral or sophisticated tones like smoky quartz greys, champagne golds, or dusty rose. Thinking ahead to the final context helps ensure the finished piece feels at home rather than visually at odds with its surroundings.
Step-by-Step Creation Process
Beginning the construction of your crystal pouring watering can requires patience and a clear sequence of steps to ensure the best possible result. The first stage is preparing your watering can base. If you are working with a metal can, clean it thoroughly with rubbing alcohol to remove any oils or residue that might prevent paint or adhesive from bonding properly. Once clean, apply your base coat of metallic spray paint in light, even layers, allowing each coat to dry fully before adding the next. Two to three thin coats will typically produce a smooth, professional-looking finish that serves as an excellent foundation for your embellishments.
Once your base coat is fully cured — typically after 24 hours — you can begin planning the placement of your crystal embellishments. Many crafters find it helpful to do a dry layout first, arranging crystals on the surface of the can without glue to experiment with the composition. Start with your largest focal crystals and build outward with progressively smaller stones, creating a natural-looking cluster effect that appears to grow organically from the body of the can. Pay particular attention to the area around the spout, as this is where the visual drama of the pour effect will be concentrated, and it benefits from the densest clustering of gems.
With your layout planned, begin gluing crystals in place using E6000 or a similar high-strength adhesive. Work from the largest pieces down to the smallest, pressing each stone firmly and holding it in place for the manufacturer’s recommended bonding time. Allow the full adhesive to cure before moving on to the resin pour stage. This curing period — often 24 to 72 hours — is critical; rushing it risks displacing your carefully placed stones when you begin the more dynamic and hands-on work of creating the flowing crystal stream.
Creating the Crystal Pour Effect
The flowing crystal stream pouring from the spout of the watering can is the single most visually captivating element of this project, and it requires the most technical care. To create this effect, you will mix your two-part epoxy resin according to the manufacturer’s instructions, then tint it with your chosen mica powder or resin dye to achieve the color of your pour stream. The key to a convincing stream effect is working in multiple layers, building up the flowing shape gradually rather than attempting to pour a complete stream in one session. Each layer should be partially cured before the next is added.
To support the stream as it cures, many crafters use a combination of wax paper molds, floral wire armatures, and gravity. One popular technique involves threading crystal gems onto flexible wire and arranging them in an arcing cascade that extends from the spout down toward a decorative base or stand. Resin is then drizzled over this wire structure in stages, encasing the gems and building up the appearance of a frozen, flowing stream. This wire-supported approach gives you much greater control over the final shape of the stream than a purely resin-based method alone.
Adding fine iridescent glitter or holographic flake to your resin mixture before pouring can dramatically enhance the magical quality of the finished stream. When light catches these particles suspended within the cured resin, the stream appears to shimmer and sparkle from multiple angles, mimicking the way sunlight plays across moving water. Some crafters also embed tiny air bubbles intentionally by agitating their resin mixture slightly before applying — when viewed in the finished piece, these bubbles create the illusion of effervescence within the crystal stream, adding another layer of visual depth and interest.
Customization Ideas and Variations
One of the greatest strengths of the DIY crystal pouring watering can concept is how readily it lends itself to customization. The core design — a decorated can with a cascading crystal stream — is really more of a framework than a rigid template, and within that framework lies enormous creative freedom. One of the most popular variations involves theming the piece around specific crystal types that carry personal or metaphysical significance for the recipient. A watering can adorned with rose quartz crystals and pink resin, for instance, makes a deeply personal and symbolic gift for someone who loves crystal healing practices.
Seasonal and holiday-themed variations have also become popular, particularly around Christmas and Easter. A winter version might incorporate silver and blue crystals with a frosted white resin stream and tiny snowflake embellishments, creating the impression of a magical ice-pouring watering can. A spring version might use pastel pinks, lavenders, and mint greens alongside pressed flower inclusions in the resin, connecting the piece to the blooming energy of the garden season. These themed variations make the project ideal for holiday gift fairs, craft markets, and seasonal decorating.
For those who want to push the design into more elaborate territory, adding a matching decorative base or saucer can transform the watering can from a standalone object into a full sculptural display piece. A base covered in matching crystals and resin, designed to look as though the pour stream has pooled and crystallized below the can, creates a cohesive and dramatically beautiful effect. Some advanced crafters have even created illuminated versions of this project by incorporating LED fairy lights within the base or threaded through the crystal stream itself, producing a piece that glows softly and enchantingly after dark.
Gifting and Presentation Tips
The presentation of a handmade gift can be just as impactful as the gift itself, and the crystal pouring watering can deserves packaging that matches its artisanal beauty. Consider placing the finished piece in a lined gift box filled with tissue paper in a coordinating color — deep purple tissue under an amethyst-toned piece, for example, creates a cohesive and luxurious unboxing experience. Adding a handwritten card that describes the inspiration behind the piece and the care that went into making it adds a deeply personal touch that mass-produced gifts can never replicate.
If you are selling these pieces at a craft fair or market, consider displaying them in groups of varying sizes and color palettes to create a visually arresting arrangement that draws attention from across a room. Placing them on tiered risers or stands allows shoppers to appreciate the three-dimensional quality of the crystal streams from multiple angles. Good lighting is essential — placing your display near a window where natural light can catch the crystals, or using focused LED spotlights to illuminate the gems, will showcase the iridescent quality of the piece in the most flattering way possible.
Tips for Success and Common Mistakes to Avoid
Every DIY project comes with its learning curve, and the crystal pouring watering can is no exception. One of the most common mistakes beginners make is rushing the curing and drying stages between steps. Resin work in particular demands patience — attempting to add a new layer of resin before the previous layer has adequately cured can result in a cloudy, crazed, or structurally weak stream that lacks the clarity and brilliance of properly cured resin. Invest in a reliable timer and resist the temptation to check on or handle your piece prematurely, particularly during the first 24 hours after a resin application.
Another frequent challenge is achieving a strong and lasting bond between crystals and the metal surface of the watering can. Many crafters underestimate the importance of thorough surface preparation, assuming that a strong adhesive alone will compensate for any surface contaminants. In practice, oils from handling, factory coatings, and rust-preventative treatments on metal cans can all seriously compromise adhesion. Taking the time to degrease and lightly sand the surface before painting and gluing pays dividends in the longevity and durability of the finished piece, particularly if it will be displayed outdoors where it may be exposed to temperature fluctuations and moisture.
Working with resin in conditions of high humidity can also cause frustrating problems, including surface cloudiness, extended cure times, and increased bubble formation. Ideally, resin work should be conducted in conditions of moderate temperature — around 70 to 75 degrees Fahrenheit — and relatively low humidity. If you live in a humid climate, consider running a dehumidifier in your workspace during resin sessions. Always mix resin slowly and thoroughly to minimize bubble introduction, and use your heat gun at a safe distance to pop any surface bubbles before the resin begins to set.
- Always clean and degrease your watering can before applying any paint or adhesive.
- Allow each coat of paint to dry fully before adding the next layer.
- Plan your crystal layout before gluing — dry-fitting saves costly mistakes.
- Mix resin slowly to minimize bubble formation and always work in a ventilated space.
- Build your pour stream in multiple thin layers rather than one thick application.
- Allow full curing time between each resin layer — do not rush this process.
- Use a heat gun at a safe distance to eliminate surface bubbles in fresh resin.
- Protect your finished piece with a UV-resistant sealant if it will be displayed outdoors.
Caring for Your Finished Piece
Once your crystal pouring watering can is complete, proper care will ensure it remains beautiful for years to come. If the piece is intended purely as a decorative object rather than a functional watering can, keep it away from prolonged direct sunlight to prevent the resin from yellowing over time — a common issue with epoxy resin that is not treated with UV inhibitors. Dust it gently with a soft microfiber cloth rather than using water or cleaning sprays, which can dull the surfaces of acrylic crystal gems and streak the resin stream.
For pieces that will be displayed outdoors, applying a clear UV-resistant sealant over the entire finished surface before placing it in the garden adds a meaningful layer of protection against the elements. This is especially important for the resin elements, which are vulnerable to UV degradation, and for any painted surfaces that may chip or fade with exposure to rain and sun. Bringing the piece indoors during harsh winter weather or during heavy rainstorms will also significantly extend its lifespan and keep it looking its vibrant, sparkling best throughout the seasons.
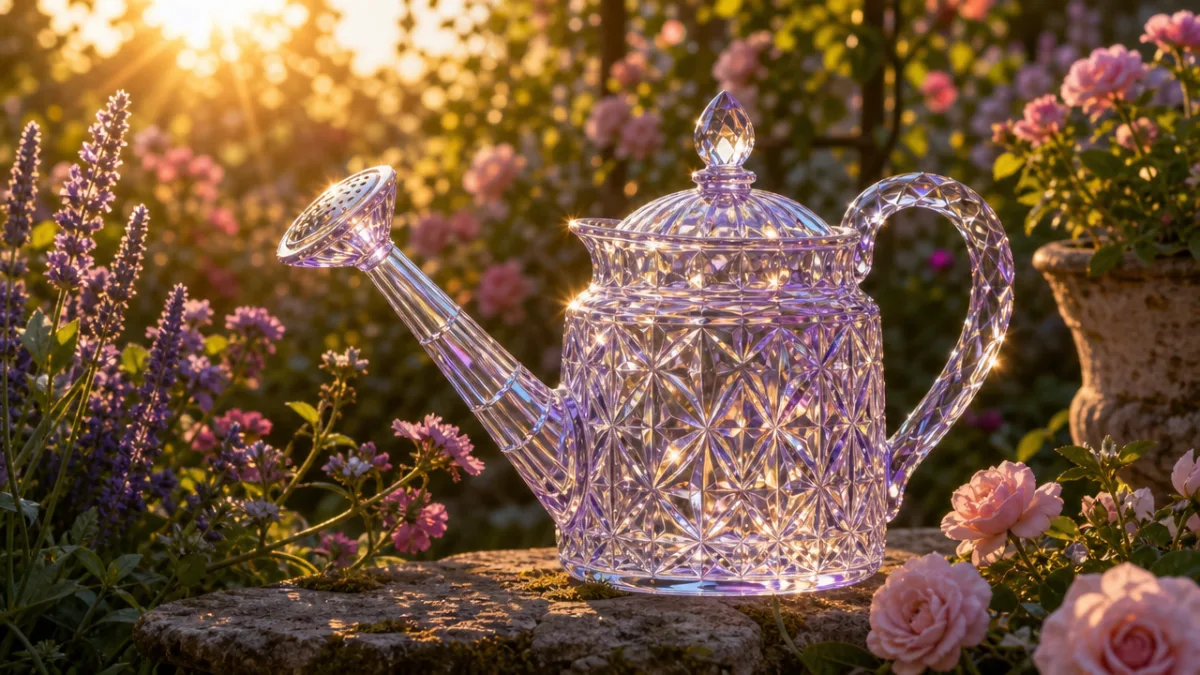
The DIY crystal pouring watering can is more than a craft project — it is an invitation to slow down, engage your creativity, and make something genuinely beautiful with your own hands. Whether you are new to resin crafting or a seasoned maker looking for your next showpiece project, this design offers the perfect blend of challenge and reward. The finished piece carries with it not just the shimmer of crystals and the flow of resin, but the warmth of the time, care, and imagination you poured into creating it — and that, more than anything, is what makes a handmade gift truly priceless.








What do you think?
It is nice to know your opinion. Leave a comment.