










How To Grow Lily of the Valley in Pots or Small Spaces
Introduction to Lily of the Valley: A Fragrant Garden Treasure
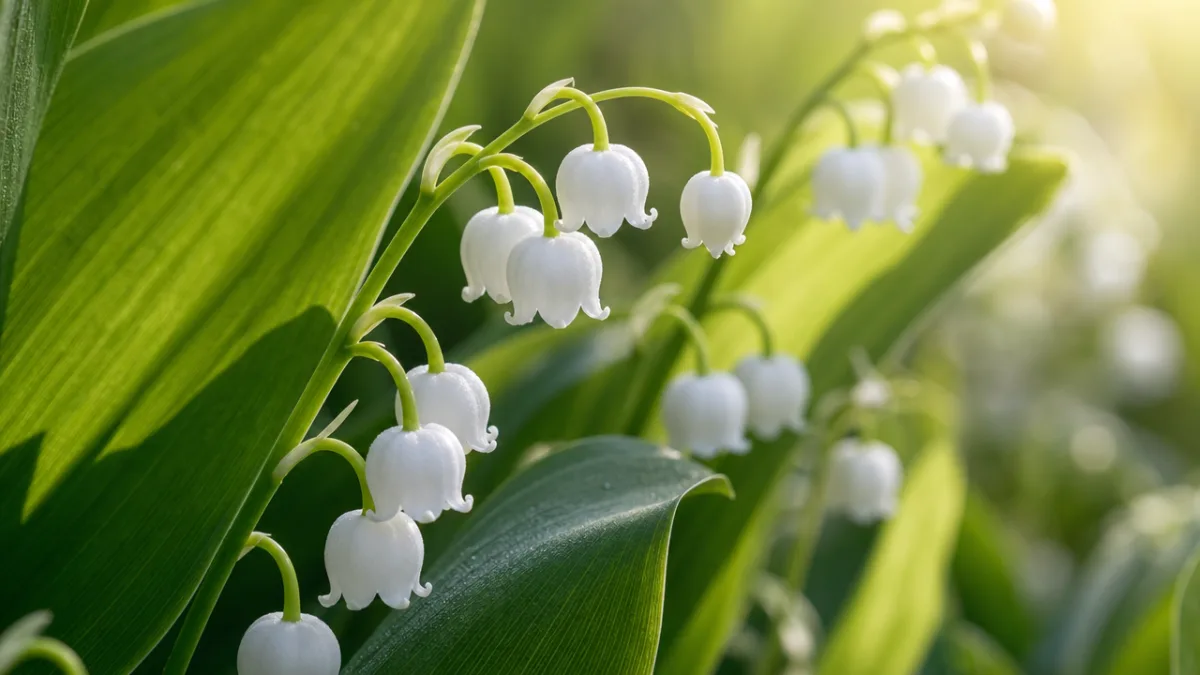
Lily of the Valley (Convallaria majalis) is one of the most beloved and enchanting plants in the gardening world, cherished for its delicate white bell-shaped flowers and intoxicating sweet fragrance. Despite its dainty appearance, this resilient perennial has been gracing gardens for centuries, appearing in wedding bouquets, perfumes, and cottage gardens across the globe. Its graceful arching stems adorned with tiny nodding blooms have earned it a permanent place in the hearts of gardeners everywhere, and for good reason — few plants can match its combination of beauty, scent, and ease of care once established.
What many gardeners don’t realize is that Lily of the Valley is remarkably well-suited to container growing and small-space gardening. If you live in an apartment, have a tiny urban balcony, or simply want to bring this woodland wonder closer to a doorway or patio where you can enjoy its fragrance, growing it in pots is a completely viable and rewarding option. With a little understanding of its needs and natural habits, you can cultivate a thriving, blooming display even without a dedicated garden bed or sprawling yard space.
This guide will walk you through everything you need to know to grow Lily of the Valley successfully in containers and small spaces. From selecting the right pot and soil mix to managing its light requirements and seasonal care, you’ll find practical, actionable advice that takes the guesswork out of the process. Whether you’re a seasoned gardener looking to try something new or a complete beginner drawn in by the plant’s legendary charm, this article will give you the confidence and knowledge to succeed.
Understanding Lily of the Valley: Growth Habits and Natural Preferences
Before you plant a single rhizome, it pays to understand how Lily of the Valley naturally grows in the wild. Native to cool temperate regions of the Northern Hemisphere, including Europe, Asia, and parts of North America, this plant thrives on the forest floor beneath the canopy of deciduous trees. It spreads by horizontal underground stems called rhizomes, or more specifically, “pips” — the small, pointed buds that emerge from the root system and eventually send up the iconic paired leaves and flower stalks each spring. This woodland origin tells you a great deal about what conditions the plant prefers.
In its natural habitat, Lily of the Valley enjoys dappled shade, cool and moist soil rich in organic matter, and protection from harsh afternoon sun. It’s a plant that thrives in the gentle, filtered light that filters through a leafy canopy rather than in the full blazing sun of an open garden. The soil it calls home is typically loamy, slightly acidic, and well-draining yet consistently moist — conditions that are easy to replicate in a container setting if you choose the right growing medium and maintain a consistent watering routine throughout the growing season.
Understanding the plant’s spreading nature is also important when planning a container garden. In the ground, Lily of the Valley can become invasive, spreading aggressively and crowding out neighboring plants. In a pot, however, this tendency works in your favor — the contained space keeps growth tidy and manageable, and after a few seasons, you’ll have a beautifully dense display of foliage and flowers without worrying about it taking over your yard. This is one of the clearest advantages of container growing for this particular species.
Choosing the Right Container and Soil for Success
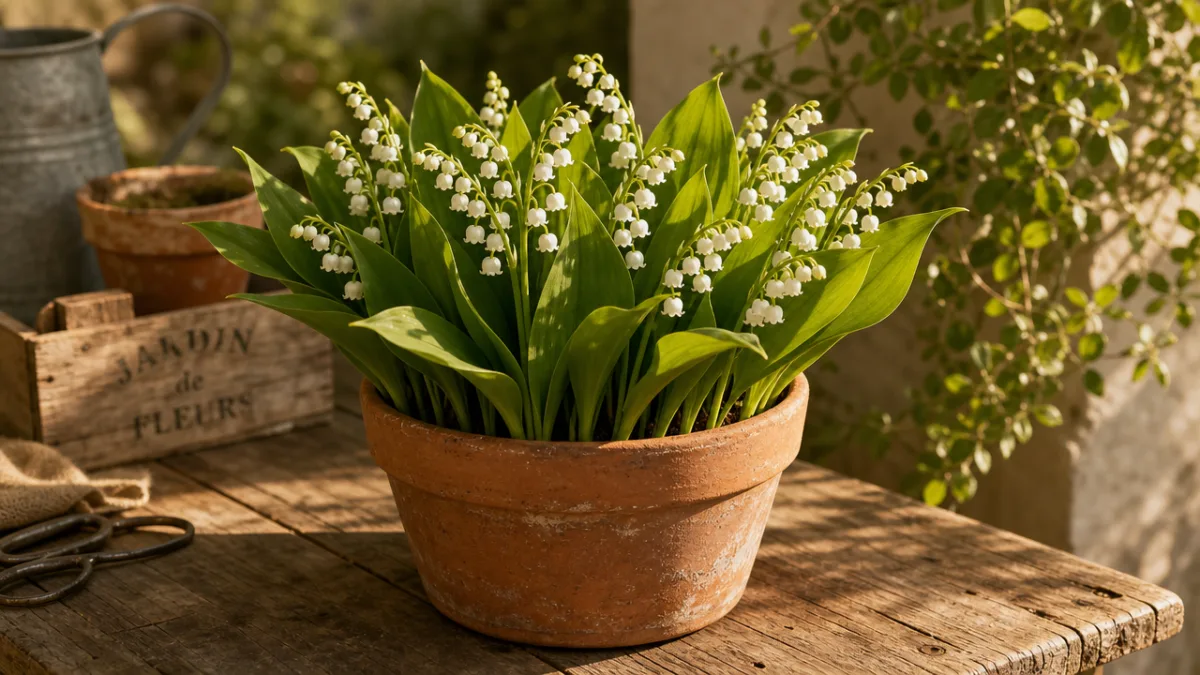
Selecting the right container is one of the most critical decisions you’ll make when growing Lily of the Valley in a small space. Because the plant spreads via rhizomes, you’ll want a wide, shallow container rather than a tall, narrow one. A pot that is at least 12 inches wide and 8 to 10 inches deep gives the rhizomes enough room to spread laterally and establish a healthy root system. Terracotta pots are a popular choice because they are porous and allow for good air circulation around the roots, though they do dry out faster than plastic or glazed ceramic options, so keep that in mind when planning your watering schedule.
Drainage is absolutely non-negotiable for Lily of the Valley. The plant needs consistently moist soil, but it will not tolerate sitting in waterlogged conditions, which can quickly lead to root rot and the death of your rhizomes. Always choose a container with multiple drainage holes at the bottom, and consider placing a layer of gravel or broken pottery shards at the base of the pot before adding your soil mix to help excess water escape freely. Elevating your pot slightly on pot feet or a saucer with pebbles can also improve air circulation and prevent water from pooling beneath the container.
For the growing medium, aim to replicate the rich, organic woodland soil the plant loves in nature. A good mix for Lily of the Valley in pots consists of equal parts high-quality potting soil, peat moss or coconut coir, and perlite or coarse sand for drainage. Adding a generous amount of well-rotted compost or leaf mold to this mix will give your plants the nutrient-rich, humus-heavy environment they crave. Avoid using heavy garden soil straight from the ground in your containers, as it tends to compact over time and restrict both root growth and drainage.
You might also consider the material and color of your container as it relates to heat retention. Dark-colored pots absorb more heat from sunlight, which can warm the root zone excessively during summer months — a problem for a plant that prefers cool roots. Lighter-colored containers or those made from materials like wood or wicker-lined planters can help keep soil temperatures more moderate. If you live in a particularly warm climate, this detail can make a meaningful difference in how well your Lily of the Valley performs from season to season.
Planting Lily of the Valley Pips: Step-by-Step Instructions
Lily of the Valley is most commonly planted from pips, which are the small dormant rhizome buds available from garden centers and online nurseries, typically in late autumn or very early spring. Planting in autumn allows the pips to establish before winter dormancy and positions them to burst into growth at the first sign of warming temperatures in spring. If you’re planting in early spring, aim to get them in the ground as soon as the soil can be worked, as the plant appreciates a good chill period to trigger strong flowering.
To plant your pips correctly, follow these straightforward steps for the best results:
- Fill your chosen container with the prepared soil mix, leaving about 2 inches of space at the top for watering.
- Soak the pips in lukewarm water for a few hours before planting to rehydrate them, especially if they arrived dried from a mail-order supplier.
- Place the pips in the soil with the pointed tip facing upward, spacing them approximately 3 to 4 inches apart to allow room for the rhizomes to spread.
- Cover the pips with about 1 to 1.5 inches of soil — they don’t need to be buried deeply, and planting too deep can inhibit flowering.
- Water gently but thoroughly after planting, ensuring the soil is evenly moist throughout the container.
- Place the pot in a cool, shaded spot and keep the soil consistently moist while the plants establish.
After planting, patience is key. Lily of the Valley can take a few weeks to show any visible signs of growth, particularly if planted in autumn. Don’t be alarmed if nothing appears to be happening above the soil surface — the plant is quietly developing its root system underground. Once the temperature begins to rise in spring, you’ll likely be rewarded with a surprisingly rapid emergence of the paired leaves and, shortly after, the iconic arching stems bearing those beautiful white bells. First-year plants may not flower as prolifically as established ones, so give them time to settle in.
One useful tip for container gardeners is to “force” Lily of the Valley pips indoors during winter for an early display of blooms. Place potted pips in a cold but frost-free location for several weeks to simulate winter dormancy, then bring them into a warmer indoor space in late winter. With adequate light and warmth, you can often coax the plant into bloom weeks ahead of its normal outdoor schedule — a wonderful trick for bringing a touch of spring fragrance into your home during the coldest months of the year.
Light, Watering, and Feeding: Keeping Your Plants Healthy
Getting the light conditions right is arguably the most important factor in growing healthy Lily of the Valley in containers. The plant performs best in partial to full shade, making it an excellent choice for those tricky north-facing balconies, shaded patios, or spots under a pergola where many other flowering plants struggle. While it can tolerate a couple of hours of gentle morning sun, exposure to hot afternoon sun will quickly scorch the leaves, cause wilting, and reduce flowering. If you’re growing your pots outdoors, position them where they’ll receive bright, indirect light for most of the day.
Watering is another area that requires consistent attention. Lily of the Valley prefers soil that stays evenly moist throughout the growing season — never bone dry, but also never saturated. In container growing, the soil tends to dry out more quickly than in garden beds, particularly during warm or windy weather, so you may need to water several times a week during the height of summer. The best practice is to check the soil moisture by pressing your finger about an inch into the surface; if it feels dry at that depth, it’s time to water. Always water at the base of the plant rather than overhead to reduce the risk of fungal issues on the foliage.
Feeding your container-grown Lily of the Valley is important because nutrients in pot soil are depleted more quickly than in open ground, especially with regular watering. In early spring, as the first signs of growth emerge, apply a balanced slow-release granular fertilizer worked lightly into the top inch of soil. A second application in midsummer will support healthy foliage development and help the plant build up the energy reserves it needs for the following year’s flowering. Avoid high-nitrogen fertilizers, which can promote excessive leafy growth at the expense of blooms.
Beyond feeding, it’s worth mulching the top of your container with a thin layer of fine bark chips, leaf mold, or compost. This serves multiple purposes: it helps retain soil moisture between waterings, keeps the root zone cool during warmer months, and adds a slow trickle of organic nutrients as it breaks down. In autumn, leaving the mulch in place also helps protect the rhizomes from frost damage, which is especially important if your container will be left outdoors through winter in a colder climate.
Seasonal Care, Overwintering, and Long-Term Container Management
One of the great joys of growing Lily of the Valley is that it’s a true perennial — it comes back year after year with minimal intervention, making it an excellent long-term investment for your container garden. After the flowers fade in late spring or early summer, the plant will continue to produce its attractive broad green foliage throughout the warmer months, providing a lush backdrop to other container plantings. Do not cut back the leaves after flowering, as they are essential for photosynthesis and help the plant store energy in the rhizomes for the following year’s growth.
As autumn arrives and temperatures cool, the foliage will begin to yellow and die back naturally. This is completely normal and is the plant’s way of entering dormancy for the winter months. At this point, you can gently remove the dead foliage and tidy up the container. In milder climates, the rhizomes will survive outdoors in their pot through winter with minimal protection. In colder regions where temperatures drop well below freezing, it’s a good idea to move containers into an unheated garage, shed, or cold frame to protect the rhizomes from hard freezes that could damage or kill them.
Every few years, your container-grown Lily of the Valley may become overcrowded as the rhizomes multiply and fill the pot. Signs of overcrowding include reduced flowering, smaller leaves, and soil that dries out very quickly after watering. When this happens, it’s time to divide and repot. The best time to do this is in early autumn after the foliage has died back. Carefully tip the plant out of its container, gently tease apart the rhizome clumps, and replant the healthiest sections into fresh potting mix. The divisions you remove can be potted up and given to friends or used to start new containers in different spots around your outdoor space.
It’s also worth being aware that all parts of Lily of the Valley are toxic if ingested, including the attractive red berries that may appear after flowering. This is an important consideration if you have children or pets who share your living space. Place containers out of reach where necessary, and always wash your hands thoroughly after handling the plant or working with the soil. Despite this caution, the plant is perfectly safe to grow and enjoy as a display plant in your home or garden, and its toxicity in no way diminishes the extraordinary beauty and fragrance it brings to any space.
Design Ideas and Creative Ways to Display Lily of the Valley in Small Spaces
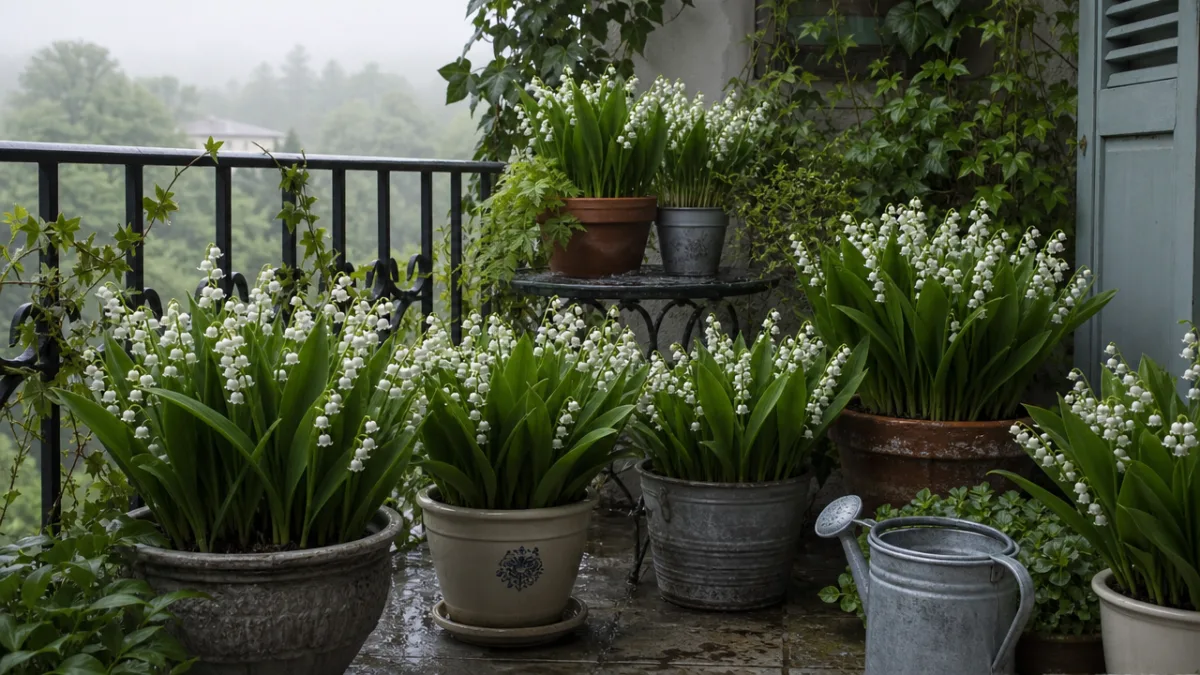
One of the most rewarding aspects of container growing is the creative freedom it gives you to design beautiful, curated plant displays that suit your personal style and available space. Lily of the Valley lends itself beautifully to a number of elegant and imaginative arrangements. A classic approach is to plant it in a grouping of three or five same-sized white or terracotta pots of varying heights, arranged on a shaded doorstep or balcony corner. The repetition of the pots creates a cohesive, professional look, while the varying heights add visual interest and allow you to see all the plants clearly.
For a more naturalistic woodland garden feel, consider planting Lily of the Valley in a wide, low trough planter alongside compatible shade-loving companions. Plants that share similar growing conditions and pair beautifully with Lily of the Valley include:
- Hostas — their bold, textured foliage provides a striking contrast to the delicate Lily of the Valley leaves and blooms.
- Ferns — feathery fronds create a lush, woodland backdrop and thrive in the same shaded, moist conditions.
- Astilbe — their feathery plumes in pink, white, or red add a vertical element and bloom just after Lily of the Valley finishes.
- Bleeding Heart (Dicentra) — another woodland perennial with arching stems and pendant blooms that complement the Lily of the Valley perfectly.
- Primroses — bright early-spring color that peaks just before Lily of the Valley comes into full bloom, extending your display season.
Window boxes are another creative option for displaying Lily of the Valley in small urban spaces. A long rectangular window box planted densely with pips can create a stunning ribbon of white blooms and fragrance directly at nose level when placed beneath a window or along a balcony railing. Because the plant has relatively shallow roots, it adapts well to the constraints of a window box as long as drainage is adequate and watering is consistent. In the months after flowering, the lush green foliage continues to look attractive and fresh throughout summer.
Finally, don’t overlook the possibility of bringing your potted Lily of the Valley indoors during its flowering period. A pot in full bloom placed on a side table, windowsill, or kitchen counter will fill the room with its extraordinary scent and bring a genuine sense of spring into even the most urban home. Once flowering is complete, move the pot back outdoors to a shaded spot where the plant can recover and rebuild its energy for the following year. This simple rotation between outdoors and indoors during the bloom period is one of the most practical and rewarding tricks in the container gardener’s toolkit.








What do you think?
It is nice to know your opinion. Leave a comment.