










Mastering the Invisible Join in Crochet: A Complete Guide to Seamless Finishing
What Is the Invisible Join and Why Does It Matter?
The invisible join is one of those techniques that really marks a turning point in someone’s crochet journey. Basically, it’s a way of fastening off at the end of a round so the final stitch blends right into the first one — no jog, no bump, no telltale seam where the round started and ended. If you’ve ever finished a gorgeous granny square or a colorful mandala and then felt your heart sink a little at that obvious join line, this is the technique you’ve been waiting for.
The difference it makes is genuinely striking. A traditional finish leaves a raised, slightly awkward connection point that immediately draws the eye and breaks up the flow of your stitch pattern. With the invisible join, that spot just disappears into the fabric. The last stitch ends up looking exactly like every other stitch around it — a proper slip stitch or single crochet, depending on your pattern — and once your tail is woven in, even you won’t be able to find the join. For anything you’re displaying or giving as a gift, that matters a lot.
And it’s not just about looks. A lumpy, overcrowded join can actually create tension problems that distort your work over time, especially after it goes through the wash. The invisible join spreads things out more evenly so there’s no stress concentrated at one spot, which helps your finished piece hold its shape better in the long run. Whether you’re making wearables, home décor, or delicate doilies, it’s a technique worth adding to your repertoire.
The Tools and Materials You Will Need
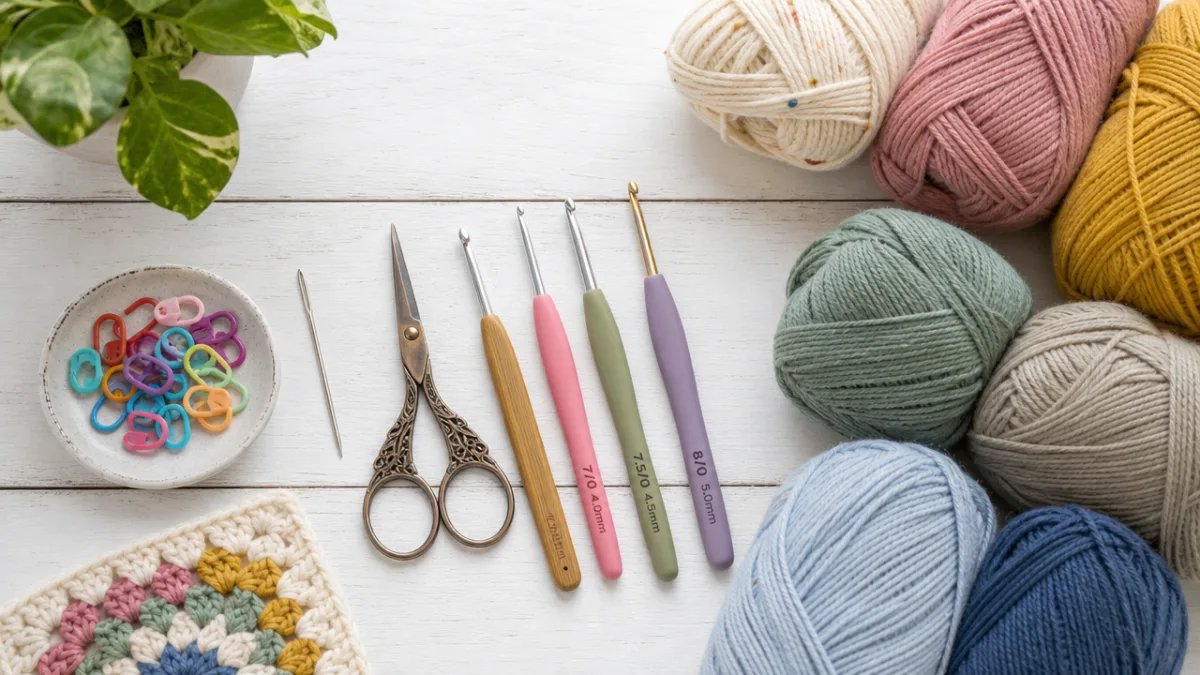
Before you dive in, it’s worth getting everything together — though honestly, you probably already have most of it. The only real essential beyond your crochet hook is a blunt-tipped yarn or tapestry needle. The blunt tip is key because it slides between the strands of your yarn rather than splitting them. Split your yarn mid-join and you’ll end up with a messier result than if you’d just used a regular slip stitch.
The yarn you’re working with also makes a difference. Smooth, plied yarns — mercerized cotton, acrylic, a nice worsted wool — are the easiest to work with because their structure is clean and predictable. Fuzzy or textured yarns like mohair or bouclé are trickier, since the fibers hide the individual stitches and make it hard to see exactly where you’re inserting your needle. If you’re new to this technique, grab something smooth, medium-weight, and light-colored for your first few tries. You’ll be amazed how much easier it is when you can actually see what you’re doing.
You’ll want sharp scissors too — cut your yarn cleanly and leave a tail of at least six to eight inches. Too short and you’ll be fighting to thread and maneuver it; too long and it just gets in the way. A stitch marker or small piece of contrasting yarn to mark the first stitch of your round before you start is also really helpful, since finding that stitch accurately is one of the most important steps. Good lighting is worth mentioning too — this is detail work, and squinting in a dim room makes everything harder.
- Blunt-tipped tapestry or yarn needle in a size appropriate for your yarn weight
- Sharp scissors for clean yarn cuts
- A smooth, light-colored practice yarn for beginners
- Stitch markers to identify the first stitch of the round
- Adequate lighting to clearly see your stitch structure
Step-by-Step Instructions for the Invisible Join
Finish your final round as normal, but stop before joining — work right up to the first stitch of the round without actually working into it. Then fasten off by cutting your yarn and pulling the tail all the way through the loop on your hook. You’ll now have a loose tail and a visible gap between the last and first stitches. Don’t worry about that gap — it’s completely expected and it’ll close up perfectly once you work the join.
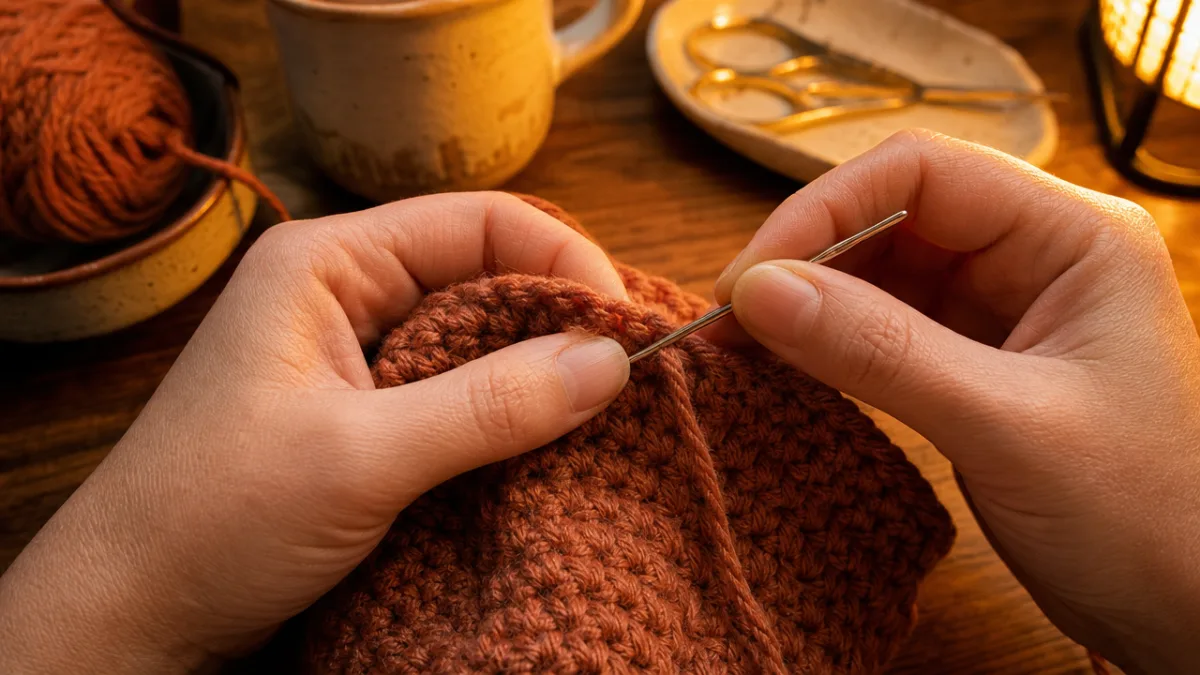
Thread your tail onto your tapestry needle. Find the first stitch of the round — the one you worked into when the round began. If you placed a stitch marker there at the start (which is a great habit), it’ll be easy to spot. Insert your needle from front to back through both loops of that first stitch, just as if you were making a slip stitch. Pull the tail through, keeping it loose enough not to distort anything but snug enough to match the tension of the stitches around it.
Now insert your needle into the back loop only of the very last stitch you made — the one your tail is coming out of. Pull the tail through and gently ease everything into place until the join sits at the same height and tension as the stitches on either side. When it’s right, that little loop of tail will look exactly like a regular stitch, and the join will be invisible from the front of your work. Weave in the tail securely on the wrong side, and you’re done.
- Complete the final round, stopping before joining, then fasten off and pull the tail through.
- Thread the tail onto a blunt tapestry needle.
- Insert the needle front to back through both loops of the first stitch of the round.
- Pull the yarn through, maintaining even tension.
- Insert the needle into the back loop only of the last stitch.
- Pull through and adjust tension to match surrounding stitches.
- Weave in the tail securely on the wrong side of the work.
Common Mistakes and How to Avoid Them
Even crocheters who’ve been at this for years can stumble a bit when they first try the invisible join, but knowing what usually goes wrong ahead of time really helps. The most common mistake is inserting the needle into the wrong stitch or the wrong loops of the right stitch. Since the whole point is to mimic the exact path a normal stitch would take, any deviation — even a small one — can leave you with a join that looks slightly raised, off-center, or weirdly twisted. It’s worth slowing down and taking a good look at your stitch structure before you go in with the needle.
Tension is the other big one. It’s tempting to pull tight to make the join disappear, but that actually puckers the fabric and makes it more obvious. Leaving it too loose creates a floppy, oversized stitch that stands out just as much. You’re aiming for a joining loop that matches the height and width of the stitches right next to it. Holding your work up at eye level and comparing the join to its neighbors is a really practical way to check — adjust until they look like the same stitch.
Cutting your tail too short before you start is another easy mistake to make. If you trim down to just an inch or two thinking it’ll be faster to weave in, you’ll find it nearly impossible to thread and maneuver. Your tail needs to be long enough to thread onto the needle, pass through two insertion points, and then get woven in for at least an inch on the wrong side. Six inches is the minimum — eight is better. You can always trim the extra once everything is secure.
And finally, a lot of beginners have trouble tracking down the first stitch of the round, especially after working several rounds without marking anything. The fix is simple: get into the habit of dropping a stitch marker into the first stitch of every round before you move on. It doesn’t need to be a fancy marker — a loop of contrasting yarn, a paperclip, anything works. That one small habit will make crocheting in the round easier across the board, not just when it’s time to join.
Adapting the Invisible Join to Different Stitch Types
The basic method described above works beautifully for single crochet rounds, which is where most people first use it. But crochet patterns use all kinds of stitches, and knowing how to adapt the technique to different stitch heights and structures makes it genuinely useful across all your projects. For half double crochet, the process is nearly identical to single crochet — just keep in mind that half double crochets have that characteristic third loop, so make sure your needle path accounts for how the stitch actually sits.
Double crochet rounds take a little more thought because the stitch is taller and the structural loops are in different places. Many experienced crocheters use a slightly modified approach here: after going through the first stitch, they pass the needle under both top loops of the last stitch from back to front before pulling through and adjusting tension. It takes a bit of practice, but once you get the feel for it, it really does mimic the lean and height of a double crochet much more convincingly than the basic method would on its own.
Granny squares and motifs that end in chains or chain spaces are their own category. If your final round ends with a chain and you’re joining back into a chain space or corner rather than a specific stitch, the principle is the same but the execution gets a bit more freeform — you’re essentially using your needle and tail to construct a small, fake chain or stitch that fills the visual gap. This is one of those situations where a video tutorial showing your specific stitch type is worth its weight in gold, because the needle path varies enough between stitch types that written descriptions can only get you so far.
Colorwork crochet — tapestry crochet, rounds in multiple colors — adds another layer to think about, since you may be joining in a color that’s changing. The main thing to watch is that the tail you’re using for the join belongs to the correct color for that last stitch, and that it blends naturally with both the last and first stitches without introducing a weird color shift. Weave in any additional color tails securely and in the right direction, and your color transitions should stay clean from every angle.
Practicing and Perfecting Your Invisible Join
Like anything in crochet, the invisible join gets a lot better with practice — and the fastest way to build confidence is to set aside some low-stakes time specifically for it. Try working a few simple single crochet rounds — small coasters or test swatches are perfect — and finish each one with an invisible join before starting the next. When you’re not worrying about a larger project, you can focus entirely on the mechanics of the join and actually notice what’s working and what isn’t.
Video tutorials are genuinely one of the best resources for this particular technique, because so much of what makes it click is visual. Watching someone insert the needle at exactly the right angle, pull the yarn to just the right tension, and then hold it up next to the camera so you can compare the join to the surrounding stitches gives you a level of understanding that words and photos really can’t replicate. Plenty of talented crochet educators on YouTube have filmed slow-motion, multi-angle invisible join tutorials — pause, rewind, and practice right along with them.
After each attempt, take a critical look at your own work. Hold the piece up in good light, turn it to see the join from different angles, and compare it honestly to the stitches around it. Is the joining stitch the right height? Does it lean the same direction as its neighbors? Does the tension match? If something’s off, try to pinpoint which step caused it and make a small adjustment on your next try. That kind of deliberate, reflective practice will get you there much faster than just repeating the same motions without really evaluating the results.
Once your invisible join is solid and consistent, you’ll find yourself doing it automatically at the end of every round — it’ll just become part of how you work. At that point, it’s really fun to pass it on. Teach a crochet friend, share it in your local yarn group, or write about it if you have a blog or social media presence. Teaching forces you to examine your own process with fresh eyes and articulate all the little things you’ve learned through experience. The invisible join is genuinely one of those skills worth spreading around.
Incorporating the Invisible Join Into Your Projects
Once the invisible join is part of your regular toolkit, you’ll start seeing opportunities to use it everywhere. Granny square blankets are the most obvious example — finish each square with an invisible join before seaming them together, and the finished blanket will have a clean, polished right side with no visible join lines anywhere. That kind of finish makes a piece feel genuinely special, the sort of thing you’d be proud to give at a baby shower, a wedding, or any occasion where the gift actually matters.
Wearables — hats, cowls, yokes, sleeve cuffs — benefit hugely from seamless finishing because they’re worn right up against the face and body, where every little detail gets noticed. A perfectly joined hat brim or a flawless cowl edge says a lot about the care that went into the piece. If you sell your crochet or regularly make things for other people, using the invisible join consistently is one of the clearest signals you can send that your finishing skills are genuinely excellent. Other crafters will notice, and they’ll appreciate it.
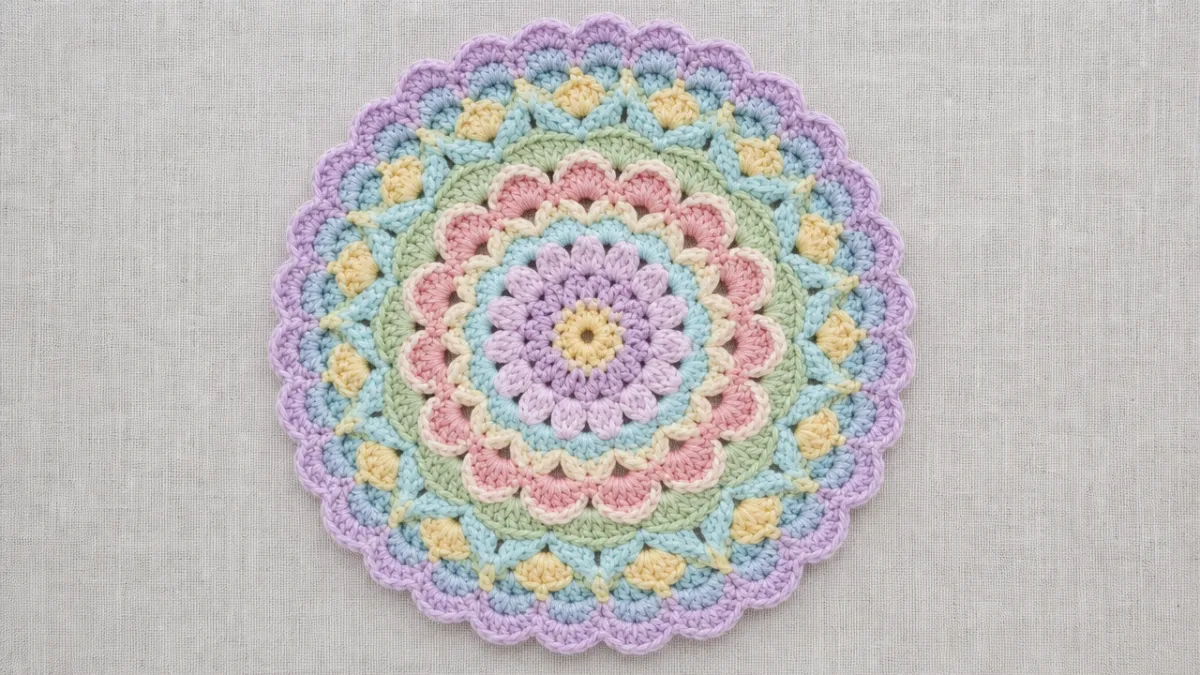
Home décor items like pot holders, placemats, wall hangings, and decorative baskets also shine with seamless finishing. These pieces are often displayed flat or hung where all sides are visible, so any irregularity at the join catches the eye every single time. Mandalas and geometric wall hangings especially — they’re designed around symmetry and visual harmony, and even a small disruption at the join can undermine the whole effect. The invisible join makes sure the geometry of the piece holds all the way to the very last stitch.
Maybe the best thing about making the invisible join a regular part of your practice, though, is what it does to how you think about finishing in general. A lot of crocheters — especially those who are self-taught — treat finishing as a chore to rush through so they can finally call something done. But once you’ve experienced the satisfaction of a join that’s truly invisible, that starts to change. Finishing starts to feel like a final act of care for the piece rather than a tedious last step. And once you’re actually looking forward to it, you’ll notice it enriches how you feel about the whole craft.








What do you think?
It is nice to know your opinion. Leave a comment.