










“`html
DIY Shelves: The Complete Guide to Building Beautiful, Functional Storage for Every Room
Why DIY Shelves Are Worth Every Bit of Effort
There’s something genuinely satisfying about stepping back and looking at a wall full of shelves you put together yourself. Beyond the pride of it, DIY shelves give you a level of customization that store-bought furniture just can’t touch. You pick the wood, the finish, the dimensions, the bracket style, the whole look — every detail is yours to decide. Whether you’re working with a tiny apartment bathroom or a big garage workshop, building your own shelves means you get exactly what you need instead of whatever happened to be in stock at the furniture store.
Cost is another big reason to go the DIY route. A set of floating shelves from a high-end furniture store can easily run several hundred dollars, while the materials to build the same shelves yourself might cost fifty to eighty bucks. That savings adds up fast when you need shelving in multiple rooms. With a modest investment in tools — most of which you’ll use over and over again — you can fill an entire home with custom storage for a fraction of what retail would cost you. Yes, there’s a learning curve, but it’s manageable, and every project teaches you something that makes the next one go faster and smoother.
There’s an environmental angle worth thinking about too. When you build your own shelves, you can seek out reclaimed lumber, choose sustainably harvested wood, or repurpose materials that might otherwise end up in a landfill. A lot of mass-produced furniture relies on particleboard or MDF with formaldehyde-based adhesives that off-gas into your home for years. Solid wood shelves you build yourself are durable, repairable, and can honestly last a lifetime — or get handed down to the next generation with a fresh coat of paint or stain.
Understanding the Different Types of DIY Shelves
Before you pick up a saw, it’s worth getting familiar with the different shelf styles available to you. Each type serves a different purpose, works better on certain wall constructions, and calls for a different level of skill and tooling. Floating shelves are probably the most popular choice right now because they create that clean, seamless look where no visible brackets interrupt the line of the shelf. They use hidden hardware — usually a steel rod or a French cleat system — anchored into wall studs, and they look fantastic in living rooms, bedrooms, and kitchens where aesthetics really matter.
Bracket shelves are the most straightforward to build and install, which makes them a great starting point for beginners. You mount a bracket — metal, wood, or decorative iron — directly to the wall, then set or attach a board on top. The bracket handles all the structural work, so you can use thinner or lighter wood without worrying about sag. Bracket shelves are incredibly versatile and come in a huge range of styles, from sleek minimalist steel to ornate cast iron that fits a more traditional or vintage space. They’re also easy to adjust or take down when your needs change.
Built-in shelves are at the ambitious end of the DIY spectrum. These are floor-to-ceiling or wall-to-wall structures that become actual architectural features of the room. They typically involve vertical side panels, horizontal shelves, and sometimes doors or drawers, all built from plywood or solid wood and finished to match the room’s trim. They take more planning, materials, and skill, but built-ins genuinely add value to a home and create a polished, custom look that can completely transform a space. Other fun options include pipe shelves, ladder shelves, rope-hung shelves, and peg rail systems — each with its own distinct personality.
- Floating shelves: Clean, modern look with concealed hardware; best for decorative and light-duty storage in living areas, bedrooms, and bathrooms.
- Bracket shelves: Easy to install, highly adjustable, and available in countless styles; ideal for kitchens, offices, garages, and utility spaces.
- Built-in shelves: Maximum storage and visual impact; a more involved project that permanently transforms a room and adds home value.
- Pipe shelves: Industrial aesthetic using threaded black iron pipe as brackets; pairs well with reclaimed wood for a rustic, warehouse-inspired look.
- Ladder shelves: Freestanding and portable, leaning against the wall; no wall anchoring required, making them perfect for renters.
- Rope-hung shelves: Bohemian or nautical style using thick rope threaded through drilled holes; lightweight and easy to make, great for plants and small décor.

Essential Tools and Materials You Will Need
One of the most common mistakes first-time shelf builders make is not gathering the right tools before they start. You don’t need a fully stocked woodworking shop, but there are a handful of things that make the difference between a shelf that looks professional and one that looks, well, homemade in all the wrong ways. A stud finder is completely non-negotiable — shelves carry weight, and that weight needs to anchor into studs or proper wall anchors, not just drywall. A good level, both a short torpedo level and a longer four-foot one, keeps your shelves perfectly horizontal instead of subtly tilting in a way that gets more obvious over time.
For cutting, a miter saw (sometimes called a chop saw) is the most efficient tool for clean, square crosscuts in shelf boards. If you don’t own one, many hardware stores rent them, or a circular saw with a quality blade and a straightedge guide works perfectly well. A drill driver is essential for driving screws and drilling pilot holes, and you’ll want both standard drill bits and a countersink bit so screw heads sit flush with or just below the wood surface. Sandpaper in multiple grits — 80, 120, and 220 — along with a sanding block or random-orbital sander will help you get a smooth, paint-ready or stain-ready surface.
The wood you choose matters a lot for both looks and performance. Common board from a big-box hardware store — usually pine or whitewood — is affordable, easy to find, and takes paint really nicely, though it can show knots and grain variation. For a more consistent look, consider poplar, which is also relatively inexpensive and cuts cleanly. If you want a dramatic wood grain to show through a stain or oil finish, oak, walnut, or maple are beautiful choices, though they’ll cost more. Plywood with a hardwood veneer face is a smart pick for longer spans because it resists sagging much better than solid pine boards of the same thickness.
- Stud finder — locate framing before drilling any anchor points
- Level (torpedo and 4-foot) — ensure perfectly horizontal installation
- Drill and driver — for pilot holes, countersinking, and driving screws
- Miter saw or circular saw — clean, accurate crosscuts in your boards
- Tape measure and pencil — measure twice, cut once
- Sandpaper (80, 120, 220 grit) — smooth surfaces before finishing
- Clamps — hold pieces together while glue dries or while you drill
- Safety glasses and hearing protection — always protect yourself
Step-by-Step Instructions for Building Floating Shelves
Floating shelves are the holy grail of DIY shelf projects — sleek, elegant, and endlessly versatile. The most reliable method for building them at home uses a concealed cleat system: a piece of wood (or a purpose-built metal bracket) gets anchored firmly to the wall, and a hollow shelf box slides over it. Start by figuring out your dimensions. Measure the wall space carefully and decide on your shelf depth — typically eight to twelve inches works well for books and décor — and your shelf length, which should span at least two studs. Cut your top, bottom, and side pieces from 3/4-inch plywood or solid wood.
Assemble the shelf box by gluing and nailing or screwing the pieces together, leaving the back open so it can slide onto the cleat. Use wood glue at every joint for maximum strength, and wipe away any squeeze-out with a damp cloth before it dries. Once the box is together, sand all the exterior surfaces through your grits, finishing with 220 for a silky result. Apply your chosen finish — paint, stain, or a clear polyurethane — and let it cure fully before installation. Rushing the finish is one of the most common mistakes people make; a fully cured finish is far more durable and washable than one that’s only dried on the surface.
For installation, use your stud finder to locate the studs behind the drywall and mark their centers clearly with painter’s tape. Hold your cleat against the wall, use your level to confirm it’s perfectly horizontal, and drill pilot holes through the cleat and into the studs. Drive 3-inch structural screws into each stud — at least two screws, and preferably three or four for longer shelves. Give the cleat a firm tug to make sure it’s rock solid. Then slide your finished shelf box over the cleat from the front, pressing it flush against the wall. If you want extra security, drive one or two screws up through the bottom of the shelf box into the cleat from inside. Step back and enjoy the view.
The finishing touches are what take a shelf from good to genuinely professional. If there are small gaps between the shelf and the wall because of an uneven surface, a thin bead of paintable caulk smoothed with a damp finger will make them disappear. Check that the shelf is still level after installation and make any minor adjustments before the caulk sets. Think about what you’re actually going to put on the shelf — heavy books need more robust anchoring than lightweight decorative objects. As a general rule, two properly anchored screws into studs should hold fifty to seventy-five pounds per shelf, but when in doubt, always add more anchoring rather than less.
Finishing, Styling, and Maximizing Your Shelf Space
A beautifully built shelf deserves a finish that does it justice. Paint is the most versatile option — a satin or semi-gloss in white or a soft neutral looks clean and contemporary, while a deep charcoal or forest green adds real drama. If you’re painting, always prime raw wood first to seal the grain and keep the wood from drinking up your topcoat unevenly. Two thin coats with a light sanding between them will look far better than one thick coat, which tends to drip, sag, and show brush marks. For a furniture-grade finish on flat surfaces, a foam roller minimizes texture in a way a brush simply can’t.
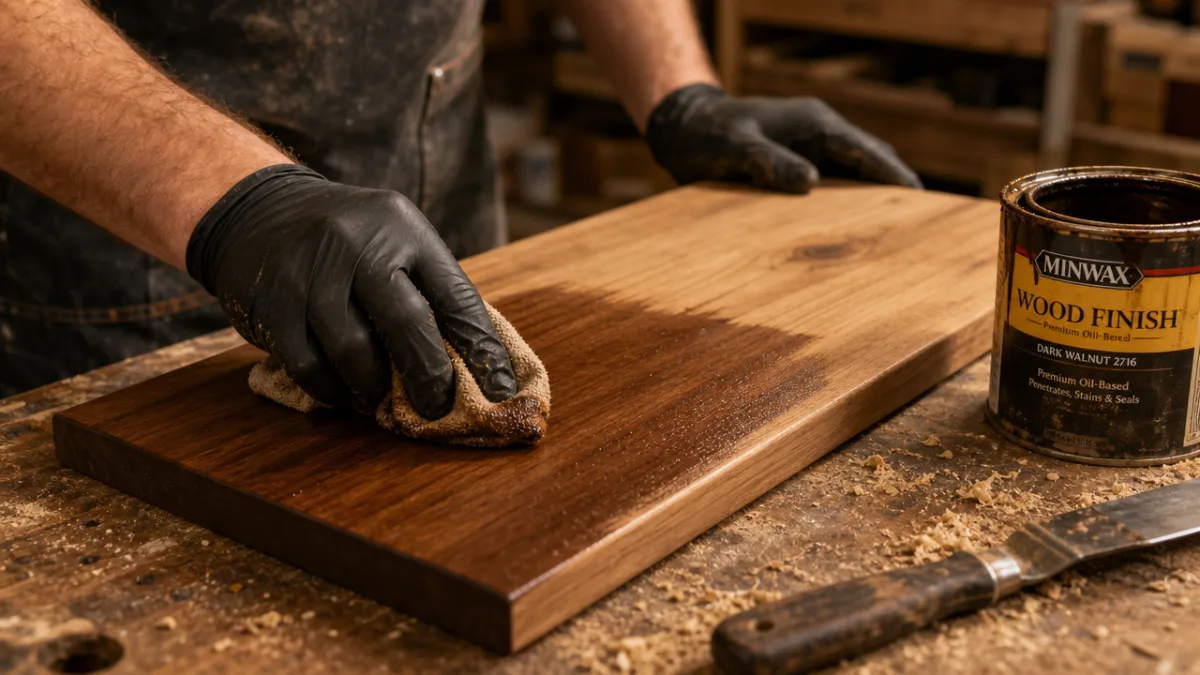
Staining opens up a world of warmth and natural character. The key to a great stain job is meticulous surface prep — any scratches or mill marks will be amplified by stain, not hidden. After your final sanding with 220 grit, apply a pre-stain wood conditioner to pine or other soft, porous woods to prevent blotchy absorption. Apply stain with a brush or cloth, work it into the grain, and wipe off the excess before it gets tacky. Finish with at least two coats of a clear topcoat — oil-based polyurethane for maximum durability, or water-based for faster drying and a slightly cooler, less amber tone.
Once your shelves are up and finished, the styling process begins — and honestly, this is where the project really comes to life. The most visually pleasing shelf arrangements mix objects of varying heights, textures, and functions. Group books of similar heights together, but vary things by standing some upright and stacking others horizontally to create visual rhythm. Add plants — trailing varieties like pothos or string of pearls bring wonderful organic movement — alongside candles, framed photos, sculptural objects, and small woven baskets for hidden storage. Leave some breathing room between groupings; a completely packed shelf looks cluttered, while one with a little thoughtful negative space looks curated.
For functional shelves in kitchens, offices, or garages, organization tools become your best friends. Matching containers — glass jars in a kitchen, fabric bins in an office, labeled metal canisters in a garage — create visual order even when the contents are all different. Adjustable shelf pins drilled into a pegboard back panel let you reconfigure shelf heights as your storage needs change over time. In a home office, mixing closed storage boxes with open display keeps things feeling intentional rather than chaotic. In a kid’s room, lower shelves with bins and baskets at reachable height encourage independence and actually make tidying up manageable for little hands.
Common Mistakes to Avoid and Pro Tips for Success
Even experienced woodworkers make mistakes on shelf projects, and knowing the most common pitfalls ahead of time can save you a lot of frustration. The single most frequent error is not accurately locating studs before drilling. Anchoring a shelf carrying heavy objects into drywall alone is a disaster waiting to happen — the weight will gradually pull the anchor free, and the shelf will come down, potentially damaging your wall and everything that was sitting on it. Always use a reliable electronic stud finder, and confirm the stud location by driving a small test nail at the edge of where you expect the stud to be before committing to your mounting holes.
Not accounting for wall imperfections is another issue that catches people off guard. Very few walls are perfectly flat or perfectly plumb, and that matters when you’re trying to hang a level shelf flush against the surface. Use shims behind your cleat or bracket if needed to account for any bow or belly in the wall. Similarly, if baseboard molding is in the way of a floor-level unit, you’ll need to either remove it temporarily or notch the back of your shelf unit to fit around it. Taking the time to measure and plan for these real-world complications before you cut your wood will save you from having to recut pieces or compromise your design.
On the finishing side, rushing drying or curing time between coats is a mistake that shows up clearly in the final result. Water-based products might feel dry to the touch in an hour but won’t reach full hardness for several days. If you load a freshly painted shelf with heavy objects too soon, you can leave permanent impressions in the finish. Likewise, applying a second coat of stain or polyurethane before the first has fully dried can cause the layers to lift, bubble, or wrinkle. Read the manufacturer’s recommendations for recoat windows and cure times, and resist the urge to rush this part of the process.
- Always drill pilot holes before driving screws into wood to prevent splitting, especially near the ends of boards.
- Use clamps generously when gluing up assemblies — glue needs pressure to bond properly, and dried glue drips are harder to sand off than wet ones are to wipe away.
- Buy ten percent more material than your measurements require to account for bad cuts, knots, or any pieces that need to be redone.
- Test your stain or paint color on a scrap piece of the same wood before committing to the full project — color always looks different on wood than it does on a paint chip.
- Label each piece as you cut it (top, bottom, left side, right side) so assembly goes smoothly without confusion.
- Do a dry assembly — putting everything together without glue first — to confirm that all pieces fit correctly before you apply glue and make the joint permanent.
Maybe the most important pro tip of all is to embrace the iterative nature of woodworking. Your first set of shelves won’t be perfect, and that’s completely okay. Every imperfection is a lesson that makes your next project better. The small gaps that bothered you can be filled with wood putty. The finish that came out a shade darker than expected becomes a feature rather than a flaw once you style the shelf and see it in context. The skill of building functional, beautiful things with your own hands grows with every project, and the shelves you build — imperfections and all — will be some of the most meaningful objects in your home precisely because you made them yourself.

“`








What do you think?
It is nice to know your opinion. Leave a comment.