










Introduction to the Cable Stitch in Crochet
The cable stitch is one of the most visually stunning and texturally rich techniques in the world of crochet. Traditionally associated with knitting, this stitch has been beautifully adapted for crochet and delivers that same classic, rope-like twisted pattern that gives finished pieces an almost sculptural quality. Whether you are a seasoned crocheter looking to expand your repertoire or an intermediate crafter ready to take on a satisfying challenge, the cable stitch opens up a world of creative possibilities that will transform your projects from simple to show-stopping.
What makes the cable stitch so special is its three-dimensional character. Unlike flat stitches that lie smoothly against the fabric, cable stitches cross over one another, creating raised ridges and deep valleys in the textile. This dimensional quality makes cabled crochet pieces feel substantial and luxurious in the hand, which is why cables are so popular in winter accessories like scarves, hats, and sweaters. The technique mimics the look of traditional Aran knitwear from the Irish islands, lending any project a timeless, heritage aesthetic that never goes out of style.
Many crocheters are intimidated when they first encounter cable stitches, assuming the technique requires advanced skills or complicated tools. The good news is that with a clear video tutorial, a helpful diagram, and a patient approach to learning the foundational steps, almost any crocheter with basic front post and back post stitch knowledge can master cables. This article will walk you through everything you need to know, from the tools and yarn you will need to step-by-step instructions and finishing tips that will make your cable crochet projects look professionally crafted.
Tools, Materials, and Yarn Selection
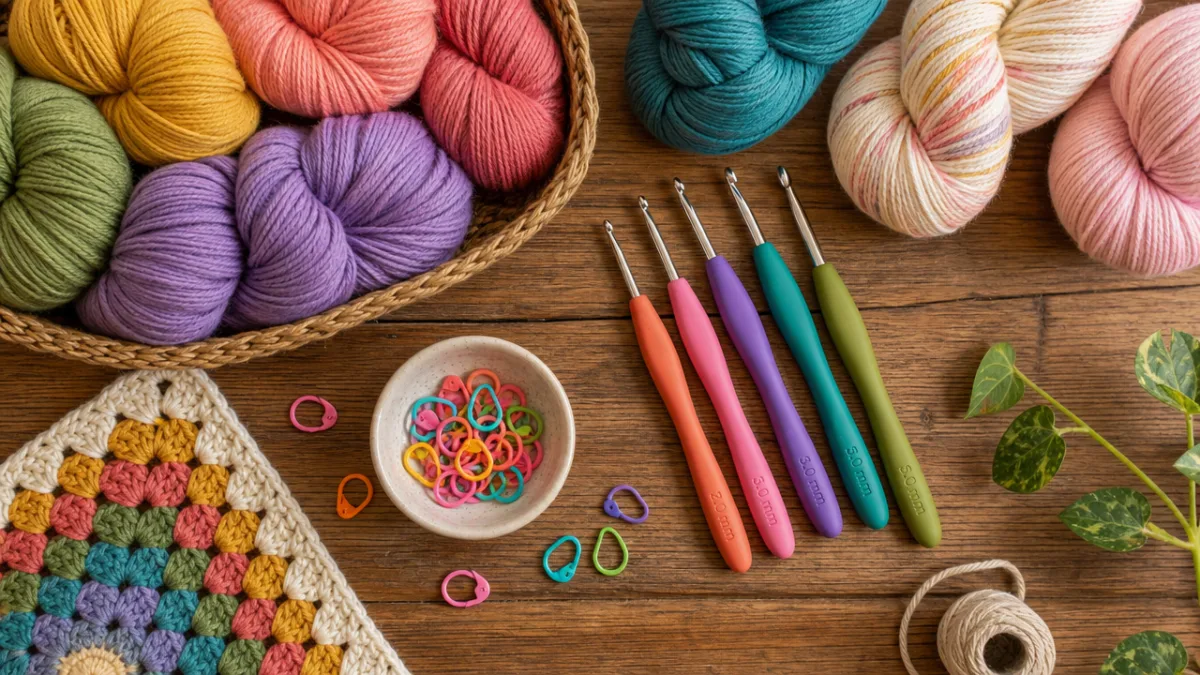
Before you pick up your hook and begin crocheting cables, it is essential to gather the right materials. The most important tool you will need is a crochet hook that is appropriately sized for your chosen yarn. For cable stitches, it is often recommended to go up one hook size from what the yarn label suggests, because cables tend to pull the fabric inward and create a tighter gauge than standard stitches. Using a slightly larger hook helps maintain a balanced, even tension throughout your work and ensures the cable pattern is visible and well-defined rather than bunched or stiff.
Yarn choice plays a crucial role in how beautifully your cable stitch shows up in a finished piece. Smooth, plied yarns in solid or semi-solid colors are ideal because they allow the twist and cross of the cable to be seen clearly. Highly textured yarns, thick bouclé yarns, or heavily variegated yarns can obscure the cable detail and make all that hard work nearly invisible in the final fabric. Medium weight yarns, such as worsted or DK weight, are particularly beginner-friendly for cable crochet because they are easy to handle, create a satisfying stitch size, and work up relatively quickly without requiring hours of fine detail work.
In addition to your hook and yarn, a few other tools will make your cable crochet experience smoother and more enjoyable. A cable needle or a spare stitch marker can be helpful when you are first learning, as it allows you to temporarily hold skipped stitches in place while you work the crossing stitches. Scissors, a yarn needle for weaving in ends, and a stitch counter app or simple row counter will also be your best friends throughout any cabled project. Having a well-lit, comfortable workspace where you can easily see your stitches will reduce eye strain and help you catch any mistakes before they become too embedded to fix.
Recommended Yarn Brands for Cable Crochet
- Lion Brand Wool-Ease Thick & Quick – excellent stitch definition and warmth for chunky cable projects
- Cascade 220 Superwash – a smooth, worsted weight wool blend with outstanding stitch clarity
- Paintbox Yarns Simply DK – affordable, solid-color option perfect for learning cable technique
- Malabrigo Rios – a semi-solid merino with beautiful drape and excellent texture visibility
- Caron Simply Soft – a budget-friendly acrylic that works up smoothly and shows cable detail well
Understanding Front Post and Back Post Stitches
The cable stitch in crochet is built entirely upon a mastery of front post and back post double crochet stitches, which are the foundational techniques you must understand before attempting cables. A front post double crochet, abbreviated as FPdc, is worked by inserting your hook from the front of the work, around the post of the stitch below, and back to the front again, rather than through the top loops as in a standard double crochet. This creates a stitch that sits in front of the fabric, adding a raised ridge that you can feel and see clearly when the work is held face up.
A back post double crochet, abbreviated as BPdc, works in exactly the opposite manner. Instead of inserting the hook from the front, you bring it around the back of the post, creating a stitch that recesses behind the fabric surface. When you alternate front post and back post stitches across a row, you create the classic ribbing pattern often seen at the cuffs and hems of crocheted garments. This same principle of working around stitch posts rather than through the tops of stitches is what gives crochet cables their distinctive texture and dimensional structure.
Practicing front post and back post stitches on a small swatch before attempting your first cable is highly recommended, especially if you have not worked these stitches before. Create a foundation chain of about 20 stitches and work several rows of alternating FPdc and BPdc to get the feel of inserting your hook around the post and managing the yarn tension. Pay attention to how each stitch sits against the fabric and practice keeping your tension consistent, as uneven tension is one of the most common challenges new cable crocheters face. Once these stitches feel natural and automatic, the cable crossing technique will come much more easily.
Key Abbreviations to Know
- FPdc – Front Post Double Crochet
- BPdc – Back Post Double Crochet
- FC – Front Cable Cross
- BC – Back Cable Cross
- ch – chain
- sk – skip
- st(s) – stitch(es)
- rep – repeat
Step-by-Step Guide to Crocheting the Cable Stitch
Now that you have your materials ready and understand the foundational stitches, it is time to learn how to actually crochet the cable stitch itself. The most common cable crossing technique in crochet involves working a set of front post double crochet stitches out of order, crossing one group of stitches in front of or behind another group to create that signature twisted cable column. Begin by creating your foundation chain in a multiple that suits your pattern, typically a multiple of four or six stitches for a standard cable panel, and work one or two rows of basic double crochet to establish a base.
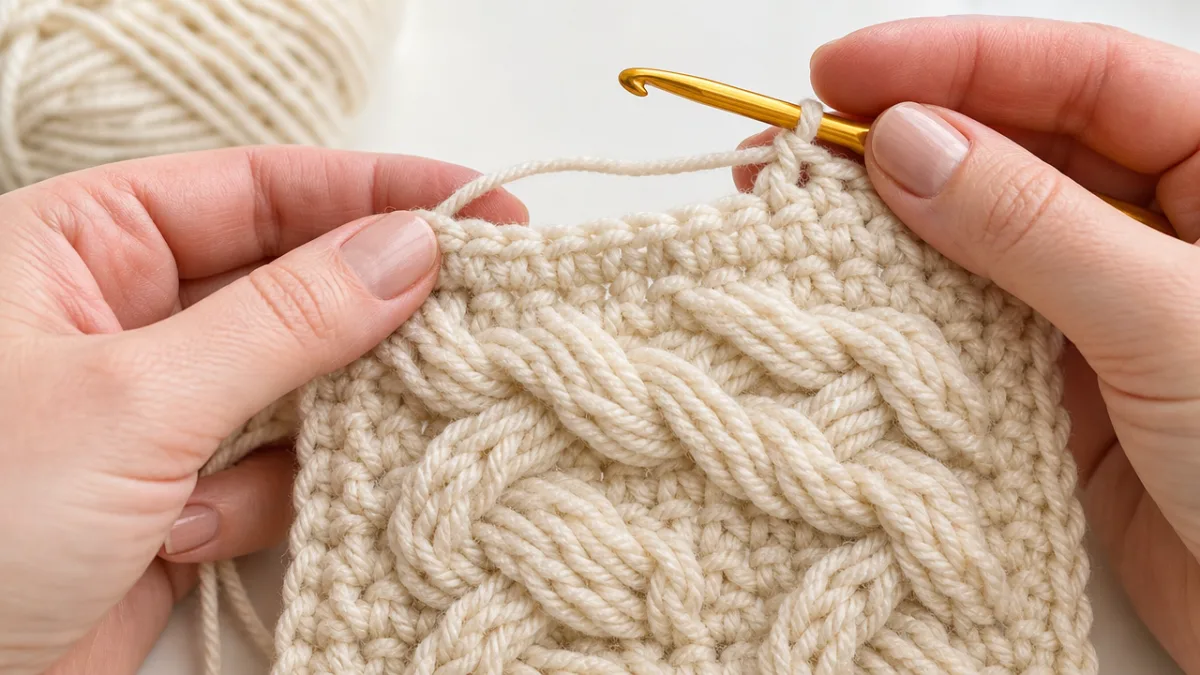
To work a front cable cross, which creates a cable that twists to the left, skip the next two stitches on your current row and work a front post double crochet around the third and fourth stitches. Then go back and work a front post double crochet around each of the two skipped stitches. This crossing action places the first pair of stitches behind the second pair in the finished fabric, creating the visual appearance of one set of vertical strands twisting over the top of another. It sounds complex in text but becomes visually intuitive very quickly once you attempt it with your own hands and yarn.
For a back cable cross, which creates a cable that twists to the right, the method is reversed. Skip two stitches, work a front post double crochet around the third and fourth stitches, then return to work front post double crochets around the two skipped stitches, this time positioning the work so the skipped stitches cross in front. Alternating front and back cable crosses in a pattern produces the iconic twisted rope cable that appears in classic Aran designs. Most cable patterns will alternate a cable crossing row with one or more plain rows of front and back post stitches, which allows the twist to build up gradually and become more dramatic with each repeat.
Basic Cable Stitch Pattern Instructions
- Chain a multiple of 6 plus 2 turning chain stitches to begin your swatch or project panel.
- Row 1: Work one double crochet in each chain across, turn.
- Row 2: Chain 2, work BPdc in each stitch across to establish the ribbed base row, turn.
- Row 3 (Cable Row): Chain 2, *skip 2 sts, FPdc in next 2 sts, FPdc in 2 skipped sts (cable made), BPdc in next 2 sts*, repeat across, turn.
- Rows 4–6: Chain 2, alternate FPdc and BPdc as established, turn.
- Repeat rows 3 through 6 for the cable pattern, ending with a plain row before binding off.
Reading and Using a Cable Stitch Diagram
Crochet diagrams, also known as stitch charts, are visual representations of a pattern using internationally recognized symbols to indicate each type of stitch and its placement. For cable stitches, diagrams are particularly valuable because they allow you to see the crossing action of the cable at a glance, making it far easier to understand the spatial relationship between stitches than written instructions alone can convey. Each symbol in a crochet diagram corresponds to a specific stitch, and crossing lines or arrows indicate where the cable crosses are made and in which direction they twist.
When reading a cable crochet diagram, start from the bottom right corner and work your way left across the first row, then return to the right side for the next row above it, just as you would when physically crocheting a flat piece. The vertical lines represent double crochet stitches or post stitches, while curved or crossing lines represent the cable crosses themselves. Diagrams often include a legend or key that clarifies what each symbol means within that particular pattern, so always check the key before diving into the chart itself to ensure you are interpreting the symbols correctly.
One of the most helpful aspects of working with a diagram alongside a video tutorial is the ability to pause the video and compare what you see on screen with the corresponding symbols in the chart. This dual-format approach reinforces your understanding of the stitch construction from two different angles simultaneously, which accelerates learning significantly. Printing out the diagram and using a highlighter or ruler to track which row you are on can prevent confusion and help you maintain your place, especially in more complex multi-cable patterns where several different cable panels are working simultaneously across the fabric.
Tips for Following Crochet Diagrams Effectively
- Always read diagrams from bottom to top, right to left on odd rows, and left to right on even rows for flat crochet.
- Use a sticky note or ruler to cover completed rows so you can focus on only the current row without distraction.
- Color-code different cable panels with highlighters to keep track of multiple crossing patterns in complex designs.
- Compare the finished stitch appearance on your work to the diagram symbols after each row to catch errors early.
- Download or print diagrams at the largest size possible so you can clearly see every symbol and crossing line.
Common Mistakes and How to Troubleshoot Them
Even experienced crocheters encounter challenges when first learning cable stitches, and understanding the most common mistakes will help you troubleshoot your work with confidence rather than frustration. One of the most frequent issues beginners face is working into the wrong stitch when performing the cable cross. Because you are skipping stitches and coming back to them, it is easy to lose your place in the row, especially when working a long project or crocheting while distracted. The best prevention is to count your stitches carefully before and after each cable cross, and to use stitch markers to flag the beginning of each cable panel so you always know exactly where you are.
Tension inconsistency is another very common challenge in cable crochet. Because you are pulling your yarn around the posts of stitches below rather than through the tops, and because the cable crossings involve some degree of stretching and gathering, the tension in cable rows often differs from the tension in plain rows. If your cable panels are pulling inward and making the fabric wave or pucker, try consciously loosening your tension on cable rows or going up a hook size for those rows only. Conversely, if the cables look loose and undefined, work with tighter tension or a slightly smaller hook to bring the crossing stitches closer together for a crisper result.
A third common mistake is accidentally working into the skipped stitches before completing the crossing stitches, which causes the cable to look tangled or reversed rather than cleanly twisted. If you notice this error within the same row, the best course of action is to carefully frog, or unravel, back to the start of the cable cross and redo it correctly. If the mistake is discovered several rows later, you have two options: accept a minor irregularity in the pattern or carefully drop the affected stitches down to the mistake row and re-work them using a crochet hook to ladder back up, which is an advanced technique but entirely possible with practice and patience.
Creative Project Ideas Using the Cable Stitch
Once you have mastered the cable stitch, the range of projects you can create expands dramatically and excitingly. One of the most beloved applications of cable crochet is the classic cabled scarf or cowl, where a single cable panel runs down the center or multiple panels run parallel across the width of the piece. A simple rectangle worked in cable stitch using a chunky wool yarn creates a heirloom-quality accessory that looks far more complex than it actually is to make, and it works up surprisingly quickly once the cable rhythm becomes second nature in your hands.
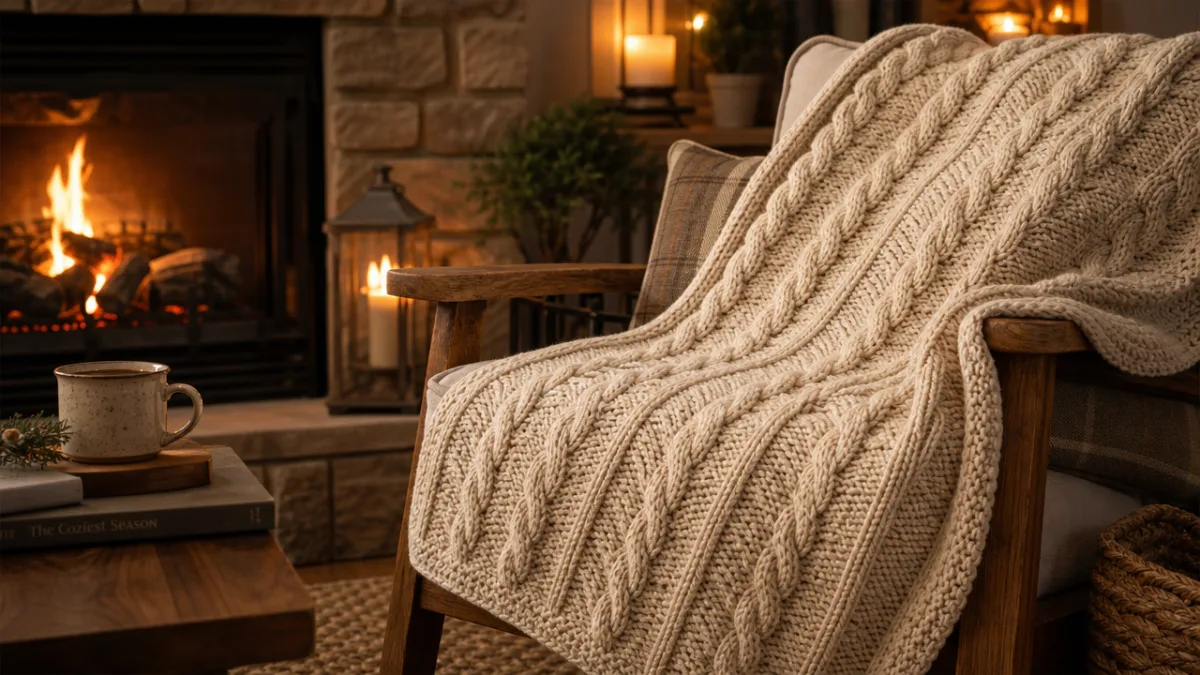
Cable stitch crochet is also spectacular when applied to home décor projects such as throw blankets, pillow covers, and table runners. A cable stitch throw blanket worked in a neutral palette of cream, oatmeal, or warm gray makes a stunning focal point for any living room and has the substantial, cozy weight that makes it ideal for cool evenings spent reading or watching films. Pillow covers featuring a single large cable panel flanked by ribbing are a fantastic intermediate project that gives you the satisfaction of a finished, usable home accessory while continuing to build your cable technique skills with each completed square.
For those interested in garment making, cable stitch crochet opens the door to truly impressive wearable pieces. A cabled beanie hat with a turned-up brim is an achievable beginner garment project that showcases cables beautifully on a small, manageable scale. More ambitious makers might tackle a cabled cardigan or pullover sweater, where multiple cable panels work across the body and sleeves to create a garment that rivals the finest hand-knitted Aran sweaters in appearance and warmth. The key to success with cabled garments is thorough gauge swatching before beginning, as the inward pull of cable stitches significantly affects finished measurements and fit.
Beginner-Friendly Cable Crochet Project Ideas
- Single-panel cable headband or ear warmer worked flat and seamed at the back
- Simple cable stitch dishcloths or facecloths in cotton yarn
- Cabled bookmark worked in fine thread or sport weight yarn
- Chunky cable pillow cover using a single six-stitch cable panel down the center
- Ribbed and cabled mug cozy worked in the round on a small circumference
Intermediate and Advanced Cable Project Ideas
- Multi-panel cable blanket with alternating twist directions for visual complexity
- Cabled beanie or slouchy hat with a folded ribbed brim
- Aran-style infinity scarf with three or four cable panels worked side by side
- Cable stitch tote bag worked in cotton rope or macramé cord for structure
- Cabled yoke sweater with cables radiating outward from the neckline
The cable stitch truly rewards the time and patience invested in learning it. Whether you choose to keep your projects simple and classic or push yourself toward increasingly complex cable combinations and garment construction, every piece you create with this technique carries with it the deeply satisfying sense of having made something genuinely beautiful and skillfully crafted. With a good video tutorial to guide your hands, a clear diagram to map your stitches, and this comprehensive guide to support your understanding, you have everything you need to embark on a wonderfully rewarding cable crochet journey.








What do you think?
It is nice to know your opinion. Leave a comment.