










Why Every Home Gym Needs a Dumbbell Rack
If you’ve been working out at home for any length of time, you’ve probably experienced the frustration of dumbbells scattered across your floor. They roll under benches, create tripping hazards, and make your workout space feel chaotic rather than motivating. A dedicated dumbbell rack solves all of these problems at once, transforming your home gym from a cluttered spare room into a functional, professional-feeling fitness space that actually inspires you to train harder and more consistently.
Beyond the obvious safety benefits, having your weights organized and accessible changes the entire rhythm of your workout. When you can immediately grab the right dumbbell without hunting through a pile, your rest periods stay tight, your focus stays sharp, and you spend more time actually training. Professional gyms have known this for decades, which is why commercial weight rooms are always meticulously organized — that structure isn’t just aesthetic, it’s functional, and it contributes directly to better workout quality and outcomes.
Building your own dumbbell rack rather than purchasing a commercial one gives you several meaningful advantages. You can customize the dimensions to fit your exact space, design it to hold your specific dumbbell collection, choose materials and finishes that match your gym’s aesthetic, and save a significant amount of money in the process. A well-built DIY rack can handle the same load as a commercial unit costing hundreds of dollars, and the satisfaction of using something you built yourself adds an unexpected layer of pride to every training session.
The Hidden Costs of Disorganization
It might seem like a small thing to leave your dumbbells on the floor between sessions, but the long-term costs of disorganization add up in ways that aren’t immediately obvious. Weights left on bare floors can scratch or dent the surface, damage rubber flooring over time, and create genuine safety hazards if someone walks through the space unexpectedly. If you have children or pets in the home, this concern becomes even more pressing — a dumbbell that rolls underfoot is a serious injury waiting to happen, and preventing that scenario is worth every bit of effort a rack requires.
There’s also the psychological dimension to consider. Numerous studies on environmental psychology have found that cluttered spaces increase stress, reduce motivation, and make it harder to focus on tasks. Your workout space is no exception. Walking into a gym area that looks organized and intentional puts you in a focused, ready-to-work mindset from the moment you step through the door. Conversely, stepping over scattered weights before you even begin can subtly drain your energy and enthusiasm before you’ve done a single rep. The environment you train in matters more than most people realize.
Planning Your DIY Dumbbell Rack Build
Good projects start with good planning, and a dumbbell rack is no exception. Before you buy a single board or drive a single screw, take the time to assess your space carefully. Measure the area where you intend to place the rack, noting both floor space and ceiling height, and think about how the rack will relate to other equipment in the room. You’ll also want to inventory your dumbbell collection, taking note of the heaviest weights you own, since that will determine the structural requirements your build needs to meet to remain safe and stable under load.
Consider how many dumbbell pairs you need to store and whether that number is likely to grow in the coming months or years. It’s often worth building slightly larger than your current needs require, since adding capacity later usually means starting over rather than simply extending an existing structure. Think also about the style of rack that will work best for your space — a horizontal tier rack that steps down like bleachers is the most common design and works well for most collections, but A-frame racks, wall-mounted racks, and vertical peg designs each have situations where they outperform the standard tiered approach.
Sketch your design before purchasing materials, even if you’re not a confident drafter. A rough pencil drawing with dimensions noted on each component is enough to help you calculate material quantities, anticipate assembly challenges, and spot potential design flaws before they become expensive mistakes. Take your sketch to the lumber yard or hardware store and walk through it with a staff member if you’re uncertain — most are happy to help, and the advice is free. Arriving prepared means you’ll come home with exactly what you need and nothing you don’t, which saves both money and return trips.
Choosing the Right Materials
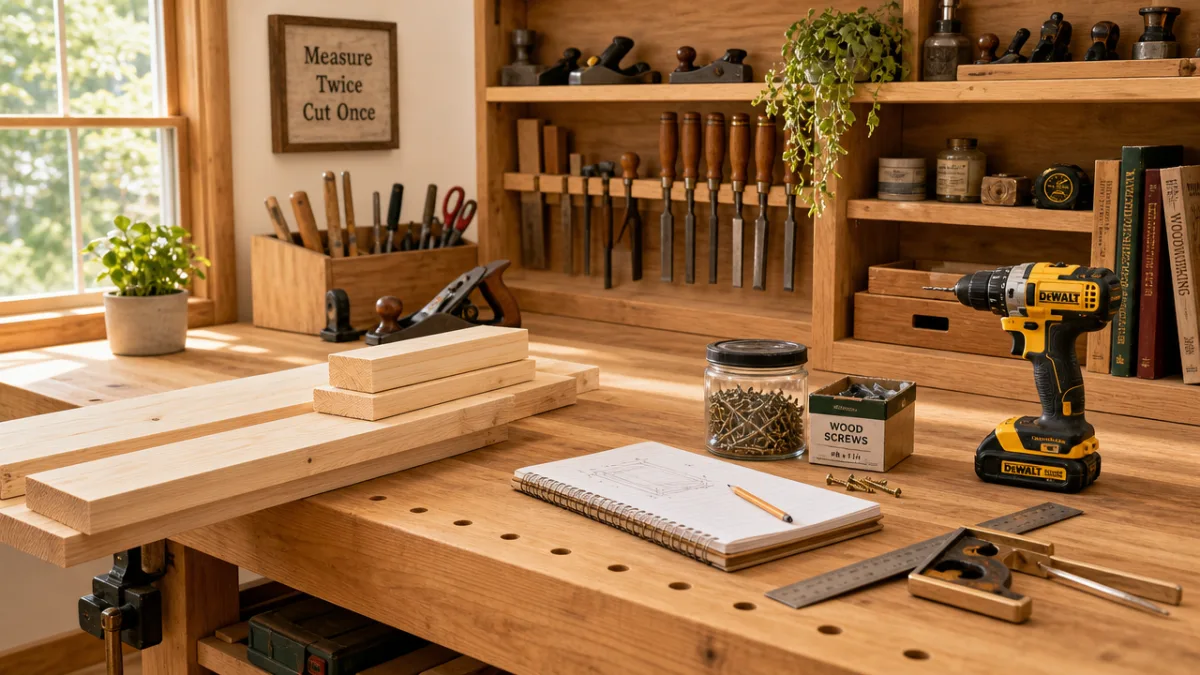
For most DIY dumbbell racks, dimensional lumber is the material of choice. Standard 2x4s and 2x6s are widely available, affordable, and more than strong enough to handle the weight loads a typical home gym collection places on a rack. Douglas fir and southern yellow pine are both excellent choices for their strength-to-weight ratio and relative affordability. If you want a more refined appearance, select-grade lumber with fewer knots will take stain and finish much more cleanly than construction-grade boards, and the price difference is modest when you’re only buying a few pieces.
Hardware selection matters as much as lumber quality when it comes to longevity and safety. Use structural screws or lag bolts at the primary joints rather than standard drywall screws, which can shear under dynamic loads — and dumbbell racks experience dynamic loads every single time you drop a weight back onto the tier. Carriage bolts with washers and nuts are ideal for the most critical connections, providing a clamped joint that won’t loosen over repeated use the way screwed joints sometimes do. Spend the extra few dollars on galvanized or coated fasteners to prevent rust, especially if your gym space experiences temperature and humidity swings.
Step-by-Step Construction Guide
With your materials gathered and your design finalized, construction can begin. Start by cutting all of your components to length before assembling anything, organizing the cut pieces by type and labeling them with chalk or a pencil to avoid confusion during assembly. Working this way — cutting first, assembling second — is far more efficient than the cut-one-assemble-one approach many beginners default to, because it lets you use your saw setup consistently without repeatedly adjusting between cuts. A miter saw makes this process fast and accurate, but a circular saw with a good fence will do the job just as well if that’s what you have available.
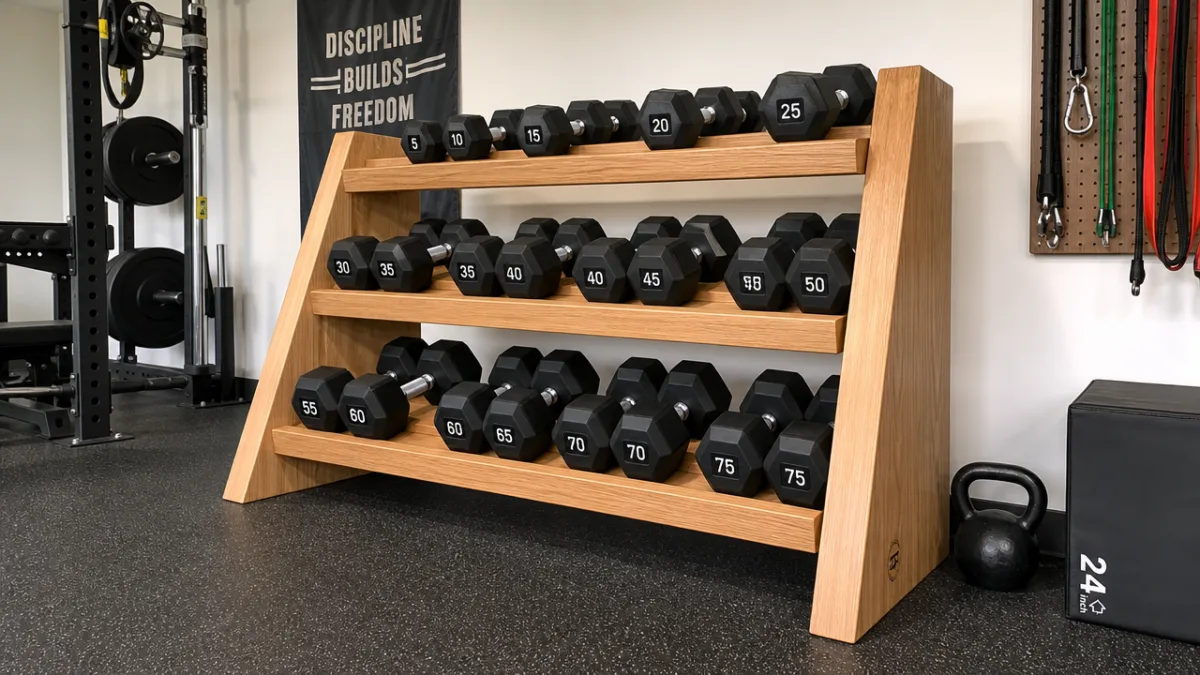
For a standard three-tier horizontal rack, your assembly sequence should follow a logical order to prevent access problems that make later steps awkward. Begin by building the two side panels as independent units, then connect them with your horizontal support rails. Getting the side panels square is critical — use a framing square at every joint and clamp pieces firmly before driving fasteners. A rack that’s even slightly out of square will look noticeably wrong once it’s loaded with weights, and correcting it after the fact is far more frustrating than taking the extra minute to check alignment during the build.
Once the basic frame is assembled, add the weight-bearing tier rails. These are the horizontal boards on which the dumbbells will actually rest, and they deserve particular attention to spacing. Measure the diameter of your largest dumbbells and design your tier spacing to allow easy placement and retrieval without forcing you to angle the weights awkwardly. A gap of approximately two to three inches between the end of the stored dumbbell and the tier above it is a comfortable working clearance that keeps the rack compact while still allowing fluid access. Test-fit a dumbbell pair at each tier during construction rather than waiting until the build is complete.
Finishing and Surface Treatment
Raw lumber on a dumbbell rack will absorb sweat, chalk, and rubber residue from your weights over time, eventually becoming grimy and difficult to clean. A proper finish prevents this by sealing the wood surface and making it wipeable. For gym equipment that experiences regular contact and occasional impact, a penetrating oil finish or a hard-wax oil is an excellent choice — it enhances the natural look of the wood, provides meaningful protection, and is easy to reapply when it wears through. Polyurethane works well too and offers slightly better moisture resistance, making it a good option for garage gyms that experience significant temperature swings.
If you prefer a painted finish, a semi-gloss or gloss latex paint over a primed surface is durable and easy to wipe clean. Many home gym builders choose to paint their racks in a color that coordinates with their flooring or wall color, creating a more cohesive, intentional look that elevates the entire space. Whatever finish you choose, apply it before final assembly if possible, since reaching interior corners and tight spaces is much easier when components are still separate. Allow adequate drying and curing time — most finishes look dry long before they’ve reached full hardness, and loading the rack too soon can leave marks or impressions.
Loading, Safety, and Long-Term Maintenance
A well-built rack is only as safe as the way it’s used, and loading your rack correctly from the first day is a habit worth establishing carefully. Always place your heaviest dumbbells on the lowest tier — this keeps the center of gravity low, which dramatically improves the stability of the entire structure and reduces the risk of the rack tipping forward when you reach for a heavy pair. Many commercial racks use this same principle, and it’s one of the reasons experienced gym designers always specify bottom-heavy storage configurations for free weight equipment.
Inspect your rack regularly, especially in the first few months of use as the wood acclimates to the humidity and temperature conditions of your gym. Wood expands and contracts with seasonal changes, which can loosen joints and fasteners that were tight when the rack was first built. Make a habit of checking all visible fasteners every month or two, tightening anything that shows movement before it progresses to a genuine structural concern. This kind of preventive maintenance takes less than ten minutes and keeps your rack safe and solid for years, turning a weekend project into a piece of equipment that can serve you for a decade or more.
If your rack ever shows signs of structural stress — cracking at joints, visible deflection in the tier rails under load, or any wobble in the frame — address it immediately rather than continuing to use the rack. Wood can fail progressively, and a rack that feels slightly unstable one week can fail completely the next. The repair is almost always straightforward: add a gusset plate to a stressed joint, sister a sagging rail with a second board, or replace a fastener that has pulled through. None of these fixes require advanced skills, and all of them are far easier and cheaper than dealing with the aftermath of a rack collapse.
Customizing Your Rack for Maximum Function
One of the greatest advantages of building your own rack is the freedom to add features that commercial products rarely include. Consider adding a small shelf to the top of the rack to hold your phone, a water bottle, or a workout journal — having these items at eye level during your session means less time hunting for things between sets. A hooks or pegs mounted to the side panel of the rack can hold resistance bands, jump ropes, or lifting straps, consolidating several categories of equipment into one organized zone rather than scattering them around the room.
Casters are another worthwhile addition if your gym space needs to serve multiple purposes. Heavy-duty locking casters mounted to the base of the rack allow you to roll it out of the way when you need floor space for stretching, yoga, or other activities, then lock it firmly in place during your lifting sessions. Use casters rated well above your rack’s loaded weight — if your dumbbell collection weighs three hundred pounds and the rack itself weighs fifty, choose casters rated for at least six hundred pounds total to give yourself a meaningful safety margin and ensure smooth rolling even when fully loaded.
- Add rubber feet or anti-slip pads to the base if you prefer a stationary rack — these protect your floor and prevent any sliding during energetic use.
- Mount a small mirror or whiteboard nearby to track your workout sets and reps without looking away from your equipment.
- Install a simple LED strip light underneath the top tier for under-rack illumination that makes it easier to identify weights at a glance.
- Label each tier with the weight range it’s intended to hold, which keeps the rack organized even when multiple family members use the gym.
- Sand all edges and corners to a smooth radius — this prevents both splintering and the minor but persistent skin abrasions that sharp-edged wooden racks inflict over time.
Inspiring Your Broader Home Gym Organization
A finished dumbbell rack has a way of inspiring broader organization throughout your home gym, and this is one of the most valuable secondary effects of the project. Once you’ve experienced the difference that proper storage makes for your dumbbells, you’ll find yourself wanting to apply the same logic to every other category of equipment in the space. Resistance bands, kettlebells, foam rollers, jump ropes, and barbell accessories all benefit from dedicated storage solutions, and many of them can be built with the same basic woodworking skills and tools you used for the rack.
Think about your gym’s traffic flow as you plan additional storage. Equipment you use in every session should be the most accessible, while specialized tools you reach for occasionally can live in less prime locations. Wall-mounted storage is particularly valuable in small spaces because it uses vertical real estate that floor-based storage ignores entirely. A simple plywood panel with a French cleat system attached to one wall can support an almost unlimited variety of custom hooks, shelves, and holders, all of which can be repositioned as your equipment collection and training priorities evolve over time.
The end goal of home gym organization isn’t perfection for its own sake — it’s creating an environment that removes friction from your training routine and makes it as easy as possible to show up, work hard, and recover well. Every piece of equipment that has a designated home is a small obstacle removed from the path between you and your next workout. Over months and years, those small removals compound into a meaningfully more consistent training practice, and that consistency is ultimately what drives results in any fitness pursuit. Your DIY dumbbell rack is more than a storage solution — it’s the foundation of a better training environment and a stronger commitment to your fitness goals.
Sharing Your Build and Finding Community
The DIY home gym community is large, enthusiastic, and genuinely generous with knowledge. Once you’ve completed your rack build, consider documenting the process and sharing it on platforms like Pinterest, Instagram, or dedicated home gym forums. Your specific material choices, dimensions, and design solutions might be exactly what someone else is searching for as they plan their own build, and the feedback and encouragement you receive in return can be surprisingly motivating. Many people who share their first build go on to tackle increasingly ambitious gym improvement projects, energized by the community response and their own growing confidence with tools.
If you’re searching for additional inspiration before you start, platforms like Pinterest are an extraordinary resource for home gym organization ideas. You’ll find hundreds of variations on the basic tiered dumbbell rack, from ultra-minimal single-tier designs suited to small collections to elaborate multi-tier systems that hold dozens of pairs in a surprisingly compact footprint. Pay attention not just to the designs themselves but to the context they’re shown in — the surrounding organization, the flooring choices, the lighting, and the overall aesthetic — because these details will help you develop a more complete vision for your own space rather than optimizing one element in isolation.
Building something functional with your own hands carries a satisfaction that purchased solutions simply can’t replicate. Every time you reach for a dumbbell and find it exactly where you left it, in a rack you designed and built yourself, there’s a small but real reminder that you’re someone who solves problems and creates order rather than simply tolerating inconvenience. That mindset — resourceful, capable, willing to put in the work for a better outcome — is ultimately the same mindset that keeps you showing up to train when motivation is low and life is busy. Your dumbbell rack and your fitness goals are more connected than they might appear, and both are worth building well.








What do you think?
It is nice to know your opinion. Leave a comment.