










The Delightful World of Crochet Sushi Sets: An Introduction
Crochet has long been celebrated as one of the most versatile and imaginative fiber arts, capable of transforming simple yarn into objects of beauty, whimsy, and even culinary mimicry. Among the most charming and increasingly popular projects in the crochet community is the crochet sushi set — a collection of adorable, handcrafted pieces that replicate the beloved Japanese cuisine in yarn form. These miniature masterpieces have captured the hearts of crafters around the world, offering a delightful blend of creativity, humor, and technical skill that appeals to beginners and experienced crocheters alike.
The appeal of a crochet sushi set extends far beyond the craft room. These playful creations serve as imaginative toys for children, whimsical decorative pieces for kitchen shelves, thoughtful handmade gifts for food lovers, and even educational tools that introduce kids to Japanese culture and cuisine in a tactile, engaging way. The growing popularity of amigurumi — the Japanese art of crocheting or knitting small stuffed animals and objects — has created the perfect cultural and creative environment for sushi sets to flourish as one of the most sought-after patterns in the crafting world.
Whether you are brand new to crochet or a seasoned maker looking for your next satisfying project, a crochet sushi set offers something truly special. The individual pieces — from nigiri topped with colorful fish to perfectly wrapped maki rolls and delicate temaki cones — each present their own mini challenge and reward. Working through a complete sushi set pattern gives crafters the experience of mastering multiple techniques, experimenting with color combinations, and finishing a cohesive collection that tells a story together. This article will guide you through everything you need to know to embark on your own crochet sushi adventure.
Why Sushi Makes the Perfect Crochet Subject
Sushi’s geometric shapes and distinctive color palette make it uniquely well-suited to crochet translation. The clean lines of a maki roll, the oval mound of nigiri rice, the triangular elegance of a temaki cone — these forms translate beautifully into three-dimensional crochet construction. Unlike some food subjects that rely on complex organic curves, sushi’s relatively structured appearance means that even beginner-friendly crochet techniques like working in the round and basic increases and decreases can produce recognizable, satisfying results that look remarkably true to life.
The color story of a sushi set is another reason it works so beautifully in yarn. The stark white of sushi rice, the deep green of nori seaweed, the vivid orange of salmon, the rosy pink of tuna, the rich purple of eel — these bold, contrasting colors are easy to replicate in acrylic or cotton yarn and create a visually striking finished set. Working with multiple colors across a sushi set project also gives crafters excellent practice in color changes and working with multiple yarn ends, skills that are invaluable for more complex projects down the line.
Essential Materials and Tools for Your Crochet Sushi Set
Before diving into your crochet sushi set pattern, gathering the right materials will make your crafting experience smoother and your finished pieces more polished. The most important decision you will make is choosing your yarn. For sushi sets, many experienced crafters strongly recommend cotton yarn over acrylic, particularly for pieces intended as children’s toys or food play sets. Cotton yarn holds its shape exceptionally well, has a slightly firmer texture that mimics the appearance of real sushi ingredients, and is durable enough to withstand the enthusiastic play of young children. Popular choices include Paintbox Simply DK Cotton, Lion Brand 24/7 Cotton, and Rico Creative Cotton.
If you prefer the wider color range and softer feel of acrylic yarn, look for options with good stitch definition that will show off the details of your work. Yarns with too much halo or fuzz can obscure the crisp color contrasts that make a crochet sushi set look realistic and charming. A yarn weight of DK or worsted is ideal for most sushi patterns, as it creates pieces that are satisfyingly substantial without being unwieldy — most finished nigiri pieces, for example, end up around three to four inches long when worked in DK weight with a 3.5mm hook.
Beyond yarn, you will need a selection of tools and notions to complete your sushi set successfully. A well-stocked toolkit makes all the difference between a frustrating and an enjoyable crafting session. The following items are recommended for any crochet sushi project:
- Crochet hooks in sizes 3.0mm to 4.0mm, depending on your yarn weight and personal tension
- Polyester fiberfill stuffing for giving your pieces their three-dimensional form
- A tapestry needle for weaving in yarn ends and joining pieces
- Stitch markers to keep track of rounds when working in the round
- Small scissors with sharp tips for clean yarn cuts
- Optional: safety eyes if you want to add personality to your sushi pieces
- Optional: black felt or embroidery floss for adding nori detail lines
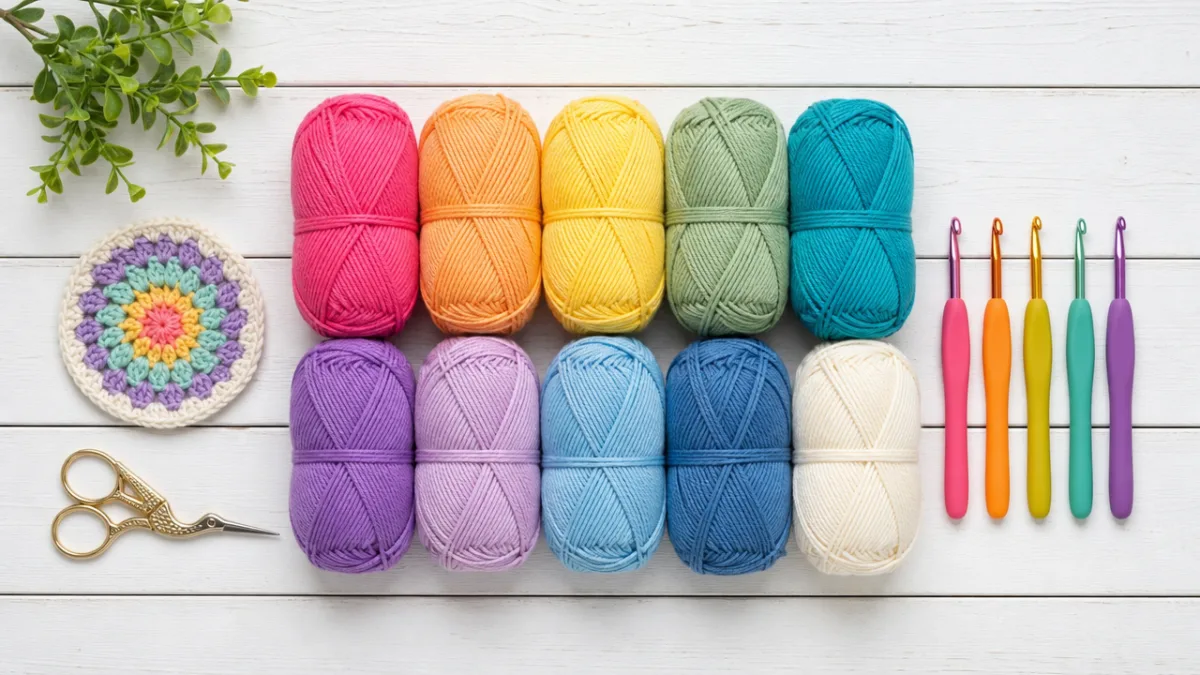
Color selection deserves its own consideration when preparing your sushi set materials. A basic set will require white or cream for rice, black or dark forest green for nori, and then a range of pinks, oranges, purples, and reds for the various toppings and fillings. Many crafters find it helpful to lay out their planned color palette before beginning, placing yarn skeins side by side to check that the colors read as distinct and complementary. Having all your colors selected and wound into manageable balls before starting means you can work through your pattern with momentum rather than stopping to hunt for materials.
Understanding Crochet Sushi Set Patterns: A Breakdown of Techniques
Most crochet sushi set patterns are built around a core set of techniques that, once mastered, repeat across each individual piece in the collection. The foundation of almost every sushi element is working in continuous rounds — sometimes called the spiral method — which is the technique used to create seamless, rounded three-dimensional shapes in amigurumi-style crochet. Unlike working in rows, working in continuous rounds means you never turn your work or join rounds with a slip stitch; instead, you simply continue spiraling upward, using a stitch marker to track the beginning of each round. This method creates the smooth, seamless appearance that makes crocheted sushi look so satisfying.
The magic ring, also known as the magic circle or adjustable ring, is another essential technique for sushi set patterns. This method of starting your work allows you to create a tight, closed center when working in the round — crucial for the tops of nigiri pieces and the ends of maki rolls where you want no visible hole at the starting point. If you have never worked a magic ring before, a sushi set project is an excellent opportunity to practice, as the technique appears repeatedly throughout the pattern and you will quickly develop confidence and consistency with it through repetition.
Increases and decreases are the sculptural tools that give each sushi piece its characteristic shape. Standard single crochet increases — working two stitches into the same stitch — expand the circumference of your piece and create the rounded, dome-like shape of nigiri rice. Single crochet decreases — working two stitches together as one — narrow the fabric and close up the ends of maki rolls or shape the pointed tip of a temaki cone. Understanding how to read a pattern’s increase and decrease instructions and visualizing how they will affect the shape of your piece is an important skill that a sushi set project will help you develop in an enjoyable, low-stakes context.
Breaking Down Each Sushi Component
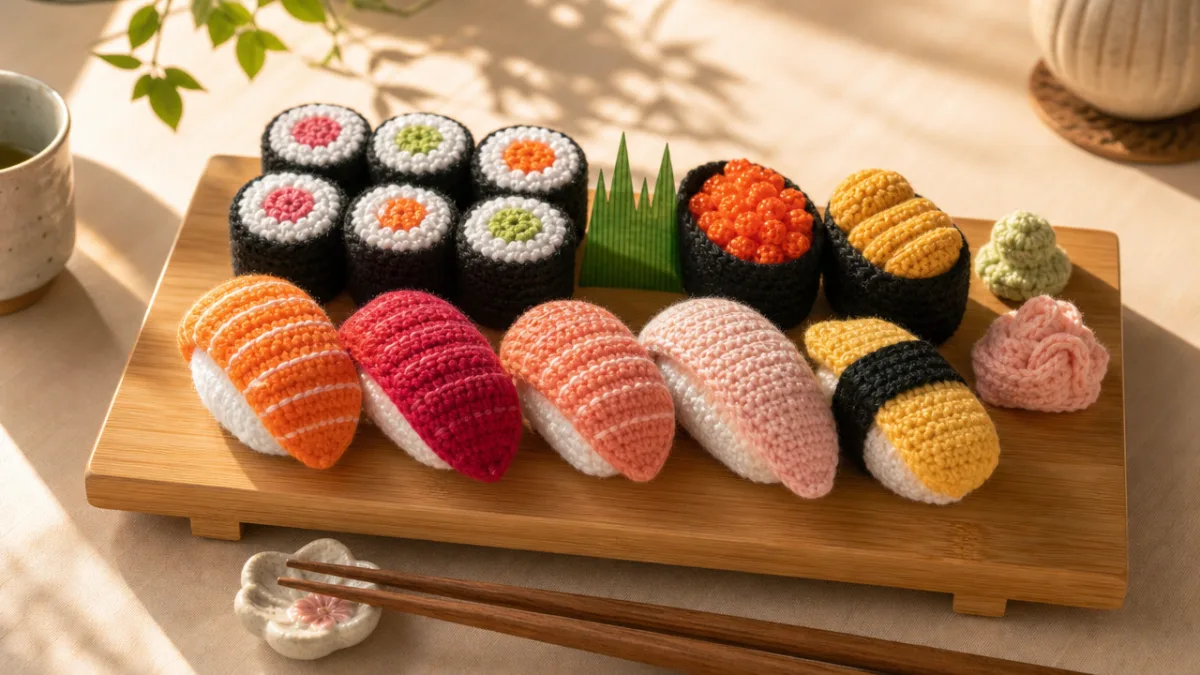
A complete crochet sushi set typically includes several distinct components, each worked separately and then assembled. Nigiri — finger-pressed mounds of rice topped with a slice of fish — consists of two main pieces: the rice base, which is an oval worked in white or cream yarn using increases and decreases to create a rounded rectangular mound, and the topping, which is a flat oval in salmon, tuna, shrimp, or eel colors that sits on top and is stitched into place. Many patterns add a tiny strip of black yarn or felt wrapped around the middle to represent the nori band sometimes used to hold nigiri together.
Maki rolls — the cylindrical rolls wrapped in seaweed — are among the most satisfying pieces in a sushi set because their construction is so clearly logical. You work a tube in black or dark green yarn for the nori exterior, then create the rice filling as a separate cylindrical insert in white yarn, and finally add a small circular topping in your chosen filling color. Some patterns instruct you to work the entire maki as a single piece, while others have you construct the components separately and assemble them. Both approaches produce beautiful results, and trying each method will help you understand which workflow suits your personal crafting style.
Temaki hand rolls, with their distinctive cone shape, introduce a slightly different construction challenge. Rather than working in the round from the base, many temaki patterns have you work flat pieces and seam them into a cone shape, or use a combination of increases worked in a specific direction to naturally produce a conical form. The interior of the temaki, visible from the open top, is often represented by small loops or tufts of yarn in rice-white and filling colors, creating a charming textural detail that makes the finished piece look remarkably like the real thing when photographed from above.

Step-by-Step Guide to Crocheting Your First Nigiri Piece
Nigiri is the perfect starting point for your crochet sushi set because its construction introduces all the fundamental techniques you will use throughout the entire project, while remaining manageable in scale and complexity. Begin by selecting your white or cream cotton yarn and your appropriately sized crochet hook. Most DK weight patterns will call for a 3.5mm hook, but adjust up or down based on your personal tension — you want a fabric that is firm enough to hold its shape and hide the stuffing inside without being so tight that it is difficult to work. A swatch of test stitches can help you check your gauge before committing to the full piece.
Start your nigiri rice base with a magic ring and work the number of single crochet stitches specified in your pattern into the ring — typically six — before pulling the ring closed and placing your stitch marker. From here, the pattern will guide you through a series of increase rounds that expand the piece into an oval by working additional increases at the two short ends while keeping the sides relatively even. This is the same technique used to start the sole of a crocheted shoe or the base of a flat-bottomed bag, and once you understand the logic of how increases placed at the ends of an oval create the characteristic elongated shape, you will be able to apply this understanding to many future crochet projects.
As you work up the sides of the nigiri rice base, the pattern will instruct you to work straight rounds — no increases or decreases — to build up the height of the piece. When you have reached the desired height, you will begin decreasing rounds to close up the top, leaving an opening large enough to stuff the piece firmly with polyester fiberfill before the final closure rounds. Stuffing is a step that many beginners underestimate in importance: a well-stuffed piece holds its shape beautifully and has a satisfying, substantial weight in the hand, while an understuffed piece looks flat and limp. Use a pencil or chopstick to push stuffing into corners and curves as you work toward the final closure.
Adding the Fish Topping and Finishing Details
Once your rice base is complete and firmly stuffed, you can turn your attention to the fish topping that gives nigiri its character. Work the topping as a flat oval following your pattern’s instructions, in your chosen topping color. Salmon is a warm peach-orange, tuna is a deep rose-red, yellowtail is a pale creamy yellow, and eel is typically represented in a rich brown or purple-brown. The topping is usually a simple flat piece without stuffing, designed to drape naturally over the curved top of the rice base and be stitched neatly into position around its edges using matching yarn and a tapestry needle.
The finishing details of your nigiri can elevate it from charming to truly impressive. Many patterns include optional embellishments such as a thin strip of black yarn or ribbon wrapped and tied around the middle of the nigiri to represent the nori band used on some traditional nigiri styles. Surface embroidery in a slightly darker shade of your topping color can suggest the texture of fish muscle or the grill marks on cooked eel. Some crafters even add tiny dots of white yarn to represent sesame seeds or a small loop of green yarn for wasabi. These details are entirely optional but can transform a basic piece into something that looks remarkably food-authentic.
Creative Variations and Customization Ideas for Your Sushi Set
One of the greatest joys of working from a crochet sushi set pattern is the enormous room for personalization and creative interpretation. While a pattern provides the structural blueprint, the color choices, embellishments, and additional pieces you include are entirely up to you. Many crafters use their sushi set as an opportunity to recreate their personal favorite sushi orders — if you are a devoted salmon lover, make six nigiri in various salmon preparations; if you prefer vegetarian options, focus on cucumber rolls, avocado temaki, and inari tofu pockets. The set becomes a delicious fiber autobiography of your sushi preferences.
Beyond the classic sushi forms, there is a rich world of Japanese food miniatures that pair beautifully with a sushi set. Crocheted edamame pods, tiny cups of miso soup with a tofu cube floating on top, a miniature bottle of soy sauce, a small dish of pickled ginger in pale pink, or a cheerful green wasabi dollop can all be worked from simple patterns and added to your set to create a full Japanese restaurant spread. Some crafters go even further, crocheting a serving board or a small wooden-look tray to display their completed sushi set, creating a truly comprehensive and displayable miniature scene.
Adding personality through faces is a beloved tradition in amigurumi that translates wonderfully to a sushi set. With the addition of small safety eyes and simple embroidered mouth expressions, each piece of sushi becomes a tiny character with its own attitude — a cheerful salmon nigiri, a sleepy maki roll, a surprised temaki cone. This kawaii-style treatment appeals enormously to children and to fans of Japanese pop culture aesthetics, and it is a simple customization that adds tremendous charm without requiring any additional technical skill. The result is a sushi set that functions as both a tactile toy and a collection of miniature soft sculptures.
Gifting and Presenting Your Finished Crochet Sushi Set
A completed crochet sushi set makes one of the most thoughtful and distinctive handmade gifts imaginable, suitable for a remarkable range of recipients. Food enthusiasts will delight in a set that celebrates their culinary passion in such a creative medium. Parents of young children will appreciate food play sets that are safe, durable, and beautifully made. Japanese culture aficionados, collectors of miniature objects, and lovers of fiber art will all find something to cherish in a carefully crafted sushi set. The gift feels personal and labor-intensive in the best way — because it genuinely is, and recipients invariably recognize and appreciate that investment of time and skill.
Presentation of your finished set can be as creative as the making process itself. Nestling your sushi pieces in a wooden or bamboo tray lined with a square of green felt to suggest a decorative leaf creates an immediately authentic and appealing display. Wrapping individual pieces in small clear cellophane bags tied with ribbon allows recipients to handle and admire each piece separately before grouping them together. Some crafters include a small handwritten card with the names of each sushi type, turning the gift into a gentle introduction to Japanese food culture. Others photograph their finished sets and include a print as an artistic keepsake alongside the physical pieces.
If you are considering making multiple sushi sets — whether for a craft fair, an Etsy shop, or a series of gifts — organizing your production into batches of individual components is a highly efficient approach. Rather than completing one full set before starting the next, work all the rice bases for all your sets in one session, then all the nori pieces, then all the toppings. This batch production method means your hands and muscle memory stay warm for each specific technique, your tension stays consistent across matching pieces, and the repeated motions become almost meditative. Many professional crochet sellers use exactly this approach to maintain quality and efficiency across large orders.
Building Your Skills: From First Sushi Set to Advanced Amigurumi
A crochet sushi set is not merely a delightful end product — it is an exceptionally effective skills-building project that will meaningfully advance your crochet abilities regardless of your starting level. By the time you complete a full set including several nigiri, multiple maki rolls, and at least one temaki, you will have practiced working in continuous rounds dozens of times, executed the magic ring technique until it feels completely natural, worked confident increases and decreases to create three-dimensional shapes, changed colors smoothly, managed multiple yarn ends neatly, and assembled separately crocheted components into a cohesive final object. These are the foundational skills of amigurumi and three-dimensional crochet construction.
With these skills firmly in place, the world of amigurumi opens up before you in all its wonderful variety. The same techniques that built your sushi set will serve you in crocheting animals, dolls, food collections from other cuisines, miniature household objects, fantasy creatures, and much more. Many crafters describe their first amigurumi food set — and sushi is a particularly common entry point — as the project that transformed their relationship with crochet from a pleasant hobby into a genuine passion and creative practice. The satisfaction of turning a pattern of numbers and abbreviations into a recognizable three-dimensional object is powerfully motivating and habit-forming in the best possible way.
As your skills grow, you may find yourself drawn to designing your own sushi variations rather than following published patterns. Perhaps you want to add a piece that your favorite pattern does not include, or you have a vision for a sushi character that does not yet exist in yarn form. Understanding the construction logic that your sushi set has taught you — how ovals are formed with strategic increases, how tubes are built with straight rounds, how shapes are closed with decreases — gives you the structural vocabulary to begin experimenting and designing. Many of today’s most celebrated amigurumi designers began exactly this way: completing existing patterns, understanding the underlying geometry, and gradually developing the confidence to innovate and create original work.
Connecting With the Crochet Community Around Sushi Projects
One of the most rewarding aspects of tackling a crochet sushi set project is the vibrant, welcoming community of fellow crafters who share your enthusiasm. Platforms like Ravelry, Pinterest, and Instagram are rich with sushi set projects shared by makers at every skill level, offering a constant stream of inspiration, technique tips, pattern recommendations, and encouragement. Searching hashtags like #crochetsushi, #amigurumisushi, or #crochetfood on Instagram will reveal thousands of beautifully photographed finished sets and works in progress, each one a testament to what is possible with yarn, a hook, and a good pattern.
Ravelry in particular is an invaluable resource for sushi set crocheters, hosting dozens of free and paid sushi patterns with detailed project notes from the crafters who have made them. Reading through project notes allows you to learn from others’ experiences — which yarns gave the best results, which steps required extra attention, which modifications improved the finished piece. Many patterns on Ravelry have active discussion threads where you can ask specific questions and receive answers from experienced makers who have worked through the same challenges. This collective knowledge base makes tackling a new pattern far less intimidating and much more successful.
If you are feeling inspired to share your own finished sushi set with the world — and you absolutely should — documenting your project with good photography is worth the effort. Natural daylight or a simple lightbox produces beautiful images that show off the colors and textures of your work far better than indoor artificial light. Arrange your pieces thoughtfully, perhaps on a wooden board or a simple cloth background, and take both close-up shots that show the stitch detail and wider shots that capture the complete set. Your finished crochet sushi set is genuinely beautiful work, and sharing it generously contributes to the inspiring, creative community that makes the fiber arts world such a wonderful place to belong.








What do you think?
It is nice to know your opinion. Leave a comment.