










The Ultimate Painting Hack Guide: Transform Your Space Like a Professional
Why Painting Hacks Are a Game-Changer for DIY Enthusiasts
There is something deeply satisfying about transforming a room with nothing more than a can of paint and a little know-how. For decades, professional painters have guarded their trade secrets jealously, leaving homeowners to struggle with drips, uneven coverage, and frustrating tape lines. But the rise of DIY culture and the sharing of clever painting hacks has democratized the craft, allowing anyone with a weekend and some determination to achieve results that look genuinely professional. These hacks are not just shortcuts — they are smarter ways of working that save time, money, and significant frustration.
The difference between a paint job that looks amateurish and one that looks polished often comes down to preparation and technique rather than raw talent. Professional painters spend years learning subtle tricks: how to hold a brush for maximum control, which direction to roll for the smoothest finish, and how to cut in along edges without leaving visible brush strokes. When you understand these principles and incorporate even a handful of well-chosen hacks into your process, the improvement in your results can be dramatic and immediately visible to anyone who walks into the room.
Beyond aesthetics, painting hacks also offer genuine practical value. They reduce the amount of paint wasted through overapplication or mistakes, they protect your furniture and flooring from accidental splatters, and they can significantly cut down the time a project takes from start to finish. When you are not spending hours cleaning up disasters or repainting sections that went wrong, the whole experience becomes far more enjoyable. This guide is designed to walk you through the most effective, tried-and-true painting hacks that professionals actually use on the job every single day.
Preparation Hacks That Make Everything Easier
The single most important phase of any painting project is the preparation, yet it is consistently the phase that beginners rush or skip entirely. A seasoned painter will tell you that at least half of the total project time should be dedicated to preparation — patching holes, sanding rough spots, cleaning walls, and taping edges. One of the best preparation hacks is to use a damp cloth or sponge with a small amount of dish soap to wipe down your walls before you ever open a can of paint. Grease, dust, and everyday grime create invisible barriers that prevent paint from bonding properly, leading to peeling and patchy coverage down the line.
Another brilliant preparation hack involves your painter’s tape. Most people apply tape and immediately start painting, but professionals know to press the tape edge down firmly with a putty knife or the edge of a credit card, then seal it with a thin layer of the existing wall color first. This seals the tape against the wall surface, and when you apply your new color over the top, any bleed that occurs will be in the old color rather than the new one. The result is a crisp, razor-sharp edge that would otherwise take years of practice with a brush to achieve freehand.
Lighting is another preparation element that most DIY painters overlook entirely. Before you begin, bring in a portable work light or position a lamp so it rakes light across the surface of your wall at a low angle. This harsh, directional lighting will reveal every imperfection — dents, scratches, old patches, and uneven texture — that normal overhead room lighting would hide. Fixing these surface issues before you paint will prevent them from becoming magnified eyesores once your fresh color is on the wall, because paint has a way of highlighting rather than hiding surface defects.
- Wipe walls with a damp soapy cloth at least 24 hours before painting to allow surfaces to fully dry.
- Use a putty knife to press painter’s tape firmly against wall edges, eliminating gaps where paint can bleed through.
- Apply a thin coat of the existing wall color along the tape edge first, then paint your new color on top once it dries.
- Use a raking work light to identify all surface imperfections before applying primer or paint.
- Sand patched areas with fine-grit sandpaper and feather the edges so repairs blend seamlessly into the surrounding wall.
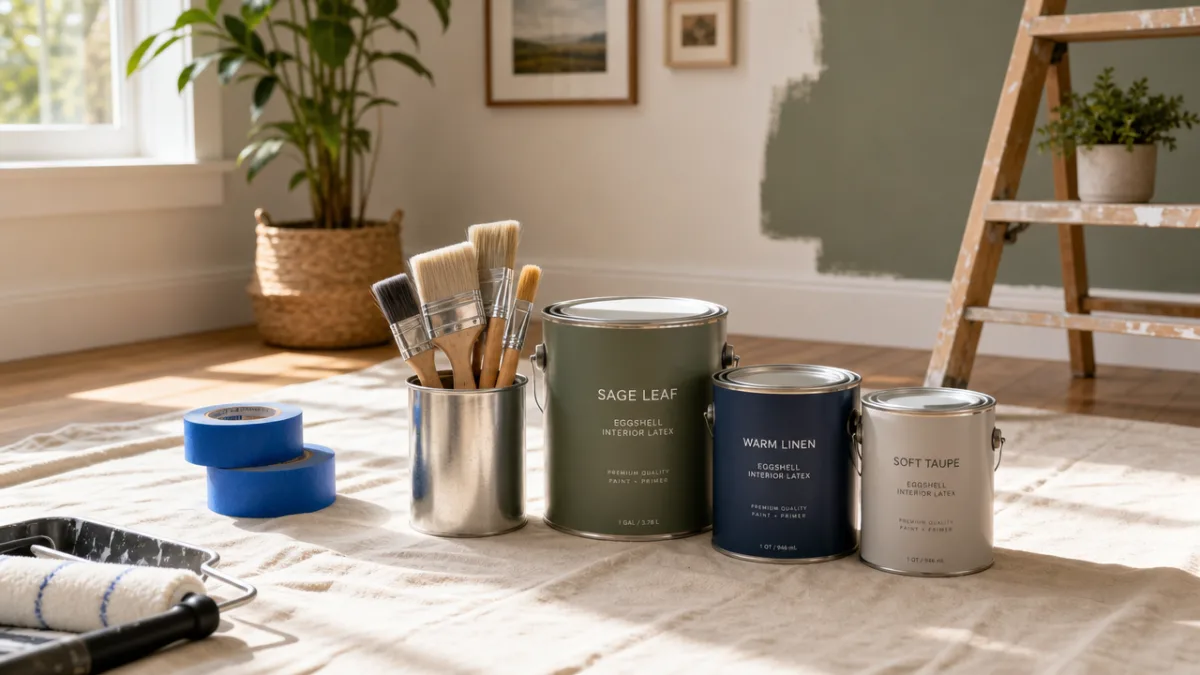
Brush and Roller Techniques That Eliminate Common Mistakes
The way you load and use your brush makes an enormous difference in the quality of the finish you achieve. One of the most impactful hacks is to avoid dipping more than one-third of the bristle length into the paint and then tapping — not wiping — the brush against the inside of the can to remove excess. Wiping the brush on the rim removes too much paint and causes the bristles to become packed and stiff, reducing their ability to release paint smoothly. Tapping leaves enough paint loaded in the brush to flow freely while preventing the drips that come from overloading.
For roller work, the grid liner inside a paint tray is less efficient than many people realize. A far better hack is to use a five-gallon bucket with a bucket screen — a metal grid that hooks over the rim. You can pour significantly more paint into a bucket than a tray, which means fewer interruptions to refill. Rolling the loaded roller up and down the screen removes excess paint far more evenly than a tray ramp does, giving you a more consistent load every single time. This consistency translates directly into smoother, more even coverage across large wall surfaces with far fewer roller marks.
The direction and pressure of your rolling strokes also matters more than most beginners appreciate. The correct technique is to apply paint in a large W or M pattern without lifting the roller, then fill in the pattern with even parallel strokes while the paint is still wet. The key hack here is to finish each section with very light, upward strokes using a nearly dry roller — this technique, called “laying off,” eliminates the stippling texture that dried roller marks leave behind and produces a finish that is noticeably smoother and more professional-looking from across the room.
When working with brushes along trim, ceilings, and edges, the hack of “cutting in” with a high-quality angled brush rather than relying entirely on tape will serve you well once you develop the skill. Load the brush, wipe the excess on the inside of the can, and use the tip of the bristles with steady hand pressure to draw a clean line. Keep a clean, barely damp brush in your other hand to immediately soften any mistakes. This two-brush technique allows you to maintain momentum without stopping to reapply tape or correct errors with a separate tool.
Color Selection and Testing Hacks for Confident Decisions
Choosing paint colors is notoriously difficult because colors behave differently in different environments, and the small swatch chips available at hardware stores bear almost no resemblance to how a color will look once it covers an entire wall of your home. One of the most valuable hacks is to purchase sample pots of your top three or four color candidates and paint large swatches — at least twelve inches by twelve inches — directly onto the wall you intend to paint. Living with those swatches for several days, observing them at different times of day and in different lighting conditions, will tell you far more than any chip card ever could.
Lighting has a transformative effect on paint color that many people dramatically underestimate. A warm, creamy white that looks fresh and bright under the cool daylight of a north-facing room can look muddy and yellow under the warm incandescent lighting of an evening gathering. A bold navy that appears sophisticated and moody in a showroom might feel oppressive and dark in your smaller bedroom with fewer windows. The hack is to evaluate your swatches not just during the day but at night with your actual room lighting turned on, because the color you live with most often is the color under your artificial lights after the sun goes down.
Another underused color hack involves understanding undertones — the subtle secondary hues present in every paint color. Even a color described simply as “gray” will have undertones that pull toward blue, green, purple, or brown, and these undertones will interact with your existing furniture, flooring, and fixed elements in ways that are not always predictable. The hack is to bring home samples of your flooring material, or photographs of your furniture, and hold them directly against your wall swatch in the room you are painting. This gives you an immediate, real-world comparison that eliminates guesswork and prevents expensive mistakes.
- Paint test swatches at least 12 inches square directly on the wall, not on paper or poster board, which changes how the color reads.
- Observe swatches at morning, midday, afternoon, and evening to understand how the color shifts throughout the day.
- Evaluate colors with all your room’s artificial lights switched on to simulate evening conditions.
- Bring flooring samples, fabric swatches, and furniture finish samples into the room to test compatibility.
- Always apply two coats of the sample color, as a single thin coat will look lighter and less saturated than the finished result.

Clean-Up and Storage Hacks That Save Time and Money
One of the most frustrating aspects of any painting project is the clean-up, and it is an area where smart hacks can save you a tremendous amount of time. If you are taking a break between coats or stopping for the day but planning to resume the following morning, wrap your brushes and rollers tightly in plastic wrap or a plastic bag rather than washing them out. A tightly wrapped roller or brush will stay workable for up to 24 hours without drying out, eliminating the need to wash and re-prime your tools between sessions. For breaks of just an hour or two, this hack saves significant time and water.
Paint storage is another area full of common mistakes and easy solutions. Most people store partially used cans by simply hammering the lid back on, but this traps air inside the can and leads to a skin forming on the surface of the paint, which then needs to be strained out before the paint can be used again. The professional hack is to pour the remaining paint into a smaller container — a mason jar or a smaller paint can — so that there is minimal air space between the paint surface and the lid. Less air means slower oxidation, which means your leftover paint remains usable for months or even years longer than it otherwise would.
Cleaning dried paint from brushes seems difficult, but there is an effective hack that works on both water-based and oil-based paints that have dried on the bristles. For water-based latex paints, soaking the brush in a mixture of warm water and fabric softener for several hours, then working the softened paint out with a comb, can rescue brushes that appear completely ruined. The fabric softener penetrates and softens the dried paint binder, making it pliable enough to remove. This hack can save you the cost of replacing brushes repeatedly throughout a project, which adds up significantly over time.
Protecting your floors and furniture during a painting project is much easier with the right hacks in place before you begin. Rather than using plastic sheeting alone, which can be slippery and tends to bunch up underfoot, lay down canvas drop cloths as your primary floor covering and use plastic sheeting only to cover furniture. Canvas absorbs paint drips rather than letting them pool and spread, and it lies flat and stable underfoot, dramatically reducing the risk of slipping and knocking over a paint can. Canvas drop cloths are reusable across dozens of projects, making them a worthwhile investment compared to the disposable plastic alternatives.
Advanced Hacks for Flawless Finishes and Special Effects
Once you have mastered the fundamentals of good painting technique, a whole new range of advanced hacks becomes available to help you achieve genuinely stunning results. One of the most transformative is the use of a paint extender or flow improver, particularly when working with latex paint in warm or dry conditions. Adding a measured amount of extender to your paint slows the drying time slightly, giving you more time to blend brush strokes and roller marks before they set. The result is a significantly smoother finish with fewer visible application marks, even for painters who are still developing their technique.
Achieving a smooth, factory-like finish on cabinets and furniture requires a different set of hacks from wall painting. The most effective approach combines a high-quality foam roller for the flat surfaces with a fine bristle brush for the detailed areas, followed by a light sanding with fine-grit sandpaper between every coat. The sanding hack is the element most DIY painters skip, but it is the key difference between a finish that looks professionally sprayed and one that reveals its brush-applied origins. After sanding, always wipe the surface clean with a tack cloth before applying the next coat to remove all the fine dust that would otherwise become embedded in the finish.
For those interested in creating textured or decorative paint effects, the rag rolling and color washing techniques offer beautiful results with surprisingly simple tools and methods. The hack for rag rolling is to use a natural sea sponge or a crumpled piece of chamois leather rather than a cotton rag, as these materials create a more organic, less repetitive pattern. Working in small, overlapping sections while the glaze is still wet allows you to blend the edges seamlessly, preventing the visible boundaries between sections that can make a decorative paint finish look unfinished or amateurish.
Dealing with glossy surfaces that need repainting is a challenge that defeats many DIY painters, because new paint simply slides off high-gloss finishes without bonding properly. The hack that professionals use is liquid deglosser — a chemical solution that you wipe onto the glossy surface with a cloth, which etches the finish at a microscopic level without requiring you to sand everything by hand. Liquid deglosser works in minutes, requires minimal physical effort, and prepares the surface for adhesion just as effectively as mechanical sanding. This single product can turn a weekend-long cabinet refinishing project into a much more manageable afternoon task.
- Add a measured amount of paint extender or flow improver to latex paint in warm, dry conditions to slow drying and improve blending.
- Sand lightly between every coat when painting cabinets or furniture, using fine-grit sandpaper and a tack cloth to remove dust before recoating.
- Use a natural sea sponge for decorative paint effects to achieve a more organic, less repetitive texture pattern.
- Apply liquid deglosser to shiny surfaces before painting to improve adhesion without extensive manual sanding.
- Keep a small, damp brush in your non-dominant hand when cutting in to immediately soften and correct any overreach mistakes.

Budget-Friendly Hacks That Maximize Your Painting Investment
Painting is one of the most cost-effective home improvement projects available, but costs can still spiral quickly if you are not thoughtful about how you shop for materials and manage your supplies. One of the best budget hacks is to purchase your primer and paint from the same brand and product line, as many manufacturers offer combination primer-and-paint products that genuinely reduce the number of coats required on properly prepared surfaces. While these combo products cost slightly more per gallon, the reduction in the total number of gallons required often makes them the more economical choice overall, particularly for large rooms or whole-house projects.
Understanding paint coverage ratings is a hack that saves many painters from buying more paint than they need. A standard gallon of paint is rated to cover approximately 350 to 400 square feet, but this assumes a single coat on a smooth, primed surface. In reality, textured walls, porous surfaces, and dark or vibrant colors will consume paint more quickly. The hack is to calculate your wall square footage precisely — measuring wall height by width for each wall and subtracting window and door openings — and then adding a buffer of approximately ten to fifteen percent rather than a full extra gallon, which is what most amateur painters purchase unnecessarily.
Returning to proper paint storage, there is an additional budget hack worth knowing that relates to rejected or mistinted paint. Paint departments at hardware stores regularly have cans of custom-mixed paint that customers ordered and then rejected, returned after opening, or simply never picked up. These cans are sold at dramatically reduced prices — sometimes as low as one or two dollars per gallon — and while you cannot choose the exact color, many of them are attractive, usable colors in high-quality paint formulations. For utility spaces, garages, basements, or children’s rooms where the exact color is less critical, mistinted paint represents extraordinary value and can make a painting project nearly free.
Investing in quality tools rather than cheap ones is a hack that pays dividends across every future painting project you undertake. A high-quality brush from a reputable manufacturer will hold its shape, release paint evenly, and provide superior control compared to an inexpensive brush with poorly anchored bristles that fall out into your finish coat. The same principle applies to rollers, tape, and drop cloths. Spending a little more upfront on tools that can be cleaned and reused saves money over time and consistently produces better results, making every subsequent project easier and more enjoyable than it would be with inferior equipment.








What do you think?
It is nice to know your opinion. Leave a comment.