










Make Beautiful Suncatchers With This Easy Craft
There is something almost magical about the way a suncatcher transforms ordinary light into something extraordinary. When sunlight passes through colored glass, translucent resin, or even simple plastic beads, it scatters across walls and floors in dancing ribbons of color that shift and change throughout the day. Suncatchers have been beloved decorative objects for centuries, appearing in Gothic cathedrals, Victorian parlors, and modern minimalist apartments alike. Their enduring appeal lies in their ability to bring the outside world indoors in the most beautiful way imaginable.
What makes suncatchers particularly appealing as a craft project is their incredible accessibility. Unlike many artistic pursuits that require years of training or expensive equipment, suncatchers can be made by almost anyone, regardless of age or artistic experience. A child can create a stunning piece using nothing more than melted pony beads, while an experienced crafter can produce gallery-worthy artwork using stained glass techniques or UV resin casting. The spectrum of difficulty and material cost is so wide that suncatchers genuinely are a craft for everyone, from the very young to the very experienced.
Beyond their aesthetic appeal, suncatchers offer real therapeutic and creative benefits. The process of selecting colors, arranging shapes, and working with light-catching materials engages both the analytical and creative parts of the brain simultaneously. Many crafters describe the process as meditative, particularly when working with glass or resin. And when the finished piece finally catches its first beam of sunlight, projecting color across the room, there is an unmatched sense of satisfaction and delight that makes every moment of crafting worthwhile.
Choosing Your Materials and Method
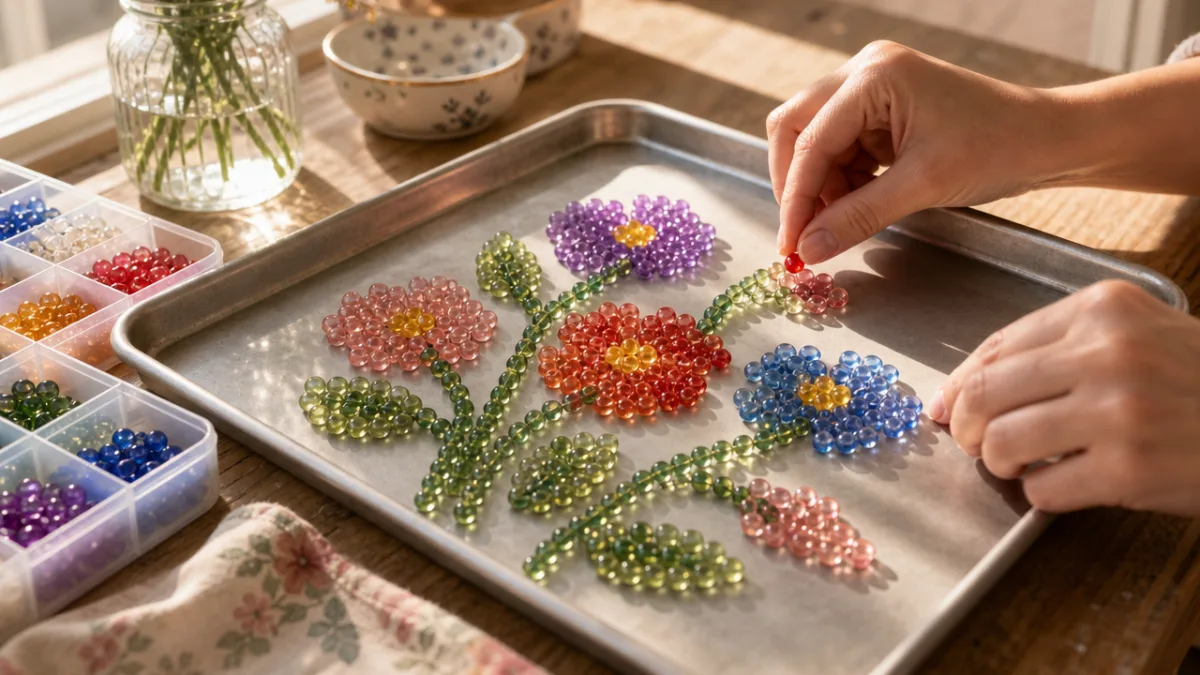
The first decision any aspiring suncatcher maker must make is choosing which method suits them best. The most beginner-friendly approach involves melted plastic beads, often called pony beads or Perler beads, arranged in a mold or on a baking sheet and fused together in the oven. This method requires minimal tools, costs very little, and produces surprisingly beautiful results. Children can easily participate, and the cleanup is straightforward. The finished pieces have a translucent, jewel-like quality that catches light beautifully, particularly in shades of amber, cobalt, and emerald.
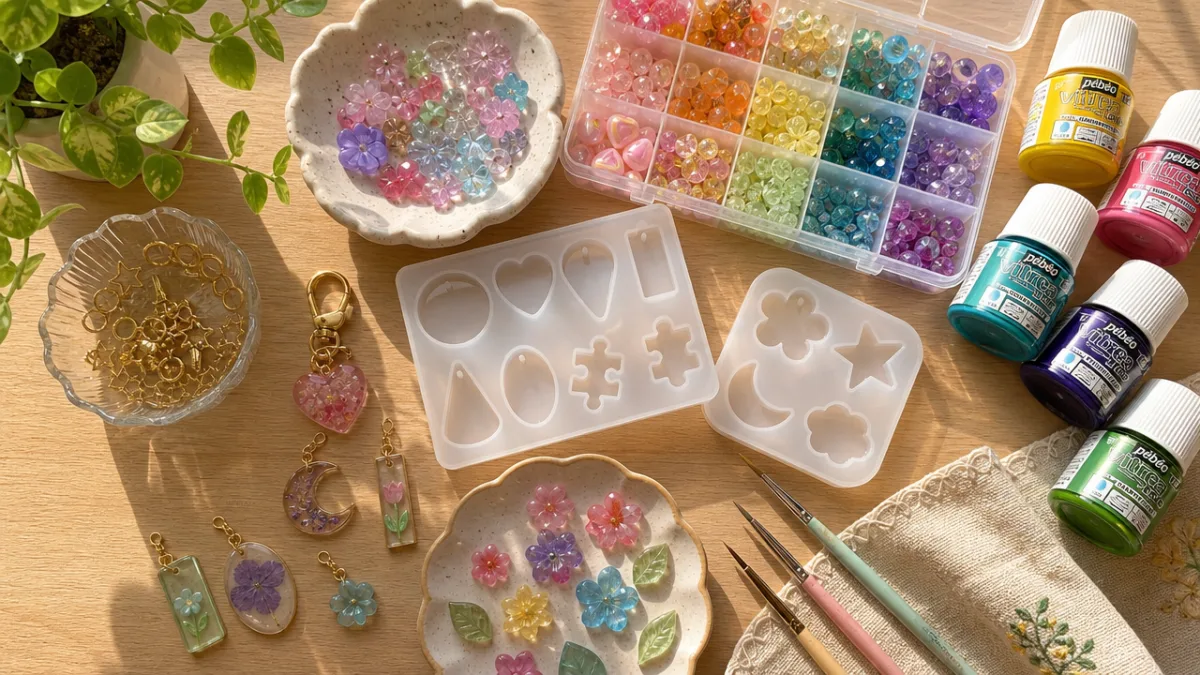
For those who want a more sophisticated finished product, UV resin casting is an excellent intermediate option. UV resin is a liquid material that cures hard and crystal-clear when exposed to ultraviolet light, either from a UV lamp or direct sunlight. Crafters can embed dried flowers, glitter, foil flakes, colored alcohol ink, or tiny decorative elements within the resin before curing it, creating pieces with incredible depth and complexity. Silicone molds in geometric shapes, circles, and organic forms are widely available and very affordable, making it easy to produce professional-looking results without a steep learning curve.
Stained glass techniques represent the traditional and most visually stunning end of the suncatcher spectrum. Using copper foil tape, lead came, or adhesive leading strips applied to glass pieces cut into specific shapes, crafters can replicate the look of authentic stained glass windows on a small, manageable scale. While this approach requires more tools and practice, the results are breathtaking and extraordinarily durable. Many crafters start with simpler geometric designs and gradually work their way toward more elaborate floral or figurative compositions as their skills develop.
Essential Supplies for Each Method
Gathering the right supplies before you begin will make your crafting experience far more enjoyable and ensure a polished finished product. For the melted bead method, you will need transparent or translucent plastic beads in your chosen colors, a metal mold or baking pan lined with parchment paper, an oven, and jump rings or wire for hanging. Cookie cutters make excellent molds and give your suncatchers charming seasonal shapes like stars, hearts, or snowflakes. A hole punch tool or skewer is useful for creating hanging holes before the beads fully harden.
UV resin crafters should invest in a quality resin that cures clear without yellowing, a UV lamp for consistent results regardless of weather conditions, silicone molds in desired shapes, a set of toothpicks or fine-tipped stir sticks for manipulating inclusions, and pigments or alcohol inks for adding color. Protective gloves and a well-ventilated workspace are important safety considerations, as uncured resin can be a skin irritant. A heat gun or lighter passed briefly over the surface of poured resin will eliminate air bubbles and give your finished piece a flawless, professional appearance.
Those pursuing faux stained glass techniques can achieve remarkable results with very accessible materials. Self-adhesive lead strips, available at most craft stores, can be applied directly to a piece of clear glass or even a sheet of acetate to create the outline of a design. Glass paint or Gallery Glass liquid leading is then used to fill in the spaces between the lead lines with transparent color. This method requires no cutting tools and is genuinely safe for older children and teenagers. The finished piece can be hung in a window using suction cup hooks or framed with a simple metal or wooden border.
Designing Your Suncatcher Pattern
Great suncatcher design begins with understanding how light interacts with different colors and levels of transparency. Not all colors perform equally well in a suncatcher context. Warm tones like amber, gold, rose, and orange tend to project the most dramatic light effects, casting pools of warm color that feel almost like candlelight. Cool tones such as cobalt blue, teal, and lavender create calmer, more ethereal projections. Combining complementary colors within a single piece can produce breathtaking light effects, particularly when the suncatcher is positioned to rotate slowly and blend those colors dynamically.
When designing your pattern, consider the balance between positive and negative space. A suncatcher that is completely filled with color will project solid patches of light, while one that incorporates clear or lightly tinted areas will create a more delicate, lace-like effect on surrounding surfaces. Geometric patterns are a natural starting point because their symmetry and regularity make them forgiving for beginners while still producing elegant results. Mandala-inspired designs, chevrons, honeycomb grids, and concentric circles are all popular choices that translate beautifully into suncatcher form regardless of the technique used.
Nature-inspired designs are perennially popular and for good reason. Flowers, leaves, dragonflies, butterflies, and sun motifs connect the suncatcher to the outdoor light it is meant to capture and celebrate. A simple daisy design with yellow petal beads and a clear or white center is a charming beginner project, while a detailed water lily rendered in UV resin with embedded dried petals can be a stunning showpiece. Animals, particularly birds and fish, are also beloved subjects because their forms translate naturally into the jewel-like quality of transparent materials and light.
Drawing and Transferring Your Design
Before you begin placing beads, pouring resin, or applying lead strips, it is worth spending time sketching your design on paper first. Working at actual size allows you to see exactly how your proportions will translate to the finished piece and gives you a template to work from throughout the crafting process. For bead or resin work, you can slip your paper template beneath a clear workspace or mold to guide your placement. For faux stained glass techniques, your paper template can be traced directly onto the surface using a marker before you begin applying your leading.
Free design resources are abundantly available online for crafters who prefer not to draw their own patterns. Coloring book pages with bold outlines, stained glass coloring sheets, and dedicated suncatcher pattern websites offer hundreds of ready-to-use designs at every difficulty level. Many crafters find that simplifying a complex image into its most essential shapes produces the most satisfying suncatcher result, since fine details can be difficult to render in physical materials and may not read clearly once the piece is backlit by sunlight. Bold, clear lines and well-defined color areas are the hallmarks of successful suncatcher design.
Digital tools can also be genuinely useful in the design phase. Simple drawing applications allow you to experiment with color combinations before committing to physical materials, which can save both time and expense. Viewing your digital design against a white or light background gives you a reasonable approximation of how the finished piece will look when lit from behind. Some crafters even print their designs onto transparency film and hold them up to a window as a final check before beginning the actual craft process, allowing them to evaluate both the overall composition and the specific color interactions in real light conditions.
Step-by-Step Crafting Process
For the popular melted bead method, the process begins with preheating your oven to approximately 400 degrees Fahrenheit, though you should always consult the specific instructions on your bead packaging as temperatures can vary by brand. Line a metal baking pan with parchment paper and place your mold or cookie cutter on top. Begin filling the mold with beads, arranging them according to your chosen design. Standing the beads upright on their ends rather than laying them flat tends to produce a more solid, even finished result with better color saturation and fewer gaps.
Once your mold is filled to your satisfaction, carefully transfer the pan to the preheated oven and bake for approximately 20 to 30 minutes, checking periodically. The beads will gradually melt and fuse together, and the piece is ready when all the individual bead shapes have smoothed out and the surface looks glossy and even. Remove the pan from the oven and allow it to cool completely before attempting to remove the suncatcher from the mold. Attempting to remove the piece while still warm can cause it to warp or crack. Once cooled, gently flex the mold to release the piece, then use a jump ring through any pre-made hole to add a hanging loop.
For UV resin suncatchers, the process is equally straightforward but requires a bit more patience between steps. Begin by preparing your silicone mold on a level surface, then carefully measure and mix your resin according to the manufacturer’s instructions. Add your chosen colorants one drop at a time, stirring gently to incorporate them without introducing too many bubbles. Pour a thin base layer into your mold, add any inclusions like dried flowers or glitter, then top with a final clear or tinted layer. Cure each layer under your UV lamp for the recommended time before adding the next, building up depth and complexity gradually for the most stunning results.
Working With Faux Stained Glass Techniques
The faux stained glass approach begins with a clean, grease-free glass surface, which could be a purchased glass blank, a piece cut to shape by a glass supplier, or even a section of clear acetate for a more beginner-friendly alternative. Transfer your design onto the surface using a permanent marker or by taping your paper template beneath the glass so the lines show through. Apply your self-adhesive lead strips along all the drawn lines of your design, pressing them firmly into place and using a burnishing tool or the back of a spoon to ensure good adhesion at every point.
Once your leading is complete, the delightful work of adding color begins. Glass paint or specially formulated transparent craft paint is applied within each section of the design using a fine brush or the applicator tip directly on the paint tube. Work from the center of each section outward, allowing the paint to flow naturally and settle evenly. Avoid overworking the paint once applied, as this can introduce bubbles and streaks. Allow each section to dry completely before moving to adjacent sections to prevent colors from bleeding into one another and muddying the clean lines of your design.
After all painted sections are fully dry, typically after 24 hours, your suncatcher can be finished and prepared for hanging. Inspect the piece carefully and touch up any thin or uneven areas with additional paint. If you worked on glass, consider applying a thin coat of clear varnish to the painted surface to protect the colors from fading and moisture damage over time. Attach a decorative chain, ribbon, or wire hanger using a suction cup hook, adhesive hanging strip, or by drilling a small hole at the top of the piece if you have the appropriate tools available.
Displaying and Caring for Your Suncatchers
The placement of your finished suncatcher is every bit as important as the crafting process itself, because even the most beautifully made piece will fail to reach its full potential if it is not positioned to receive adequate direct or indirect sunlight. East-facing windows are ideal for morning displays, when the low-angle sun of early hours creates the most dramatic and far-reaching light projections. West-facing windows perform best in the afternoon, when the warm golden tones of descending sunlight enhance the colors of amber, gold, and orange particularly well. South-facing windows receive the most consistent light throughout the day and are generally the best choice for year-round display.
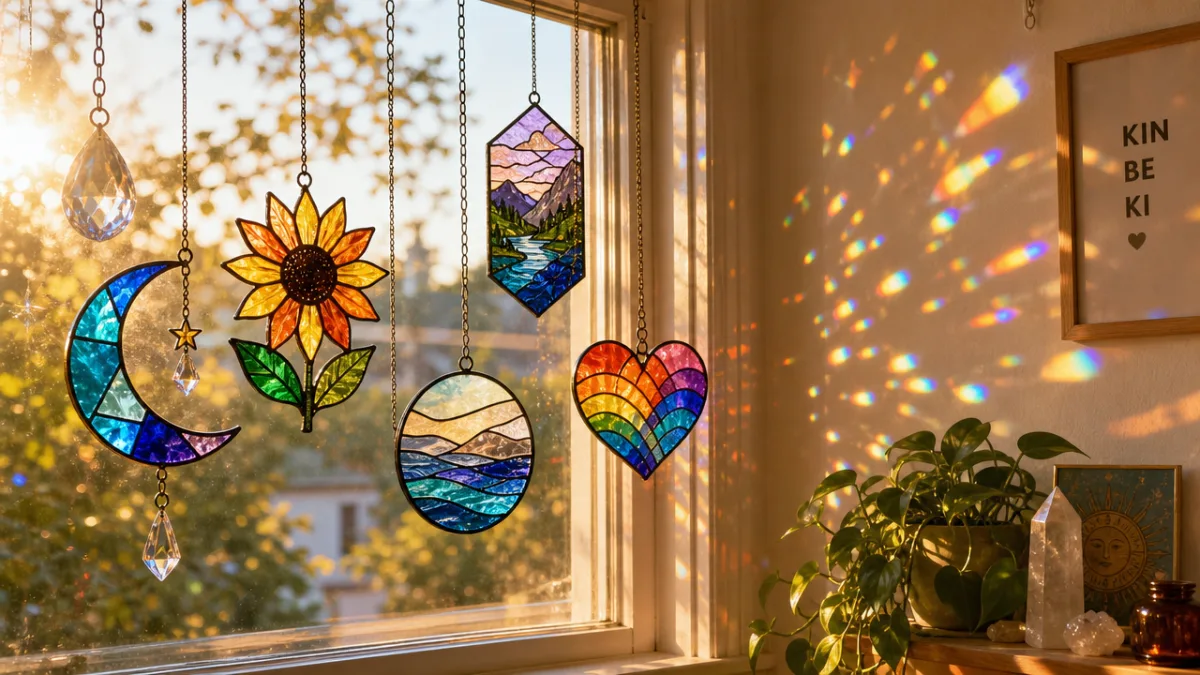
Consider not only which window to hang your suncatcher in but also where the projected light will fall within the room. A suncatcher placed in a window above a white or pale wall will cast its colored patterns most vividly, while one positioned above a dark or heavily patterned surface will lose much of its projected effect. Hanging several suncatchers at different heights in the same window can create a layered, cascading effect that fills an entire room with moving color throughout the day. Transparent fishing line is an excellent hanging material because it virtually disappears, making the suncatcher appear to float weightlessly in midair.
Caring for your suncatchers properly will ensure they remain beautiful for years or even decades. Melted bead suncatchers are quite durable but should be kept away from direct heat sources that could cause them to warp. UV resin pieces are highly resistant to water and physical impact but can yellow over time with excessive UV exposure, so rotating them periodically and keeping them out of harsh midday summer sun when possible will extend their lifespan. Faux stained glass pieces should be cleaned with a soft, damp cloth rather than chemical glass cleaners, which can deteriorate both the leading and the paint over time.
Creative Variations and Advanced Ideas
Once you have mastered the basic suncatcher techniques, a world of creative variation opens up. Seasonal and holiday-themed suncatchers are a wonderful way to mark the passage of time and celebrate special occasions throughout the year. Snowflake designs in icy blue and silver for winter, egg-shaped pieces in pastel colors for spring, sunburst designs in warm amber and gold for summer, and leaf motifs in burnt orange and crimson for autumn can become beloved annual traditions that mark each season with handmade beauty. These pieces also make deeply meaningful gifts because of the personal care and creativity invested in each one.
Mixed media suncatchers that combine multiple techniques or incorporate unexpected materials can produce truly unique results. Pressing fresh flowers between two layers of UV resin creates a botanical suncatcher that captures the ephemeral beauty of a garden in a permanent, light-catching form. Embedding vintage map fragments, music notation printed on transparency film, or even meaningful photographs treated with a transparency medium can create suncatchers with rich personal or narrative significance. Metal wire, copper foil, and decorative chain can be incorporated into the hanging structure itself, adding an additional layer of artistic interest to the piece even before light enters the equation.
Suncatcher crafting also translates beautifully into a group or community activity. Workshops for children can introduce basic color theory and light science in an engaging, hands-on way that makes abstract concepts immediately tangible and memorable. Suncatcher parties for adults have become increasingly popular as creative social events that combine the pleasure of making something beautiful with the enjoyment of shared time and conversation. Community or school suncatcher projects, where many people each contribute one piece to a larger collective installation, can produce breathtaking window displays that celebrate both individual creativity and collective effort in equal measure.
Gifting and Selling Your Creations
Handmade suncatchers make exceptional gifts for a remarkably wide range of recipients and occasions. Their visual beauty speaks immediately and powerfully, requiring no explanation or context for the recipient to appreciate the care that went into making them. A suncatcher made with the recipient’s favorite colors, or incorporating flowers from a meaningful event, or shaped to reflect a beloved interest or hobby, carries an emotional weight that mass-produced gifts simply cannot match. They are also beautifully suited to gifting because they are flat, lightweight, and easy to package attractively with minimal materials.
For crafters who find themselves making suncatchers in quantity, selling handmade pieces can be a rewarding way to share your work and recoup material costs. Online marketplaces dedicated to handmade goods are well-suited to suncatcher sales because the visual nature of the platform allows buyers to immediately appreciate the translucent beauty of the pieces. High-quality photographs taken with backlighting that simulates window light are absolutely essential for successful online selling, as these images must convey the piece’s full luminous potential to buyers who cannot see it in person. Clear, detailed listings that describe materials, dimensions, and care instructions build buyer confidence and reduce post-purchase questions.
Local craft fairs and artisan markets offer a particularly satisfying selling venue for suncatcher makers because the pieces can be displayed in conditions that truly show them at their best. A simple display stand positioned near a window or in outdoor natural light allows potential buyers to see the pieces casting their characteristic colored light in real time, which is a far more persuasive selling experience than any photograph can provide. Offering a range of price points, from simple single-color geometric pieces to elaborate multi-element compositions, ensures that customers with different budgets can find something they love and take home a piece of handmade light to brighten their own spaces.








What do you think?
It is nice to know your opinion. Leave a comment.