










Quick & Easy Bunny Crochet Rattle: A Free Pattern Guide for Beginners and Beyond
Introduction to the Bunny Crochet Rattle
There is something undeniably charming about a handmade toy, especially when it comes in the form of an adorable bunny rattle. The Bunny Crochet Rattle pattern from Chai Coffee Crochet has captured the hearts of crafters everywhere, offering a delightful project that combines simplicity with irresistible cuteness. Whether you are making it for a baby shower gift, a nursery decoration, or simply for the joy of crocheting something special, this project delivers results that feel far more impressive than the effort required to complete them.
What makes this pattern particularly appealing is its accessibility. Even crocheters who have only recently picked up a hook will find that the basic stitches and straightforward construction make this bunny rattle an achievable and rewarding weekend project. The pattern uses fundamental techniques such as single crochet, increases, and decreases — skills that build a solid foundation for any crocheter’s repertoire. The finished toy is soft, tactile, and perfectly sized for tiny hands to grasp and shake with delight.
Beyond the technical simplicity, there is a deeply satisfying emotional dimension to creating a handmade rattle. When you choose the yarn, work each stitch, and assemble the final piece, you are pouring care and intention into something that will bring joy to a child. Handmade toys carry a warmth that mass-produced items simply cannot replicate, and a bunny rattle made with love is a treasure that families often keep for years, passing it from child to child as a beloved keepsake. This guide will walk you through everything you need to know to bring your own bunny rattle to life.
Materials and Tools You Will Need
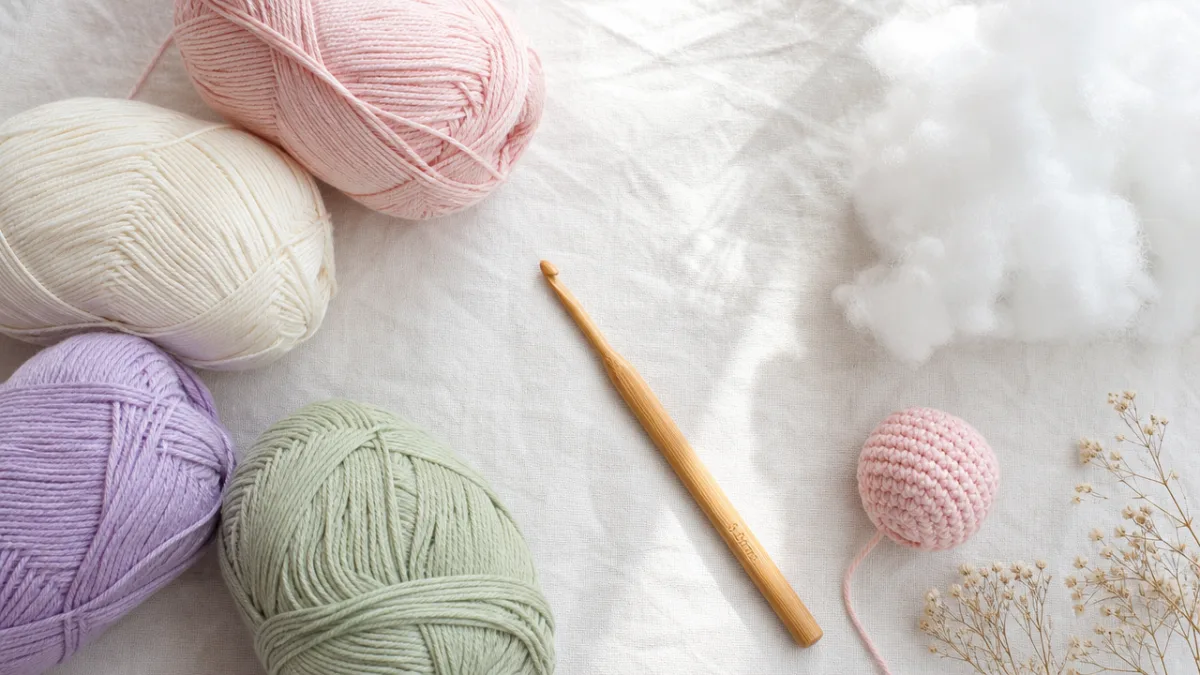
Before you begin any crochet project, gathering your materials is an essential first step that sets the tone for a smooth and enjoyable crafting experience. For the Bunny Crochet Rattle, you will want to select a yarn that is soft, washable, and safe for babies. Many crafters reach for DK weight or worsted weight yarn in classic bunny colors — think soft creams, light greys, warm tans, and gentle pastels. However, the beauty of this free pattern is that it invites creativity, so do not hesitate to choose colors that speak to you or match a nursery’s color palette.
The tools required are minimal and likely already in your crochet kit. A crochet hook sized appropriately for your chosen yarn is essential — typically a 3.5mm to 4.5mm hook works well for standard baby-safe yarns. You will also need a yarn needle for weaving in ends and assembling pieces, a small amount of fiberfill stuffing to give the rattle its plush body, and a plastic rattle insert, which is the element that gives this toy its signature sound. Rattle inserts are inexpensive and widely available online and in craft stores.
Safety is a paramount consideration when making toys for infants and young children. Always choose yarns that are labeled machine washable, as baby items will inevitably need frequent cleaning. Opt for materials free from harsh dyes or chemical treatments whenever possible. Ensure that any embellishments such as safety eyes are firmly secured — or better yet, use embroidered eyes for babies under three years old, eliminating any small-part choking hazard entirely. A quick safety checklist before you begin will save you worry later and ensure that your gift is as safe as it is sweet.
- DK or worsted weight yarn in your chosen colors (approximately 50–100 grams depending on color choices)
- Crochet hook sized to match your yarn (commonly 3.5mm–4.5mm)
- Yarn needle for seaming and finishing
- Polyester fiberfill stuffing
- Plastic rattle insert (available at craft stores or online)
- Safety eyes or embroidery thread for facial features
- Stitch markers to track rounds
- Scissors
Understanding the Basic Stitches and Pattern Structure
The Bunny Crochet Rattle pattern relies primarily on working in continuous rounds, a technique that creates seamless, tube-like shapes perfect for amigurumi-style toys. If you are new to crocheting in the round, do not be discouraged — it quickly becomes intuitive. You will begin each piece with a magic ring, also known as a magic circle, which allows you to start your rounds without leaving a visible hole at the center. This technique is especially important for the bunny’s head and body, where a tidy closure ensures a polished finish.
The core stitches you will use throughout this pattern are the single crochet (sc), increase (two single crochets in the same stitch), and decrease (single crochet two stitches together). These three elements are the building blocks of nearly all amigurumi patterns, and mastering them opens the door to an entire world of adorable crocheted creatures. The pattern also involves working a small number of flat pieces, such as the bunny’s ears, which are worked in rows rather than rounds and then folded or seamed to create dimension.
One of the most helpful habits you can develop while working through this pattern is consistent stitch counting. At the end of each round, pause to count your stitches and compare them to the pattern’s stitch count for that row. This simple practice catches mistakes early, before they compound into a shape that doesn’t match your intentions. Using a stitch marker to indicate the beginning of each round will also prevent the common confusion of losing track of where one round ends and another begins, especially as your work grows in size and complexity.
Working in the Round: A Quick Overview
Working in continuous rounds is a hallmark of amigurumi crochet and gives the Bunny Crochet Rattle its characteristic smooth, spherical shapes. Unlike working in joined rounds — where you slip stitch to join at the end of each round — continuous rounds simply spiral upward without interruption. This creates an invisible seam that keeps the surface of your work looking clean and uniform. It does mean, however, that you need to stay vigilant about tracking your round boundaries, which is where stitch markers become your best friend.
To begin, create a magic ring by looping your yarn and working your first round of single crochets into the loop before pulling it snug. The pattern will typically specify working six single crochets into the magic ring for the first round, then increasing across subsequent rounds to expand the circle into the shape of the head or body. As you follow the increase and decrease rounds precisely, a satisfying three-dimensional shape will emerge that perfectly mirrors the pattern’s design intent.
Reading the Pattern Notation
Free crochet patterns like the Bunny Crochet Rattle often use standard abbreviations that may feel like a foreign language at first glance but quickly become second nature. Common abbreviations you will encounter include sc (single crochet), inc (increase), dec (decrease), MR (magic ring), and st(s) for stitch or stitches. The pattern will typically lay out each round on a separate line, with the stitch count for that round noted in parentheses at the end — a crucial reference point for keeping your work on track.
If you encounter a notation that confuses you, remember that the crocheting community is extraordinarily generous and accessible. A quick search on YouTube for any technique you’re unsure about will yield dozens of clear tutorial videos showing the stitch in action. Many crocheters find that watching a technique performed even once unlocks an understanding that reading alone cannot provide. Do not hesitate to reach out to the pattern creator or connect with crochet groups on social media, where fellow crafters are almost always happy to help troubleshoot.
Step-by-Step Construction of the Bunny Rattle
The construction of the Bunny Crochet Rattle typically follows a logical sequence that builds each piece of the bunny separately before assembling them into the finished toy. You will generally begin with the head, which is also where the rattle insert and most of the stuffing will live. Working from the magic ring, you increase steadily over several rounds to create a rounded dome shape, then work straight rounds to form the sides of the head, and finally decrease rounds to close the base. Before fully closing, insert the rattle and stuffing securely.
The body is crocheted in much the same way as the head but with slightly different dimensions to give it a pleasingly proportioned look alongside the larger head. Once the body is stuffed — this time with fiberfill only, as the rattle insert already lives in the head — it is seamed closed and set aside while you complete the remaining pieces. Some versions of this pattern may also feature small arms or legs, worked as simple oval or cylindrical shapes, that add to the bunny’s personality when attached to the finished toy.
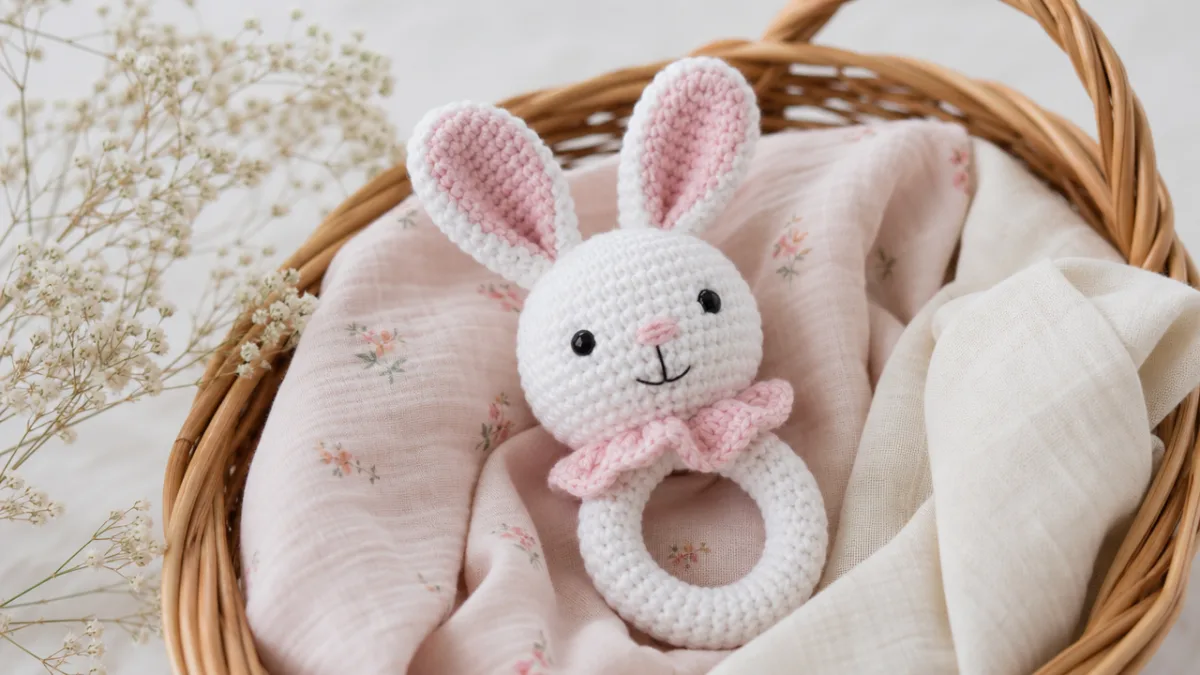
The ears are among the most distinctive and charming elements of the Bunny Crochet Rattle, and they deserve careful attention. Worked flat in rows, the ears begin wide at the base and taper to a rounded or pointed tip depending on the pattern variation you choose. Many crafters enjoy adding a contrasting color to the inner ear — a blush pink against a creamy white outer ear, for example — to give the bunny a lifelike and particularly endearing quality. Once both ears are complete, they are typically folded slightly at the base and sewn onto the top of the head at a slight outward angle.
Assembling the Pieces
Assembly is the step that truly brings your bunny rattle to life, and it requires a bit of patience and a good yarn needle. Begin by pinning the head and body together before sewing to ensure proper alignment — the bunny should sit upright with the head centered above the body. Using your yarn needle and a length of matching yarn, work a whip stitch or ladder stitch around the join, pulling firmly enough to create a secure connection without puckering the surface of either piece.
Attaching the ears requires a decision about positioning that will shape the overall character of your finished bunny. Ears placed close together and upright give a classic, alert expression, while ears positioned slightly further apart or at a gentle outward tilt create a softer, dreamier look. Similarly, the placement of the facial features — whether you use safety eyes or embroidered eyes and a small stitched nose — has an enormous impact on the bunny’s personality. Take your time with this step, using pins to test different positions before committing with your needle and thread.
- Complete the head and insert the rattle and stuffing before closing
- Complete the body and stuff firmly with fiberfill before closing
- Crochet both ears and any additional appendages such as arms or a tail
- Attach facial features (eyes, nose) securely to the head
- Pin and then sew the head to the body using a yarn needle
- Attach ears to the top of the head at your preferred angle
- Sew on any remaining pieces and weave in all yarn ends thoroughly
- Give the finished rattle a gentle shake to confirm the rattle insert is working beautifully
Customization Ideas and Variations
One of the greatest joys of working with a free pattern is the creative freedom it provides to make the project entirely your own. The Bunny Crochet Rattle is a wonderful canvas for personalization, and even small changes can result in a toy that feels uniquely special. Consider working the bunny in an unexpected colorway — a deep teal with gold inner ears, a classic black and white, or a gradient yarn that shifts from lavender to soft mint as you work through the rounds. Color choices alone can transform the same pattern into a completely different aesthetic.
Texture is another dimension worth exploring. Many crafters enjoy incorporating a small amount of fluffy or boucle yarn for the tail, creating a delightfully tactile pom-pom effect without requiring any additional construction. A subtly variegated yarn can add visual depth to the bunny’s body that a solid color cannot achieve. If you are making the rattle as a gift and know the nursery’s color scheme, matching or complementing those colors adds a thoughtful personal touch that the parents will notice and appreciate.
Beyond color and texture, you can also experiment with scale and proportion. Using a thicker yarn and a larger hook will produce a bigger, chunkier bunny that feels more like a plush toy than a rattle — ideal for toddlers who have graduated beyond the infant stage. Conversely, a finer yarn and smaller hook creates a dainty, delicate version that would make a beautiful decorative accent or Easter basket addition. The pattern’s proportional logic holds across yarn weights, making it easy to adapt without needing to rewrite the instructions entirely.
Personalizing with Embellishments
Embellishments can elevate your bunny rattle from sweet to truly extraordinary. A tiny embroidered bow tie or a ribbon tied around the bunny’s neck adds a dressy, gift-ready finishing touch. Some crafters add a small crocheted flower tucked behind one ear for a whimsical, garden-party feel. For a more gender-neutral aesthetic, a simple contrasting color stripe around the body or a geometric patch stitched on the tummy creates a modern, stylish look that feels fresh and contemporary.
If you are giving the rattle as part of a larger handmade gift set, consider making a matching lovey blanket or a small crocheted ball in the same color family. Coordinated handmade items demonstrate a level of care and craft that resonates deeply with new parents. Packaging your bunny rattle in a simple muslin bag tied with a ribbon, along with a handwritten tag noting the materials used, adds a professional, boutique-quality presentation that makes the gift feel even more special and considered.
Tips for Success and Troubleshooting Common Issues
Even experienced crocheters occasionally encounter hiccups along the way, and the Bunny Crochet Rattle is no exception. One of the most common challenges is achieving a consistent gauge — that is, ensuring your stitches are the same size throughout the project. If your gauge is too loose, the stuffing may show through the gaps between stitches, which is both aesthetically undesirable and a safety concern for a toy intended for infants. Working with a slightly smaller hook than recommended for your yarn is a simple adjustment that tightens the fabric and solves this issue effectively.
Another frequent stumbling block is the magic ring, particularly for crocheters who have not used it before. If the ring refuses to pull snug or keeps unraveling as you work, try winding the yarn twice around your fingers before beginning, or use a slip knot start as an alternative. There are several methods for starting in the round, and finding the one that feels comfortable in your hands is more important than adhering strictly to any single technique. The end result — a closed, tidy center — is what matters, not the specific path you took to get there.
Seaming is another area where patience pays dividends. Rushing the assembly process often results in a bunny whose head sits at an odd angle or whose ears are attached unevenly. Take the time to pin everything in place and step back to assess the overall look before sewing. If something doesn’t look right, it is always better to remove the pins and reposition than to sew and unpick later. A well-assembled bunny with neatly woven-in ends will look professionally made and hold up beautifully through repeated handling and washing.
Caring for Your Finished Bunny Rattle
Once your bunny rattle is complete and in the hands of its recipient, proper care instructions will help it last for years. Most baby-safe yarns are machine washable on a gentle cycle, but it is always worth checking the yarn’s label to confirm. Placing the rattle inside a mesh laundry bag before washing protects it from being stretched or snagged. Lay it flat to dry rather than tumble drying, which can cause the fiberfill to clump and lose its even distribution, distorting the bunny’s shape over time.
If the bunny rattle becomes a much-loved companion — as these handmade toys so often do — it may eventually need a little refreshing. Re-stuffing is not typically necessary unless the toy has been through exceptional wear, but a gentle reshape while the fabric is still slightly damp from washing can restore its original roundness. Embroidered features will hold up beautifully through washing, while safety eyes should be checked periodically to ensure they remain firmly attached. A little maintenance goes a long way in preserving a handmade toy’s charm and safety.
Sharing Your Work with the Crochet Community
Completing a project like the Bunny Crochet Rattle is a genuine achievement worth celebrating, and the crochet community thrives on shared creativity and mutual encouragement. Consider photographing your finished bunny and sharing it on social media, tagging the pattern creator at Chai Coffee Crochet so they can see the beautiful result of their design in someone else’s hands. Pattern creators genuinely appreciate seeing their work brought to life in new colorways and variations, and your photo may inspire another crafter to pick up the pattern themselves.
Leaving a comment or review on the original pattern page is another meaningful way to give back to the community. A few thoughtful words about your experience — what you loved, what you found challenging, how the recipient reacted — helps other crafters make informed decisions about whether to try the pattern themselves. The generosity of pattern creators who offer free designs deserves acknowledgment and support, and taking a moment to express your appreciation costs nothing but means a great deal to those who pour their time and creativity into making patterns freely available to all.
As you continue your crochet journey, you may find yourself drawn to create variations of the Bunny Crochet Rattle for every baby shower, birthday, or holiday in your calendar. Once you have made one, the pattern becomes familiar enough that you can whip up subsequent versions with increasing speed and confidence. Many crafters report making dozens of these little bunnies over the years, each one slightly different, each one carrying the handmade warmth and intention that only a crafter’s hands can provide. It is the kind of project that never grows old, because the joy of giving something handmade always remains entirely new.








What do you think?
It is nice to know your opinion. Leave a comment.