










Fold Out Craft Storage Cabinet: 10 Easy Organization Steps
If you’ve ever sat down to start a creative project only to spend the first thirty minutes hunting for scissors, untangling ribbon, or digging through a pile of mismatched supplies, you already understand the frustration that drives crafters everywhere to seek a better system. A fold out craft storage cabinet is one of the most elegant and space-efficient solutions available today, transforming a single wall-mounted unit into a fully functional crafting station that tucks away neatly when not in use. These cabinets are beloved by crafters in small apartments, dedicated craft rooms, and shared family spaces alike because they offer maximum utility without demanding permanent square footage.
The concept is simple but transformative: a cabinet that mounts to the wall, opens outward to reveal a work surface, and unfolds to expose shelves, compartments, hooks, and storage zones for every type of supply imaginable. When the crafting session ends, everything folds back in, the doors close, and your room reclaims its living space. The organizational potential within these cabinets is enormous, but only if you set them up thoughtfully from the beginning. A poorly organized fold out cabinet can become just as chaotic as the pile of supplies it was meant to replace.
This guide walks you through ten carefully considered steps for organizing your fold out craft storage cabinet so that every tool, material, and notion has a home, every zone serves a clear purpose, and your creative time is spent actually creating rather than searching. Whether you’re setting up a brand new cabinet or finally tackling the one that’s been collecting clutter for months, these steps will help you build a system that works beautifully and stays that way over time.
Step 1: Empty Everything and Audit Your Supplies
Before you can organize anything effectively, you need to know exactly what you’re working with. Begin by removing every single item from your cabinet, your craft bins, your junk drawers, and any other place where supplies have migrated over time. Spread everything out on a large table or the floor so you can see the full scope of your collection. This initial audit is often eye-opening, revealing duplicate purchases, expired adhesives, broken tools, and materials from projects you abandoned years ago that are simply taking up valuable space.
As you sort through your supplies, create broad categories to start: cutting tools, adhesives, papers and cardstock, fabrics and fibers, stamps and inks, embellishments, measuring and marking tools, and so on. Don’t worry about being too granular at this stage. The goal right now is simply to see what you own and begin grouping like items together. You’ll be surprised how much clarity this process brings. Many crafters discover they have enough of certain supplies to last years, which actually reduces future shopping impulse buys and helps them shop more intentionally going forward.
Use this audit as an opportunity to purge ruthlessly. Throw away dried-out markers, cracked stamps, tangled ribbons that will never untangle, and half-empty glue sticks that have gone hard. Donate supplies from craft styles you no longer practice. The less you have to store, the better your organizational system will function. A fold out cabinet has finite space, and filling it with items you never use is a guaranteed path back to chaos. A leaner, more curated collection is always easier to maintain than a sprawling one.
Step 2: Map Out Your Cabinet Zones Before Putting Anything Back
Resist the urge to immediately start loading supplies back into your cabinet. Instead, spend time looking at the empty cabinet carefully and thinking about how you actually work. Consider which supplies you reach for in nearly every crafting session versus the ones you only need occasionally. The most frequently used items should occupy the most accessible zones: eye level shelves, the inside of the doors, and the areas closest to the work surface when the cabinet is open. Less frequently used supplies can live on higher shelves or in deeper compartments.
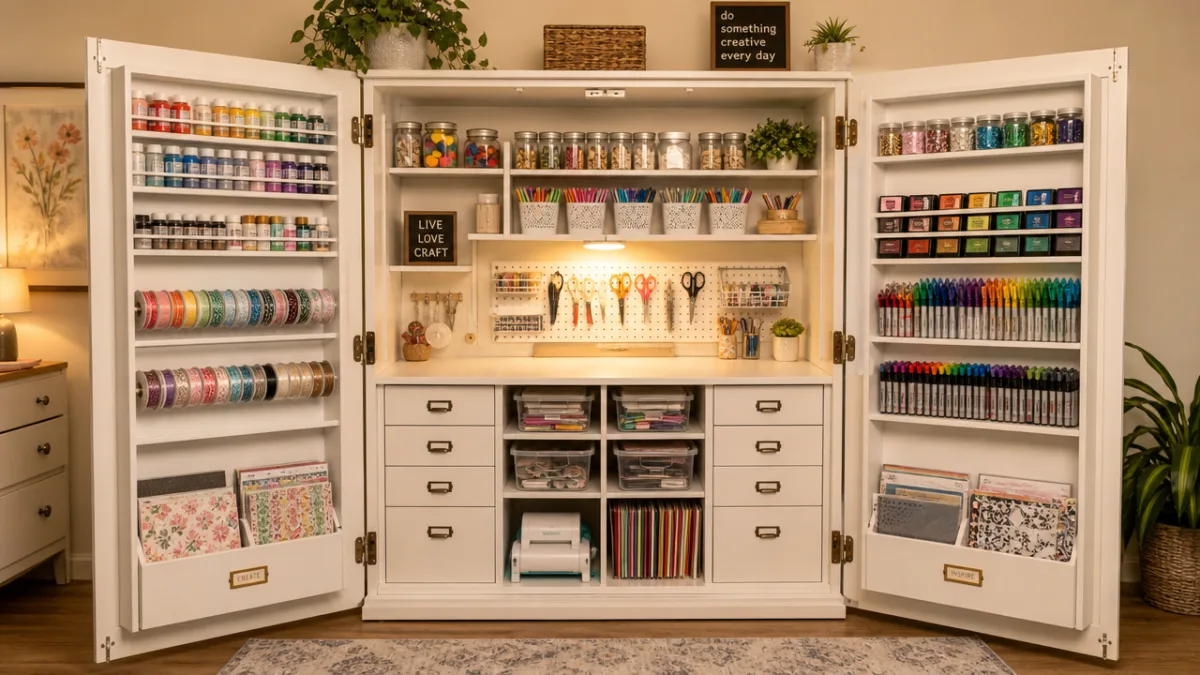
Sketch a rough diagram of your cabinet’s interior, labeling each shelf, compartment, door panel, and drawer. Assign a category to each zone before you place a single item. For example, you might designate the top shelf for paper storage, the middle shelf for tools and adhesives, the lower shelf for bulkier items like cutting mats and rulers, and the door panels for small embellishments, washi tape, and frequently grabbed tools. Having this map in place before you start loading the cabinet prevents the common mistake of filling spaces randomly and then having to reorganize again a week later.
Think also about the workflow that happens at your fold out work surface. When the cabinet opens and you sit down to craft, what do you need within arm’s reach? Scissors, your current adhesive, a bone folder, a ruler, and whatever material you’re working with should all be reachable without standing up. Design your zones with this seated working position in mind, because a storage system that feels intuitive in use is one you’ll actually maintain. Ergonomic organization isn’t just about comfort — it’s about sustainability of the whole system.
Step 3: Invest in the Right Containers and Inserts
Generic storage bins are rarely the best solution for a fold out craft cabinet, simply because these cabinets have unique dimensions, angled compartments, and specialized spaces that benefit from purpose-fit containers. Before purchasing any organizers, measure every shelf, drawer, and door panel pocket in your cabinet carefully. Note the height clearance, depth, and width of each zone. Bring these measurements with you when shopping, or keep them on your phone for online ordering. A container that’s just a half-inch too tall can throw off your entire plan and waste money.
Clear containers are almost always preferable to opaque ones in a craft storage context because they allow you to see contents at a glance without opening or removing anything. Small clear bins, stackable acrylic drawers, and transparent zip pouches all work wonderfully inside fold out cabinets. For tools like scissors, punches, and rulers, consider using narrow containers that keep items upright rather than piled flat, which makes grabbing individual items much faster. For tiny embellishments like brads, eyelets, and rhinestones, compartmentalized containers with individual small divisions are a far better choice than one large bin where everything gets jumbled together.
Door panel organization is often the most overlooked aspect of fold out cabinet setup, yet it offers some of the most accessible and visual storage space in the entire unit. Pegboard-style inserts, adhesive hooks, magnetic strips, and thin pocket organizers can transform a flat door panel into a highly functional display of your most-used tools and materials. Washi tape looks beautiful displayed on dowels or thin hooks along a door panel, and having it visible encourages you to actually use it rather than forget it exists buried in a bin. Treat your door panels as prime real estate and invest accordingly.
Step 4: Create a Dedicated Paper and Cardstock Station
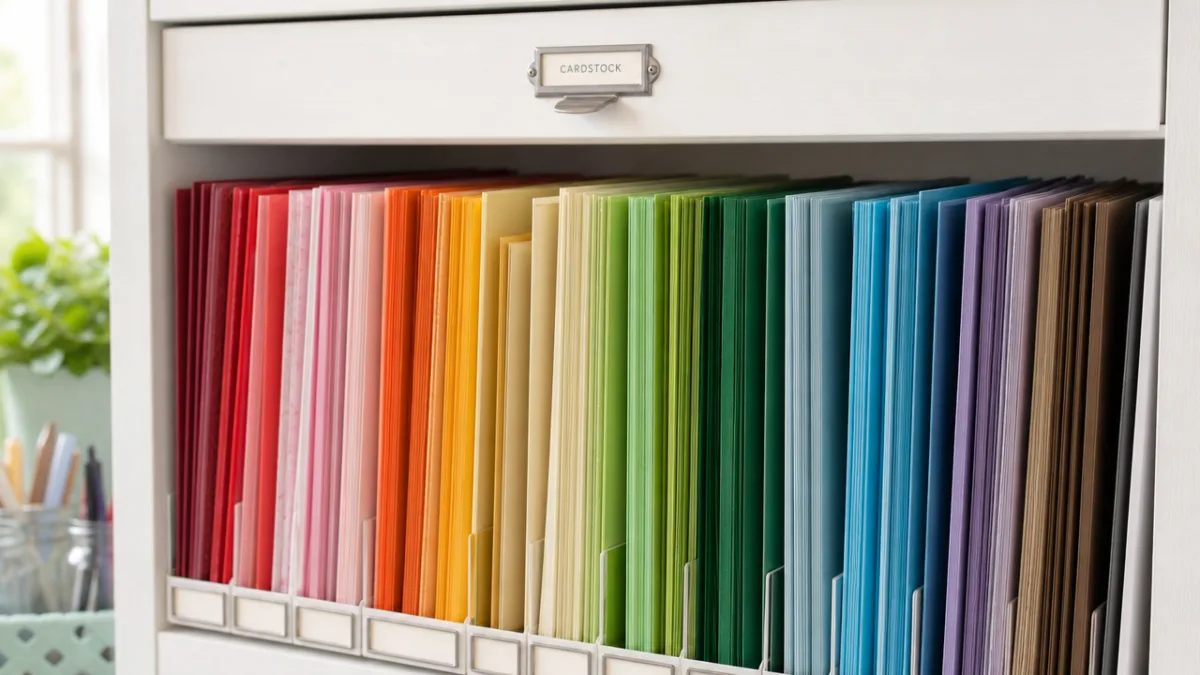
Paper is one of the most common crafting materials and also one of the most difficult to organize because it comes in so many sizes, weights, textures, and colors. Without a deliberate system, paper inevitably ends up bent, crumpled, and shuffled into disorder. The most effective approach is to designate a specific shelf or vertical file area within your fold out cabinet exclusively for paper storage, and to sort paper by size first, then by color family or type within each size group. This hierarchy makes it possible to find exactly what you need quickly without disturbing the rest of your collection.
Vertical file organizers are excellent for paper storage because they allow you to see the edge of each sheet or pad and pull out individual pieces without disrupting the entire stack. If your cabinet has a shelf deep enough to accommodate them, magazine files or letter-size vertical sorters work beautifully for cardstock and patterned paper. Label each file with the paper size and category it contains. For specialty papers like vellum, acetate, or foil sheets, consider using individual clear poly sleeves inside a dedicated folder so these delicate materials stay pristine and don’t get mixed in with regular cardstock.
Scraps deserve their own system too, because throwing away a large scrap of beautiful cardstock feels wasteful, but tossing it into a general bin leads to chaos. Create a small scrap sorting system within your cabinet using a few divided containers organized by color family. When you need a small piece of a specific color, you’ll know exactly where to look rather than rifling through a jumbled pile. Set a maximum fill level for your scrap containers and commit to purging when they exceed it — this single habit prevents the scrap overflow that plagues many craft spaces.
Step 5: Organize Tools by Frequency of Use and Function
Tools represent a significant investment in any craft space, and treating them carelessly leads to damage, loss, and frustrating searches when you need something specific. The foundation of good tool organization is separating tools by how often you use them and by what function they serve. Everyday essentials like scissors, craft knives, bone folders, and scoring tools should occupy a dedicated zone at the most accessible height in your cabinet, ideally in a holder that keeps them upright, separated, and immediately grabbable without having to dig.
For specialty tools that you use only for specific project types — embossing tools, heat tools, die-cutting accessories, sewing notions — group these together by project type in labeled bins or pouches and store them slightly further back or on a less prime shelf. When you sit down to work on a specific type of project, you pull out the corresponding pouch and have everything related to that technique in one place. This approach is sometimes called the “kit method,” and it dramatically reduces setup time because you’re not assembling tools from multiple locations before you can even begin working.
Adhesives deserve special attention because they come in so many forms and have such different applications. Keep your main everyday adhesives — tape runner, glue stick, liquid glue pen — in a small upright holder near your work surface. Store specialty adhesives like foam tape, foam dots, dimensional adhesive, and heat-activated glue separately, labeled clearly. It’s worth keeping a small label or tag on each adhesive noting what surfaces it bonds best, especially if you work with a variety of materials. This simple habit prevents the frustrating experience of reaching for an adhesive only to find it’s wrong for the material you’re working with.
Step 6: Build a Color-Coded Embellishment System
Embellishments are the delightful details that make handmade projects shine: buttons, brads, eyelets, sequins, charms, chipboard pieces, die cuts, stickers, and dozens of other tiny finishing touches. They’re also among the most organizationally challenging supplies because they’re small, varied, and easy to mix together into an unusable jumble. A color-coded organizational system is one of the most intuitive and visually satisfying approaches to embellishment storage, and it integrates beautifully into the fold out cabinet format.
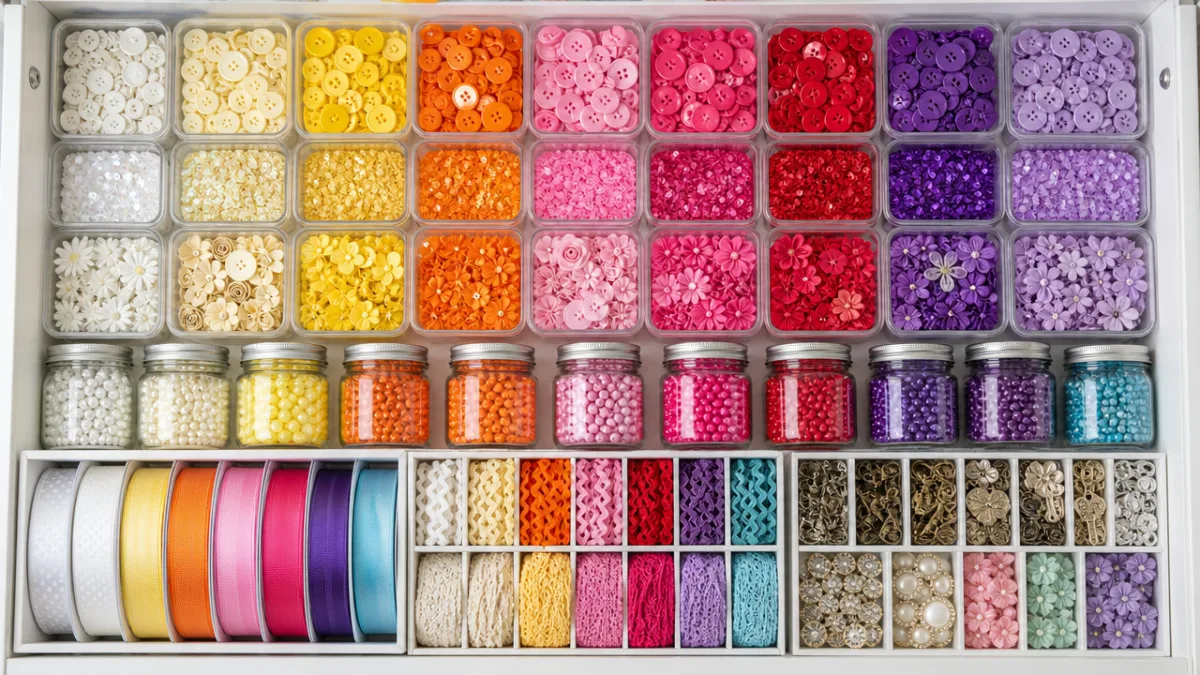
The basic principle is to sort embellishments by color rather than by type. Instead of having one bin for all buttons, one for all brads, and one for all charms, you have one bin for all red embellishments regardless of type, one for all blues, and so on. When you’re designing a project in a specific color palette, you go directly to that color’s bin and find every type of embellishment available in that range. This approach aligns with how most crafters actually work — choosing embellishments to match a project’s color story — making it far more intuitive than sorting by type.
Compartmentalized containers with multiple small dividers work extremely well for this system. A single container with twelve to sixteen small compartments can hold an entire color family’s worth of embellishments and fits neatly on a single shelf. Label the outside of each container with the color family it represents and consider color-coding the labels themselves for instant visual recognition when the cabinet is open. For larger embellishments that don’t fit in small compartments, use small clear zip bags sorted by color and stored in a labeled bin. Within a few sessions of working this way, the system becomes second nature.
Recommended Embellishment Storage Containers
- Compartmentalized bead or tackle boxes with adjustable dividers for small mixed embellishments in each color family
- Clear stackable acrylic drawers for flat embellishments like die cuts, stickers, and chipboard pieces
- Small glass jars or clear plastic containers with screw-top lids for sequins, rhinestones, and micro beads that tend to spill
- Magnetic spice containers mounted to a metal door panel for metallic embellishments and brads
- Small resealable zip pouches labeled by color, ideal for ribbon scraps and fabric trim
Step 7: Establish an Ink and Stamp Organization System
For rubber stampers and mixed media artists, ink pads and stamp sets can quickly overtake an entire cabinet if not organized with intention from the start. Ink pads are particularly tricky because they need to be stored face-up to keep the ink distributed evenly against the pad surface, which means they can’t be stacked and require horizontal space. The most efficient solution is a tiered or stepped ink pad holder that keeps every pad visible without stacking while using vertical shelf space efficiently. Many crafters use commercial stepped acrylic risers designed specifically for ink pads.
Sort your ink pads by color family and arrange them on the stepped riser in rainbow order. This arrangement is not just aesthetically pleasing — it makes finding a specific color almost instantaneous because your eye naturally navigates rainbow order without conscious thought. If you work with multiple brands of ink and have many pads, consider using one riser per color family rather than trying to mix everything on a single display. Having every pad visible and identifiable at a glance eliminates the rummaging that damages pad surfaces and leads to ink transfer between pads.
Stamp sets require their own dedicated zone, and how you organize them depends largely on how many you own and what sizes they are. For mounted stamps in clear cases, labeling the spine of each case with a small photo of the image inside makes identification possible without opening every case. For unmounted stamps stored in envelopes or clear pockets, a binder with plastic page protectors is one of the most efficient solutions — each page holds one stamp set with a stamped image on a label so you can flip through and find exactly what you’re looking for without touching the stamps themselves.
Step 8: Set Up a Ribbon and Fiber Organization Station
Ribbon, twine, thread, yarn, and other fibers are among the most challenging craft supplies to keep organized because they tangle so readily and take up disproportionate space relative to their utility. The most successful ribbon organization systems use one of two approaches: storing ribbon on spools or bobbins so it stays neat and unraveled, or hanging ribbon rolls on horizontal rods or dowels where lengths can be seen and pulled without tangling. Your fold out cabinet may accommodate one or both of these approaches depending on its interior configuration.
For spooled ribbon, clear bobbin boxes or thread organizers designed for sewing supplies work beautifully. Wind ribbon around bobbins securing the end with a small rubber band or pin, label the bobbin with the ribbon type and width, and store them in divided bobbin boxes. For ribbon you buy on the original spool, the spools can be stacked vertically in a bin or placed on a horizontal dowel rod fitted across a shelf. The dowel rod approach is particularly effective because you can see every ribbon at once and slide out just the one you want without disturbing the others.
Twine, baker’s twine, jute cord, and similar thin fibers do best when kept in individual clear containers or small jars where they can be pulled from the top as needed. Group fiber colors together and label containers clearly. Embroidery floss — which is notoriously tangle-prone — is worth taking the time to wind onto cardboard bobbins labeled with the DMC or brand color number. Store wound floss in a compartmentalized box sorted numerically or by color family. The upfront time investment in winding floss pays for itself many times over in the hours of untangling it prevents.
Step 9: Maintain a Work-in-Progress System Within Your Cabinet
One of the most underestimated organizational needs in any craft space is a designated home for projects that are in progress but not yet finished. Without this, half-completed projects occupy your work surface, supplies migrate to random locations, and the cabinet fills up with materials belonging to multiple unfinished projects. Designating a specific zone within your fold out cabinet — or a companion storage piece nearby — for active works in progress is one of the most impactful habits you can build as an organized crafter.
A simple and effective system is to assign one flat bin, project bag, or dedicated shelf section to each active project. All materials, tools, notes, and reference images for that project live together in that container until the project is complete. When you sit down to work, you pull out the relevant project container, work from it, and return everything to it when you’re done. The fold out work surface stays clear, the cabinet stays organized, and you can pick up exactly where you left off without any setup searching time. This system is especially valuable if you tend to juggle multiple projects simultaneously.
Establish a personal rule about the maximum number of active projects you’ll keep in progress at any time. This constraint prevents the project-in-progress zone from expanding indefinitely and crowding out the rest of your organizational system. Some crafters cap themselves at three active projects; others prefer just one. Whatever your limit, committing to it and actually finishing or consciously abandoning projects before starting new ones is a practice that keeps your cabinet functional and your creative energy focused. The organizational system and the creative habit reinforce each other beautifully when both are in place.
Step 10: Label Everything and Create a Maintenance Routine
Labeling is the final layer that transforms a thoughtfully organized cabinet into a truly sustainable system. Without labels, organization depends entirely on memory, and memory is unreliable — especially in shared crafting spaces or during the distracted enthusiasm of a creative session. Label every shelf, bin, container, drawer, and zone in your cabinet clearly and legibly. The level of specificity matters: a label that says “adhesives” is helpful, but a label that says “adhesives — tape runners and liquid glue” is far more useful when you’re putting things away quickly at the end of a session.
Label aesthetics matter more than many crafters expect, because a visually cohesive labeling system communicates organization and encourages you to maintain it. When everything has a matching label style — consistent fonts, matching label sizes, coordinating colors — the cabinet feels considered and intentional, which makes it psychologically easier to keep tidy. There are many ways to create attractive labels: a label maker is fast and durable, handwritten labels on kraft tags have a charming handmade quality, and printed labels with a clean modern font look professional and crisp. Choose a style you enjoy and will actually use consistently.
The maintenance routine is what keeps the entire system alive after the initial organizational effort fades. Commit to a brief end-of-session reset where you return every item to its labeled home before closing the cabinet. Schedule a slightly more thorough monthly check where you straighten containers, refill commonly used supplies, and check whether the system is still serving your actual habits or whether adjustments are needed. Twice a year, do a mini-audit similar to the initial purge in Step 1. These regular maintenance investments are small in time but enormous in impact, ensuring that your fold out craft storage cabinet remains the organized, functional creative hub it was designed to be rather than returning to the chaos it was meant to solve.
Quick Daily and Weekly Maintenance Checklist
- Return all tools to their designated holders before closing the cabinet at the end of each session
- Place scraps in the correct color-coded scrap container rather than leaving them on the work surface
- Cap and return all adhesives and ink pads to their correct positions immediately after use
- Once per week, straighten any containers that have shifted and ensure all labels are still legible
- Once per month, check supply levels and note what needs restocking to avoid mid-project supply runs
- Once per season, evaluate whether your zone assignments still match how you’re actually working and adjust as needed








What do you think?
It is nice to know your opinion. Leave a comment.