










DIY Mini Felt Frame Magnets: Your Ultimate Guide to the Cutest Girls’ Craft Night Project
Introduction: Why Mini Felt Frame Magnets Are the Perfect Girls’ Craft Night Activity
There is something genuinely magical about gathering your closest friends around a table covered in colorful felt, glue, and tiny embellishments. DIY mini felt frame magnets have taken the crafting world by storm, and it is easy to understand why. These adorable little creations combine accessibility with endless creative possibility, making them ideal for crafters of every skill level. Whether you are a seasoned DIY enthusiast or someone who has never touched a glue gun before, these miniature felt frames offer a satisfying, low-stakes entry point into the world of handmade home décor.
What makes this craft particularly special for a girls’ night setting is the collaborative energy it naturally encourages. As everyone works on their individual frames, conversations flow freely, creativity sparks inspiration, and laughter fills the room. Unlike more complex crafts that demand intense concentration, felt frame magnets allow you to be fully present with your friends while still producing something beautiful. The tactile pleasure of working with soft felt, combined with the joy of decorating with beads, buttons, and ribbon, creates a multisensory experience that is both relaxing and energizing at the same time.
Beyond the social experience, these magnets serve a genuinely practical purpose in everyday life. Once finished, they can be used to display photos on the fridge, pin notes to a magnetic board, or even decorate a locker door. They also make incredibly thoughtful and personal gifts. When you hand someone a tiny felt frame magnet you made yourself, you are giving them a piece of your time and creativity. This combination of fun, function, and heartfelt sentiment is exactly what makes this project the standout activity for your next craft gathering.
Materials and Supplies You Will Need
Before your friends arrive, it pays to have everything prepared and organized so the evening runs smoothly. Gathering the right materials ahead of time means no one spends twenty minutes hunting through a supply bag while the glue gun cools down. The good news is that felt frame magnets are genuinely budget-friendly, and most of the supplies can be found at any craft store or even ordered in bulk online. Setting up individual supply kits for each guest is a charming touch that makes everyone feel special and ready to dive straight into creating.
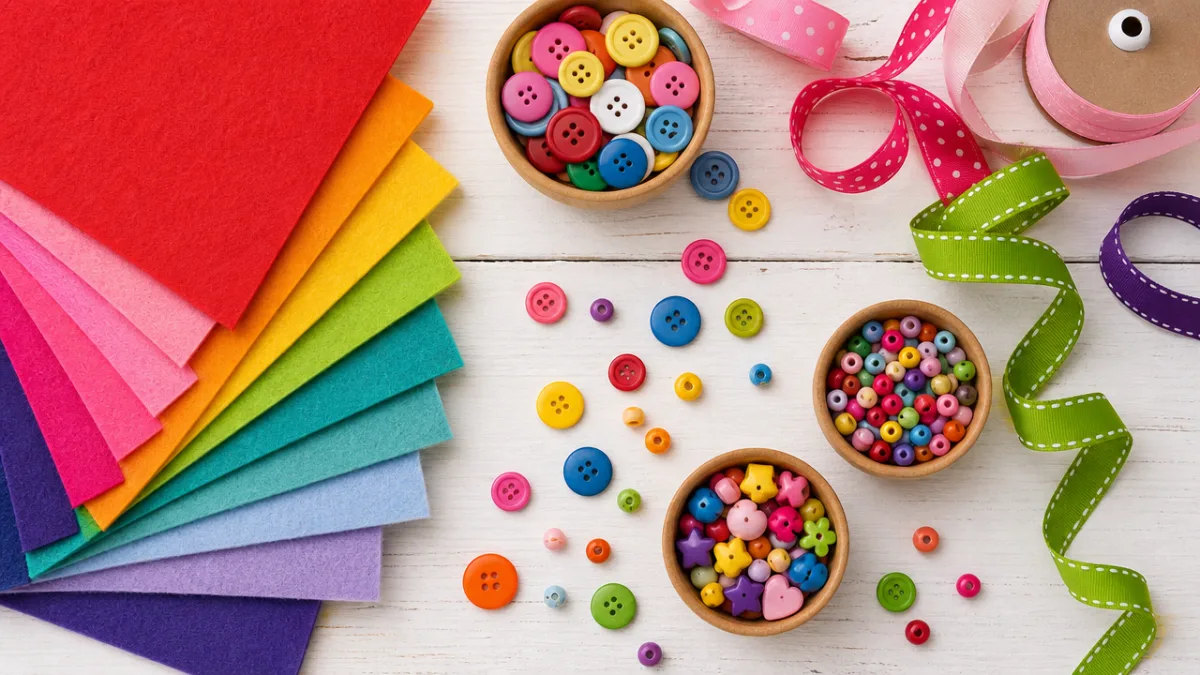
The core materials you will need include felt sheets in a rainbow of colors, small but strong disc magnets, a hot glue gun and plenty of glue sticks, sharp scissors, and a ruler or cutting template for consistent sizing. For the frame fronts, you will want to cut two matching rectangles or squares of felt per frame, with a smaller window cut from one piece to create the frame effect. The window opening is what gives the mini frame its charm, allowing a tiny photo, illustration, or decorative paper to peek through with a polished, finished look.
The decorative supplies are where the real fun begins, and this is where you should encourage your guests to let their personalities shine. Consider stocking the craft table with the following embellishments:
- Tiny buttons in assorted shapes and colors, including hearts, stars, and flowers
- Seed beads and glass pearls for elegant, delicate detailing
- Thin satin ribbon and lace trim for borders and bows
- Felt die-cuts or pre-cut felt shapes such as hearts, leaves, and arrows
- Glitter glue pens and fabric markers for hand-lettered details
- Miniature dried flowers or faux floral accents for a cottagecore aesthetic
- Sequins, rhinestones, and metallic brads for a touch of sparkle
Do not forget to prepare a workspace that is easy to clean and comfortable for everyone. Cover your table with a craft mat or a disposable plastic tablecloth to protect the surface from glue drips and glitter. Provide small dishes or muffin tins for organizing beads and embellishments so they do not roll everywhere. A dedicated cooling spot near each glue gun is essential for safety, and having a pair of scissors per person prevents the frustrating bottleneck of sharing a single pair. Small details like these transform a casual craft session into a genuinely seamless and enjoyable experience for all your guests.
Step-by-Step Instructions for Making Your Mini Felt Frame Magnets
The process of making mini felt frame magnets is refreshingly straightforward once you understand the basic structure. Each magnet is essentially a felt sandwich: a solid backing piece, an optional layer of thin batting or foam for dimension, a frame front with a cut-out window, and the disc magnet attached to the back. Working through these steps systematically means even first-time crafters can produce professional-looking results. Take your time with the cutting stage, as clean, precise edges make the biggest difference in the overall finished appearance of each miniature frame.
Begin by cutting your felt into matching pairs of rectangles measuring approximately three inches by two and a half inches, which is roughly the size of a standard mini photo. These dimensions are ideal for fitting a small printed photo or a hand-drawn illustration. From one rectangle, cut a neat interior window, leaving a border of approximately half an inch on all sides. This piece becomes the decorative front of your frame. The second uncut rectangle serves as the solid backing that will hold everything together and to which you will later attach the magnet.
Follow these steps to assemble your mini felt frame:
- Cut your felt pieces as described, ensuring both the front and back are identical in outer dimensions for a tidy finish.
- Decorate your frame front before assembly using buttons, ribbon, beads, or glitter glue, giving the glue plenty of time to dry before continuing.
- If using foam or batting for dimension, cut a piece to match the backing and glue it down as a middle layer.
- Apply a thin bead of hot glue around three edges of the backing piece, then press the decorated frame front onto it firmly, leaving the top edge open to create a pocket for inserting your photo.
- Once the frame is cool and set, slide your chosen photo or decorative insert into the pocket from the top opening.
- Apply a small dab of strong hot glue to the back center of your frame and press a disc magnet firmly into place, holding it steady for thirty seconds until it bonds.
- Allow the completed magnet to cool fully for at least five minutes before placing it on any magnetic surface.
One of the most delightful aspects of this project is how quickly it comes together once you get going. Most crafters complete their first frame in about fifteen to twenty minutes, and subsequent frames go even faster as the process becomes familiar. Encourage your guests to experiment with different color combinations and embellishment placements before committing anything with glue. Laying out all your decorative elements on the frame front dry first allows you to audition different arrangements and make changes freely before everything is permanently attached. This planning step takes only a minute or two but makes a significant difference in the final result.
Creative Design Ideas and Themes to Inspire Your Craft Night
One of the greatest joys of making felt frame magnets as a group is seeing how differently each person interprets the same basic structure. Even with identical materials laid out on the table, no two frames will ever look exactly alike, and that diversity of creative vision is something to be celebrated and admired. To help spark inspiration before guests arrive, it is a wonderful idea to prepare a small mood board or display of example frames in different styles. This gives people a launching point without constraining their imagination or making them feel pressured to copy a specific look.
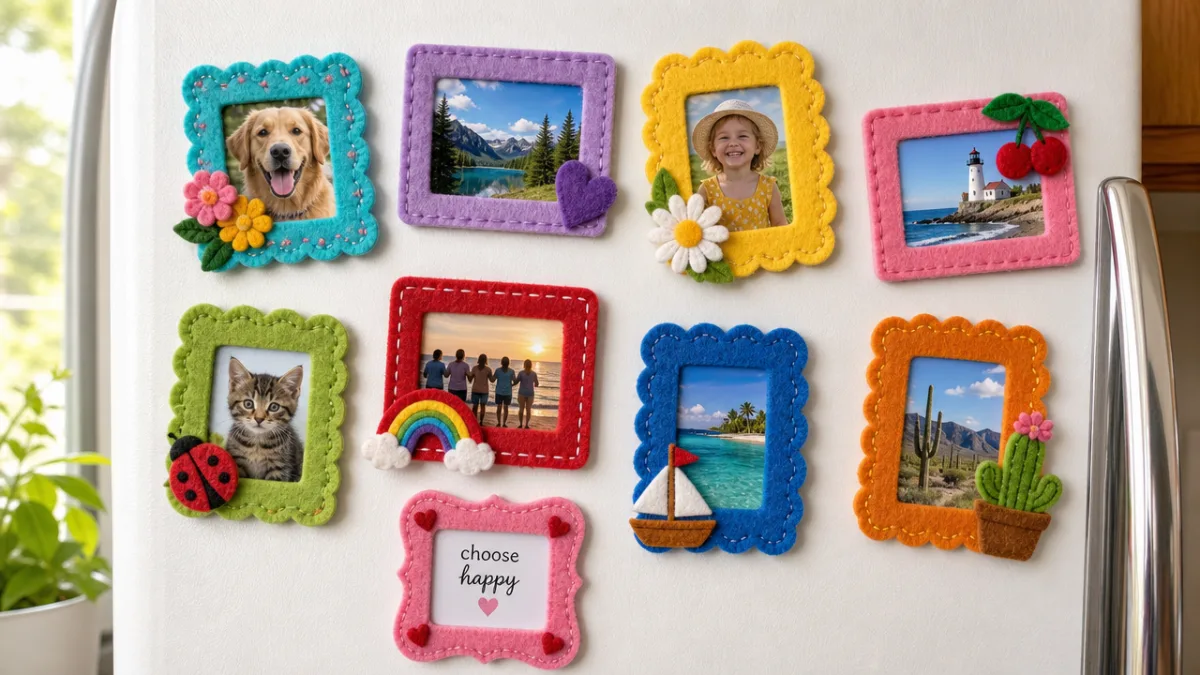
Seasonal and holiday themes are always a crowd-pleasing direction for mini felt frame magnets. Autumn frames might feature tiny felt leaves in rust, gold, and burnt orange, with a warm plaid ribbon border. Winter holiday frames could incorporate miniature snowflakes, red velvet ribbon, and a dusting of white glitter for a festive, snowy effect. Spring frames lend themselves beautifully to pastel colors, tiny felt daisies, and delicate lace trim. Summer versions might celebrate sunshine with yellow and coral felt, tiny shell embellishments, and raffia ribbon bows. Having a seasonal theme for your craft night also provides a lovely cohesive aesthetic when guests display their finished magnets together.
For those who prefer a more personal or sentimental approach, consider the following themed design directions that work beautifully in miniature felt frames:
- Botanical and garden-inspired: Use green felt frames adorned with tiny fabric leaves, pressed flower accents, and earthy ribbon in sage or terracotta tones to create a lush, nature-forward aesthetic.
- Vintage and romantic: Combine ivory or blush felt with pearl button clusters, antique lace trim, and sepia-toned photo inserts for a timeless, nostalgic look that feels like a keepsake.
- Bold and graphic: Embrace bright primary colors with geometric felt shapes cut from contrasting felt scraps, creating a modern, graphic art feel that stands out beautifully on a fridge or magnetic board.
- Celestial and mystical: Deep navy or purple felt paired with gold star and moon sequins, crescent moon die-cuts, and iridescent beads creates a dreamy, mystical frame with serious visual impact.
- Kawaii and whimsical: Pastel rainbow felt, smiley face buttons, cloud and rainbow shapes, and playful fabric paint doodles result in an irresistibly joyful and youthful frame style.
Another creative approach that generates wonderful energy at a group craft session is the friendship frame concept, where each person makes a frame specifically intended as a gift for the friend sitting next to them. This means you design your frame to reflect the recipient’s personality, favorite colors, and aesthetic sensibilities rather than your own. The results are often more thoughtful and surprising than anything someone would make for themselves, and the moment of presenting and receiving these personalized mini frames at the end of the evening is genuinely moving. It transforms the craft activity into a meaningful ritual of friendship and appreciation.

Tips for Hosting the Perfect Girls’ Craft Night Around This Project
The difference between a good craft night and a truly memorable one often comes down to the hosting details that happen before anyone picks up a pair of scissors. Thoughtful preparation on the part of the host creates a relaxed, welcoming atmosphere where creativity can flourish without stress or confusion. Start by sending a fun digital invitation at least a week in advance, letting guests know the project so they can come mentally prepared and excited. Including a small supply list for guests who like to bring their own special embellishments is a nice touch that invites personal investment in the evening from the very beginning.
Setting the mood with your environment is every bit as important as having the right supplies. Consider creating a craft station that is both functional and beautiful, with flowers in a vase at the center of the table, string lights draped nearby for a warm glow, and a curated playlist of feel-good music playing softly in the background. Providing snacks and drinks that are easy to eat with one hand and unlikely to stain felt is important practical consideration. Charcuterie boards, fruit skewers, sparkling water with fruit, and small chocolates all work wonderfully for a craft night where hands are frequently busy.
Structuring the evening with a gentle rhythm helps keep energy flowing without making things feel too regimented or formal. Consider beginning with a brief, enthusiastic demonstration of the basic frame-making process so that everyone understands the structure before diving in. Keep the demo light and fun rather than instructional and serious, emphasizing that there are no mistakes in this project, only happy accidents and creative detours. After the demo, let the session evolve organically, with conversation, laughter, and collaborative decision-making about embellishments driving the pace. Ending the evening with a show-and-tell circle where everyone shares their finished magnets and the stories behind their design choices creates a beautiful sense of community and celebration.
Displaying, Gifting, and Extending the Life of Your Mini Felt Frame Magnets
Once you have a collection of adorable mini felt frame magnets in hand, the question becomes how to display them in a way that does them justice and maximizes their visual impact in your home. A single magnet on a fridge is charming, but a curated gallery of ten or fifteen frames arranged in a casual cluster becomes a genuine conversation piece. Consider grouping frames by color family or theme for a cohesive look, or embrace an eclectic mix of styles for a more playful, personal vibe. Framing the display area with a strip of washi tape or a painted border on your magnetic surface can elevate the presentation from casual to intentional.
Mini felt frame magnets also shine as personalized gifts that carry a warmth no store-bought item can replicate. Consider making a small set of coordinating frames as a housewarming gift, filling them with photos of shared memories or cheerful illustrated prints. They make wonderful classroom gifts for teachers, especially at the end of a school year, and they are delightful additions to birthday packages, wrapped with a ribbon and tucked alongside a heartfelt card. For baby showers and new parent gifts, frames filled with sweet infant illustrations or milestone dates printed in pretty fonts make a genuinely touching keepsake.
To ensure your felt frame magnets stay looking beautiful over time, a few simple care tips will extend their life significantly. Keep them away from high moisture environments, as felt can absorb humidity and lose its crispness if placed near a sink or in a damp space. If embellishments begin to loosen over time, a tiny dab of craft glue will reattach them easily. To keep felt colors vibrant, avoid placing your magnets in direct sunlight for extended periods, as UV exposure can cause subtle fading over months. With minimal maintenance, a well-made felt frame magnet can remain a lovely, functional decoration for years, a lasting reminder of the fun evening when you and your friends created something beautiful together.
Perhaps the most satisfying thing about this craft is how it naturally evolves into a beloved tradition. Once your friend group discovers the joy of a felt craft night, the desire to repeat the experience with new projects and new embellishments is almost universal. Many groups use it as a seasonal ritual, gathering each autumn, winter, and spring to make themed magnets and reconnect over glue guns and good conversation. The physical act of making something with your hands alongside people you love creates a kind of shared memory that is both specific and timeless, something you return to not just for the beautiful objects produced, but for the irreplaceable feeling of creative community it always brings.








What do you think?
It is nice to know your opinion. Leave a comment.