










DIY Cutting Board Storage: A Quick and Easy Solution for Your Kitchen
Why Cutting Board Storage Matters More Than You Think
If you’ve ever dug through a crowded cabinet to grab one cutting board and ended up knocking three others onto the floor, you know exactly what I’m talking about. Cutting boards are one of those things that seem totally straightforward to store — until they’re not. They’re flat, they’re awkward, and they never quite stack the way you want them to. The second you open a cabinet door, they’re sliding and tumbling like they’ve been waiting for the chance.
But here’s the thing — good cutting board storage isn’t just about keeping things tidy, though a well-organized kitchen is genuinely a pleasure to cook in. It’s actually about hygiene, safety, and making your boards last longer. When you pile them flat without any airflow between them, moisture gets trapped and that’s when bacteria and mold start to show up. Wooden boards especially can warp and crack pretty quickly when they’re sitting under pressure in a damp, airless stack.
There’s also a simple efficiency argument here. Cooking goes so much better when you can reach for the right tool without a whole production. A dedicated spot for your cutting boards means you can grab your big butcher block for carving or your small plastic board for herbs without disturbing anything else. Spend a weekend afternoon on this project and you’ll be thanking yourself every single day after that.
Planning Your DIY Cutting Board Storage Project
Before you even think about picking up a tool or heading to the hardware store, take a few minutes to actually think through what you need. Pull out all the cutting boards you own, count them, measure them, and note what they’re made of — wood, plastic, bamboo, composite. Ask yourself which ones you use every day and which ones barely come out. That distinction matters, because your everyday boards should be the ones you can grab without any effort at all.
Next, figure out where the storage is going to live. The most common options are countertop organizers, racks mounted to the inside of a cabinet door, pull-out drawer inserts, and freestanding shelf dividers. Each one has its own strengths depending on your kitchen. A countertop solution is by far the easiest to build and doesn’t require you to touch your cabinetry at all — great if you’re renting or just like keeping your options open. Cabinet or drawer solutions keep your counters clear and look really clean, but they take a bit more measuring and care to install properly.
Once you know where it’s going, sketch out a rough plan. Nothing fancy — a pencil drawing on a notepad is totally fine. Write down your measurements, how many slots you need, and anything specific like extra-wide slots for a thick butcher block. This step alone saves a ton of frustration. There’s nothing worse than getting halfway through a build and realizing the finished piece doesn’t actually fit where you planned. A few minutes of thinking ahead is worth a lot.

Materials and Tools You’ll Need
One of the best things about this project is how approachable the materials are. You don’t need anything fancy. In most cases, a single piece of common lumber — pine, poplar, or even plywood — is all you need for the main structure. It’s cheap, it’s easy to find at any home improvement store, and it works great with basic tools. If you want something that looks a little more refined, oak or maple stain beautifully and hold up really well in a kitchen environment.
Here’s a basic materials list for a countertop-style cutting board holder with four to six slots:
- One 1×6 or 1×8 board, roughly 3 to 4 feet long (for the base and sides)
- Wooden dowels, 3/8-inch diameter, cut to 6-inch lengths (these become your slot dividers)
- Wood glue rated for interior use
- Sandpaper in 80, 120, and 220 grit
- A food-safe finish — mineral oil, beeswax, or a water-based polyurethane that’s labeled food-safe once cured all work well
- Optional: wood stain if you want to add some color before sealing
For tools, you’ll want a miter saw or circular saw for clean cuts, a drill with a 3/8-inch bit for the dowel holes, clamps to hold things together while the glue dries, and a tape measure and pencil for marking. If you don’t have these at home, most hardware stores rent tools for a pretty minimal cost. A palm sander speeds up the finishing process, but hand-sanding works perfectly well and actually gives you a bit more control on edges and curves.
Step-by-Step Build Instructions
Start by cutting your base piece to length — somewhere between 10 and 14 inches tends to work well on most countertops. Then cut two equal end pieces that will form the left and right walls of the organizer. Make these end pieces a couple inches taller than your tallest cutting board so the boards won’t tip out if something bumps the holder. Give all your cut edges a light sand before assembly to knock off any splinters and rough spots.
Once everything is cut and sanded, do a dry fit first — put it all together without glue just to make sure everything lines up the way you want. When you’re happy with the fit, apply a thin, even bead of glue along the bottom edges of each side piece and press them firmly onto the base. Clamp the joints tight and wipe off any glue that squeezes out with a damp cloth right away, before it dries and messes with your finish. Let the glue cure for at least an hour, though overnight is really the better call if you have the patience.
With the box assembled, it’s time to add the dividers. Mark evenly spaced positions along the base for the dowels — usually 1.5 to 2 inches per slot gives you enough room for most boards with a little breathing space on either side. Drill a hole at each mark, put a small amount of glue in each hole, and press the dowels in firmly. Let that cure completely. Then do one final pass with your 220-grit sandpaper, paying attention to any glue residue or rough spots. The smoother you get the surface, the better your finish is going to look and stick.
Finishing is honestly the step that makes or breaks this project, especially since it’s going to live in your kitchen near food prep surfaces. Apply your food-safe finish in two or three thin coats, letting it dry fully between each one. Mineral oil is the easiest option by far — just wipe it on, let it soak in for about 20 minutes, and buff off the excess. It won’t create a hard surface coating, but it does nourish the wood and gives it decent moisture resistance. If you want something more durable, a water-based polyurethane that’s been fully cured for 30 days is a solid choice.
Creative Variations and Customization Ideas
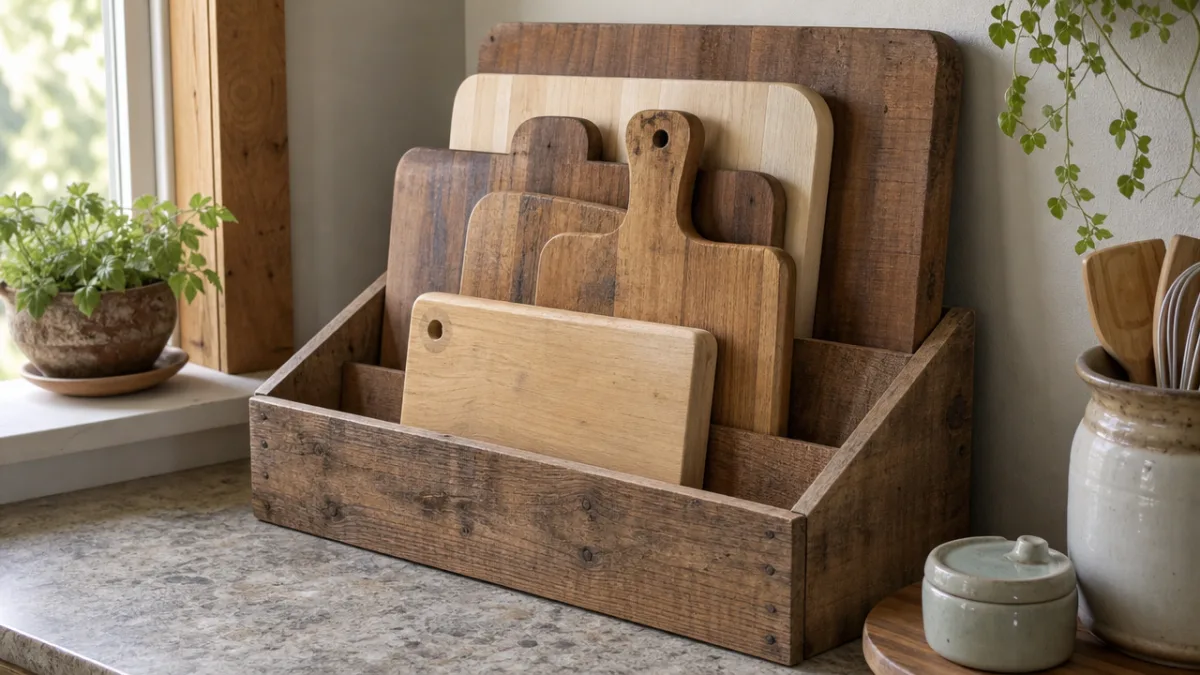
The basic dowel-and-box design is just a starting point. Once you’ve built one and gotten comfortable with the process, there are so many ways to put your own spin on it. For a more modern, minimal look, try skipping the dowels and using thin plywood sheets as vertical dividers instead. Cut them to the same height as your side walls and dado them into the base for a really clean, seamless look. It tends to look more polished and is easier to wipe down too.
If counter space is tight — which it is in a lot of apartments and smaller kitchens — a cabinet door-mounted version might actually serve you better. It attaches to the inside of a lower cabinet door and keeps your cutting boards completely out of sight until you open the door. The build is similar to the basic version, but you’ll want to keep the materials lighter so you’re not putting too much stress on the door hinges. Thin plywood with dowel or tension-wire dividers works great here, and just double-check that the finished organizer clears the cabinet shelves when the door swings shut.
If you like the idea of something that looks as good as it works, try an open countertop rack with a small tray built into the base. The tray catches drips and debris from the boards, and you can line it with a removable silicone mat for super easy cleaning. From there, you can go as decorative as you want — wood burning, routed lettering, metal hardware that matches your kitchen fixtures. That’s really the joy of doing it yourself: the finished piece can look and feel exactly like you, not like something off a shelf at a big box store.
Tips for Maintaining and Maximizing Your Storage Solution
Building the organizer is only half the job. Keeping it in good shape over time doesn’t take much, but it does take a little consistency. Since this piece lives in your kitchen, it’s going to see splashes, humidity, and the occasional food mess. Wipe it down with a barely damp cloth when it needs it rather than soaking it with water, which can cause the wood to swell and crack over time. If you used mineral oil as your finish, plan to reapply it every few months or whenever the wood starts to look a little dry and dull — it takes just a few minutes and makes a real difference.
It also helps to build one simple habit around using it: always let your cutting boards dry completely before putting them back in their slots. Sliding a wet board into a snug wooden slot is just asking for mold and odor down the road. If your kitchen tends to run humid, a small desiccant packet tucked inside or near the organizer can help manage moisture around it. Small habits like these do a lot to protect both the organizer and the boards stored in it.
And think of your storage solution as something that can grow with you rather than a one-and-done project. If you pick up a beautiful handcrafted board at a local market or grab a specialized pastry board, you might need to adjust a slot or build a second organizer to fit it. Because you built this yourself, you know exactly how it goes together and can tweak it without any hesitation. That adaptability is one of the biggest advantages of building your own over buying something fixed and finished off a store shelf.

Why DIY Is the Right Choice for This Kitchen Project
There’s no shortage of cutting board organizers you can buy online or at a kitchen store. So why bother building one? For me, it really comes down to three things: cost, customization, and the satisfaction of actually making something. A decent countertop organizer from a well-known kitchen brand can run anywhere from $40 to $80, and it still might not fit your boards right, match your kitchen, or be made from materials you’d feel great about near your food prep area. A DIY version in solid wood typically runs $15 to $25 in materials and takes a single afternoon.
The customization angle is honestly the most compelling part. When you build it yourself, every dimension is intentional. The slots fit your actual boards. The height works for your specific space. The finish ties in with the other woodwork in your kitchen. Got an unusually thick butcher block or a bunch of thin plastic boards? You can design around that. No store-bought product can do that because it’s built for the average kitchen — and your kitchen probably doesn’t match that average in at least a few ways that actually matter to you.
There’s also just something genuinely satisfying about using something you made with your own hands. Every time you reach for a cutting board and it slides smoothly out of a slot you built to exactly that size, it feels good in a quiet, real way. And projects like this one build skills that carry over — measuring, cutting, drilling, finishing — skills that make the next project easier and maybe a little more ambitious. A simple cutting board organizer on a Saturday afternoon might just be the beginning of something bigger. Which, honestly, is one of the best things about getting started.








What do you think?
It is nice to know your opinion. Leave a comment.