










DIY Honeycomb Paper Ornaments: A Complete Guide to Creating Stunning 3D Decorations
What Are Honeycomb Paper Ornaments?
Honeycomb paper ornaments are three-dimensional decorative objects made from layers of tissue paper or craft paper that have been glued together in a specific pattern, then expanded to reveal a stunning geometric cell structure that mimics the look of a natural honeycomb. When you pull the layers apart, they fan out into a round, sphere-like shape with mesmerizing depth and texture. These ornaments have been a beloved crafting tradition for decades, appearing at celebrations ranging from birthday parties to weddings, holiday gatherings, and everyday home décor displays.
The magic of honeycomb paper ornaments lies in their deceptive simplicity. When flat, they look like nothing more than a stack of paper. But once you gently tease them open and hang them from a string or ribbon, they transform into eye-catching, dimensional globes that seem almost too beautiful to have been made by hand. The honeycomb structure is achieved by applying glue in alternating offset rows between sheets of paper, so that when the layers separate, each glued joint pulls against the next to create those signature hexagonal cells.
These ornaments have seen a massive resurgence in popularity thanks to the modern DIY and handmade crafting movement. Crafters around the world have embraced them not just for their visual appeal, but for their affordability and the satisfaction of creating something so impressive with such modest materials. Whether you are decorating for a holiday season, a baby shower, or simply want to add a whimsical touch to a shelf or window, honeycomb ornaments deliver maximum impact with minimal expense. Their lightweight construction also makes them ideal for hanging in large clusters without worrying about structural stress on your display area.
Materials and Tools You Will Need
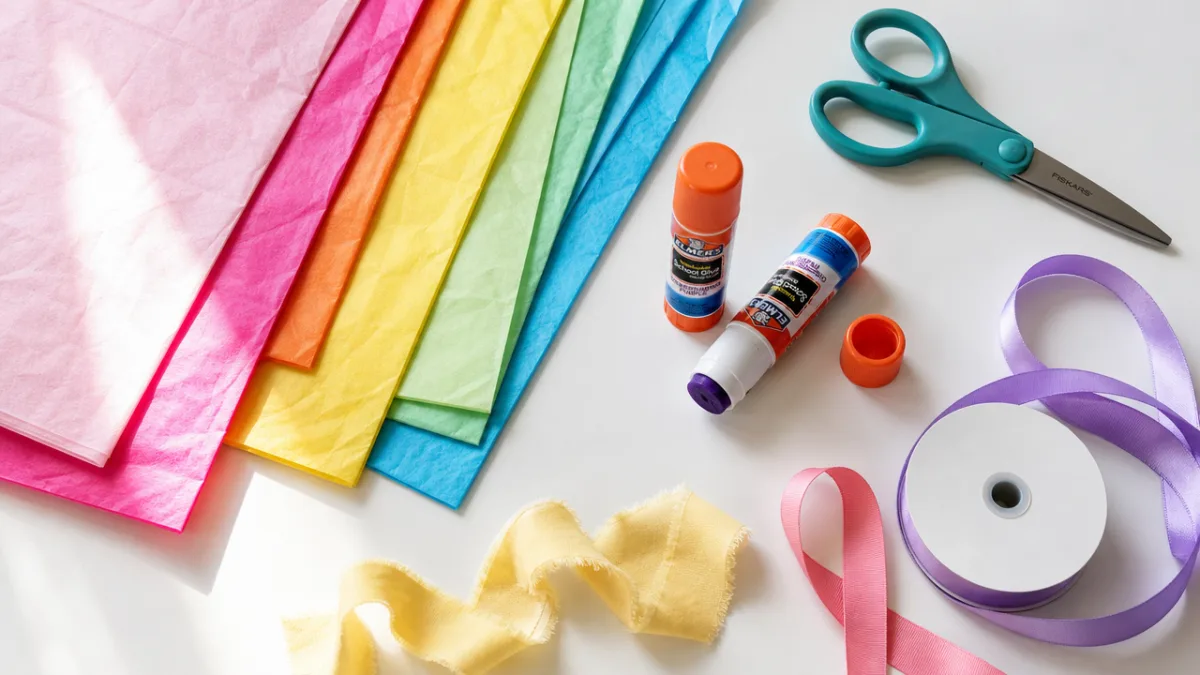
Before you begin crafting your honeycomb paper ornaments, gathering the right materials is essential. The most important supply is tissue paper, which is available in virtually every color imaginable at craft stores, dollar stores, and online retailers. Tissue paper works best because of its light weight and translucency, which gives the finished ornament that delicate, airy quality. However, you can also experiment with lightweight crepe paper or thin craft paper for slightly different textures and effects. Plan to use sheets that are roughly the same size for consistency throughout each ornament.
In addition to paper, you will need a reliable adhesive. A standard glue stick works well for beginners because it dries quickly and is easy to control, but some crafters prefer liquid PVA glue or even a thin line of hot glue for a stronger bond. You will also need scissors or a craft knife and cutting mat for trimming your paper to shape, a ruler for measuring glue line placement, a pencil for marking, and string, twine, or ribbon to use as a hanger. A bone folder or butter knife can help you press glue seams firmly for better adhesion.
Optional but highly recommended tools include a template or stencil for cutting uniform ornament shapes, especially if you want to make a batch of matching decorations. Circular templates in various diameters — from small four-inch ornaments to large twelve-inch statement pieces — will keep your cuts clean and consistent. Some crafters also enjoy adding embellishments after the ornament is assembled, such as glitter, paint, metallic markers, small stickers, or paper tassels. Having a dedicated crafting space with a flat, clean surface will make the gluing and assembly process much smoother and more enjoyable.
- Tissue paper in your chosen colors (at least 15 to 30 sheets per ornament, depending on size)
- Glue stick, PVA glue, or thin-tip hot glue gun
- Sharp scissors or a craft knife with a self-healing cutting mat
- Ruler and pencil for marking glue lines
- Circular template or compass for cutting round shapes
- String, ribbon, or fishing line for hanging
- Optional embellishments such as glitter, metallic paint, or decorative tape
Step-by-Step Instructions for Making Honeycomb Paper Ornaments
Begin by cutting your tissue paper sheets into identical rectangles or squares. For a standard round ornament approximately six inches in diameter, sheets measuring roughly six by four inches work well. Stack your sheets neatly in a pile of at least twenty layers — the more layers you use, the fuller and more three-dimensional your ornament will appear when opened. Take your time aligning the edges cleanly, as uneven stacks will produce an ornament that looks lopsided or inconsistent when expanded. Use a paper trimmer if you have one for the cleanest, most precise cuts.
Next, apply your glue in horizontal rows across the top sheet of your stack. Use your ruler to draw faint pencil lines spaced about half an inch apart across the paper as a guide. Apply a thin line of glue along every other line — so line one gets glue, line two does not, line three gets glue, and so on. Carefully lay the next sheet of paper on top and press it firmly into place. On this second sheet, apply glue along the opposite set of lines — the ones that did not have glue on the first sheet. Continue this alternating pattern throughout your entire stack of paper sheets. This offset glue placement is the key technical step that creates the honeycomb cell structure.
Once all your layers are glued together, place the stack under a heavy book for at least twenty to thirty minutes to ensure all seams are firmly bonded. When the glue is dry, trace your circular template onto the top of the stack and carefully cut through all layers simultaneously using sharp scissors or a craft knife. Before you open the ornament, fold a small loop of ribbon or string and glue it between the top two layers of your stack to create a hanger. Then gently pull the top and bottom layers apart, coaxing the paper open into its full dimensional shape. If any sections resist opening, encourage them gently with your fingers rather than forcing them.
To close your ornament neatly for storage or to permanently display it in its open state, you can glue the first and last sheets of the stack together to form a complete closed sphere. Simply apply glue to the outermost layer on one side and press it against the outermost layer on the other side, matching edges carefully. Hold firmly for a minute or two until the glue sets. Your finished ornament is now ready to display, and if you chose not to glue it fully closed, it can be gently flattened for storage and re-opened whenever needed, making it a wonderfully reusable decoration.
Creative Variations and Design Ideas
One of the greatest joys of making honeycomb paper ornaments is the incredible range of creative possibilities they offer. Once you have mastered the basic round ornament, you can experiment with cutting your stacked paper into different shapes before opening the honeycombs. Star shapes, hearts, teardrops, diamonds, eggs for springtime displays, and even simple animal silhouettes can all be achieved by simply changing your cutting template. The honeycomb structure expands beautifully in almost any shape, giving you sculptural, three-dimensional versions of familiar forms that look spectacular hung in a window or grouped on a holiday tree.
Color choice opens up yet another dimension of creativity. You might create ombre ornaments by using sheets that gradually shift from one color to another through your stack, producing a subtle gradient effect when the ornament is opened. Alternating two or more colors in your paper stack will create a striped or patterned honeycomb that catches the eye from across the room. Metallic tissue paper in gold, silver, copper, or rose gold adds glamour appropriate for New Year’s celebrations or elegant winter holidays. For a rustic or nature-inspired look, kraft paper or brown craft paper gives the ornaments an earthy, warm quality that pairs beautifully with greenery and wooden accents.
You can also add surface decoration to your completed ornaments for extra personality and visual interest. Once the ornament is fully open, use a fine brush to apply patches of glitter glue for a sparkling effect. Metallic paint sponged lightly over sections of the surface adds a sophisticated sheen without obscuring the beautiful honeycomb texture beneath. Rubber stamps with holiday motifs or floral designs can be pressed gently onto the cell surfaces. Some crafters glue on small paper flowers, sequins, or tiny fabric bows to the ornament’s center or edges. Each embellishment technique can be mixed and matched to create ornaments that feel genuinely unique and personal.
- Try teardrop or raindrop shapes for elegant hanging displays at weddings or showers
- Make matching sets in graduated sizes for a cluster installation on a ceiling or wall
- Use patterned wrapping paper or scrapbook paper for a graphic, modern aesthetic
- Create seasonal color palettes — red and green for winter holidays, pastels for spring
- Combine multiple ornaments with paper garlands and tassel strings for a festive backdrop
Tips for Displaying Your Honeycomb Ornaments
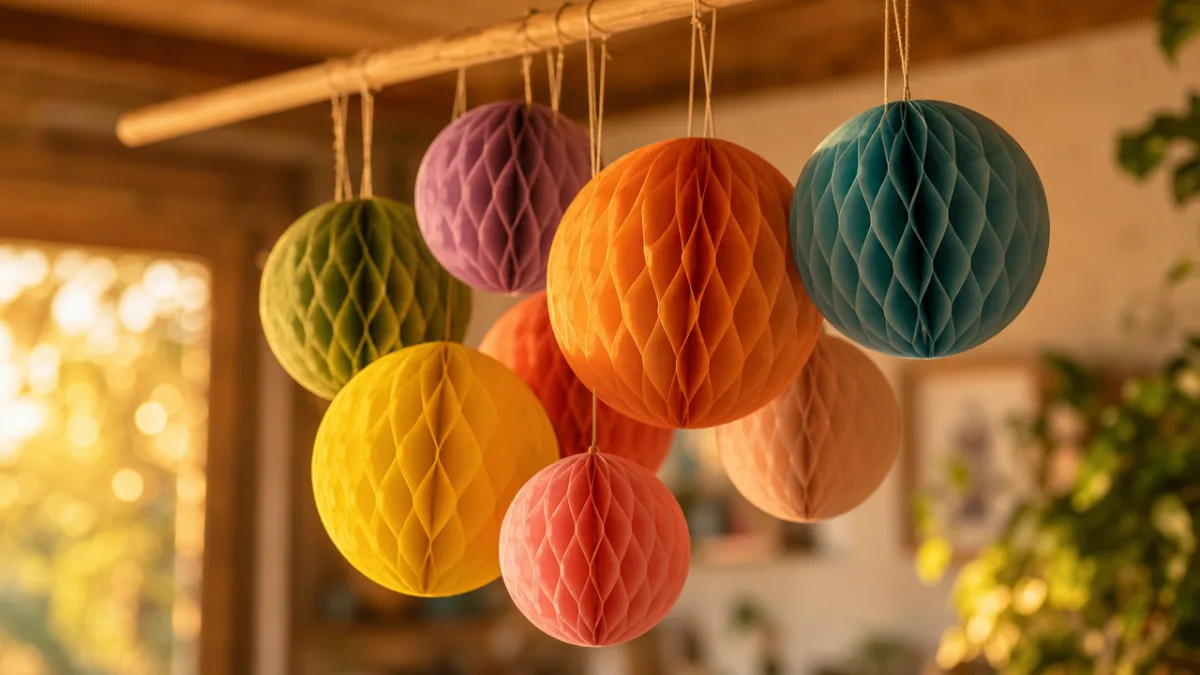
The way you display your honeycomb paper ornaments can make a tremendous difference in the overall visual impact of your décor. Because these ornaments are lightweight, they are remarkably versatile in terms of where and how they can be hung. A simple tension rod placed inside a doorway or window frame allows you to hang multiple ornaments at varying heights for a dreamy, layered curtain effect. Fishing line or transparent thread makes for nearly invisible hangers, giving the illusion that the ornaments are floating in mid-air — a particularly magical effect when sunlight catches the translucent tissue paper and casts soft shadows across your walls.
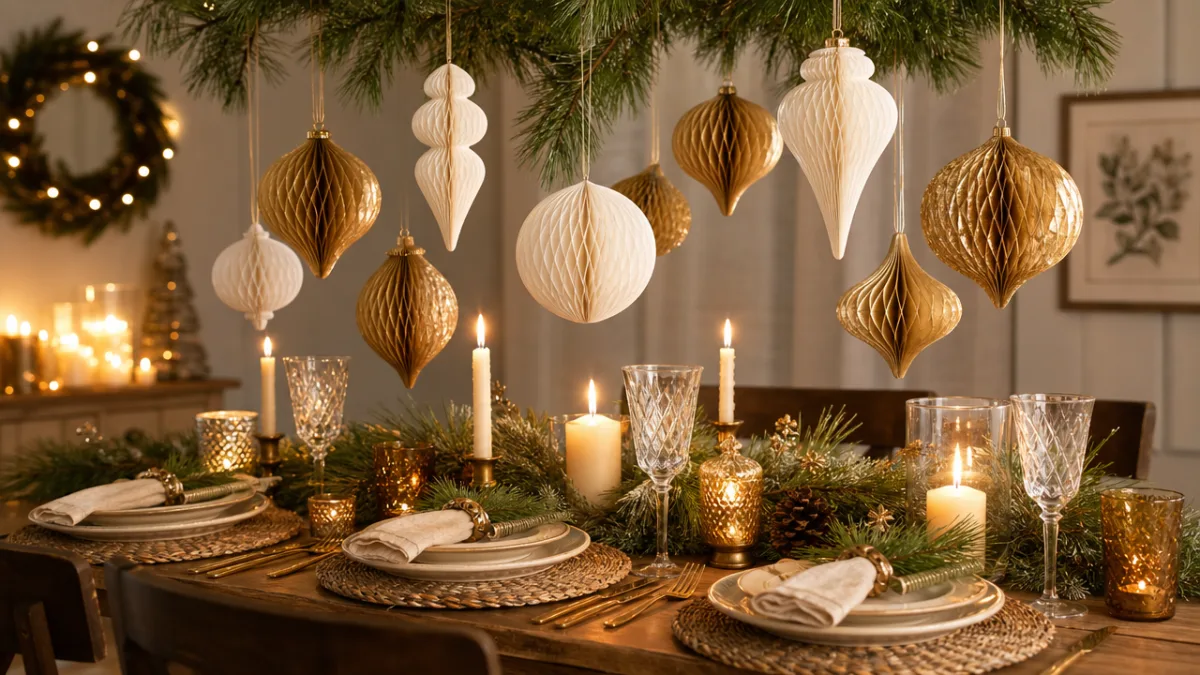
Grouping ornaments in clusters rather than hanging them individually tends to create a more dramatic and cohesive decorative statement. Try arranging three to five ornaments of varying sizes at different heights, using a single anchor point such as a ceiling hook or a branch mounted horizontally on a wall. Consider mixing your honeycomb ornaments with complementary decorations like paper fans, streamers, tassels, or fresh or dried botanicals to add texture and dimension to your display. When decorating a dining table for a party or celebration, a low-hanging cluster of honeycomb ornaments above the centerpiece creates an intimate, festive canopy that guests will find genuinely enchanting.
Seasonal rotation is one of the practical advantages of honeycomb ornaments, particularly if you make the non-glued variety that can be gently flattened for storage. Craft a collection of ornaments in different color palettes and motifs throughout the year, then swap them in and out as the seasons change. Pale pinks and yellows work beautifully for spring; vivid tropical hues suit summer celebrations; rich burnt oranges, deep reds, and mustards are perfect for autumn; and the classic combination of deep greens, reds, golds, and icy silvers brings warmth to winter spaces. Storing your flat ornaments in a large flat envelope or folder between sheets of tissue keeps them in perfect condition year after year.
The History and Cultural Significance of Honeycomb Paper Craft
The honeycomb paper construction technique has a fascinating history that stretches back well over a century. The process of gluing paper in alternating offset strips to create expandable honeycomb structures was first developed and patented in the late nineteenth and early twentieth centuries, initially for industrial and packaging purposes rather than decorative ones. Early manufacturers recognized that the honeycomb structure gave paper remarkable strength relative to its weight, making it useful as a cushioning and structural material. These same properties that make it practical in engineering also happen to make it visually captivating when crafted into decorative forms.
By the mid-twentieth century, the decorative possibilities of honeycomb paper had caught the attention of party supply manufacturers, and colorful honeycomb balls, bells, and centerpieces became a staple of American holiday and party decoration. Vintage Thanksgiving turkeys, Christmas bells, and Easter eggs made from honeycomb tissue paper became treasured family keepsakes that appeared year after year on holiday tables and mantels. Many people today still have fond childhood memories of opening up a honeycomb paper pumpkin or Christmas bell decoration as part of an annual seasonal ritual, and this nostalgic association gives modern DIY honeycomb ornaments an added emotional resonance beyond their visual appeal alone.
Globally, paper crafting traditions that share similarities with honeycomb techniques exist in many cultures. Japanese origami and kirigami practices celebrate the transformation of flat paper into dimensional form. Mexican papel picado uses cut paper to create intricate lacy decorations for festivals. Chinese lantern-making employs folded and glued paper to create expandable three-dimensional structures for celebrations. The honeycomb ornament sits comfortably within this worldwide tradition of transforming humble, inexpensive paper into objects of genuine beauty, connecting contemporary crafters to a long and richly varied human history of creative making with simple materials.
Today, the DIY honeycomb paper ornament has found a new global community of enthusiasts thanks to social media platforms and online crafting communities. Makers from every continent share their variations, innovations, and finished creations online, inspiring one another and collectively pushing the art form in new directions. What began as a patented industrial process has become a beloved handmade tradition that continues to evolve, adapt, and delight with each new generation of crafters who discover the simple joy of pulling a stack of glued paper apart to reveal something unexpectedly beautiful inside.
Making Honeycomb Ornaments With Kids and as Gifts
Honeycomb paper ornaments are one of the most family-friendly crafts available, making them an ideal activity to share with children during school breaks, rainy days, or holiday preparation sessions. The basic process — stacking paper, applying glue, cutting shapes, and opening the finished ornament — is accessible to children as young as five or six with appropriate adult supervision for the cutting steps. Older children from about eight or nine years old can manage the gluing and cutting steps with minimal guidance, giving them a genuine sense of ownership and pride over the finished decoration. The moment of opening the ornament and seeing the honeycomb structure emerge is reliably met with delight from crafters of all ages.
When crafting with younger children, simplify the process by pre-cutting the paper stacks and pre-drawing the glue line guides so that little ones can focus on the satisfying tasks of applying glue and watching the ornament open up. Let children choose their own color combinations to encourage creative decision-making and investment in the outcome. You might theme a crafting session around an upcoming holiday, birthday, or season, giving children a fun context for the activity while also producing decorations that will be genuinely used and displayed in your home. Labeling each child’s ornament with their name and the year creates a charming annual tradition and a meaningful collection of handmade keepsakes over time.
Honeycomb ornaments also make thoughtful, personal gifts that are far more meaningful than anything purchased from a store. A set of matching ornaments in a friend’s or family member’s favorite colors, packaged in a pretty box with a handwritten card, is a gift that communicates care, time, and creativity. For wedding or baby shower favors, small honeycomb hearts or stars in the event’s color palette make charming keepsakes that guests can take home and display. Teachers, neighbors, coworkers, and anyone who appreciates handmade things will find a carefully crafted honeycomb ornament genuinely touching. Because the materials cost is so low, you can make generous sets of gifts without straining your budget, while the end result looks and feels truly luxurious and special.
Crafting honeycomb ornaments in a group setting — whether at a community center, school classroom, church hall, or informal gathering of friends — transforms the activity into a social event that is both productive and enjoyable. Set up a long table with shared supplies, put on some music, and let conversation flow naturally while everyone works at their own pace. Group crafting sessions are wonderful for building community, sharing techniques and tips, and generating the collective creative energy that often leads to unexpected innovations and variations. At the end of the session, everyone goes home with beautiful handmade decorations and, often, the warm feeling that comes from having made something meaningful together.








What do you think?
It is nice to know your opinion. Leave a comment.