










Get Inspired by This Simple and Easy Vase DIY Craft Idea
There’s something really satisfying about turning an ordinary object into something beautiful for your home — especially when all it takes is a bit of creativity, an afternoon, and a few dollars’ worth of supplies. DIY vase projects have become a staple in the crafting world, and honestly, it’s easy to see why. They’re beginner-friendly, endlessly customizable, and the results always look way more polished than the effort involved. Whether you want to freshen up a shelf, make a heartfelt handmade gift, or just enjoy some quiet, mindful crafting time, a vase DIY is a wonderful place to start.
Pinterest has always been a goldmine for craft inspiration, and vase DIYs are consistently among the most saved and shared projects on the platform. From clean Scandinavian minimalism to boho-chic textured designs, there’s genuinely something for every taste and every home. What makes these projects so great is that the materials are almost always things you already own or can pick up for next to nothing at a thrift store or dollar shop. Old glass bottles, mason jars, plastic containers, even cardboard tubes — all of them can become the foundation for something really lovely.
This article walks you through everything you need to know to make your own DIY vase, from picking your materials and settling on a design style, all the way through to styling the finished piece. Along the way you’ll find practical tips, creative variations, and ideas for making your vase truly one of a kind. So clear off the craft table, make yourself a cup of tea, and let’s get into it.
Gathering Your Materials and Choosing the Right Base
The first big decision in any vase DIY is choosing your base vessel, and it’s worth thinking through before you dive in. Where are you planning to display it, and what kind of look are you going for? Glass bottles and jars are the most popular starting point — they’re sturdy, smooth, and easy to work with. Wine bottles, pasta sauce jars, tall juice bottles — all great options. Pay attention to the silhouette too, because a bottle with a narrow neck and a wide base will give you a very different final look than a straight-sided jar.
But glass isn’t the only option. Terracotta pots can be painted and dressed up to hold dried flowers or pampas grass. Tin cans, once cleaned up and checked for sharp edges, can be grouped together for a charming rustic cluster. Even plastic bottles, wrapped in twine, fabric, or paper, can be transformed into something genuinely beautiful. The trick is to look at every container as a blank canvas rather than something ordinary or plain — the potential is almost always there if you look for it.
Once you’ve picked your base, gather everything else you’ll need to bring your vision to life. Depending on your chosen style, that might include acrylic paint, spray paint, mod podge, twine, ribbon, lace, dried botanicals, sand, pebbles, shells, or tissue paper. Having all your supplies laid out before you start makes the whole process so much more enjoyable. A drop cloth or some old newspaper to protect your work surface is always a good call too, along with a cup of water for rinsing brushes and a few paper towels nearby. Good preparation makes everything go more smoothly — it’s one of those things that really does make a difference.
Design Styles and Creative Techniques to Try
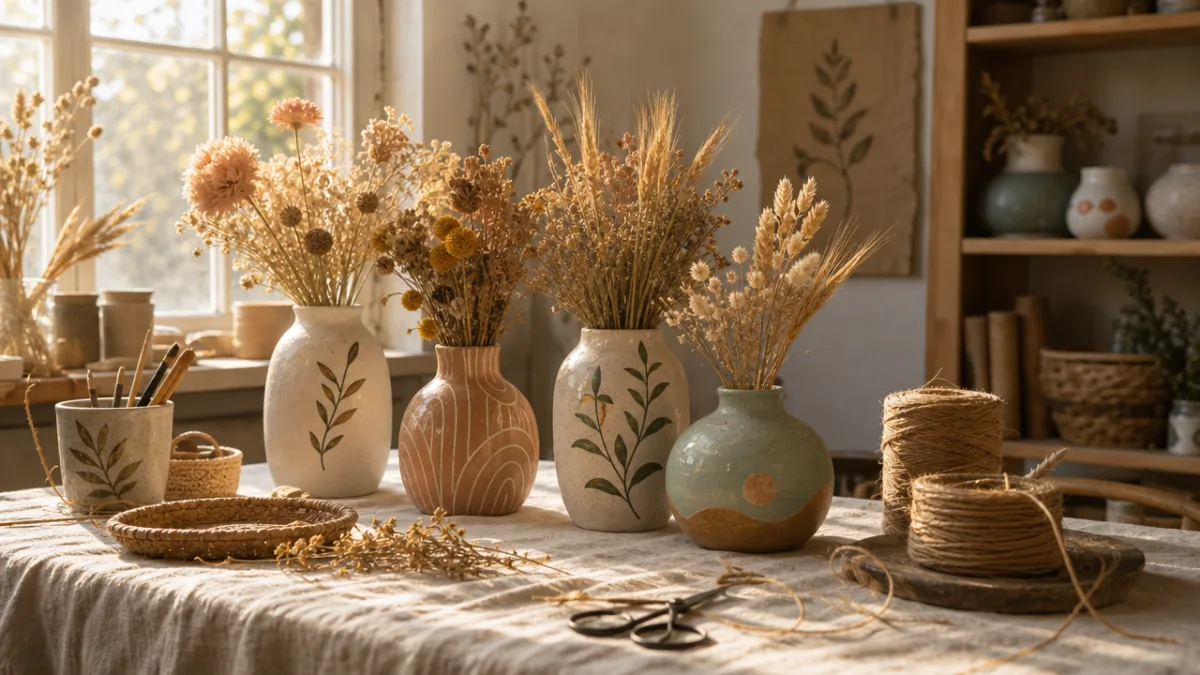
One of the best parts of making your own vase is how many different techniques you can try. If you love a clean, modern look, a simple two-tone paint treatment is a great place to start. Paint the bottom half of the vase in a bold matte color and leave the top half natural or finished in gold. This dipped effect is so easy to pull off with just painter’s tape and a few coats of acrylic paint, but it looks genuinely polished sitting on a shelf or windowsill. Terracotta, sage green, and dusty blue are all really on trend right now and work beautifully with this technique.
If you’re more drawn to a textured, handcrafted look, try wrapping your vase with natural twine or jute rope. It adds such warmth to any container and has a lovely organic quality. Start at the bottom and work your way up, securing the rope with a strong craft glue and pressing each row snugly against the last. You can leave the neck of the bottle unwrapped for contrast, or go all the way to the top for full coverage. Finishing it off with a little bow or a sprig of dried eucalyptus gives it that effortlessly styled look — you know the one.
Decoupage is another technique worth trying, especially if you love a unique, patterned finish. Brush a thin layer of mod podge onto your vessel, press on your chosen paper or fabric, smooth out any bubbles, and seal with another coat on top. Once it dries, you end up with a surprisingly durable surface that looks really special. Floral tissue paper, vintage maps, and sheet music are all popular choices, and each one gives a completely different feel. It’s one of those techniques where the results always exceed expectations.

Step-by-Step Guide to Creating Your Vase
Now that you’ve got your materials together and a design in mind, let’s walk through the actual making process. Start by cleaning your vessel thoroughly — this step matters more than people realize. Any grease, residue, or sticky label adhesive left on the surface will stop your paint or glue from adhering properly. Wash it with warm soapy water, then use a little rubbing alcohol or adhesive remover on any stubborn patches. Let it dry completely before you do anything else, because moisture trapped under paint or glue will cause bubbling and peeling down the line, and that’s a frustrating thing to deal with after you’ve put in the work.
If you’re painting your vase, a light coat of primer first will help the paint grip better and give you a more even finish — especially important on slick glass surfaces. Apply thin, even coats and let each one dry fully before adding the next. This is the step where most beginners go wrong, and it’s also the easiest to get right just by being patient. Two or three thin coats will always beat one thick coat, which tends to drip and dry unevenly. If you’re using spray paint, head outside or to a well-ventilated space and hold the can about twelve inches from the surface.
Here’s a simple step-by-step you can follow for a painted dipped vase:
- Clean and dry your glass bottle or jar completely, removing all labels and adhesive residue.
- Apply a strip of painter’s tape around the bottle at the point where you want the paint to end, pressing it down firmly to create a clean edge.
- Apply a light coat of primer below the tape line and allow it to dry for at least thirty minutes.
- Paint the lower portion of the bottle with your chosen acrylic or chalk paint, using smooth, even strokes and allowing each coat to dry between applications.
- Once the final coat is completely dry, carefully peel away the painter’s tape to reveal the crisp dividing line.
- Optionally, apply a clear sealant spray to protect the paint finish and add a subtle sheen.
- Fill with dried flowers, pampas grass, or a simple branch and display with pride.
If you’re going the twine wrapping route instead, the process is just as simple but does require a bit more patience. Apply your craft glue to a small section of the bottle at a time rather than trying to cover the whole thing at once. Press the twine firmly into the glue and hold it there for a few seconds before moving on. Work slowly and steadily — if the first few rows feel a little loose, don’t worry, they’ll tighten up as the glue sets. The finished result has such a lovely handmade quality that you really can’t get from anything store-bought, and that makes the extra care completely worth it.
Styling and Displaying Your DIY Vase
Making the vase is only half the fun — styling and displaying it is where things really come together. How you fill and arrange your vase will have just as much impact on the final look as the decoration itself. Dried flowers and botanicals are incredibly popular right now, partly because they require no water and last indefinitely, which makes them ideal for decorative vases that aren’t fully waterproof. Pampas grass, dried lavender, bunny tail grass, and preserved eucalyptus are all beautiful options that suit a wide range of vase styles and home aesthetics.
When it comes to placement, try grouping objects in odd numbers — it almost always looks more visually interesting than even groupings. Three vases in varying heights and finishes will look far more dynamic on a shelf or mantelpiece than two identical ones sitting side by side. Mixing different textures within a grouping — a painted vase next to a twine-wrapped one next to a plain glass bottle — adds depth and visual interest while still feeling like a cohesive set. Work your DIY vases into a larger styled vignette with candles, books, a trailing plant, or some framed artwork, and the whole thing comes together really nicely.
Lighting matters more than you might expect. A glass vase on a windowsill catches natural light beautifully, especially if light can filter through the base. In the evenings, positioning a vase near a warm lamp or tucking a battery-operated tea light inside a glass vessel creates a really cozy, magical effect. And don’t underestimate the impact of wall-mounted shelving either — a row of small DIY vases arranged on a floating shelf at eye level can become a real focal point in a room, and they make for a great conversation starter when people come to visit.

Creative Variations and Ideas for Every Skill Level
One of the nicest things about DIY vase projects is that there really is a version of this craft for everyone, no matter your experience level or how much time you have. If you’re brand new to crafting, or you’re doing this with kids, something as simple as collecting a few glass jars, tying a piece of ribbon around the neck of each one, and painting them in coordinating colors can be done in under an hour — and the result is genuinely charming. It’s also a fantastic activity for birthday parties, crafty afternoons with friends, or school holidays when you want the kids to make something they can actually use and feel proud of.
For intermediate crafters looking for something with a little more challenge, try a marbled paint effect on a smooth glass vase. You drop two or three nail polish colors onto the surface of a bowl of water, swirl them gently with a toothpick, then dip the vase so the pattern transfers onto the surface. The results are honestly breathtaking — and completely unique, because no two marbled vases will ever look exactly the same. It takes a little practice and some trial and error, but that’s part of what makes it fun.
More experienced crafters might want to explore something like concrete casting, where you use a balloon or mold to create a vase entirely from scratch using quick-setting concrete mix. The results have a real designer feel and can be customized with pigments, textures, and embedded objects. Air-dry clay is another fantastic option — it’s approachable, dries naturally without a kiln, and can be painted, carved, and finished in so many different ways. Whatever your skill level, there’s a DIY vase project that will stretch you just the right amount and give you something you’ll genuinely love showing off.
Making It a Sustainable and Eco-Friendly Craft
Beyond being creative and genuinely enjoyable, DIY vase crafting is one of the most naturally eco-friendly hobbies you can pick up. At its heart, this kind of project is upcycling — you’re taking something that might otherwise end up in the recycling bin or landfill and giving it a new, beautiful life. Every glass bottle you transform into a decorative vase is one less item in the waste stream. Every tin can you repurpose is a small but real reduction in your household waste. When you approach crafting with that mindset, the finished piece feels even more satisfying — you’ve made something beautiful and made a thoughtful choice at the same time.
To make your projects even more sustainable, look for eco-friendly craft supplies where you can. Plenty of brands now offer water-based, low-VOC paints that are better for indoor air quality and the environment. Natural materials like twine, dried botanicals, and fabric scraps from old clothing are lovely alternatives to synthetic decorations. Even your adhesives can be swapped out — homemade paste made from flour and water works surprisingly well for decoupage and involves no packaging or chemical ingredients at all. These small choices really do add up over time.
Sharing your finished vases as gifts is another wonderful way to carry this sustainable spirit forward. A handmade vase — especially one made from a repurposed vessel — carries a story and a personal touch that nothing off a shop shelf can match. People appreciate not just the beauty of the object, but the time and thought that went into making it. A cluster of small upcycled vases filled with dried flowers makes a wonderful housewarming gift, a birthday present, or a simple token of appreciation. And when you share the joy of handmade crafting, you often inspire others to try it themselves — and that ripple effect might just be the most rewarding part of all.








What do you think?
It is nice to know your opinion. Leave a comment.