










What Is a DIY Rainbow Glow Lava Lamp and Why Should You Make One?
A DIY rainbow glow lava lamp is one of those magical science-meets-craft projects that manages to delight children and adults in equal measure. The moment you add the first drop of food coloring and watch it descend through a column of oil before hitting the water below and blooming outward in a vivid burst of color, something clicks in your brain that is simultaneously scientific and deeply satisfying. These homemade lamps tap into the same wonder that made the original 1960s lava lamp a cultural icon, but with the added thrill of having built it yourself from simple household materials.
Unlike many DIY projects that require specialized tools, significant budgets, or advanced crafting skills, the rainbow glow lava lamp is genuinely accessible to almost anyone. The core principle behind it relies on the well-known fact that oil and water do not mix, combined with the effervescent reaction produced when an Alka-Seltzer tablet or similar fizzing agent is introduced into the mixture. The resulting bubbles carry droplets of colored water up through the oil and back down again in a mesmerizing loop that can last for minutes at a time, and can be restarted simply by dropping in a fresh tablet whenever you want more action.
The rainbow element of this particular version comes from using multiple colors simultaneously or in sequence, creating a lamp that transitions through vivid hues like a slow-motion aurora borealis trapped inside a bottle or glass. When you place the finished lamp near an LED light source or a simple flashlight underneath, the colors glow with an intensity that makes the whole thing feel far more elaborate and professional than its humble ingredients would suggest. It is the kind of project that photographs beautifully, makes an impressive gift, and teaches genuine scientific concepts without ever feeling like homework.
The Science Behind the Magic
Understanding what is actually happening inside your lava lamp transforms the experience from a neat trick into a genuinely illuminating lesson in chemistry and physics. The fundamental concept at work is density. Oil is less dense than water, which is why it floats on top rather than mixing in. No matter how vigorously you shake the two together, they will always separate back out because the molecular structure of oil is hydrophobic, meaning it actively repels water molecules. Food coloring is water-soluble, so when you add it to the oil layer, it simply beads up and sinks through until it reaches the water below, where it then disperses in those gorgeous blooming clouds of color.
The fizzing tablet you drop in is typically composed of citric acid and baking soda, which react together when they come into contact with water to produce carbon dioxide gas. Those gas bubbles are less dense than both the oil and the water, so they rise upward rapidly. As they travel through the oil layer, they carry tiny droplets of colored water along for the ride, which is what creates the iconic lava-lamp blobbing motion. When the bubbles reach the surface and pop, releasing their carbon dioxide into the air, the water droplets lose their buoyancy and sink back down through the oil again.
The glow effect is produced by the way light interacts with the two different liquid layers. Oil and water have different refractive indices, meaning they bend light in slightly different ways. When a light source shines through from below, the colors in the water layer are intensified and the boundary between the oil and water layers creates a subtle lens effect that makes everything look more vivid and luminous. This is why even a cheap flashlight or a few LED tea lights placed underneath can transform your lamp from something pretty into something that genuinely looks like it might have cost a great deal of money from a specialty store.

Gathering Your Materials: Everything You Need Before You Begin
One of the most appealing aspects of this project is that the shopping list is short, inexpensive, and composed almost entirely of things you likely already have somewhere in your home. The primary vessel is the most important choice you will make, and it is worth taking a moment to think it through before defaulting to the first glass you pull from the cabinet. Tall, narrow containers work best because they give the colored droplets more vertical distance to travel, which makes the lava-lamp motion more dramatic and easier to see. A large glass drinking bottle, a mason jar, a tall drinking glass, or even a clean plastic bottle with smooth sides all work beautifully.
Your liquid ingredients are simple: baby oil or mineral oil and water. Baby oil is often preferred because it is slightly more viscous than mineral oil, which slows the movement of the droplets just enough to make the whole display feel more languid and relaxing, similar to the pacing of the classic commercial lamps. You will want enough oil to fill roughly three-quarters of your container, with the remaining quarter filled with water. The exact ratio is not critical, but having more oil than water gives the colored droplets more room to travel and creates a more impressive visual effect during the active phase.
For the rainbow effect specifically, you will want at minimum three colors of food coloring, and ideally five or six so that you can work through a full spectrum from red through orange, yellow, green, blue, and violet. Gel food coloring produces more vibrant results than liquid food coloring, but either will work. You will also need fizzing tablets such as Alka-Seltzer, generic antacid tablets, or even vitamin C effervescent tablets, all of which produce the necessary carbon dioxide reaction. A UV or black light flashlight, or even a string of LED lights, will complete the glow effect and elevate the finished lamp from daytime craft project to evening showpiece.
Optional Enhancements to Consider
While the basic version of this project is perfectly spectacular on its own, there are several optional additions that can take your rainbow glow lava lamp to the next level. Glitter is a popular choice, particularly holographic or iridescent craft glitter, which catches the light and adds a sparkling dimension to the already colorful display. You do not need much, just a small pinch stirred into the oil layer, and it will float around and catch the light in ways that make the lamp look genuinely magical. Be aware that glitter can eventually settle, but a gentle swirl of the container brings it back into motion easily.
Some makers like to add a few drops of glow-in-the-dark paint or neon food coloring that reacts strongly under ultraviolet light, which dramatically intensifies the glow effect when you use a black light as your illumination source. This is particularly effective for evening use or for creating an atmospheric display at a party or sleepover. The neon colors under UV light are genuinely striking and have a quality that photographs extremely well on a smartphone camera, making this a project that translates beautifully to social media sharing if that appeals to you.
Another enhancement worth considering is the lid or closure for your container. If you are using a bottle with a cap, you can seal it tightly with waterproof sealant or a hot glue gun once you are done experimenting and want a permanent display piece. A sealed lamp will not produce new bubble activity without the fizzing tablet reaction, but it will preserve the layered color effect indefinitely and can be gently tilted and swirled to create slow, rolling motion similar to a snow globe. Some crafters fill several small bottles and line them up on a windowsill where natural light filters through to create a stained-glass effect.
Step-by-Step Instructions for Building Your Rainbow Glow Lava Lamp
Begin by selecting and thoroughly cleaning your container. Even a small residue of soap can affect the separation between your oil and water layers, so rinse well and allow the container to dry completely before you begin adding your ingredients. If you are using a glass bottle with a narrow mouth, consider using a small funnel to make pouring easier and cleaner. Set up your workspace on a surface you do not mind getting a few drops of food coloring on, or lay down a sheet of newspaper or a piece of parchment paper as a protective layer, because food coloring will stain fabric and can temporarily discolor some surfaces.
Pour your water into the container first, filling it to roughly one quarter of its total capacity. This is the moment to add your food coloring, and here is where the rainbow strategy comes into play. If you want to see multiple colors active at the same time, add two or three different colors directly to the water and allow them to spread and mix slightly. If you prefer to introduce colors one at a time and watch each one bloom separately, you can add them individually to the water before each new tablet drop. For a rainbow gradient effect inside the water layer itself, tilt the container slightly and add colors along different sides before gently returning it to upright.
Next, pour the oil in slowly and carefully on top of the water. Pouring against the inside wall of the container rather than directly down into the center helps minimize turbulence and keeps the layers as distinct as possible. You will see the oil settle on top clearly, with the colored water visible beneath it. At this point your lamp already looks beautiful, like a living watercolor painting. Allow it to settle for a minute or two so that any mixing caused by the pouring process can resolve itself naturally before you move on to the active phase.
Activating the Glow and Managing the Reaction
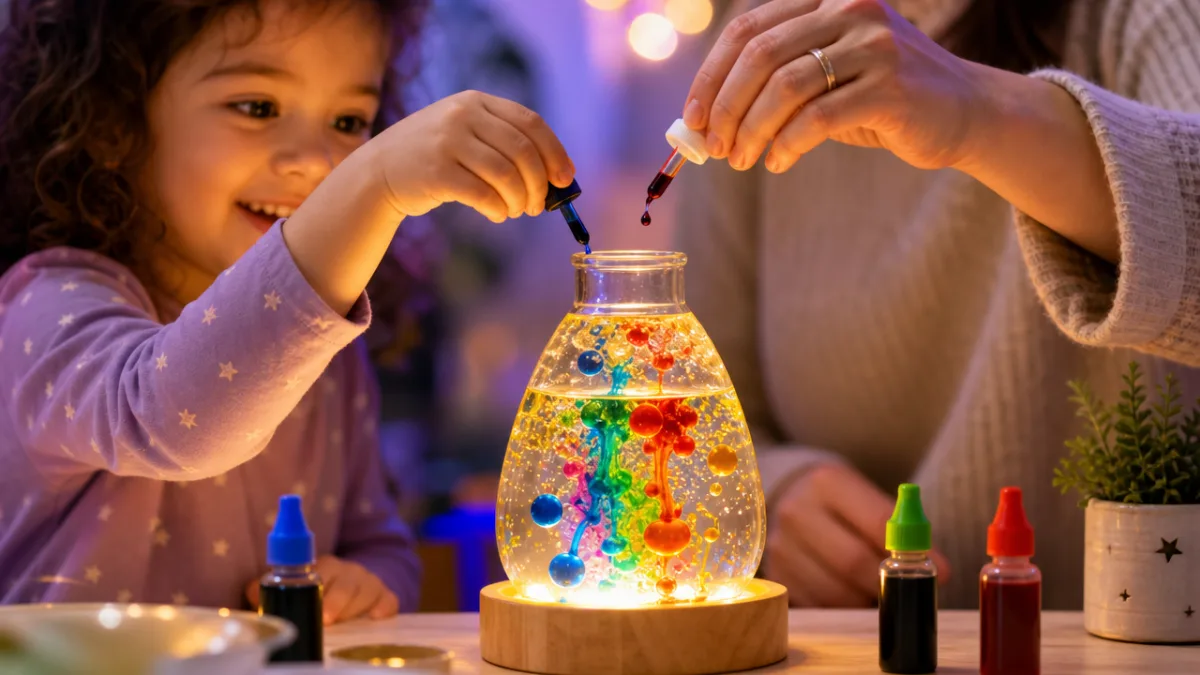
With your layers settled and your light source positioned underneath or behind your container, drop in one quarter to one half of a fizzing tablet and watch the reaction begin almost immediately. The bubbles will form at the oil-water boundary and start carrying colored droplets upward in those characteristic lava-lamp blobs. The speed and intensity of the reaction depends on the temperature of the water, the size of the tablet piece you used, and the exact composition of your tablet, but most reactions are quite vigorous for the first thirty to sixty seconds before slowing to a gentle percolation that can last several more minutes.
For the full rainbow effect, prepare several small sections of tablet and color drops in advance so that you can introduce new colors as the previous reaction begins to slow. Dropping in a small piece of tablet followed immediately by a drop or two of a different color creates a layered sequence of different colored blobs moving through the oil, and watching them coexist in the same column simultaneously is particularly striking. The colors in the water layer below will gradually blend together over multiple sessions, eventually turning a brownish purple if you use many different colors, but this does not affect the glow effect significantly, and you can always replace the water and start fresh.
Once you are finished with the active display portion of the project, you can position your lamp near a UV LED strip, place it over a color-changing LED tea light, or simply use a standard flashlight held beneath the base. Each light source creates a slightly different effect. UV light makes fluorescent colors pop dramatically, color-changing LEDs create a shifting rainbow effect even without adding new tablets, and a simple white LED produces the clearest, most intense illumination of the colors already present in the water layer. Experimenting with different light sources is half the fun and costs nothing if you already have these items around the house.
Troubleshooting Common Problems and How to Fix Them
Even a project as straightforward as this one can occasionally produce results that are less than satisfying, and understanding the most common issues makes it easy to correct course quickly. The most frequently encountered problem is poor layer separation, where the oil and water seem to be mixing more than expected or the boundary between them appears cloudy and indistinct. This is almost always caused by one of three things: the presence of soap residue in the container, using a type of oil that is too light or too similar in density to water, or shaking the container too vigorously before allowing it to settle. A thorough re-rinse, a switch to pure mineral oil, and patience are usually all it takes to resolve this.
Another common frustration is weak or nonexistent bubble activity when the fizzing tablet is added. This typically indicates that the water is too cold, which slows the chemical reaction significantly, or that the tablet you are using has degraded due to moisture exposure and is no longer fully active. Try using slightly warmer water, not hot but comfortably warm to the touch, and make sure your tablets are stored in a dry, sealed container between uses. Some generic antacid tablets produce a noticeably weaker reaction than brand-name versions, so if you are consistently disappointed with the activity level, switching to a higher-quality tablet can make a significant difference.
Color bleeding or the colors disappearing too quickly into a murky brown mixture is a natural consequence of mixing many pigments together over time, and it is not really a malfunction so much as a predictable outcome of working with subtractive color mixing. To extend the life of your rainbow effect, use gel food colors rather than liquid ones, as they are more concentrated and maintain their vibrancy longer. You can also try introducing colors more sparingly and sequentially rather than all at once, which slows the blending process and gives you more time to enjoy each individual hue before it merges with the others.
Safety Considerations and Best Practices
While this project uses ingredients that are generally considered safe and non-toxic, it is still worth following a few common-sense precautions, particularly when making it with younger children. Food coloring will stain skin, fabric, and some countertop surfaces, so wearing an apron and working on a protected surface is genuinely advisable rather than merely cautionary. The fizzing tablets used in this project are safe household antacids but should not be consumed in large quantities, and the reaction they produce releases carbon dioxide gas, which is harmless in the open air but not something you want to breathe in directly over the container. Simply step back a few inches when you drop the tablet in.
Oil spills are the other practical hazard to be aware of, as mineral oil and baby oil both make surfaces extremely slippery if spilled. Clean up any drips or spills immediately with paper towels and then follow up with a mild dish soap solution to cut the oil residue on the surface. Keep the container on a stable, flat surface away from the edge of the table, especially during the active bubbling phase when the visual excitement tends to make everyone lean in for a closer look. A container with a wider base is more stable than a tall, narrow one, so if you are working with younger children, choosing a squat mason jar over a tall bottle is a sensible precaution.
When the project is finished and you want to dispose of the contents, pour the oil into a sealable container and check your local municipal guidelines for oil disposal, as it should not be poured down the drain in large quantities. The water and food coloring mixture can be poured down the drain safely, and the tablets are fully water-soluble and pose no disposal concerns. The container itself can be cleaned with dish soap and warm water and reused for the next round of experiments, which is one of the genuinely lovely aspects of this project: it is not a one-time consumable craft but a repeatable experiment that can be run again and again simply by replenishing the tablets and food coloring.
Creative Variations and Ways to Display Your Finished Lamp
Once you have mastered the basic version of the rainbow glow lava lamp, an entire world of creative variations opens up that can keep this project feeling fresh and exciting across many sessions. One of the most popular adaptations is the seasonal color palette version, where you limit your color choices to reflect a particular time of year or holiday. Red, orange, and yellow for autumn, red and green for winter holidays, pastels for spring, and electric brights for summer all create versions of the lamp that feel themed and purposeful rather than generic. These make particularly thoughtful and inexpensive handmade gifts when presented in a sealed decorative bottle with a small card explaining the science behind the magic.
For a more permanent display piece, consider layering multiple colors of water in sequence using a technique borrowed from layered cocktail making. If you dissolve different amounts of salt into separate portions of water before adding food coloring, you can create water layers of slightly different densities that will stack on top of one another rather than mixing immediately. Adding oil on top of these stratified colored water layers creates a rainbow gradient effect that is visible at all times, not just during the active bubbling phase. This version is slower to set up and requires more precision, but the result is genuinely stunning and maintains its layered appearance for much longer.
Display-wise, the placement of your lamp matters enormously to the overall effect it creates in a room. A windowsill location allows natural light to filter through the colors during the day, creating a stained-glass effect that is completely different from the glow produced by artificial light at night. A small mirrored tray underneath the lamp reflects the light source and the colors back upward, doubling the visual impact. Grouping several lamps of different sizes and colors together creates an installation-like effect that is genuinely impressive and can transform a shelf or sideboard into a conversation piece. Whether you make one lamp or a whole collection, the rainbow glow lava lamp is the rare DIY project that looks as good on display as it does in action.
Sharing the Experience and Extending the Learning
One of the most rewarding aspects of a project like this is the opportunity it creates for shared discovery, whether that means making it together with children, bringing it to a classroom or community group setting, or simply sharing photos and videos of the process online with people who appreciate a well-executed science craft. The visual quality of the rainbow glow lava lamp is naturally photogenic, and filming the active reaction phase in slow motion using a smartphone camera produces footage that is genuinely mesmerizing to watch back and satisfying to share. The moment the colored droplets start rising through the oil is particularly striking in slow motion, as the bubble structures become clearly visible and the whole process takes on an almost alien beauty.
If you are using this project in an educational context, the list of concepts it touches on is impressively broad for such a simple setup. Density, miscibility, hydrophobia, chemical reactions, carbon dioxide production, light refraction, and color mixing are all directly observable and discussable using this single experiment. For older students, you can extend the investigation by varying one element at a time, testing different oils, different water temperatures, different tablet types, or different container shapes, and recording the results systematically. This transforms the craft project into a genuine scientific inquiry and teaches experimental design in an accessible, enjoyable way that is far more memorable than reading about these concepts from a textbook.
Ultimately, the DIY rainbow glow lava lamp earns its place among the best of all science craft projects because it delivers on every level simultaneously. It is visually spectacular, genuinely educational, easy and inexpensive to make, repeatable without additional cost, adaptable to different skill levels and age groups, and capable of producing results that feel magical even when you fully understand the science behind them. That combination of accessible wonder and real intellectual content is rare in any medium, and it is the reason that lava lamp projects in various forms have remained popular for generations. Making your own rainbow version is simply the most colorful and dazzling expression of an already wonderful idea.








What do you think?
It is nice to know your opinion. Leave a comment.