










Birthday Hand Painted Candles: The Ultimate Guide to Creating Personalized Celebration Masterpieces
The Art of Hand Painted Candles: A Creative Tradition Reimagined
Hand painted candles have been making birthdays feel extra special for decades, and honestly, it’s easy to see why. When you hand someone a candle you painted yourself, you’re giving them something a store shelf simply can’t replicate — your time, your creativity, and a little piece of how much you care about them. These candles pull double duty as both a gorgeous gift and a keepsake worth holding onto long after the celebration is over.
What I love most about this craft is how flexible it is. You could go simple with a pillar candle and some pretty floral accents, or go all-in on an intricate taper with hand-lettered birthday messages — the options really are endless. Whether you’ve never picked up a paintbrush before or you’ve been crafting for years, there’s a style and complexity level that’ll work for you.
There’s also something really timely about this hobby. In a world of two-day shipping and identical mass-produced gifts, a hand painted candle stands out because it took real effort. People genuinely want gifts that mean something, that have a story behind them. And nothing says “I was thinking about you” quite like something made with your own hands, designed specifically with that person in mind.
Essential Materials and Tools for Hand Painted Candles
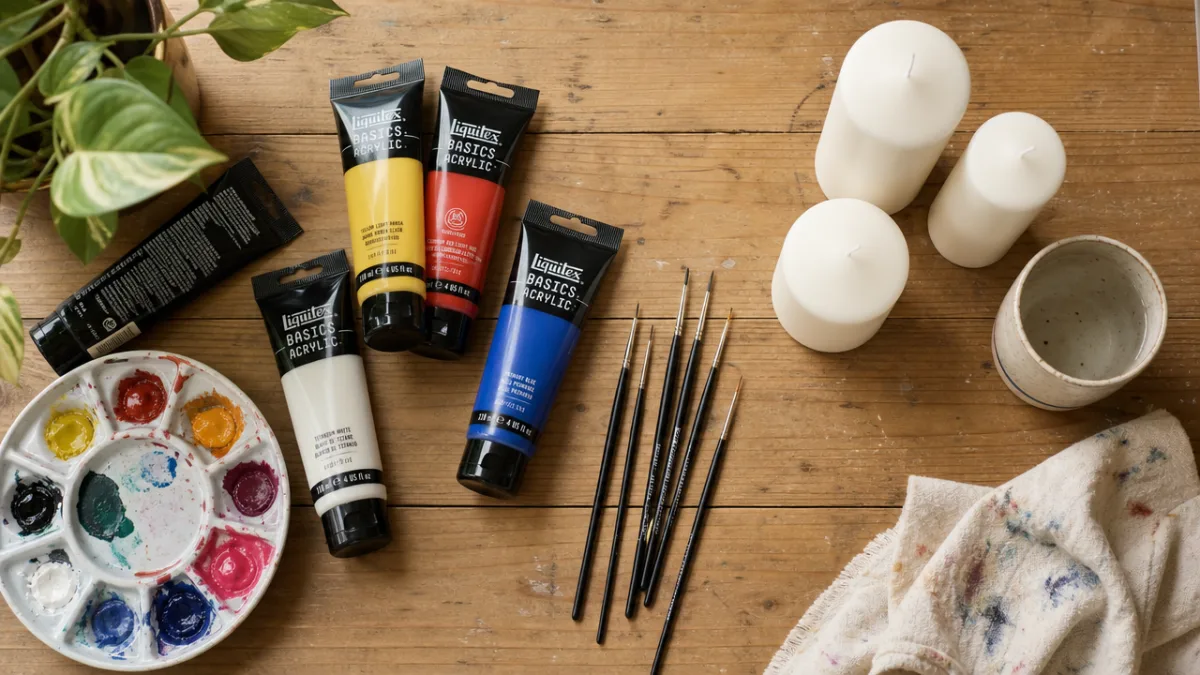
Before you dive into your first project, it’s worth taking a little time to gather the right supplies — it makes a bigger difference than you’d think. The candle itself is your starting point, and pillar candles are a great pick for beginners because you get a nice flat, broad surface to work with. Stick with paraffin or a paraffin blend if you can, since those surfaces tend to hold paint much better than soy or beeswax, which are oilier and can actually repel certain paints.
For the paint itself, acrylics are pretty much the go-to choice. They have great pigmentation, they stick well to wax, and they dry fast. If you can, go for artist-grade acrylics rather than the basic craft store versions — the difference in color vibrancy and longevity is genuinely noticeable. You can also find specialty candle paints that are designed to flex as the wax warms up, which helps prevent cracking or flaking down the line.
Your brushes matter more than you might expect. A solid starter set with a range of shapes and sizes will give you a lot more flexibility as you work through different design elements.
- Fine liner brushes (size 0 or 00) for lettering, outlines, and intricate detail work such as flower stamens or delicate vines
- Flat shader brushes in medium sizes for filling in large areas of color with smooth, even coverage
- Round brushes in a range of sizes for general painting, blending, and creating petal shapes
- Fan brushes for creating soft, feathery textures like foliage or abstract background effects
- Palette knives or stylus tools for adding texture, dot work, or scraping techniques
A few other things worth having nearby: a palette or spare flat plate for mixing colors, rubbing alcohol to clean the candle surface before you start, a heat gun to speed up drying between layers, and a sealant spray made for candles to lock everything in and prevent smudging. Oh, and don’t overlook good lighting — trying to paint fine details in a dim room is a frustrating experience you can easily avoid.
Design Ideas and Inspiration for Birthday Candles
Coming up with the right design is honestly one of the most fun parts of the whole process. The best birthday candles feel personal — they reflect the colors, interests, or symbols that actually mean something to the person you’re celebrating. Got a friend who’s always outside on a hiking trail? A nature-inspired design with watercolor botanicals or a mountain landscape wrapping around the candle could be perfect. Know someone who’s deep into a particular aesthetic? Art deco geometric patterns, retro florals, or clean Scandinavian-inspired designs are all worth exploring.
Lettering is also a seriously powerful tool here. A beautifully painted name, age, or birthday phrase can carry a whole design on its own, or you can weave it into a larger illustrated scene. Brush lettering, serif scripts, block letters, playful balloon fonts — they all translate really well onto candle surfaces. Just do yourself a favor and practice on paper first, since the slightly waxy surface of a candle handles a little differently than what you’re probably used to.
If you’re looking for more specific direction, themed designs are a great place to start. Some of the most popular categories that tend to work really well for birthdays include:
- Floral celebrations featuring roses, peonies, or wildflower arrangements in the recipient’s favorite palette
- Celestial themes with moons, stars, planets, and constellation patterns for astrology enthusiasts
- Abstract expressionist designs using bold color blocking, splatter techniques, and gestural brushstrokes
- Portrait candles featuring simplified, stylized illustrations of the birthday person or beloved pets
- Milestone number designs where the age itself becomes the focal point, decorated with ornate flourishes
- Cultural and traditional motifs drawn from heritage, folklore, or meaningful traditions
It’s also worth thinking about color intentionally. Rather than reaching for every paint you own, try limiting yourself to three to five colors that work well together — either complementary or analogous on the color wheel. It sounds like a constraint, but it almost always produces something more elegant and cohesive than throwing everything at the canvas. And if you haven’t tried metallic paints yet, gold, silver, rose gold, and copper are absolutely worth experimenting with. They catch the light in a way that makes even a simple design look luxurious.
Step-by-Step Techniques for Painting Your Birthday Candle
Here’s something a lot of beginners skip over: prep work. It’s genuinely the most important step, and rushing through it is one of the most common reasons a project doesn’t turn out the way you hoped. Wipe down your candle with a cotton ball soaked in rubbing alcohol before you do anything else. This clears away dust, fingerprints, and skin oils that would otherwise stop the paint from adhering properly. Then let it dry completely and try to touch it as little as possible before you start painting.
Transferring your design onto the candle before you pick up a brush is a technique that makes the whole process much less stressful, especially if you’re nervous about freehanding directly onto wax. One easy method is to sketch your design on tracing paper, then press it firmly against the candle to lightly transfer the outline. You can also print a design at the right size, tape it around the candle, and trace the lines with a stylus or an empty pen to leave a subtle impression in the wax. If you’re comfortable going freehand, a water-soluble chalk marker works beautifully as a sketching tool since it wipes away cleanly afterward.
When you actually start painting, thin layers are your best friend. Multiple thin coats will almost always look better than one thick one — they dry faster, blend more smoothly, and hold up better as the wax naturally expands and contracts with heat. Start with your background colors and the largest shapes, then gradually work toward finer details and highlights. Let each layer dry fully before adding the next, and use a hair dryer on a cool setting or a heat gun held at a safe distance if you want to speed things along.
Getting clean lines is often the trickiest part, but there are some reliable workarounds. Painter’s tape is great for blocking off areas to create crisp geometric edges. For curves and script, rest your wrist against the candle rather than holding your brush suspended in mid-air — that small point of contact makes a huge difference in steadiness. Practice your stroke in the air a couple of times before touching the candle, and don’t overload your brush, since too much paint leads to drips and bleeds that are tough to fix.

Finishing, Sealing, and Presenting Your Hand Painted Candle
Once your design is fully dry, sealing it is the step that really locks everything in and keeps your work looking great over time. A matte or satin finish sealant spray made for wax surfaces is the most straightforward option — hold the can about twelve inches away and apply light, even coats in a smooth sweeping motion. Glossy sealants can work, but they sometimes make the candle look more plastic than handmade, so unless you’re specifically going for that high-shine look, matte or satin tends to feel more natural. Give it at least twenty-four hours to cure before handling the candle much.
Some candle artists prefer brushing on a thin coat of outdoor-formula Mod Podge, which is flexible enough to move with the wax instead of cracking. Apply it with a soft foam brush using smooth, quick strokes — you don’t want to linger or you’ll end up with streaking. A final pass with a soft cloth after sealing can help blend out any texture and bring the surface back to a nice, even finish. Whatever sealing method you go with, test it on a practice candle or a hidden spot first to make sure it plays nicely with your specific paints and wax type.
Presentation is worth putting thought into too, because a beautiful candle in thoughtful packaging feels like a completely different gift than the same candle dropped in a plastic bag. Some ideas that work really well:
- Nestling the candle in a bed of tissue paper inside a decorative box tied with ribbon in the recipient’s favorite color
- Pairing the candle with complementary accessories such as a handcrafted ceramic candle holder, a box of matches with a decorated matchbox, or a small card explaining the design’s personal significance
- Creating a gift set of multiple smaller candles in coordinating designs, perhaps featuring different elements from a shared theme
- Wrapping the candle in translucent vellum paper and securing it with a wax seal for an especially elegant presentation
- Including care instructions on a hand-written card, advising the recipient to keep the candle away from direct sunlight and to avoid touching the painted surface while the wax is warm
If you’re planning to share your work online or sell candles down the road, it’s worth taking a few good photos of your finished piece. Natural light near a window during that late afternoon golden hour is hands-down the best option — it’s warm, directional, and incredibly flattering for candles. Keep your background simple and neutral so the colors in your design really pop. Shoot from a few different angles to capture both the full composition and the finer details of your brushwork, and light the candle briefly to get that shot of the flame glowing through your painted design. It’s a magical effect that photographs beautifully.
Selling and Gifting Hand Painted Candles: Turning a Passion into a Practice
Something that happens to a lot of people who get into this craft: your friends and family see what you’re making, and suddenly everyone wants one. That kind of organic word-of-mouth is often how a small creative side business is born. If you find yourself in that position, it’s worth thinking ahead about how you’d handle taking orders. Figure out which designs you can execute consistently and confidently, and build a small portfolio around two or three signature styles. Specializing actually works in your favor — it’s more sustainable than trying to do everything, and it gives you a recognizable aesthetic that people remember.
Pricing is something a lot of artisans wrestle with at first, and the instinct to undercharge is really common. A solid starting point is to add up your material costs, factor in a reasonable hourly rate for your time, and then add a margin for overhead and profit. Don’t try to compete with mass-produced candles on price — the people coming to you aren’t looking for the cheapest option, they’re specifically looking for something a factory can’t make. Pricing too low actually signals lower value rather than drawing in more buyers. Check what other makers are charging on Etsy or at local craft fairs and use that as a baseline for positioning yourself.
Of course, gifting a hand painted candle to someone you actually know is a different experience entirely from selling one. When you’re making it for a friend or family member, you can get really personal — inside jokes translated into little painted scenes, imagery pulled from memories you share, symbols that only the two of you would understand. That level of specificity is what transforms a hand painted candle from a pretty object into something genuinely moving. It says not just that you made an effort, but that you really know and appreciate the person you’re celebrating.
As your skills grow, you might find yourself wanting to share what you’ve learned — whether that’s through casual sessions with friends, local workshops, or eventually an online course. The candle painting community is a genuinely warm and generous one, with experienced makers freely sharing techniques, advice, and inspiration. Getting plugged into that community through Instagram or Pinterest (both perfect platforms for a visual craft like this) will keep your creativity fresh and connect you with makers whose work will push you to keep experimenting and growing.








What do you think?
It is nice to know your opinion. Leave a comment.