










How To Clean Couch Fabric with Homemade Upholstery Cleaner
Why Homemade Upholstery Cleaner Is Worth Your Time
If you’ve ever stood in the cleaning aisle staring at shelf after shelf of upholstery sprays, trying to figure out which one will actually work without leaving a weird residue or bleaching your fabric, you’re definitely not alone. A lot of commercial cleaners are loaded with harsh chemicals that aren’t great for delicate sofa fabrics — and they’re even less great if you have kids or pets who basically live on that couch. Making your own cleaner at home means you know exactly what’s going onto your furniture.
The cost savings alone make it worth trying. A single bottle of name-brand upholstery cleaner can set you back anywhere from eight to twenty dollars, and a stubborn stain might eat through the whole bottle. The ingredients for a homemade version — dish soap, white vinegar, baking soda, warm water — are things most people already have sitting in their kitchen. You can whip up a fresh batch whenever you need it, which is actually better anyway since you’re not working with something that’s been sitting in a bottle for months slowly separating.
There’s also something genuinely satisfying about tackling a grimy couch with something you made yourself. When the fabric brightens up, the smell clears out, and those mystery stains you’d basically accepted as permanent finally lift — that feels pretty great. This guide covers everything you need, from figuring out your fabric type to applying the cleaner the right way and drying it properly, so your couch comes out actually refreshed rather than just wet.
Understanding Your Couch Fabric Before You Begin
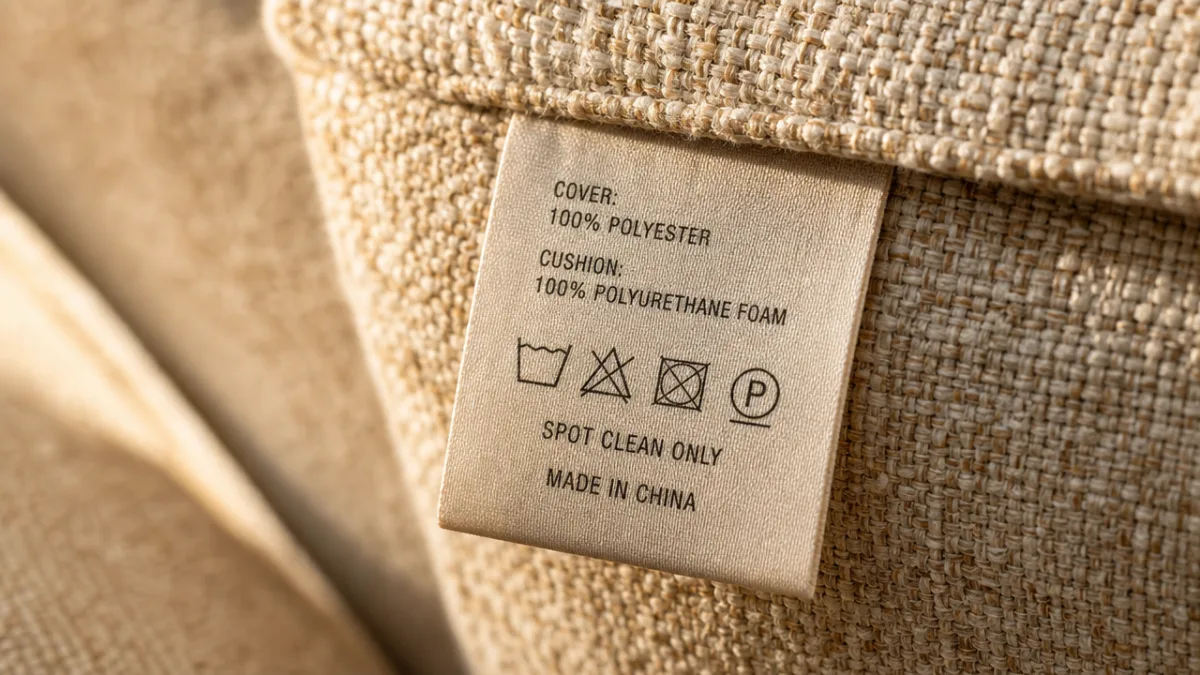
Before you mix anything, the single most important step is figuring out what your couch is actually made of. Upholstery isn’t one-size-fits-all — microfiber, cotton, linen, velvet, polyester blends, and synthetic suede all react very differently to moisture and cleaning products. Using the wrong cleaner on the wrong fabric can cause permanent water stains, color bleeding, shrinkage, or a texture change that no amount of rinsing will fix. Spend five minutes checking the tag before you do anything else.
Most couches made in the last couple of decades have a cleaning code on their tag, usually tucked underneath a cushion or along the bottom hem of the sofa skirt. These codes are a standardized system that upholstery manufacturers use to tell you how to safely clean the fabric. W means water-based cleaners are fine — which is exactly what homemade solutions are. S means solvent-based cleaners only, and water can actually cause damage. W-S means either type works, and X means vacuuming only, no liquids whatsoever.
If your couch has a W or W-S code, you’re good to go. If it says S, you’ll need a dry-cleaning solvent instead of a DIY water-based mix. If it says X, stop and call a professional. And if the tag has faded or disappeared entirely, you can often track down the cleaning code in the manufacturer’s paperwork or by searching the brand and model online. It’s a small step that saves you from a potentially expensive mistake.
The Best Homemade Upholstery Cleaner Recipes
Once you’ve confirmed your fabric is water-safe, it’s time to pick a formula. There’s no single “best” homemade upholstery cleaner because different stains respond to different ingredients. Greasy stains — popcorn butter, skin oils, salad dressing — need a degreasing dish soap to do the heavy lifting. Pet odors or stains that have had time to dry out respond much better to the combination of baking soda and white vinegar. Knowing what you’re dealing with upfront saves you a lot of trial and error.
For a general all-purpose cleaner that handles everyday grime and lighter stains, mix one tablespoon of dish soap, one tablespoon of white vinegar, and two cups of warm water. Stir gently — you don’t want a ton of foam. This is mild enough for regular maintenance but strong enough to lift surface dirt and most everyday stains. The dish soap breaks up oils while the vinegar cuts through residue and kills odors without leaving a strong smell behind once everything dries.
For tougher stains or serious odor issues, a two-step approach works better. Start by sprinkling a generous layer of dry baking soda directly on the problem area and leave it for at least fifteen to twenty minutes — even longer if you’re dealing with something like pet urine. The baking soda pulls out moisture and neutralizes acidic odor compounds. Vacuum it up, then follow with the soap-and-vinegar solution. For stains that have completely dried and bonded to the fabric, you can add about a tablespoon of hydrogen peroxide to your mix for extra stain-lifting power, though you should always spot-test this version first since it can lighten darker fabrics.
Here is a quick-reference summary of the most effective homemade formulas:
- All-purpose maintenance cleaner: 1 tablespoon dish soap + 1 tablespoon white vinegar + 2 cups warm water
- Odor-fighting cleaner: Baking soda dry treatment followed by the all-purpose solution
- Tough stain formula: 1 tablespoon dish soap + 1 tablespoon white vinegar + 1 tablespoon hydrogen peroxide + 2 cups warm water (spot-test first)
- Grease-specific cleaner: 2 tablespoons dish soap + 1 cup warm water, applied directly and blotted immediately
Step-by-Step Cleaning Process
Prep matters just as much as the actual cleaning, and skipping it is one of the most common reasons people end up with a couch that looks worse afterward. Start by pulling off all the cushions and vacuuming every surface thoroughly, including the crevices where crumbs, pet hair, and dust love to hide. Use the upholstery attachment and go over things in multiple directions to really lift embedded debris. If you skip this and apply liquid cleaner over loose dirt, you’re essentially making mud and pushing it into the fibers — not the outcome you’re going for.
Before putting any cleaner on a visible area, do a spot test somewhere hidden — the back of a cushion, the underside of a flap, somewhere that’s never seen. Apply a small amount of your solution, let it sit for five minutes, blot it dry, and look for any color change, watermark, or texture shift. Let that test spot dry completely before you decide it’s safe, because some reactions don’t show up until the moisture is gone. This sixty-second step can save you from a couch-sized disaster.
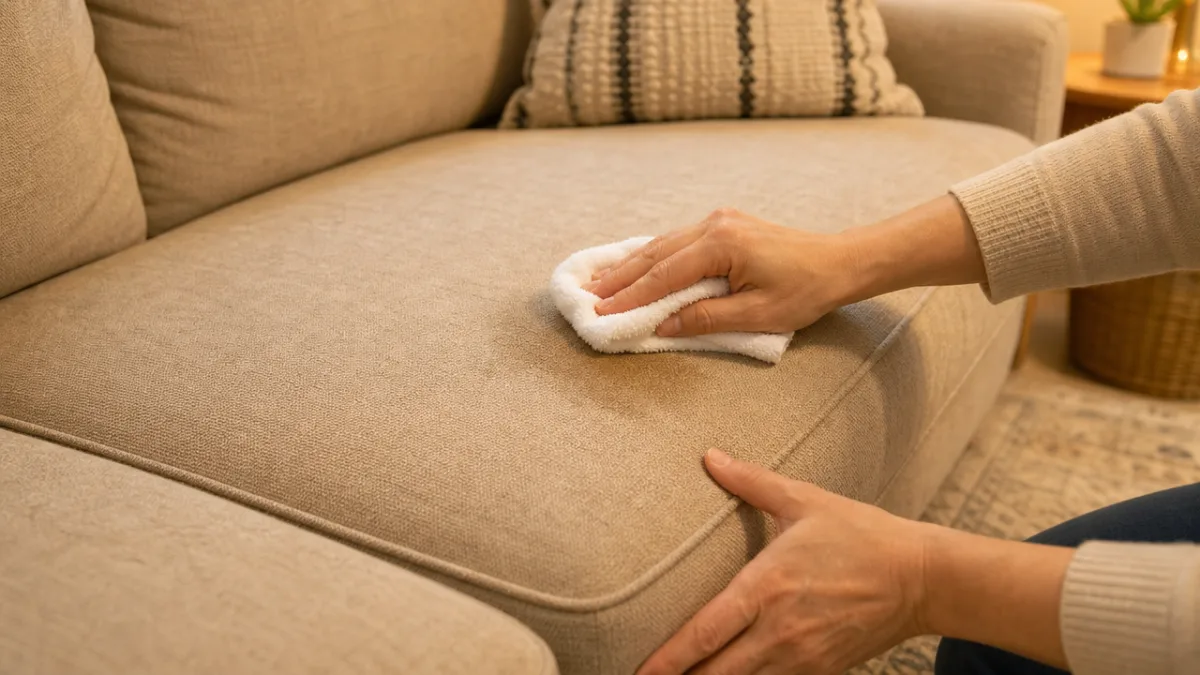
When you’re ready to clean, use a clean white cloth — never a colored one, which can transfer dye to wet fabric — or a soft-bristled brush for more stubborn spots. Work the cleaner into the fabric with gentle circular motions, then switch to blotting rather than scrubbing. Scrubbing pushes the stain deeper and can mess up the fabric’s weave or pile. Always blot from the outside of a stain inward so you don’t spread it, and use a fresh section of cloth each time so you’re not just putting the dirt back.
After cleaning, go over the treated areas with a clean cloth dampened with plain water to rinse out any soap. This part matters — soap left in the fabric acts like a dirt magnet, attracting new grime faster than untreated fabric would. Once you’ve rinsed, blot with a dry towel to soak up as much moisture as you can, then let everything air dry completely before putting cushions back or sitting on it. Open a window, turn on a fan, or use a hairdryer on the lowest cool setting from a distance to speed things up.
Tackling Specific Stains with Targeted Techniques
Different stains have different chemistry, and knowing that makes you a smarter cleaner. Fresh stains are almost always easier to deal with than dried ones because the compounds haven’t had time to bond with the fabric yet. If a spill happens right in front of you, your first move is to get as much of the physical stuff off as possible before it soaks in — use a spoon or the flat edge of a butter knife for solids, and blot liquid with a dry cloth without pressing hard. The urge to rub is strong, but rubbing spreads the stain and drives it deeper.
For wine and dark juice stains, speed is your friend. Blot up as much as you can first, then apply the all-purpose soap-and-vinegar solution and let it sit for three to five minutes before blotting again. Club soda is a great first-response option when you don’t have your cleaner mixed yet — the carbonation helps push the stain up before it sets. For dried wine stains, rewet the area with warm water first to loosen things up, then apply your solution. You may need to go a few rounds on older stains, and patience will get you further than using a stronger cleaner.
Pet stains are a special category because you’re dealing with both the visible stain and the odor underneath. Urine in particular contains uric acid crystals that most standard cleaners can’t fully break down, which is why a “clean” pet stain can seem to come back on humid days — the crystals reactivate when they hit moisture. For pet urine, the baking soda pre-treatment is especially helpful, followed by your solution with a bit of hydrogen peroxide if your fabric can handle it. Enzyme-based cleaners are technically the gold standard for this, but a generous vinegar treatment followed by baking soda left overnight handles most situations pretty well.
Food stains each come with their own quirks. Tomato-based stains are acidic and respond well to dish soap. Chocolate has both fat and protein, so start with a cold-water rinse — hot water sets protein stains — then follow up with the degreasing soap solution. Mustard contains turmeric, which is a notoriously stubborn natural dye, so reach for the hydrogen peroxide formula here and rinse thoroughly. Ink and pen marks are some of the trickiest stains on fabric, and rubbing alcohol on a cotton ball, blotted gently rather than rubbed, often does a better job than water-based solutions for those.
Maintaining Your Couch Between Deep Cleans
A clean couch stays cleaner longer when you build a few simple habits around it. Weekly vacuuming is honestly the single biggest thing you can do to stretch out the time between full cleaning sessions. Dust, skin cells, pet dander, and food crumbs settle into upholstery constantly, and when they mix with natural skin oils and the occasional spill, they form a grimy layer that gets progressively harder to deal with. A quick pass with the upholstery attachment once a week only takes a few minutes and keeps that buildup from taking hold in the first place.
Rotating and flipping cushions every two to four weeks helps spread wear evenly and prevents the permanent flattening and discoloration that tends to develop in everyone’s favorite spots. If your cushions are reversible, flip them; if not, just rotate them so the back becomes the front. This not only keeps things looking more uniformly clean but extends the life of the cushion fill and prevents the fabric from wearing thin or fading in the same spots over and over.
After a deep clean is also a good time to apply a fabric protector spray. These products create a light barrier that makes future spills bead up on the surface rather than immediately soaking in, buying you a few extra seconds to blot instead of watching liquid vanish into the fabric in real time. They’re not miracle workers, and a spill still needs prompt attention, but they help. Reapply after each major clean, since the cleaning process strips the protective layer along with the dirt.
Here is a simple maintenance schedule to keep your couch in consistently good condition:
- Weekly: Vacuum all surfaces using an upholstery attachment, including under and between cushions
- Bi-weekly: Rotate and flip cushions to distribute wear evenly
- Monthly: Spot-treat any stains or discoloration that have appeared, address pet hair buildup with a lint roller or rubber glove
- Every 3–6 months: Perform a full deep clean using your homemade upholstery cleaner on all fabric surfaces
- Annually: Consider a professional cleaning for antique, delicate, or heavily soiled pieces that need extra care

Common Mistakes to Avoid When Cleaning Upholstery
Even people with good intentions can end up making things worse, and the most common mistakes tend to show up across all kinds of households and fabric types. Overwetting is at the top of the list. Upholstery is usually backed with padding that soaks up moisture quickly and releases it slowly, and when that padding stays wet too long, mold and mildew move in. The musty smell that follows is often worse than whatever stain you were trying to fix. Use as little liquid as you need, and always follow up with thorough blotting and good airflow.
Using too much soap is another mistake that creates problems down the road. More soap doesn’t mean better cleaning — it means more residue left behind. Soap residue makes fabric feel stiff when it dries, dulls the way it looks, and attracts new dirt faster than clean fabric would. Stick to the measured amounts in your recipe rather than eyeballing it generously, and always rinse with plain water when you’re done. If the fabric feels tacky or stiff after drying, there’s almost certainly soap still in there — blot it again with a plain damp cloth and let it dry once more.
Skipping the spot test, rushing the drying process, using colored cloths that bleed dye, scrubbing instead of blotting, cleaning against the pile of velvet or microfiber rather than with it — all of these are easy mistakes to make that can stack up into real visible damage. One of the least obvious but most damaging habits is holding a heat source too close when trying to speed up drying, which can permanently set stains, distort synthetic fabrics, or cause shrinkage in natural fiber blends. Keep dryers and hair dryers at a distance on the lowest setting, and when in doubt, just let air circulation and time do the work. It’s slower, but it won’t make things worse.








What do you think?
It is nice to know your opinion. Leave a comment.