










Essential Tips for Pruning Azaleas for Healthy Blooms
Understanding When to Prune Azaleas
If there’s one thing that makes or breaks azalea pruning, it’s timing. These shrubs have a quirk that catches a lot of gardeners off guard — they set next year’s flower buds surprisingly early, usually by midsummer. So if you pick up your pruners too late in the season, you could be snipping off the very buds that would have given you that gorgeous spring show. Getting your head around this rhythm is really the first step to pruning azaleas well.
The sweet spot for pruning is right after your azaleas finish blooming in spring — somewhere between late April and early June for most temperate climates, though it varies by region and variety. At that point, the plant has used up its energy flowering but hasn’t started forming new buds yet. If you can get your pruning done within three to four weeks of the last bloom, the shrub has plenty of time to bounce back and set healthy buds before summer wraps up.
People often wonder if it’s ever okay to prune outside that window. The short answer is: it depends on what you’re doing. Light, cleanup-style pruning to remove dead, diseased, or damaged wood is fine pretty much any time of year. But if you’re doing heavy shaping or rejuvenation work in late summer, fall, or winter, you’re almost certainly going to sacrifice some blooms next spring. If you absolutely have to prune out of season, keep the cuts to a minimum and make peace with the fact that flowering might be a bit sparse the following year.
Choosing the Right Tools for the Job
Before you make a single cut, it really pays to have the right tools ready to go. Dull or wrong-sized tools don’t cut cleanly — they crush and tear plant tissue, leaving messy wounds that heal slowly and can invite fungal problems or pests. A small collection of quality pruning tools is honestly one of the best investments you can make for your garden.
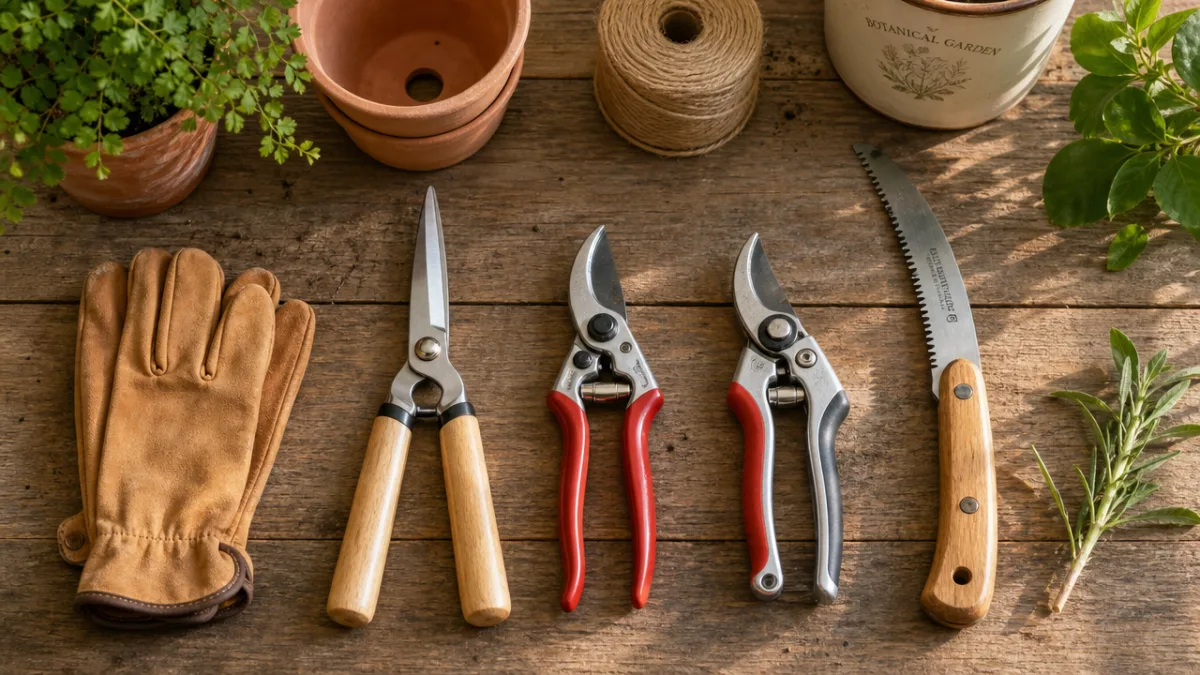
For most azalea work, a good pair of sharp bypass pruners will be your go-to tool. Bypass pruners work like scissors, giving you a clean, precise cut — much better than anvil-style pruners, which press straight down and tend to crush stems. For thicker branches, say anything over about three-quarters of an inch in diameter, a pair of loppers gives you the extra leverage to cut cleanly without wrecking your wrists.
One step a lot of home gardeners skip entirely is sanitation, and it really matters. Pruning tools can spread fungal spores, bacteria, and viruses from plant to plant faster than you might think. Before you start on any shrub, wipe your blades with diluted bleach (one part bleach to nine parts water) or isopropyl alcohol at 70% or higher. Do it again any time you move from a sickly plant to a healthy one, and once more when you’re done for the day before putting your tools away.
- Sharp bypass hand pruners for stems up to half an inch thick
- Long-handled loppers for branches between half an inch and one inch in diameter
- A pruning saw for heavy rejuvenation cuts on mature, overgrown shrubs
- Isopropyl alcohol or diluted bleach solution for blade sanitation
- Gardening gloves to protect your hands from scratches and irritants
How to Deadhead and Shape Azaleas After Bloom
Deadheading — removing the spent flower heads — is the mildest form of azalea pruning, and the payoff is bigger than you might expect. Once flowers fade and start browning, the plant shifts its energy toward making seeds. If you snap those spent blooms off before seed pods form, that energy gets redirected toward new growth and bud development instead, which sets you up for a better show next spring. It’s a small task that consistently delivers great results.
To deadhead, just pinch the base of a spent flower cluster between your thumb and finger and give it a gentle twist to snap it free — or use your bypass pruners to clip it just above the first set of healthy leaves. The key thing to watch out for is the small, swelling growth buds already forming just below each spent flower. Those are next year’s blooms in embryo, and they’re easy to knock off or nick if you’re not paying attention. Work your way around the shrub methodically, branch by branch, from the outside in.
Shaping takes things a step further by addressing the overall look and structure of the plant. Azaleas naturally grow in a soft, rounded, layered form, and it’s usually best to work with that natural tendency rather than fight it. Step back often while you’re working — what looks fine up close can look lopsided from a few feet away. Take out any branches that cut through the center of the shrub, since those block airflow and shade out the interior growth. You’re aiming for a shape that’s a little wider at the base than the top, which helps light reach every part of the plant evenly.
Rejuvenation Pruning for Overgrown Azaleas
If you’ve taken over a garden with azaleas that have gotten leggy, bloom poorly, and look more like a tangled thicket than a flowering shrub, rejuvenation pruning might be exactly what’s needed. This means cutting the plant back quite hard — sometimes to within twelve to eighteen inches of the ground — to kick off a flush of vigorous new growth from the base. It sounds drastic, and honestly it can feel alarming to cut something that big down so far, but azaleas are tougher than they look. Most well-established plants bounce back beautifully with a little post-pruning care.
There are two ways to go about it. The first is the all-at-once approach: you make all your major cuts in one session, ideally in early spring just as new growth is starting to emerge. You’ll sacrifice a year or two of blooms, but the transformation happens faster. The second option is a gradual three-year approach where you remove about one-third of the oldest, woodiest canes each year. It’s gentler on the plant, and you’ll still get some flowers along the way — it just takes longer to fully reshape the shrub.
Whichever route you take, what happens after you prune is just as important as the pruning itself. Give the plant a boost with a balanced, slow-release fertilizer made for acid-loving plants soon after you’re done. Water deeply and regularly throughout the growing season, especially during dry stretches — a plant that’s just been heavily pruned has less canopy to balance against its root system, so it’s more vulnerable to drought than usual. A two-to-three-inch layer of pine bark or pine straw mulch over the root zone does a lot of good too, helping lock in moisture, even out soil temperature, and add a gentle trickle of acidity as it breaks down.
- Identify and remove the oldest, thickest, and most unproductive canes first.
- Cut each selected cane back to a healthy lateral branch or to within twelve to eighteen inches of the ground.
- Step back after each cut to assess the overall shape before proceeding.
- Remove any crossing, rubbing, or inward-growing branches that compromise structure.
- Apply mulch and fertilizer, then water thoroughly to support recovery.
Common Pruning Mistakes and How to Avoid Them
Even seasoned gardeners slip up with azaleas sometimes, and a lot of the most common mistakes are easy to make without realizing it. Pruning at the wrong time is probably the biggest one, and as we covered earlier, it directly translates to fewer or no flowers the following spring. It’s really tempting to tidy things up in late summer or fall when the shrubs look a little scruffy after a long growing season — but that impulse almost always leads to a disappointing spring.
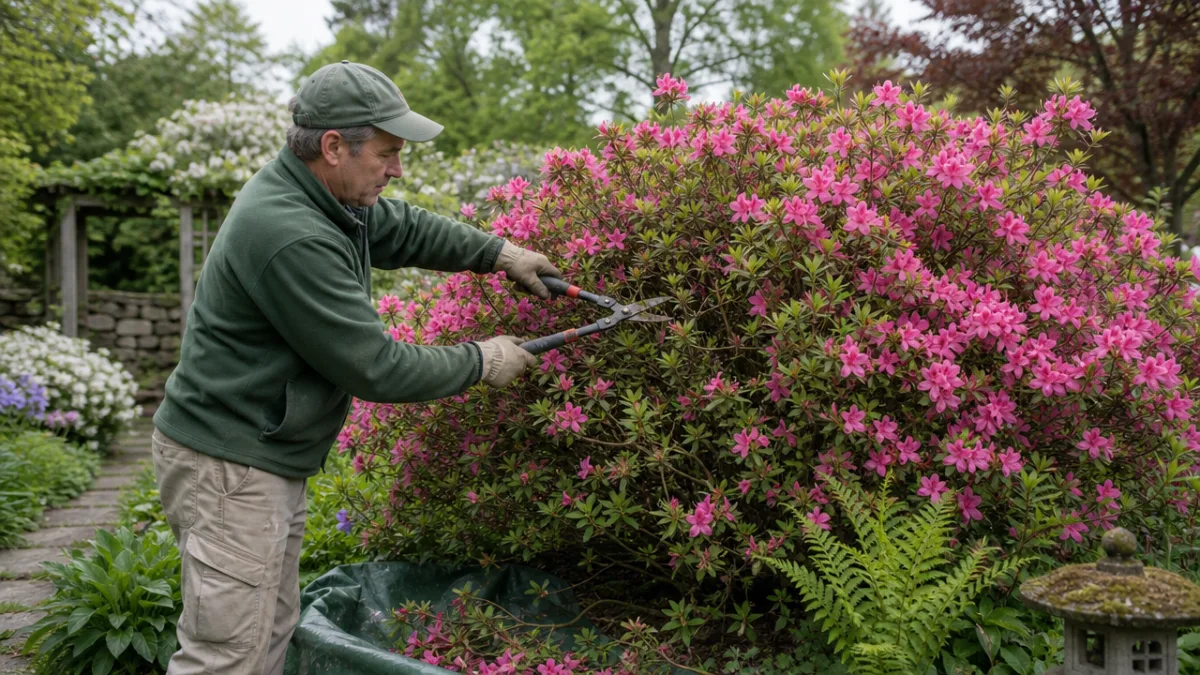
Shearing is another mistake that causes a lot of long-term damage. Running hedge shears or a power trimmer across the surface of an azalea cuts every stem at the same depth, which creates a dense shell of outer foliage while completely cutting off light to the inside of the plant. Over the years, the interior becomes a maze of bare, woody stems where pests and disease love to hide, while only that thin outer layer is doing anything useful. Azaleas should always be pruned with hand tools, making individual cuts at natural branch junctions — never sheared across the top like a box hedge.
Taking off too much at once is another thing azaleas handle badly. A good rule of thumb is to never remove more than one-third of the plant’s total foliage in a single session. Cut more than that and you seriously undermine the plant’s ability to photosynthesize, which can push it into a prolonged slump that’s slow to recover from. If a plant genuinely needs more reduction than that, spread it out over a few seasons using the gradual rejuvenation method rather than trying to fix everything at once.
Fertilizing and Caring for Azaleas After Pruning
Pruning puts the plant to work on two fronts at once — healing its wounds and pushing out new growth — and both of those things take energy. Giving your azaleas the right nutritional support after pruning helps them recover faster, grow stronger, and build up what they need for a great flower show next season. That said, fertilizing at the wrong time or with the wrong product can backfire, so it’s worth knowing a few basics before you start.
Azaleas like acidic soil, ideally somewhere between a pH of 4.5 and 6.0. Fertilizers made specifically for azaleas, rhododendrons, and other acid-loving plants are formulated to deliver nutrients in a form the plant can actually use at those pH levels, and many include supplemental sulfur to help keep soil acidity where it needs to be. Apply a slow-release granular fertilizer shortly after your spring pruning, sticking closely to the recommended rate on the package. It’s easy to over-do it — especially with high-nitrogen products — which pushes too much leafy growth, cuts into bud production, and can even burn roots if applied too heavily.
Good aftercare goes beyond just fertilizing. Azaleas have shallow root systems with feeder roots sitting very close to the surface, which makes them vulnerable to both dry spells and waterlogged soil. During dry periods, water deeply once or twice a week and let it soak in slowly rather than drenching quickly and letting it run off. Keep an eye out for common problems like lace bug damage (which gives leaves a pale, stippled, silvery look), petal blight, or root rot — all of these are much easier to deal with when you catch them early.
- Apply a slow-release, acid-formulated fertilizer in spring immediately after pruning.
- Avoid high-nitrogen fertilizers that promote leafy growth over bud formation.
- Maintain a two-to-three-inch layer of organic mulch over the root zone year-round.
- Water deeply and consistently, especially during the first growing season after heavy pruning.
- Test soil pH every two to three years and amend with sulfur if it rises above 6.0.
- Monitor leaves regularly for early signs of pest damage or fungal disease.

Building a Long-Term Pruning Routine for Lasting Beauty
The most stunning azalea gardens didn’t get that way from one big pruning effort — they got there through small, consistent habits repeated year after year. When you start thinking of azalea care as an ongoing relationship rather than an occasional chore, the work actually gets easier over time, and the results get more rewarding with every season. A little time and attention each spring, done faithfully, keeps plants healthy, well-shaped, and capable of putting on the kind of flower show that makes azaleas so beloved in the first place.
It helps to put together a simple annual calendar for your azalea care rather than relying on memory. Note when each of your plants blooms — different varieties peak at different times — and pencil in your pruning session for three to four weeks after the last flowers fade on each one. Add reminders to fertilize, top up your mulch, and check soil pH. Over time, that calendar also becomes a genuinely useful record of how your plants respond to different care approaches, which helps you dial in what works best in your specific garden.
And finally, don’t underestimate what you can learn just by walking through your garden regularly and paying close attention. Make a habit of checking in each week with fresh eyes — notice new growth patterns, changes in leaf color, any unusual spots or discoloration, how vigorous each plant looks overall. Azaleas are pretty good at signaling when something’s off, and they do it through their foliage and growth habits well before things get serious. A gardener who’s paying attention will almost always spot problems early enough to handle them without much fuss. That kind of steady, attentive care — backed up by timely and correct pruning — really is the most reliable way to keep your azaleas blooming beautifully year after year.








What do you think?
It is nice to know your opinion. Leave a comment.