










DIY Concrete Ladybugs: Transform Your Garden with Adorable Handmade Decor
There’s something genuinely magical about walking through a garden that has a few personal, handmade touches scattered through it. And right now, concrete ladybugs might just be my favorite example of that. They’ve become one of the most popular weekend DIY projects going around, and honestly, it’s easy to see why — they’re charming, they’re achievable for pretty much any skill level, and they give your flower beds, pathways, and potted arrangements that storybook quality that’s hard to get any other way.
Unlike anything you’d pick up at a garden center, handmade concrete ladybugs have real personality. Each one comes out a little different — subtle imperfections, slightly unique shapes — and that’s actually the whole point. Whether you line them along a border, tuck them in among your hostas, or perch one on the edge of a birdbath, they catch the eye immediately and pretty much guarantee a smile from anyone who wanders through your yard.
This guide walks you through the whole process from start to finish — gathering supplies, mixing and molding the concrete, painting, sealing, and finally finding the perfect spots for your finished pieces. Even if you’ve never touched concrete before, I promise this project is more forgiving than it looks. By the time you’re done, you’ll have a little collection of garden companions built to weather the seasons for years to come.
Gathering Your Materials and Tools
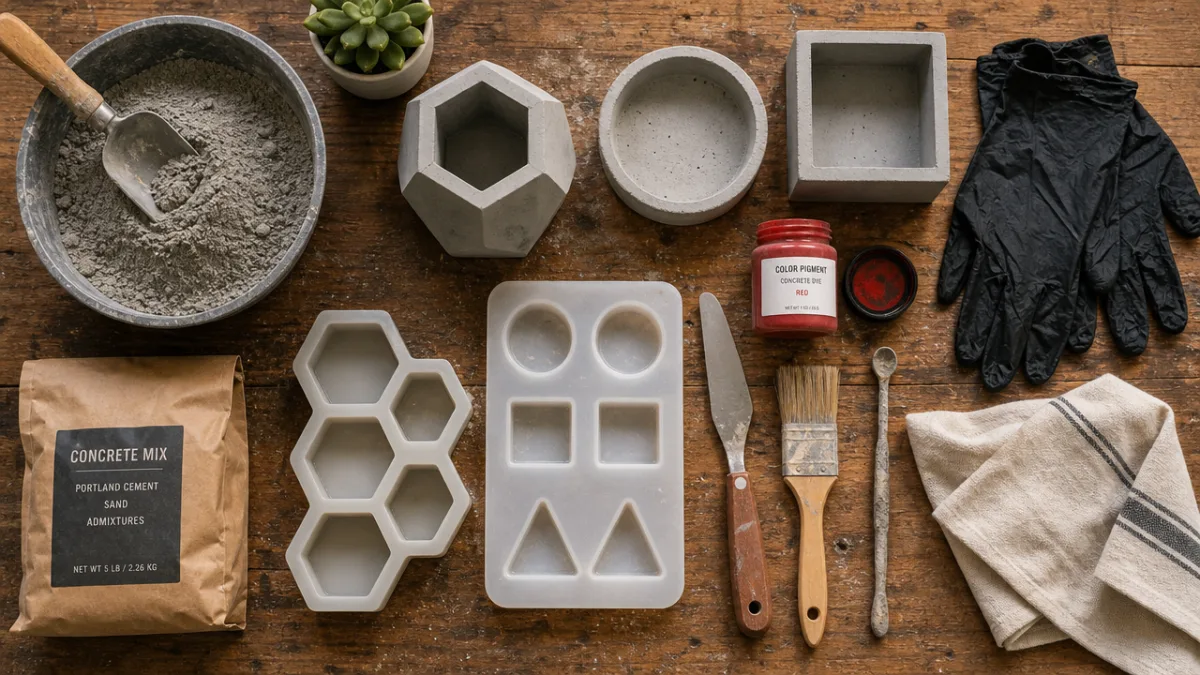
Getting everything together before you start makes the whole process so much smoother. The main ingredient is a bag of concrete mix, which you can grab at any hardware store. Go for a fine-textured mix rather than one with chunky aggregate stones — the smoother the mix, the better it captures that nice rounded ladybug shape, and you’ll spend a lot less time sanding afterward.
For molds, you’ve got a few good options depending on how big you want your ladybugs to be. Rubber balls cut in half are the classic choice and give you that perfect dome shape. Old plastic bowls, balloon molds, or even large plastic Easter eggs all work well too. You’ll also want a mixing container, a trowel or sturdy spoon, disposable gloves, and a drop cloth or tarp to keep your workspace from turning into a mess.
For painting and finishing, pick up some exterior-grade acrylic paint in red and black, plus a clear outdoor sealer to protect everything from rain, frost, and sun. Small foam brushes handle the base coats nicely, while a fine-tipped artist brush gives you the control you need for dots and dividing lines. Keeping a pencil or chalk nearby to sketch your design before you commit to paint is one of those small habits that makes a real difference.
- One bag of fine-textured concrete mix (the smaller repair-sized bags are perfect for small batches and easy to find at hardware stores)
- Rubber ball halves or rounded bowl molds in a few different sizes so you end up with some variety in the finished pieces
- Disposable gloves, safety glasses, and a dust mask for handling the dry concrete powder safely
- Exterior acrylic paint in red, black, and white for the body, spots, head, and eye details
- Outdoor-rated clear sealer in a matte or satin finish to protect the paint and concrete from the elements
- Smooth river pebbles or glass beads if you’d like to press decorative elements into the wet concrete
Mixing and Molding the Concrete
Mixing concrete sounds a lot more intimidating than it actually is. Pour your dry mix into a clean container, then add water slowly — and I mean slowly — stirring as you go. You’re aiming for something that looks like thick oatmeal or peanut butter: firm enough to hold its shape when you press it, but still pliable enough to smooth out without cracking. Adding too much water is the classic beginner mistake, and it results in concrete that’s weak and prone to cracking once it cures, so go slow and keep checking the consistency.
Once the mix looks right, it’s time to fill your molds. If you’re using balloon molds, fill the balloon with wet concrete to get that smooth rounded shell. For bowl or plastic molds, press the mix in firmly and tap the mold gently on your work surface to knock out any air pockets. Whatever mold you’re using, try to keep the underside as level as possible — a flat bottom makes all the difference when it comes to stability in the garden.
Leave the concrete in the molds for at least 24 to 48 hours before you try to remove them. Concrete hardens through a chemical process called hydration, and pulling the pieces out too early means you’ll end up with something fragile or crumbly. Once demolded, give the shapes another 24 hours to cure in a shaded spot. Try to keep them out of direct harsh sunlight during this period, since rapid drying can cause surface cracks that are genuinely tricky to fix without affecting how the final piece looks.
Tips for Achieving Smooth, Round Shapes
If your demolded pieces have rough patches or bumps, wet sanding with fine-grit sandpaper smooths them out beautifully. Just dip the sandpaper in water and work in gentle circular motions, rinsing the surface often. It’s a step that makes a surprisingly big difference — smooth concrete takes paint so much more evenly, and the finished piece just looks more intentional and polished. Don’t rush it; the extra time is absolutely worth it.
While the concrete is still wet, you can press smooth pebbles, glass beads, or broken tile pieces into the surface for built-in texture or detail. These can double as the black spots on your ladybug or just add some visual interest around the edges. Press them in firmly enough that they won’t pop out once everything hardens, and keep them far enough from the edge that they don’t weaken the shell.
If you want a really stable flat base but don’t have a flat-bottomed mold handy, pour a small separate slab of concrete, let both pieces cure fully, then bond them together with outdoor-rated concrete adhesive. It gives you the most control over the final height and lets you angle the ladybug body slightly upward, which looks especially nice when it’s nestled among low ground-cover plants.
Painting Your Concrete Ladybugs
This is the part where things really start to come alive — and for a lot of crafters, it’s the most fun stage of the whole project. Start with a coat of exterior primer on the fully cured concrete. It’s not strictly required, but it helps the paint bond properly and stops the porous surface from drinking up color unevenly. Let it dry completely before you go in with your actual paint colors.
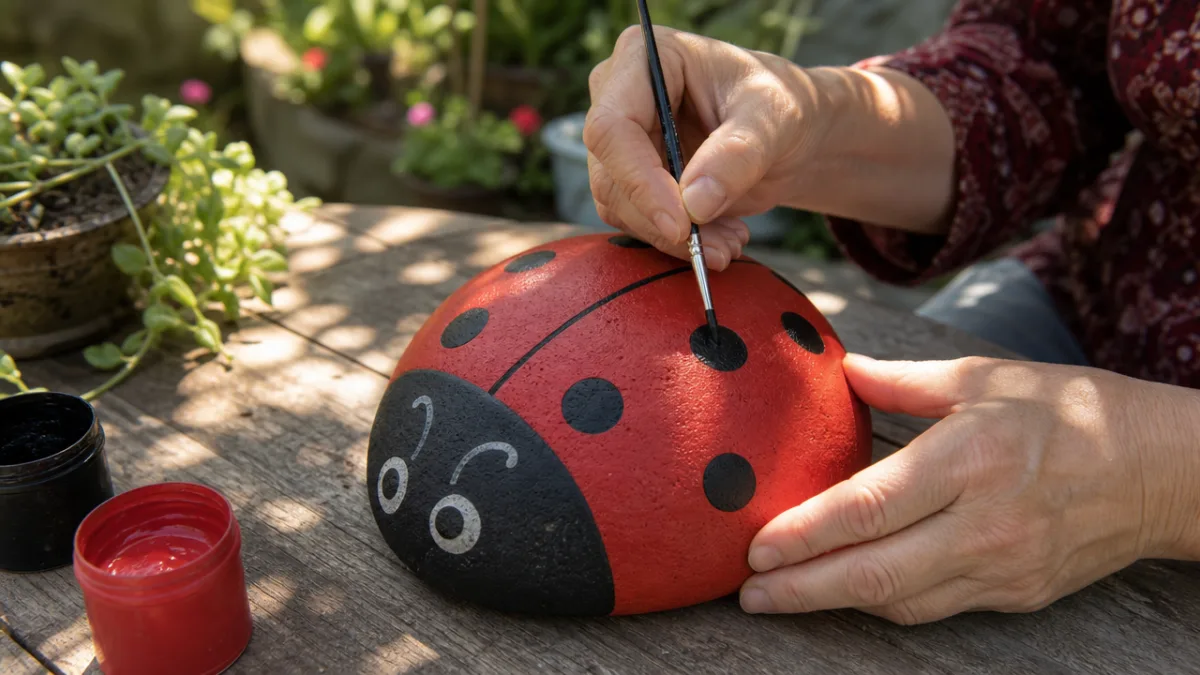
Use a foam brush to apply the classic bright red to the main dome of the body — foam distributes paint evenly without leaving brush marks. You’ll probably need two or three coats for full, vibrant coverage since concrete is quite absorbent, so be patient and let each coat dry thoroughly before adding the next. While you wait, paint your head section in solid black. You can either make this a separate piece to attach later or simply paint the front third of your dome black if you prefer keeping everything in one piece.
Once the base colors are fully dry, switch to your fine artist brush for the signature details: the central line running from head to tail, and the circular spots on each side. Classic ladybugs have somewhere between two and seven spots per side, so you’ve got creative room to play here. Adding tiny white dots to the eyes makes the whole piece feel animated and full of life. Step back every now and then as you work to check your symmetry — it’s much easier to fix while the paint is still wet.
Creative Variations Beyond the Classic Design
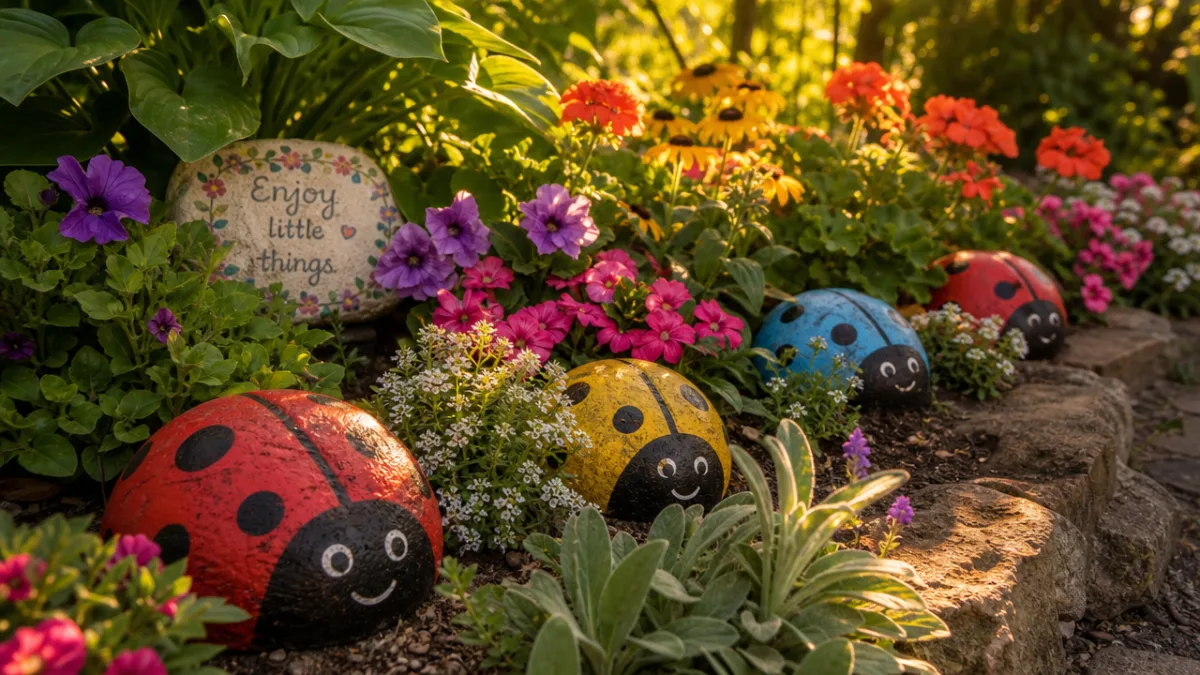
The traditional red and black is beloved for good reason, but there’s absolutely no rule that says you have to stick to nature’s color scheme. Soft lavender with white spots, sunny yellow with orange, deep teal with gold detailing — all of these work beautifully and give your garden a more eclectic, curated feel. Mix a few different colorways together in a cluster and the effect is genuinely lovely rather than uniform.
Paint pens or fine permanent markers are great for adding those extra little details that take things up a notch — delicate antenna lines from the head, heart-shaped spots instead of circles, or tiny floral designs worked into the shell. They require a steady hand and a bit of patience, but they push your concrete ladybugs from simple garden ornaments into something that feels more like folk art and really reflects your own sense of style.
For a more rustic, aged look that sits naturally in wilder garden settings, try dry-brushing after your base coats are dry. Dip a stiff brush into a small amount of white or cream paint, wipe most of it off on a paper towel, then drag the nearly dry brush lightly across the raised surfaces. The result is a weathered, vintage quality that makes brand-new pieces look like they’ve been charming your garden for years.
Sealing and Weatherproofing for Long-Lasting Results
Sealing is one of the most important steps in this whole project, and it’s also one of the easiest to skip when you’re excited about your freshly painted pieces. Please don’t skip it. Concrete is naturally porous, which means it soaks up water — and in freezing temperatures, that water expands and can crack or spall the material over time. Paint without a sealer will fade, chip, and peel after just one season outdoors. A good sealer is really what separates a garden ornament that lasts twenty years from one that looks rough after twelve months.
Look for a clear acrylic sealer rated for outdoor use, ideally with UV protection built in to keep those painted colors from fading in the sun. Apply it in thin, even coats with a foam brush or a light spray, following the manufacturer’s guidelines on drying time between coats. Two to three coats is the standard recommendation for anything that’ll live outside year-round. Pay extra attention to any spots where you’ve glued two concrete pieces together — those joints are the most vulnerable to water getting in.
Plan to reseal every year or two. Before you do, give the piece a gentle scrub with a soft brush and mild soap to clear away any dirt, moss, or algae that’s built up, then let it dry completely before applying fresh coats. It’s a small time investment, but it keeps your ladybugs looking bright and fresh for many more years than they would otherwise.
- Wipe the fully cured and painted surface with a dry cloth to remove any dust or debris before you start sealing
- Apply the first coat of outdoor-rated clear acrylic sealer thinly and evenly, making sure to cover all surfaces including the underside
- Let the first coat dry completely according to the product instructions, usually around one to two hours
- Apply a second coat and let that dry fully before you handle the piece or bring it outside
- For areas with harsh winters, go ahead and apply a third coat once the second is thoroughly dry
- Give everything a full 24-hour cure period after the final coat before placing your ladybug in the garden
Displaying Your Concrete Ladybugs in the Garden
This is the part that feels like the real payoff — finding just the right spots for your finished ladybugs. Because they’re compact and relatively lightweight compared to larger concrete statuary, you’ve got a lot of flexibility. They look wonderful tucked at the base of flowering perennials like coneflowers, black-eyed Susans, and daylilies, where their rounded shapes echo the blooms and their colors play off whatever’s growing nearby.
Pathways and stepping stone borders are another natural home for them. Placed at intervals along a garden path, they bring a sense of whimsy and little moments of discovery that both kids and adults love. You can alternate them with smooth river stones or group them in casual clusters of two or three. A small grouping near a garden gate or at the edge of a porch step creates a genuinely welcoming focal point — something that catches the eye before visitors even reach the door.
Container gardens are another great option. Tuck a ladybug among the trailing stems of a planter full of petunias, sweet potato vine, and verbena and it adds an element of surprise that makes an otherwise straightforward container feel like it has some personality. You can also balance a small one on the rim of a terracotta pot or position one on top of a garden boulder so it gets a bit of prominence rather than getting swallowed up by the foliage.
Creating a Themed Garden Display
If you really get into this project and find yourself making quite a few over a few crafting sessions, consider turning them into a proper garden vignette. Arrange a family grouping in graduated sizes — from a large adult-scale piece down to a tiny baby no bigger than a golf ball — nestled together beneath a flowering shrub. That kind of narrative arrangement transforms your ornaments from simple decorations into a small tableau that tells a story and rewards a closer look.
You can build on the theme by adding other handmade concrete creatures alongside your ladybugs — toads, snails, and mushrooms all follow similar construction techniques and fit the aesthetic perfectly. A miniature concrete garden scene tucked into a corner of the yard or filling a dedicated raised planter can become a real conversation piece, and for a lot of crafters, this project turns out to be the gateway to an entire hobby built around concrete garden art.
And if you end up with more ladybugs than your own garden can handle, they make truly wonderful gifts. A single large ladybug wrapped in kraft paper and raffia ribbon is a heartfelt housewarming gift, birthday present, or thank-you for any garden-loving person in your life. Because you made it yourself, the recipient knows they’re holding something that can’t be replicated by any amount of online shopping or browsing garden centers. That’s really the heart of why DIY garden decor stays so popular — and why it feels so good both to make and to give away.








What do you think?
It is nice to know your opinion. Leave a comment.