










DIY Guide: How to Easily Cut Corks for Creative Recycling Projects
Introduction: Why Corks Are a Crafter’s Best Friend
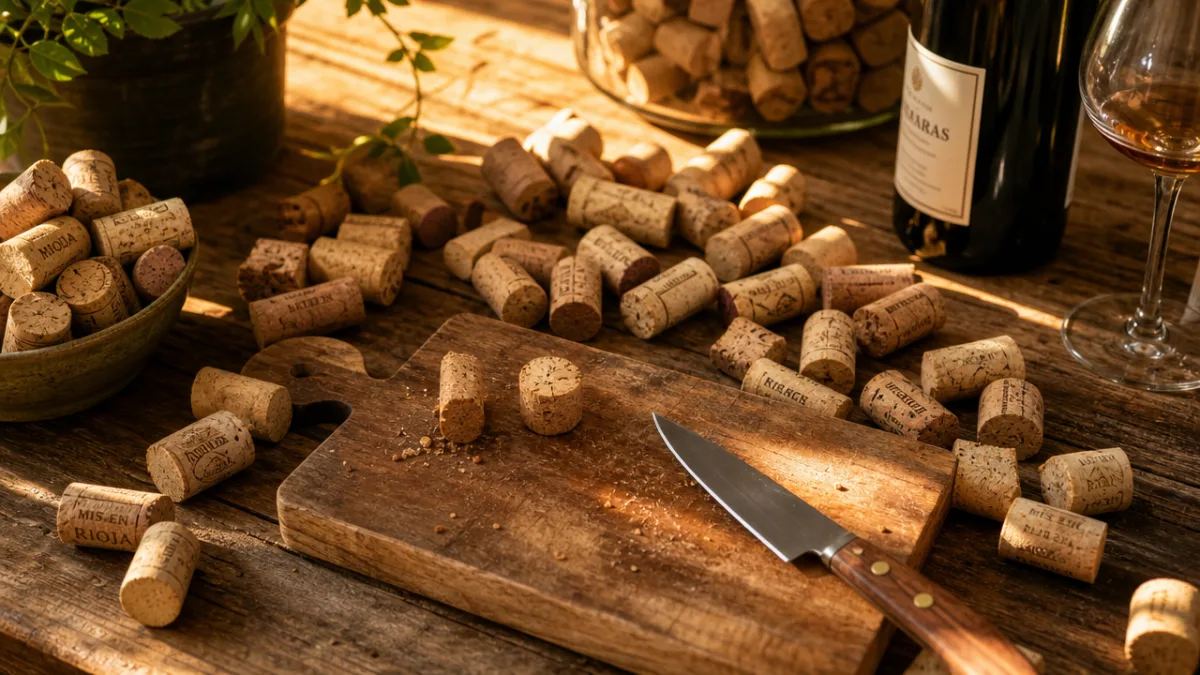
Wine corks are one of those humble household items that most people toss into the recycling bin without a second thought, but crafters and DIY enthusiasts have long recognized their remarkable potential. These small, cylindrical pieces of natural or synthetic material are surprisingly versatile, durable, and easy to work with once you understand the basics. Whether you’ve been saving corks from dinner parties, collecting them from restaurants, or sourcing them in bulk online, you’re sitting on a treasure trove of crafting material that costs virtually nothing.
The art of cutting corks opens up a world of creative possibilities that goes far beyond simple decoration. From functional items like trivets, coasters, and bulletin boards to artistic endeavors like mosaic tiles, stamps, and jewelry components, properly cut corks serve as the foundational building blocks of countless projects. Understanding how to cut them cleanly and safely transforms an awkward, rounded object into precisely shaped pieces that can be assembled into something genuinely beautiful and useful for your home.
What makes corks particularly appealing for the environmentally conscious crafter is their biodegradability and the simple joy of repurposing something that would otherwise go to waste. Natural cork is harvested from the bark of cork oak trees in a process that doesn’t harm the tree, and reusing the corks themselves extends the lifecycle of this already sustainable material. By learning to cut and shape corks effectively, you’re participating in a small but meaningful act of creative recycling that reflects a broader commitment to reducing waste in your daily life.
Understanding Cork Types and Their Cutting Properties
Before you pick up a knife, it’s worth taking a moment to understand that not all corks are created equal, and the type of cork you’re working with will significantly influence your cutting approach and the tools you choose. Natural corks are harvested from cork oak bark and have a distinctive texture with visible pores and grain patterns. They tend to crumble slightly at the edges when cut, especially if they’re dry, but they hold their shape beautifully once sliced cleanly and are ideal for most craft applications because they accept paint and adhesive so readily.
Synthetic corks, which are increasingly common in wine bottles as manufacturers seek cheaper and more consistent alternatives, are made from plastic compounds and behave quite differently under a blade. They cut more cleanly than natural cork with less crumbling, but they don’t absorb paint or stain in the same organic way, and some crafters find them less aesthetically pleasing for decorative work. Agglomerated corks, which are made from compressed cork granules bonded together, fall somewhere between the two and can be slightly more brittle, requiring a steady hand and a very sharp blade to prevent them from splintering along their internal seams.
The age and moisture content of your corks also matter more than most beginners realize. Fresh corks, recently removed from a bottle, still retain some of the wine’s moisture and are noticeably easier to cut without crumbling. Older, drier corks that have been sitting in a jar for months or years will be more prone to breaking and crumbling at the edges. A useful trick many experienced crafters swear by is soaking dry corks in water for a few hours before cutting, which rehydrates the cellular structure and allows the blade to pass through more smoothly, resulting in cleaner, more precise cuts with far less frustration.
Essential Tools for Cutting Corks Safely and Precisely
The single most important factor in successful cork cutting is the sharpness of your blade. A dull knife will compress and tear the cork’s cellular structure rather than slicing cleanly through it, leaving you with ragged, uneven edges that are difficult to work with and aesthetically disappointing. Invest in a quality utility knife or craft knife with replaceable blades and change the blade frequently — far more often than you think necessary. Many experienced cork crafters change blades after every dozen or so cuts to ensure consistently clean results throughout their projects.
Beyond the basic utility knife, several other tools have proven particularly effective for cork cutting depending on the type of cut you need to make. A serrated bread knife works surprisingly well for cutting corks in half lengthwise, providing a sawing motion that distributes pressure more evenly than a single straight push. For very thin, uniform slices — which are essential for mosaic and tile-style projects — a sharp chef’s knife or a mandoline slicer fitted with appropriate guards can produce remarkably consistent results. Some dedicated cork crafters even invest in a miter box or a simple jig built from scrap wood to hold the cork steady while they cut, which dramatically improves both precision and safety.
Safety equipment is not optional when working with sharp blades and a material that can shift unexpectedly under pressure. Always use a proper cutting mat beneath your work to protect your table surface and provide a stable, non-slip base. A pair of cut-resistant gloves, available inexpensively at most hardware stores, offers meaningful protection for your fingers during those inevitable moments when a cork shifts or a blade slips. Keep your non-cutting hand positioned well behind the blade, use slow and deliberate strokes, and never rush a cut. The few extra seconds of care you invest in each slice will save you from accidents and wasted materials.
Recommended Tools at a Glance
- Sharp utility knife or craft knife with replaceable blades — the essential workhorse for most cutting tasks
- Serrated bread knife — excellent for lengthwise cuts and halving corks cleanly without compression
- Chef’s knife — ideal for producing thin, uniform cross-section slices for mosaic and tile projects
- Cutting mat — protects surfaces and provides a stable, non-slip cutting base that prevents dangerous cork movement
- Cork-holding jig or miter box — ensures straight, consistent cuts, especially useful for batch projects
- Cut-resistant gloves — essential protective gear that allows you to work confidently without fear of slips
- Ruler or measuring guide — helps mark consistent slice thicknesses before cutting for uniform pieces
Step-by-Step Techniques for Different Types of Cork Cuts
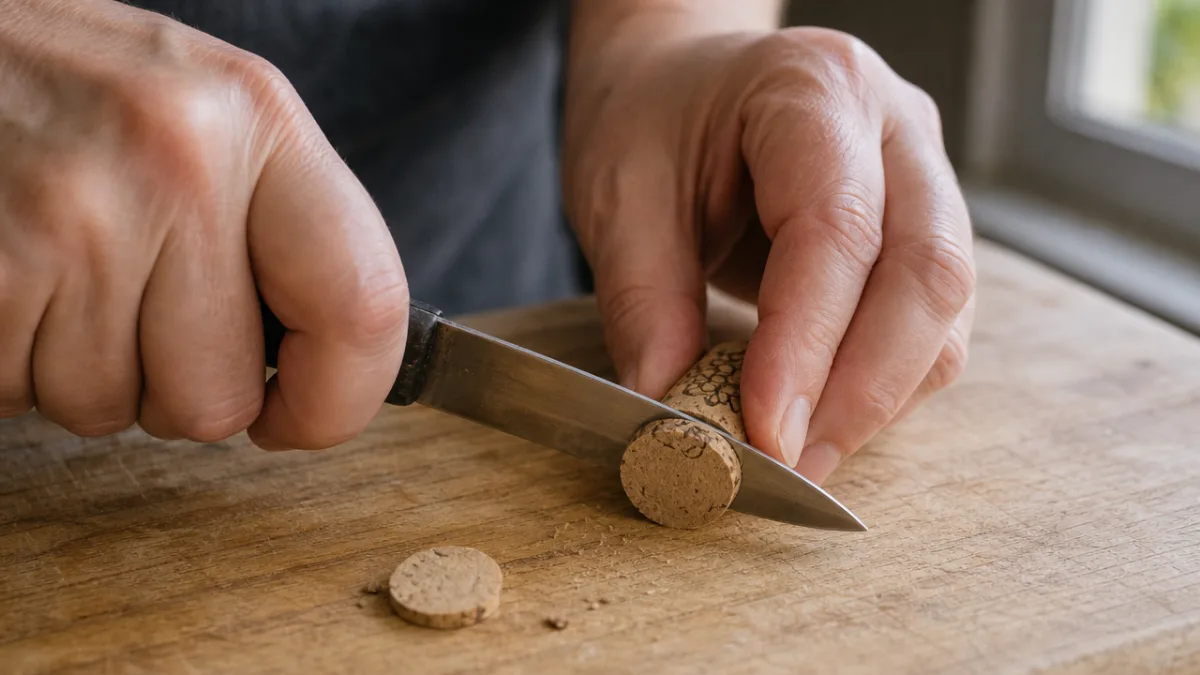
The most basic and commonly needed cork cut is the simple cross-section slice, which produces the circular discs you see used in bulletin boards, coasters, and tile projects. To achieve this cut cleanly, place the cork horizontally on your cutting mat and use a pencil or felt-tip marker to draw a line around the circumference at your desired thickness before you begin. This guide line gives your blade a target and helps you maintain consistency across multiple slices. Press down gently but firmly with your non-dominant hand behind the marked line, position your blade on the mark, and apply steady downward pressure using a single, smooth slicing motion rather than a sawing back-and-forth movement.
Lengthwise cuts, which split the cork into halves or quarters along its long axis, require a slightly different technique and are often best achieved with a serrated knife. Place the cork on your cutting mat with the flat end facing you, and if possible, use a jig or fold a piece of cardboard into a channel shape to cradle the cork and prevent it from rolling during the cut. Position your blade along the top center of the cork and use a gentle sawing motion, letting the serrations do the work rather than forcing the blade through with brute pressure. Lengthwise halves are the starting point for dozens of projects, from miniature planters and candle holders to drawer organization inserts and decorative borders on picture frames.
For more advanced cuts like angled slices or decorative shapes, a razor blade or exacto knife gives you the finest control and is the preferred tool of crafters who create cork stamps for printmaking. To make a stamp, cut a cross-section disc about half an inch thick, then use your exacto knife to carve a simple relief design into the flat face of the disc. Geometric shapes, letters, and simple botanical motifs all work beautifully and can be inked with a stamp pad to create charming custom wrapping paper, card designs, or fabric prints. The key is to work slowly, removing small amounts of material at a time, and to keep your design bold and simple for the cleanest printed results.
Basic Cork Cutting Steps
- Soak dry or older corks in warm water for two to four hours to restore moisture and improve cutting ease
- Mark your desired cut lines with a pencil or fine marker before picking up any blade
- Set up your cutting mat on a stable, flat surface at a comfortable working height
- Put on your cut-resistant gloves and ensure your blade is sharp — replace it if there’s any doubt
- Secure the cork using your non-dominant hand positioned safely behind the cut line or use a jig
- Apply steady, even pressure with a single smooth slicing motion, avoiding sawing for straight cuts
- Inspect each cut piece and discard any that have crumbled edges if clean edges are critical to your project
Creative Projects You Can Make With Cut Corks
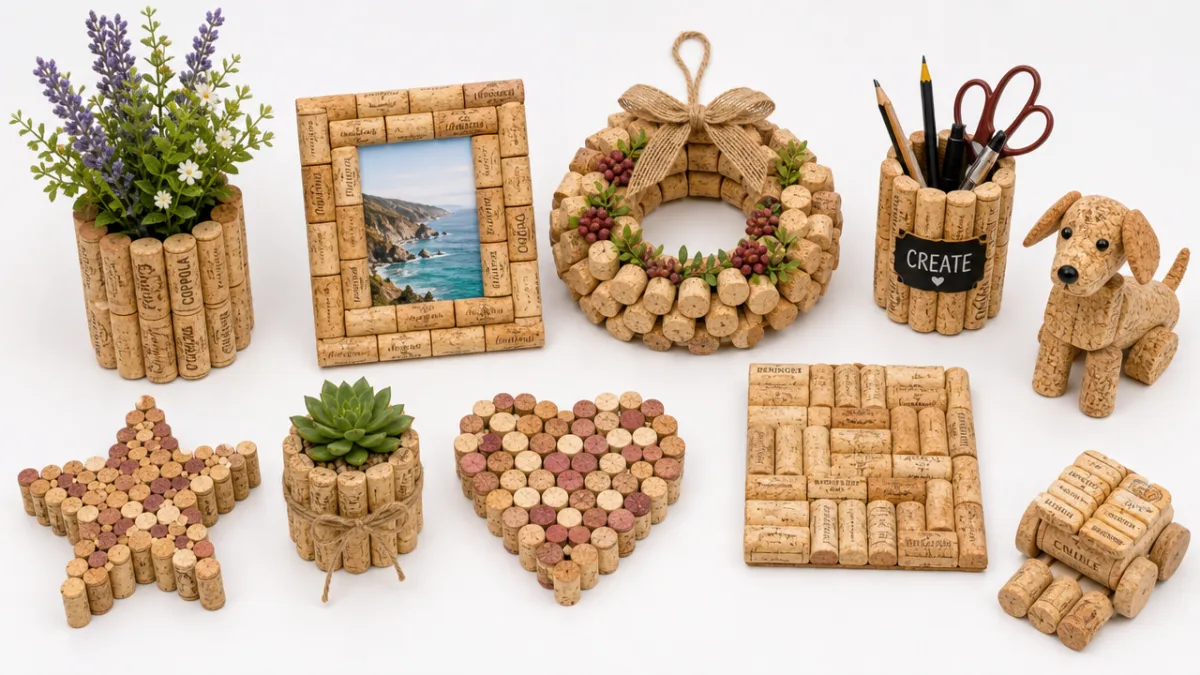
Once you have a collection of cleanly cut cork pieces in various sizes and orientations, the project possibilities are genuinely exciting and span a wide range of skill levels and time commitments. One of the most popular and visually striking beginner projects is the cork bath mat, made by gluing cross-section discs of uniform thickness to a rubber shower mat or mesh backing. The resulting surface is wonderfully tactile underfoot, naturally water-resistant, and has a warm, organic aesthetic that looks right at home in a spa-inspired bathroom. It typically takes between fifty and one hundred corks depending on the mat size, making it a perfect motivation to start collecting in earnest.
Cork bulletin boards and wall art panels represent another beloved category of cork craft, and cutting your own corks rather than buying pre-cut tiles gives you the freedom to create interesting patterns and varied textures. By mixing halved corks placed cut-side-out with whole cross-section slices, you can create beautiful geometric arrangements that look far more artisan than anything available commercially. Frame the finished panel in a simple shadow box frame, and you have a functional piece of wall art that also serves as a pin board for notes, photos, and mementos. Adding a coat of chalk paint to some of the pieces before assembly introduces color variation and a playful, contemporary feel.
For the kitchen, cut cork trivets and coasters are practical gifts that anyone would appreciate and can be customized to suit any home’s style. Hexagonal arrangements of cross-section slices make particularly handsome trivets, and adding a ring of whole corks around the perimeter creates an attractive border with a pleasing three-dimensional quality. Seal the finished piece with a thin coat of clear craft varnish to improve durability and make it easier to wipe clean. Cork coasters can be made even more personal by burning simple designs onto the surface using a wood burning tool before assembly, adding an artisan quality that elevates the piece far above its humble raw materials.
Troubleshooting Common Cork Cutting Problems
Even experienced crafters run into problems when cutting corks, and knowing how to identify and address these issues quickly will save you a great deal of wasted material and frustration. The most common problem by far is crumbling edges, where the cork breaks apart along the cut line rather than slicing cleanly. This issue almost always comes down to one of three causes: a dull blade, a cork that is too dry, or too much lateral pressure being applied during the cut. Address these issues systematically — replace the blade, soak the cork, and focus on applying downward pressure only — and you’ll find that clean cuts become consistently achievable.
Uneven slice thickness is another frequent frustration, particularly when you need a large number of uniform pieces for a tiled or mosaic project. The solution here is almost always the introduction of a simple guide or jig rather than trying to maintain consistency by eye alone. Even a few strips of cardboard taped to your cutting mat to create a channel can dramatically improve uniformity. If you’re cutting a very large quantity of corks and uniformity is critical, consider building a small wooden jig with stop blocks positioned at your desired slice thickness, which will allow you to position each cork identically before every cut.
Some crafters report that their cut corks don’t adhere well to surfaces during project assembly, which can be a particular problem when building large panels or mats that will be subject to regular handling. This adhesion issue usually traces back to surface contamination from wine residue or the natural oils present in cork material. Before gluing, wipe each cut piece with a damp cloth and allow it to dry completely, then lightly roughen the surface that will receive adhesive using fine-grit sandpaper. Use a strong craft glue or construction adhesive formulated for porous materials, apply it to both the cork and the backing surface, and allow it to become slightly tacky before pressing the pieces together for the best possible bond.
Quick Reference: Problem and Solution
- Crumbling edges — replace your blade immediately, soak dry corks overnight, and reduce lateral cutting pressure
- Uneven slice thickness — build or buy a simple cork-holding jig with measured stop blocks for consistent positioning
- Cork rolling during cutting — use a channel jig made from cardboard or wood to cradle and stabilize the cork
- Poor adhesive bond — clean surfaces with a damp cloth, allow thorough drying, sand lightly, and use a porous-material adhesive
- Cracking in older corks — soak for a longer period (up to eight hours) and cut more slowly with extra-gentle pressure
Storing, Collecting, and Sourcing Corks for Your Projects
One of the most enjoyable aspects of cork crafting is the collecting phase, which can become a pleasant ongoing habit that turns every bottle opened at a dinner party into a small contribution to your creative supply. Keep a dedicated jar or basket in your kitchen or bar area specifically for cork collection, and encourage friends and family to contribute their corks as well. Restaurants and wine bars are often happy to give away their corks if you simply ask — many of them accumulate huge quantities and have no use for them — and this is an excellent way to build your supply quickly when you’re preparing for a larger project.
Proper storage of your collected corks before use is worth paying attention to, as corks stored in damp conditions can develop mold while those kept in very dry environments will become brittle and difficult to cut. An open container in a cool, dry location with reasonable air circulation is ideal for most climates. If you live somewhere very dry, storing your corks in a sealed container with a small damp sponge placed inside can maintain just enough humidity to keep them pliable. Corks can be safely stored for years under reasonable conditions, so there’s no hurry to use them before they deteriorate — take your time collecting until you have enough for the project you have in mind.
For larger projects where your personal collection simply isn’t sufficient, several online retailers specialize in selling corks by the bag, box, or pallet at very reasonable prices. When purchasing corks online for crafting, look specifically for “natural wine corks” rather than synthetic or sparkling wine corks, as these tend to be the most versatile and aesthetically pleasing for craft work. Check the dimensions carefully, as cork sizes vary considerably between manufacturers and wine bottle types, and uniform sizing makes assembly projects significantly easier. Many sellers also offer pre-sorted bags of matching sizes, which can be worth the small additional cost for projects that demand visual consistency across many pieces.








What do you think?
It is nice to know your opinion. Leave a comment.