










Bertie’s Jumper: A Complete Guide to the Free Crochet Pattern
Introduction to Bertie’s Jumper and Why Crocheters Love It
Bertie’s Jumper is one of those free crochet patterns that somehow gets everything right. It’s approachable enough for someone who’s just moved past the basics, but satisfying enough to keep an experienced crocheter genuinely engaged. Whether you’re after a relaxed weekend project or your very first wearable garment, it’s easy to see why this one has built up such a loyal following. The silhouette is timeless, the construction is thoughtful, and the stitch detail gives it a finished quality that honestly doesn’t look free.
What really sets it apart is how it manages to feel modern without abandoning what makes crochet so lovely in the first place. The textured stitches give it that handmade, artisanal quality — but in the best possible way, not in a “my nan made this in 1987” way. People who’ve made it often say it reminded them why they picked up a hook to begin with: the rhythm, the steady growth of the fabric, and that specific satisfaction of pulling on something you made yourself.
The pattern has spread all over Pinterest, where its warm photography and the fact that it’s completely free have helped it find makers across the UK, Australia, North America, and well beyond. Everyone brings their own yarn choices and colour preferences, which means the finished versions out there are wonderfully varied. That global little community of Bertie makers is a big part of what gives this pattern its staying power — it’s not just a pattern, it’s a shared project.
Understanding the Materials and Tools You Will Need
Getting your materials sorted before you start makes a real difference with any crochet garment. For Bertie’s Jumper, yarn weight and fibre content matter more than you might expect — they affect the drape, the fit, and the overall feel of the finished piece. Most versions call for worsted or aran weight yarn, which hits a nice sweet spot between warmth and stitch definition. Natural fibres like wool, merino, or a wool-cotton blend tend to work beautifully here; they hold their shape well and feel genuinely lovely to wear.
It’s worth taking a moment with your yarn choice rather than just grabbing whatever’s in your stash. A solid or semi-solid merino will really show off the stitch texture, while a rustic wool blend leans into that cosy, lived-in aesthetic. If you’d rather avoid animal fibres, a good acrylic blend or a cotton-acrylic mix can absolutely work too — just bear in mind they may behave a little differently during blocking. And please, swatch first. It saves so much heartache later.
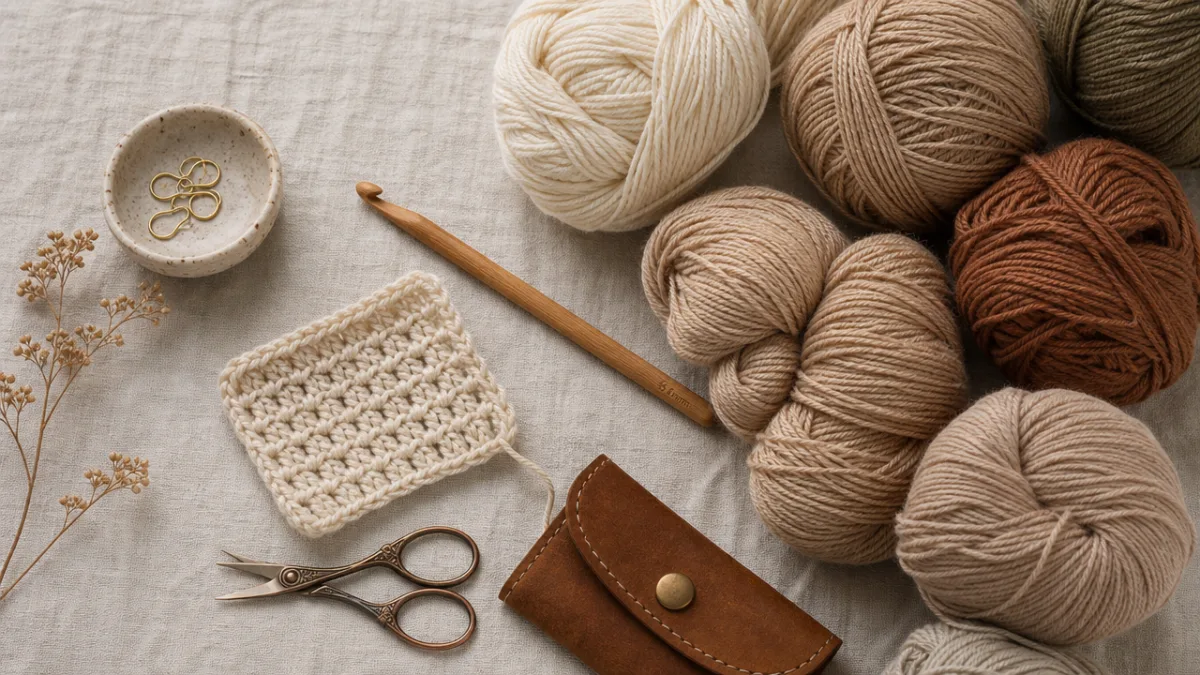
For tools, you’ll need a hook in the size the pattern recommends — usually a 5mm or 5.5mm for aran weight — plus a yarn needle for seaming and weaving in ends, sharp scissors, stitch markers, and a tape measure. A row counter is also genuinely worth having, whether that’s a little clicker or an app on your phone. You’ll be glad of it once you’re deep into the structured sections of the pattern.
Reading and Understanding the Pattern Structure
One of the best habits you can build as a crocheter is reading a pattern all the way through before you touch your hook. Bertie’s Jumper is written in a clear, accessible style that’s well suited to intermediate makers, but a quick read-through at the start will help you see where you’re headed and catch anything that might trip you up. Pay particular attention to the abbreviations — US and UK crochet terminology uses the same names for different stitches, so it’s worth confirming which convention the designer is using before you begin.
The pattern is typically constructed in flat pieces — a front panel, a back panel, and two sleeves — which are then seamed together. If you prefer working in rows to working in the round, this is a lovely approach, and it also makes it easy to adjust the length of the body or sleeves as you go. The neckline shaping comes from a series of strategic decreases that give the finished jumper its clean, professional look without requiring anything particularly advanced.
Make sure you understand the stitch pattern before you start the actual work. Bertie’s Jumper usually combines a few basic and textured stitches in a repeating sequence, and once you know the repeat, you’ll be able to check your own work as you go and catch any mistakes while they’re still easy to fix. Stitch markers at the start and end of each repeat are your friend here, especially in the early rows. A printed copy with pencilled notes in the margins isn’t a bad idea either.
Step-by-Step Construction of the Jumper Body
You’ll start with the back panel, which is a great way to ease into the stitch pattern before you’re working on the more visible front. Cast on your foundation chain in the size you’ve chosen, work a row of your base stitch — usually single or half double crochet — to give the lower edge a stable, tidy finish, and then settle into the main texture. The rhythm tends to click into place fairly quickly, and from there it’s a genuinely enjoyable project to work through.
As the back panel grows, the pattern will take you through any waist shaping if the design includes it, and then up to the underarm shaping, where you’ll leave stitches unworked on either side to create the armhole openings. This part can feel a little daunting if it’s your first garment, but honestly it’s much more straightforward than it looks. Follow the decrease instructions, keep your tension consistent, and the armhole will form neatly on both sides without much drama.
The front panel works exactly like the back until you reach the neckline, where things branch off to create the front opening. Whether Bertie’s Jumper uses a crew neck or a slightly scooped shape, you’ll divide your stitches at the centre front and work each shoulder section separately. This is what creates that gradual, flattering curve at the neckline — take it slowly and don’t rush through the final rows of each shoulder panel. It’s worth the patience.
The sleeves start at the cuff and work upward, usually beginning with a simple rib or stitch border before you start increasing at regular intervals on both sides to build out the sleeve’s shape. Keep careful track of your increase rows — this is exactly the moment your row counter earns its keep. Once each sleeve reaches the right length and width to match your armhole measurement, fasten off and set it aside. Make both sleeves before you start seaming so you can catch any discrepancies and fix them symmetrically.
Seaming, Finishing, and Blocking Your Jumper
The finishing stage is where everything comes together, and it’s genuinely exciting. Once you have your four pieces ready — back, front, and both sleeves — you’ll join them using a seaming method that sits flat and looks tidy. Mattress stitch and a slip stitch seam worked through the back loops are both popular choices for this kind of project, giving you a join that’s neat and durable without adding bulk at the seams.
Start with the shoulder seams to connect the front and back panels at the top, then set in the sleeves by matching the centre of each sleeve cap to the shoulder seam and working down each side. Close the side seams and underarm seams in one continuous line from the hem up. Pinning everything in place before you pick up your needle is a small step that makes a big difference — it’s much easier to check the alignment before you’ve committed to the seam. Use yarn from your project if you can, so the seams blend in naturally.
Blocking is the step that new garment makers most often skip, and it’s also the step that makes the biggest visible difference. Wet blocking — soaking the jumper in cool water, rolling it in a towel to remove the excess moisture, then laying it flat to dry in the right dimensions — smooths out tension variations, opens up the stitches, and helps the whole garment settle into its proper shape. With wool and wool-blend yarns especially, the before-and-after is almost startling. Just make sure it’s completely dry before you wear or fold it.
Sizing, Fit Adjustments, and Customising Your Bertie
One of the best things about crochet is how easy it is to tweak a pattern to suit your actual body rather than the body the pattern was designed for, and Bertie’s Jumper is particularly accommodating in this regard. The pattern typically covers a good range of sizes, but even within your chosen size, small modifications can make a real difference to the fit. The most impactful is usually body length — you can add or subtract rows before the armhole shaping without disrupting anything else in the pattern.
Sleeve length is just as easy to adjust, since the increases happen at a fixed rate regardless of how long you work. Lengthen them for a cosy, dramatic sleeve or stop a bit early for a three-quarter length that’s lovely in autumn or spring. Neckline depth is another thing worth thinking about before you start: a few extra rows before you divide for the neck will give you a higher crew neck, while fewer rows opens it up a bit more. These are small decisions with a noticeable impact on how the finished jumper feels to wear.
Then there’s colour, which is where things get really fun. The pattern is often shown in classic neutrals — cream, oatmeal, soft grey — but it works just as well in deep jewel tones, earthy terracottas, or soft pastels. Some makers have tried colourblock versions with the front and back in contrasting shades, or added a second colour at the cuffs and neckline for a polished, coordinated look. The stitch texture carries a solid colour beautifully on its own, but there’s plenty of room to play if you want to get creative with it.

Caring for Your Finished Crochet Jumper
After all the time you’ve put into making Bertie’s Jumper, it’s worth taking care of it properly so it lasts. The care routine depends mostly on your yarn. Wool and wool-blend garments generally do best hand washed in cool water with a gentle wool wash, then reshaped and laid flat to dry. Don’t wring or twist them — that’s how you end up with a felted mess — just press the water out gently and roll them in a towel first.
If you used a machine washable yarn, like superwash wool or a quality acrylic, you have a bit more flexibility and can usually run it through a gentle machine cycle in a mesh laundry bag. Even so, flat drying is still the better option for a handmade crochet garment — tumble drying can cause pilling, shrinkage, or stretching depending on the yarn. And when you’re storing the jumper, fold it rather than hanging it; hanging puts weight on the shoulders over time and they’ll gradually stretch out of shape.
Pilling happens with natural fibres and it’s nothing to worry about — a fabric shaver or lint comb will sort it out quickly. If you catch a snag, ease the yarn back through to the right side with a blunt needle before it turns into a bigger problem. Look after it well and a jumper like Bertie’s really can become a long-term wardrobe staple, the kind of thing you reach for every autumn and feel quietly pleased about every single time.
Building Community Around the Pattern
Something lovely happens around a popular free pattern like Bertie’s Jumper — a community forms. Ravelry, Instagram, and Pinterest are full of makers sharing their finished versions, their yarn choices, their tweaks, and their in-progress photos. Searching the pattern name or a dedicated hashtag will turn up a huge amount of inspiration and practical advice from people who’ve already worked through exactly the same sections you’re puzzling over, plus a genuinely diverse range of body types and yarn interpretations to browse through.
If you want to make the project even more social, look out for a crochet-along, or CAL, organised around the pattern. Yarn shops, craft bloggers, and community groups often host them — everyone works through the pattern together over a few weeks, sharing progress and supporting each other through the tricky bits. There’s something really motivating about knowing other people are at the same row you are, and the live check-ins, encouragement, and occasional prize draws don’t hurt either.
Once you’ve finished, consider posting your Bertie’s Jumper on Ravelry or social media with the relevant tags. The notes you leave about your yarn substitutions, your sizing adjustments, or anything you did differently become genuinely useful to the next person who finds the pattern. That culture of sharing what you learned — whether you’re a beginner posting your first-ever garment or a more experienced maker whose tips save someone else a lot of frogging — is one of the things that makes the crochet community such a good place to be.








What do you think?
It is nice to know your opinion. Leave a comment.