










Save Water & Time: How to Set Up Your Own Drip Irrigation System for Better Garden Planning
Why Drip Irrigation Is a Game-Changer for Home Gardeners
If you have ever stood in your garden with a hose in hand, watching water splash off leaves and pool on the surface before soaking in, you already understand the inefficiency of conventional watering. Drip irrigation solves this problem by delivering water slowly and directly to the root zone of each plant, where it is needed most. The result is dramatically less waste, healthier plants, and far more time freed up from routine garden chores throughout the growing season.
Traditional overhead sprinklers can waste up to 50 percent of the water they distribute through evaporation and runoff, especially in warm or windy conditions. Drip systems, by contrast, operate at low pressure close to the soil surface, which means most of the water you apply actually reaches plant roots rather than evaporating into the air or running off into the street. Studies from agricultural extension programs consistently show that drip irrigation reduces water consumption by 30 to 70 percent compared with conventional methods, making it one of the most impactful changes a home gardener can make.
Beyond conservation, drip irrigation fundamentally changes how you interact with your garden. Once your system is set up and connected to a timer, watering becomes automatic. You no longer have to reorganize your morning routine around garden chores, worry about plants drying out during a vacation, or scramble to water during a heatwave. The garden runs itself on a schedule you define, and you step in only to tend to plants, harvest produce, and enjoy the space you have worked so hard to create.
The Environmental Case for Switching to Drip
Water scarcity is a growing concern across much of the world, and home gardens are not exempt from the conversation. In many regions, outdoor watering accounts for 30 percent or more of total residential water use during the summer months. Shifting even a portion of that consumption to a more efficient delivery system has a meaningful cumulative impact on local water supplies, particularly in drought-prone areas where municipal restrictions are increasingly common.
Drip irrigation also reduces the risk of fungal diseases by keeping foliage dry. When overhead sprinklers wet leaves regularly, they create conditions that favor powdery mildew, blight, and other moisture-loving pathogens. By delivering water at soil level, drip systems help maintain the kind of dry-leaf, moist-root environment that most vegetables, herbs, and ornamentals truly thrive in. Healthier plants require fewer chemical interventions, which is another win for the environment and for your own peace of mind.
Understanding the Key Components of a Drip System
Before you purchase anything or dig a single trench, it helps to understand how a drip irrigation system is structured. Every system, regardless of its size or complexity, is built from the same basic categories of components working together. Getting familiar with these parts before you shop will help you make smarter purchasing decisions and avoid the frustration of discovering missing pieces once you are already mid-installation on a hot afternoon.
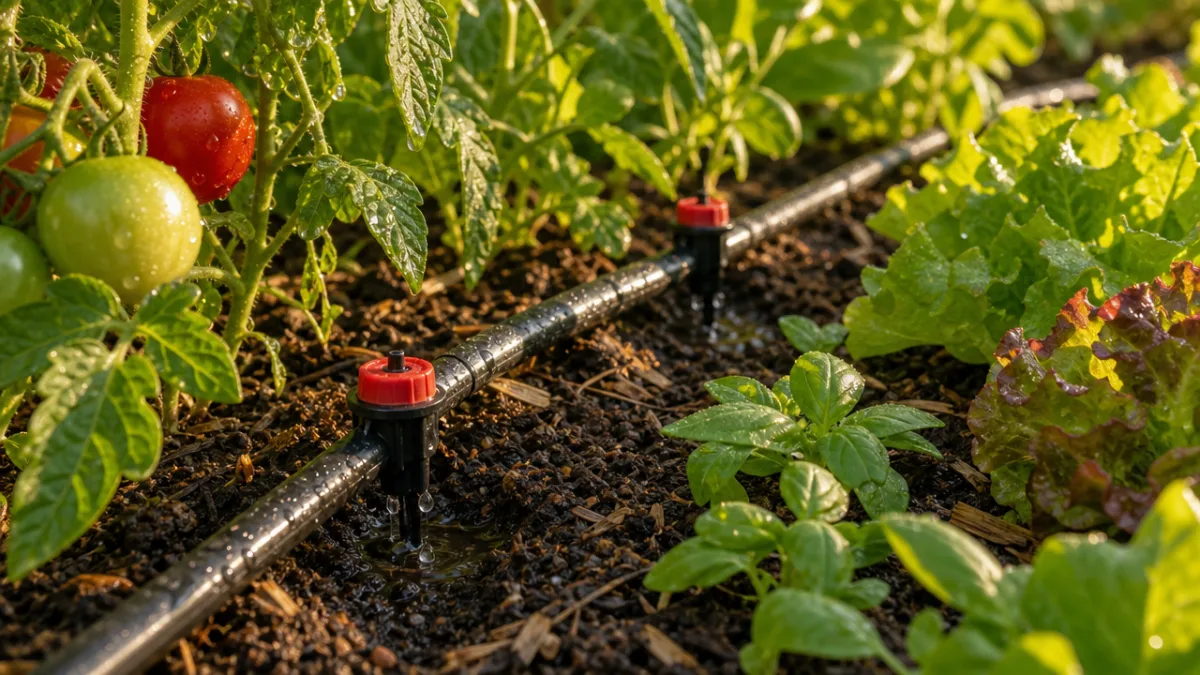
The backbone of any drip system is the mainline tubing, typically half-inch polyethylene tubing that carries water from your water source to the general areas of your garden beds. From the mainline, you branch out using quarter-inch distribution tubing, also called spaghetti tubing, which routes water to individual plants. At the end of each distribution line sits an emitter, the small device that controls the flow rate and ensures each plant receives the right amount of water based on its needs.
Equally important are the control components: the pressure regulator, the filter, and the timer. Residential water pressure is usually too high for drip emitters, so a pressure regulator steps it down to the 15 to 30 PSI range that most systems require. The filter prevents mineral deposits and debris from clogging the emitters over time. And the timer is arguably the most valuable component of all, because it transforms your drip system from a convenient tool into a fully automated watering solution that operates even when you are nowhere near the garden.
Choosing the Right Emitters for Your Plants
Emitters come in a range of flow rates measured in gallons per hour, and selecting the right rate for each plant type is one of the most important decisions you will make. Shallow-rooted herbs and annual flowers typically do well with half-gallon-per-hour emitters, while thirsty vegetables like tomatoes, squash, and peppers benefit from one- or two-gallon-per-hour versions. Trees and shrubs planted in garden beds may require multiple emitters placed around their drip line to ensure even moisture distribution throughout the root zone.
You will also encounter different emitter styles designed for specific situations. Pressure-compensating emitters are ideal for gardens on slopes or for longer runs of tubing where pressure varies, because they deliver a consistent flow regardless of line pressure. Adjustable emitters let you dial in exactly how much water each plant receives, which is especially useful in mixed plantings where you have a variety of species with different water needs growing side by side. Micro-sprayers and micro-bubblers are also available for groundcovers and densely planted areas where individual emitters would be impractical.
Planning Your Drip Irrigation Layout Before You Buy
The single most common mistake gardeners make with drip irrigation is buying a generic kit and trying to force it to fit their space. A much better approach is to plan your layout on paper first and then purchase exactly the components you need. Start by sketching your garden beds to scale, marking the location of each plant and noting its approximate water requirements. This kind of planning takes an hour or two upfront but saves enormous time and expense once you begin installation.
Measure the total length of mainline tubing you will need to reach all areas of your garden from your water source. Then calculate how many individual plants need to be served, and figure out the distribution tubing runs required to connect each one to the mainline. It is smart to add 10 to 15 percent to your measurements to account for routing around obstacles, mistakes, and future expansion. A good plan also identifies where your pressure regulator and filter will sit in the system and how the timer will connect to your outdoor spigot.
Consider the grouping of plants with similar water needs on the same zone or circuit, a practice called hydrozoning. When you group drought-tolerant herbs together and keep water-hungry vegetables on a separate line, you can set run times that are appropriate for each group rather than compromising and giving everyone an average amount that suits no one perfectly. Hydrozoning is a core principle of efficient landscape design, and it translates directly into healthier plants and lower water bills when applied to your drip irrigation layout.
Mapping Your Water Source and Pressure
Your water source is the starting point for all layout decisions. Most home gardeners connect to a standard outdoor spigot, which works perfectly well for small to medium-sized systems. Larger properties with multiple garden areas may benefit from connecting to a dedicated irrigation line with its own shutoff, or from using a manifold system that allows multiple zones to be controlled independently. Knowing your source location early helps you plan the most logical path for your mainline and minimizes unnecessary tubing runs.
Test your water pressure before finalizing your plan by attaching a simple pressure gauge to your outdoor spigot. Most residential supplies run between 40 and 80 PSI, which is well above the operating range of most drip emitters. Your pressure regulator will handle the reduction, but knowing your baseline pressure ensures you select the right regulator for your specific supply. If your pressure is on the lower end, you may be able to get away with a lighter-duty system, while very high pressure situations require a more robust regulator to protect your tubing and emitters from damage.
Step-by-Step Installation Guide for Beginners
Installing a basic drip irrigation system is genuinely achievable for anyone comfortable with simple DIY projects. No special plumbing skills are required, and the tools needed are minimal: a hole punch for the mainline tubing, tubing cutters or a sharp utility knife, and your hands. Most systems can be installed in a single afternoon, and the satisfaction of watching your automated system run for the first time makes every bit of the effort worthwhile.
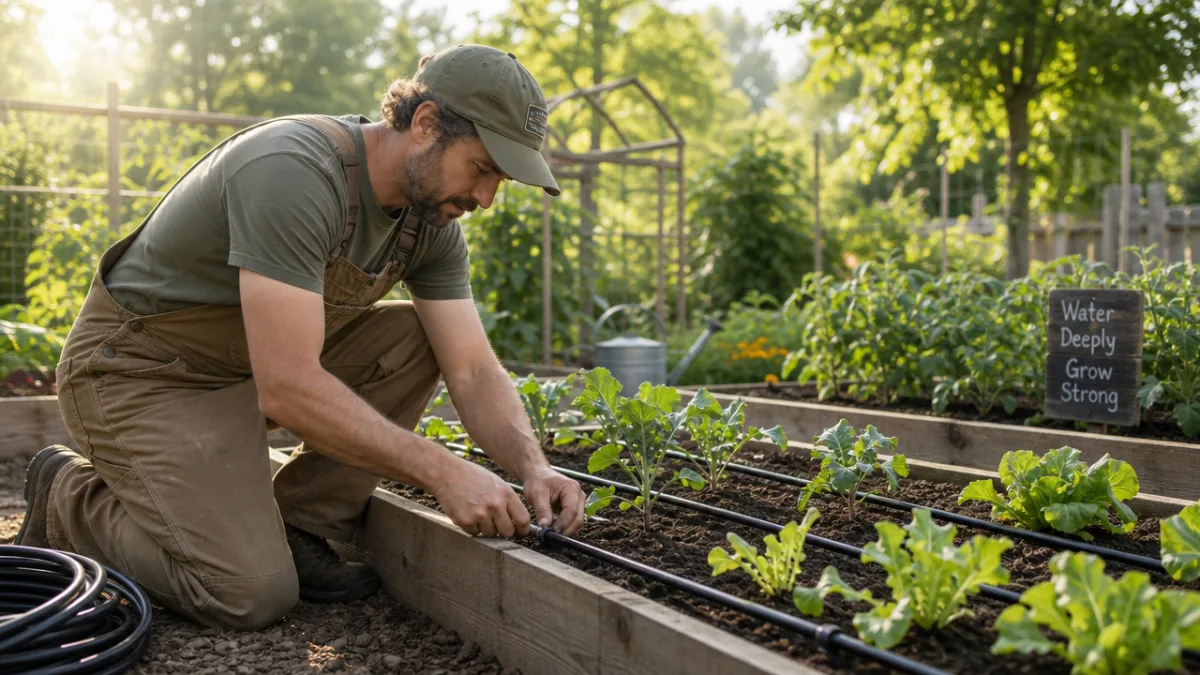
Begin by connecting your timer, backflow preventer, pressure regulator, and filter to your outdoor spigot in that order. Run your mainline tubing from this assembly along the edge of your garden bed, securing it with tubing stakes every few feet to keep it in place. Use a hole punch to create openings in the mainline wherever a distribution line needs to branch off, then insert barbed connectors and run quarter-inch tubing to each plant location. Cap the ends of all tubing runs with figure-eight end caps or goof plugs to ensure no water escapes from the system unintentionally.
Once the tubing is in place, insert your chosen emitters at the base of each plant by pushing them firmly into the end of the distribution tubing or directly into pre-punched holes in the mainline. Place emitters about two to four inches from the plant stem, close enough to deliver water to the root zone but far enough to avoid direct contact with the stem, which can cause rot in some species. Run your system manually the first time and walk the entire layout, checking for leaks at every connection and making sure water is flowing from every emitter as expected.
Programming Your Timer for Maximum Efficiency
Setting your timer correctly is where all the planning and installation effort pays off. Most garden timers allow you to set specific watering days, start times, and run durations. A common starting point for vegetable gardens is watering daily or every other day in the early morning for 20 to 45 minutes, though the right schedule for your garden depends on your climate, soil type, emitter flow rates, and what you are growing. Sandy soils drain quickly and may need shorter, more frequent cycles, while heavy clay soils benefit from longer, less frequent watering to allow proper absorption.
Take advantage of any rain delay or soil moisture sensor features your timer offers. These smart additions prevent the system from running during or immediately after rainfall, which is one of the easiest ways to waste water even with an otherwise efficient setup. Many modern timers connect to Wi-Fi and can access local weather data automatically, adjusting your schedule in real time based on conditions outside. While these advanced options cost more upfront, the water savings and plant health benefits they deliver make them well worth considering.
Maintaining Your Drip System Through the Seasons
A drip irrigation system is a long-term investment, and like any investment, it rewards consistent maintenance. The good news is that drip systems require relatively little ongoing attention compared to the time they save. The primary maintenance tasks are periodic checks for clogged or damaged emitters, filter cleaning, and seasonal preparation at both the start and end of the growing season. Building these simple habits into your garden routine will ensure your system performs reliably for many years.
Emitter clogging is the most common maintenance issue, caused by mineral deposits from hard water or fine particles that slip past the filter. Check your emitters monthly by visually confirming that each one is producing a slow, steady drip rather than a trickle or nothing at all. Clogged emitters can usually be cleared by soaking them in white vinegar for a few hours to dissolve mineral buildup. If an emitter is physically damaged or beyond cleaning, replacement emitters cost only a few cents each and are simple to swap out on the spot.
Flush your mainline tubing at least once a month by removing the end caps and running the system briefly to push out any debris that has accumulated inside. Clean your filter by removing and rinsing it under running water, checking for tears or deterioration that would allow particles through. At the end of the growing season, drain your system completely before the first freeze by disconnecting tubing from the water source and allowing any remaining water to drain out. Store emitters and sensitive components indoors during freezing temperatures to extend their lifespan significantly.
Troubleshooting Common Drip System Problems
Even a well-designed and properly installed system will occasionally present challenges, and knowing how to address them quickly prevents small issues from becoming costly problems. If you notice a section of your garden consistently drier than expected, start by checking whether the emitters in that zone are clogged or whether a distribution line has become kinked or disconnected. Tubing can pull free from fittings over time as soil shifts or as you work around the garden, and a disconnected line simply needs to be reseated in its fitting to restore flow.
If your system seems to be using significantly more water than usual, inspect all tubing connections and the mainline for cracks or holes. Rodents occasionally chew through drip tubing, and this is more common than many gardeners expect. A small puncture in the mainline can be repaired with a goof plug or a coupler fitting, while a longer damaged section can be cut out and replaced with fresh tubing and two coupler fittings. Keeping a small repair kit on hand with extra emitters, fittings, end caps, and a length of spare tubing means most problems can be fixed in under ten minutes.
Expanding and Upgrading Your System Over Time
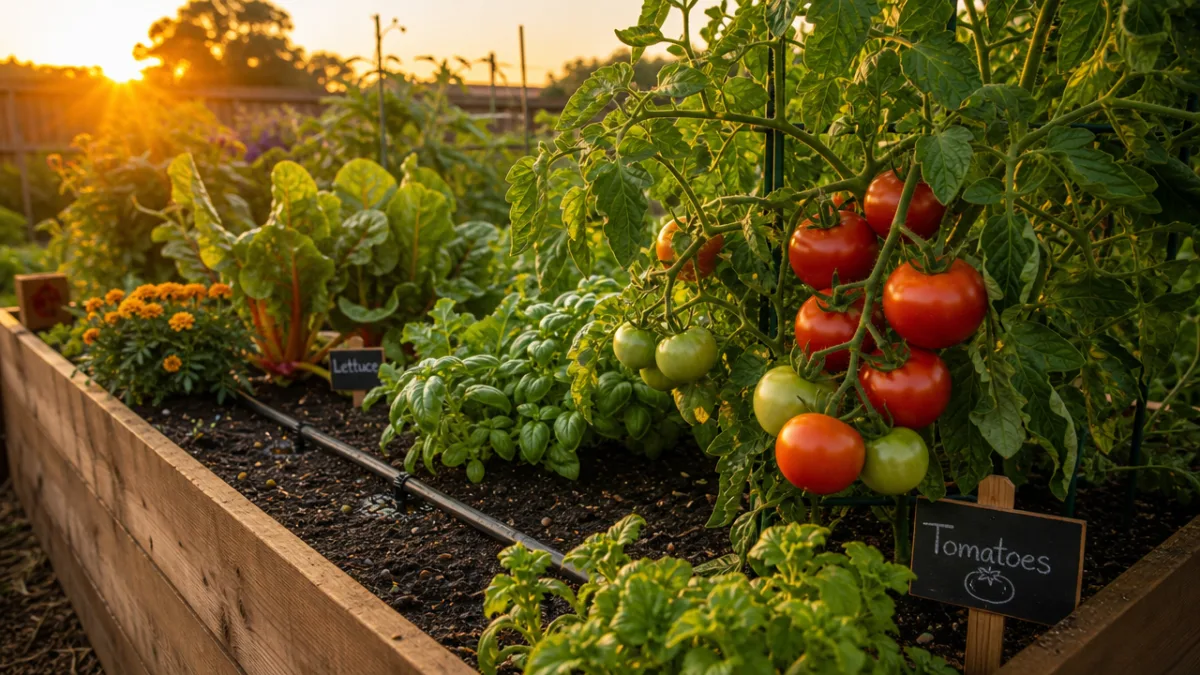
One of the most appealing qualities of drip irrigation is its modularity. Unlike a built-in sprinkler system embedded in concrete or hardscape, a surface drip system can be extended, reconfigured, and upgraded as your garden evolves. If you add a new raised bed or expand your planting area next season, you simply tap into your existing mainline with a tee fitting and run new distribution tubing to the new area. This scalability makes drip irrigation a smart choice for gardeners who are still experimenting with layout and expanding their growing space incrementally.
As you become more comfortable with the basics, you may want to explore more sophisticated options that add intelligence and convenience to your setup. Smart controllers that connect to your home Wi-Fi and adjust schedules based on local weather data are increasingly affordable and can make a meaningful difference in water savings over a full season. Soil moisture sensors that pause watering when the soil is already adequately moist are another excellent upgrade, particularly for gardeners in climates with unpredictable rainfall patterns throughout the growing season.
Consider these worthwhile upgrades as your system matures and your gardening ambitions grow:
- Smart Wi-Fi timers that sync with local weather forecasts and adjust run times automatically based on temperature, rainfall, and humidity data, eliminating guesswork from your watering schedule entirely.
- Soil moisture sensors installed at root depth in different zones of your garden, which communicate wirelessly with your timer to prevent watering when adequate moisture is already present in the soil.
- Drip tape for row crops, which is a flat emitter tubing designed for densely planted rows of vegetables like lettuce, carrots, and beets where individual emitters would be impractical to space and maintain.
- Fertilizer injectors, also called fertigation systems, which allow you to dissolve liquid fertilizers into your irrigation water and deliver nutrients directly to plant roots on a precise schedule throughout the growing season.
- Multiple zone manifolds that allow different garden areas to receive different watering schedules from a single timer unit, giving you precise control over each section of a larger property.
Combining Drip Irrigation with Mulching for Maximum Water Retention
Drip irrigation and mulching are two of the most complementary practices in the home garden, and using them together produces results that neither achieves alone. When you layer two to four inches of organic mulch such as wood chips, straw, or shredded leaves over your drip tubing, the mulch acts as a barrier that dramatically slows surface evaporation. The moisture delivered by your drip emitters stays in the soil longer, which means you can often reduce run times and watering frequency while still maintaining the moist, stable root environment your plants need.
Mulching also suppresses weed growth, which is a significant benefit in any garden but particularly in vegetable beds where weeds compete aggressively with crops for both water and nutrients. A well-mulched, drip-irrigated bed essentially becomes a low-maintenance growing environment where your main job is planting and harvesting rather than constant watering and weeding. Over time, organic mulches break down and enrich the soil, improving its structure and water-holding capacity in ways that make your entire irrigation system more effective season after season.
Together, drip irrigation and consistent mulching represent a complete approach to water stewardship in the garden. They work with the natural behavior of soil and plants rather than against it, creating growing conditions that are efficient, productive, and genuinely satisfying to manage. Whether you are a first-season gardener setting up your initial raised beds or an experienced grower looking to bring more precision to an established landscape, a drip irrigation system tailored to your specific garden is one of the most rewarding projects you can undertake. The time you invest in planning and installation comes back to you many times over in saved water, healthier harvests, and more hours to simply enjoy the garden you have grown.








What do you think?
It is nice to know your opinion. Leave a comment.