










Cheap and Easy DIY Renter-Friendly Wainscoting: Transform Your Walls Without Losing Your Deposit
If you’ve ever scrolled through home design inspiration and felt a pang of jealousy at those gorgeous paneled walls, only to remember you’re renting and can’t do anything permanent, you’re not alone. Wainscoting — the decorative wall treatment that runs along the lower portion of a wall — has long been associated with elegant, custom-built homes. But here’s the secret that renters everywhere are discovering: you can achieve that same polished, architectural look without drilling a single permanent hole or kissing your security deposit goodbye. This guide is your complete roadmap to renter-friendly wainscoting that looks expensive, installs easily, and comes down just as cleanly when it’s time to move on.
The demand for renter-friendly home improvements has exploded in recent years, and for good reason. More people are renting for longer periods, and the desire to personalize a space without sacrificing thousands of dollars in deposits is completely understandable. Thankfully, the DIY community has risen to the challenge with ingenious solutions using removable adhesives, peel-and-stick materials, and lightweight molding alternatives. What once required a carpenter and a nail gun can now be accomplished on a weekend with a few basic tools and a modest budget.
Throughout this article, you’ll learn everything from choosing the right materials and planning your design, to installing your panels step by step and styling the finished result beautifully. Whether you’re working with a bland apartment hallway, a beige rental bedroom, or a bathroom that desperately needs personality, the techniques covered here will give you the knowledge and confidence to pull off a genuinely impressive transformation. Best of all, the total cost for most projects runs between $50 and $150, making this one of the highest-impact, lowest-cost upgrades available to renters today.
Understanding Wainscoting Styles and Choosing What Works for Your Space
Before you buy a single material, it pays to understand the different styles of wainscoting so you can choose the one that best fits your space, your skill level, and your aesthetic goals. The most classic form is raised panel wainscoting, which features recessed or protruding rectangular panels and looks incredibly traditional and formal. Board and batten wainscoting, on the other hand, uses vertical boards with thin strips (battens) layered on top, creating a clean, modern farmhouse look that has become enormously popular over the past decade. Flat panel wainscoting sits somewhere in between, offering a more minimalist take that works beautifully in contemporary and transitional interiors.
For renters specifically, board and batten tends to be the most practical choice. It’s simpler to recreate using lightweight foam molding or thin MDF strips secured with removable adhesive, and the geometric lines read as intentional and designed even when executed with inexpensive materials. That said, flat panel wainscoting can be equally achievable using picture frame molding adhered directly to the wall. The key is that none of these styles require you to actually build structural paneling into the wall — they’re all about the visual impression created by layering shapes and lines at lower wall height.
When deciding on a style, consider the height of your ceilings and the proportions of the room. Wainscoting typically covers the lower one-third of a wall, so in a standard 8-foot ceiling room, you’re looking at panels roughly 30 to 36 inches tall. In rooms with higher ceilings, you can push that to 42 or even 48 inches. Rooms that feel narrow benefit from board and batten’s vertical lines, which draw the eye upward and make the space feel taller. Wider rooms with more breathing room can handle the more complex geometry of flat panel or picture frame styles without feeling busy or overwhelming.
Gathering Your Materials: What to Buy and Where to Save Money
One of the most satisfying parts of a renter-friendly wainscoting project is how affordable it can be when you shop smart. The core materials you’ll need fall into a few categories: the molding or strips that form the panels, the adhesive that holds everything in place, paint, and a handful of basic tools. For molding, foam crown and chair rail molding is your best friend. It’s lightweight, easy to cut with a regular craft knife or miter box, and adheres beautifully to walls with products like Gorilla Mounting Tape or Command Strips rated for heavier loads. Many craft and hardware stores carry foam molding in a variety of profiles for as little as $5 to $15 per 8-foot length.
For the batten strips themselves — the vertical pieces in a board and batten design — you have several excellent options. Thin hobby wood strips from a craft store work well and are inexpensive. Foam board cut into strips is another popular choice, and some crafters even use wooden paint stir sticks for very narrow battens, which are often available free at hardware stores. If you want a slightly more substantial look, thin MDF lattice strips from the lumber section of a home improvement store are only a few dollars each and can be cut to length easily. The key measurement to keep in mind is that battens typically range from 1.5 to 2.5 inches wide for most room scales.
Here’s a basic material checklist to get you started:
- Foam chair rail molding (enough for the linear footage of your walls)
- Foam or thin wood batten strips for verticals
- Heavy-duty removable double-sided mounting tape (Command or Gorilla brand)
- Removable adhesive caulk or white spackling for filling small gaps (make sure it’s removable)
- Primer spray paint for foam surfaces
- Interior latex wall paint in your chosen color
- Painter’s tape and drop cloth
- Level, measuring tape, and pencil
- Miter box and hand saw or craft knife
Your total materials cost will depend heavily on room size, but a typical bedroom accent wall or hallway treatment can be completed for under $75. Shopping at dollar stores for basic supplies, catching sales at craft chains, and using paint you already own can push that cost even lower. Many successful renter wainscoting projects have been completed for under $40 when the maker planned carefully and shopped resourcefully.
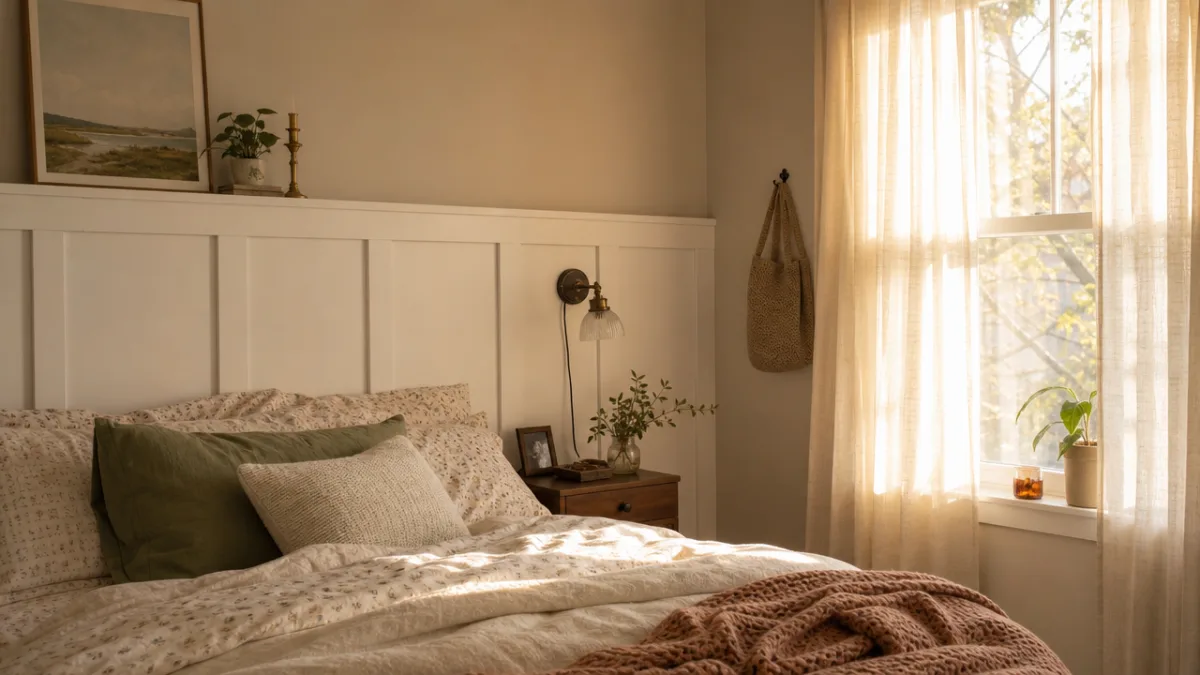
Planning and Measuring: The Step That Makes or Breaks the Project
No amount of beautiful material can save a wainscoting project that wasn’t planned carefully. Measurement and layout are genuinely the most important part of this entire process, and spending an extra hour here will save you from headaches, wasted material, and a result that looks off. Start by deciding on the height of your wainscoting rail — this is the horizontal molding that runs along the top of the treatment and visually caps it. Mark this height lightly in pencil all the way around the room, using a level to make sure the line is perfectly horizontal. Nothing will make wainscoting look amateur faster than a crooked rail line.
Once your rail height is marked, decide on the spacing of your vertical battens. For board and batten, battens are typically placed 12 to 16 inches apart for a standard wall, though you can go wider (up to 24 inches) for a more modern, airy feel. The most important thing is that the spacing looks balanced on each individual wall, meaning the panels (the spaces between battens) should be roughly equal in width. To achieve this, measure each wall’s total width, subtract the width of all your battens, then divide the remaining space by the number of panels you want. This gives you your panel width, and from there you can mark exact batten placement. Do this math on paper before making any marks on the wall.
Pay special attention to corners and doorways. Inside corners are relatively straightforward — you can simply butt your molding into the corner. Outside corners require a 45-degree miter cut for a clean, professional finish. Doorways and window casings also need to be accounted for in your layout, since you may need to adjust batten spacing slightly near these interruptions so that the design terminates cleanly. Sketch a simple diagram of each wall with measurements marked before you begin purchasing or cutting anything. This diagram will also serve as your cutting list, helping you figure out exactly how many pieces of each length you need.
Installation: A Step-by-Step Walkthrough for Perfect Results
With your measurements done and materials gathered, it’s time for the satisfying part: putting it all together. Begin by cleaning your walls thoroughly. Any dust, grease, or loose paint will compromise the adhesive bond and cause pieces to fall off, sometimes in the middle of the night with a startling crash. Wipe down the wall surface with a slightly damp cloth, let it dry completely, and then wipe it once more with a dry cloth. If your walls are textured, understand that heavily textured surfaces will reduce adhesion significantly — in that case, use additional adhesive strips and consider pressing a thin piece of cardboard between the molding and wall to bridge the texture gap.
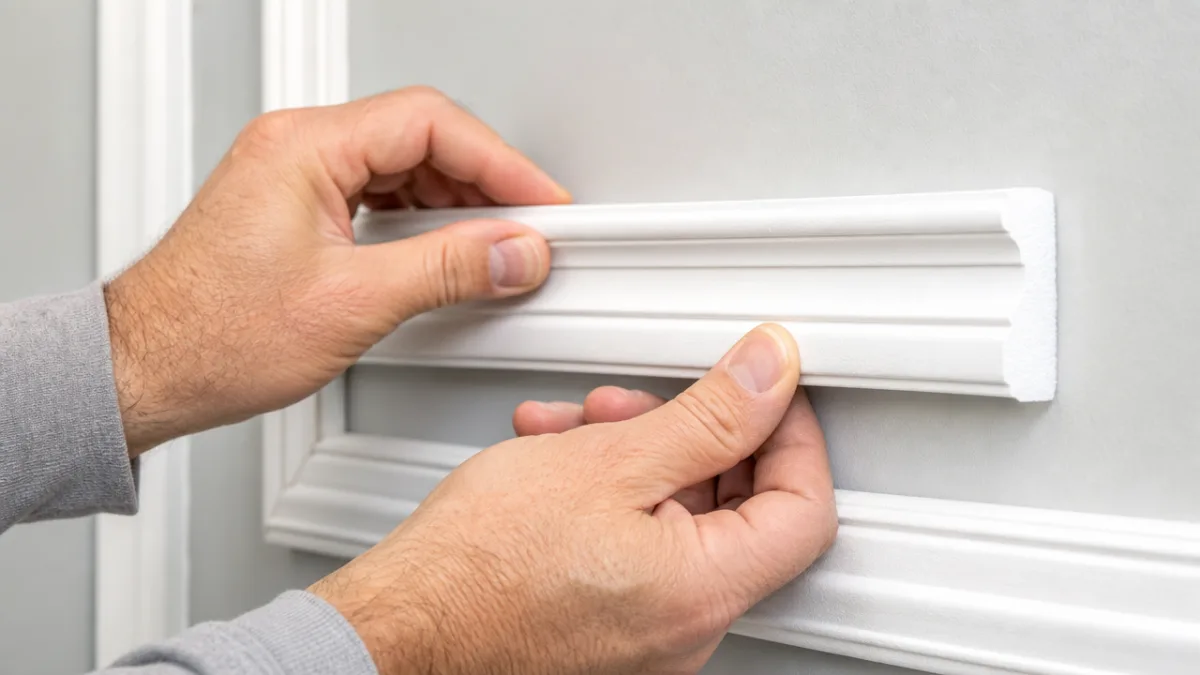
Install the horizontal chair rail first, as it establishes the entire visual framework. Apply strips of heavy-duty removable mounting tape to the back of the molding, spaced every 6 to 8 inches along its length. For foam molding, you can also apply a thin bead of removable construction adhesive (check the label to confirm it’s removable and won’t damage paint) for extra security. Carefully align the molding with your penciled line, pressing firmly and evenly as you go. Hold it in place for 60 seconds, then step back and check it with a level before moving on. Work in manageable sections — no more than 4 feet at a time — to maintain control and accuracy.
Next, install the vertical battens. Pre-cut all pieces to your desired height (from the baseboard to just below the rail), then apply mounting tape to each one and press them firmly into position at your marked intervals. Use a small level or plumb line to confirm each batten is perfectly vertical before moving to the next. Once all your battens are in place, step back and assess the overall look. If anything seems slightly off, removable tape allows you to carefully peel pieces away and reposition them — a major advantage over nailed or glued installations. Finish by adding a thin base molding strip along the bottom if your space doesn’t already have baseboard trim, which gives the whole treatment a properly framed, complete appearance.
Here’s the installation sequence in order:
- Clean and dry the wall surface completely
- Mark the horizontal rail line with a level
- Mark vertical batten positions with a pencil
- Cut all pieces to length using your cutting list
- Install horizontal chair rail molding first
- Install vertical battens from left to right across each wall
- Install base molding or bottom rail if desired
- Fill any visible gaps with removable caulk or spackle
- Allow everything to cure for 24 hours before painting
Painting and Finishing: Pulling the Look Together
The finishing stage is where your wainscoting goes from looking like a craft project to looking like a professionally designed interior feature. Paint is absolutely transformative here, and the approach you take will significantly affect the final result. The most classic and popular option is to paint the entire wainscoting area — molding, battens, and the wall behind them — a single solid color, typically crisp white or soft white. This monochromatic approach creates a clean, built-in look that reads as intentional and architecturally considered. If your room has white or off-white walls already, this is an especially easy path to a beautiful result.
For a more dramatic effect, consider painting the wall behind the wainscoting a different color than the wall above the rail. This is a technique often called a two-tone or color-blocked wainscoting finish, and it’s enormously effective at adding depth and visual interest. The lower wall (behind the panels) might be a deep sage green, navy, charcoal, or warm terracotta, while everything from the rail up remains white or a lighter neutral. The molding and battens themselves are then painted the same color as the upper wall, allowing them to stand out against the darker background. This technique is particularly striking in dining rooms, hallways, and bedrooms.
Before painting, prime any foam molding pieces with a spray primer designed for foam — regular latex primers can cause foam to bubble or warp. Once primed and dry, apply paint with a small angled brush, carefully cutting in along the edges of each batten and molding piece. A small foam roller can help you paint the flat areas of the wall between battens quickly and smoothly. Expect to apply two coats for full coverage, especially if you’re going over a darker base color. Finish with a satin or semi-gloss sheen on the molding pieces specifically, as this creates a subtle visual distinction between the trim and the wall that mimics how real painted wood wainscoting looks in custom homes.
Styling, Decorating, and Maintaining Your Renter-Friendly Wainscoting
Once your wainscoting is installed and painted, you’ve created a wonderful new visual framework for your room that will make decorating significantly easier. The chair rail line naturally suggests where wall-hung art and decor should sit — above the rail, in the upper two-thirds of the wall, framed by the architectural structure below. Gallery walls look particularly gorgeous above board and batten wainscoting, and the clean geometric lines of the paneling provide a sophisticated backdrop that makes even simple, inexpensive prints look intentional and curated. Mirrors above the rail add light and make a space feel larger, which is doubly effective when paired with the grounding visual weight of the wainscoting below.
For furniture placement, consider how pieces will interact with your wainscoting height. A bed headboard, for instance, looks beautiful when its height roughly aligns with or slightly exceeds the wainscoting rail. A console table in a hallway sits elegantly in front of paneled walls. In a bathroom, wainscoting above the toilet or along a vanity wall creates a spa-like quality that dramatically elevates the perceived luxury of the space. Whatever room you’ve installed it in, the wainscoting effectively becomes a design anchor — a structural element that all other decor decisions can reference and respond to.
Maintenance is minimal and entirely renter-friendly. Foam and wood molding painted with a satin or semi-gloss finish can be wiped down with a damp cloth when dirty, making this treatment as practical as it is beautiful. Periodically check that adhesive strips are still holding firmly, especially in humid environments like bathrooms where moisture can degrade some adhesives over time. If a piece works loose, simply add fresh adhesive strips and press it back into place. When the time comes to move out, removal is straightforward: slowly peel away each piece, then use an adhesive remover product like Goo Gone to clean the wall surface, followed by a touch-up of any paint that may have pulled away. Leave the walls in the same or better condition than you found them, and your deposit remains safely intact.
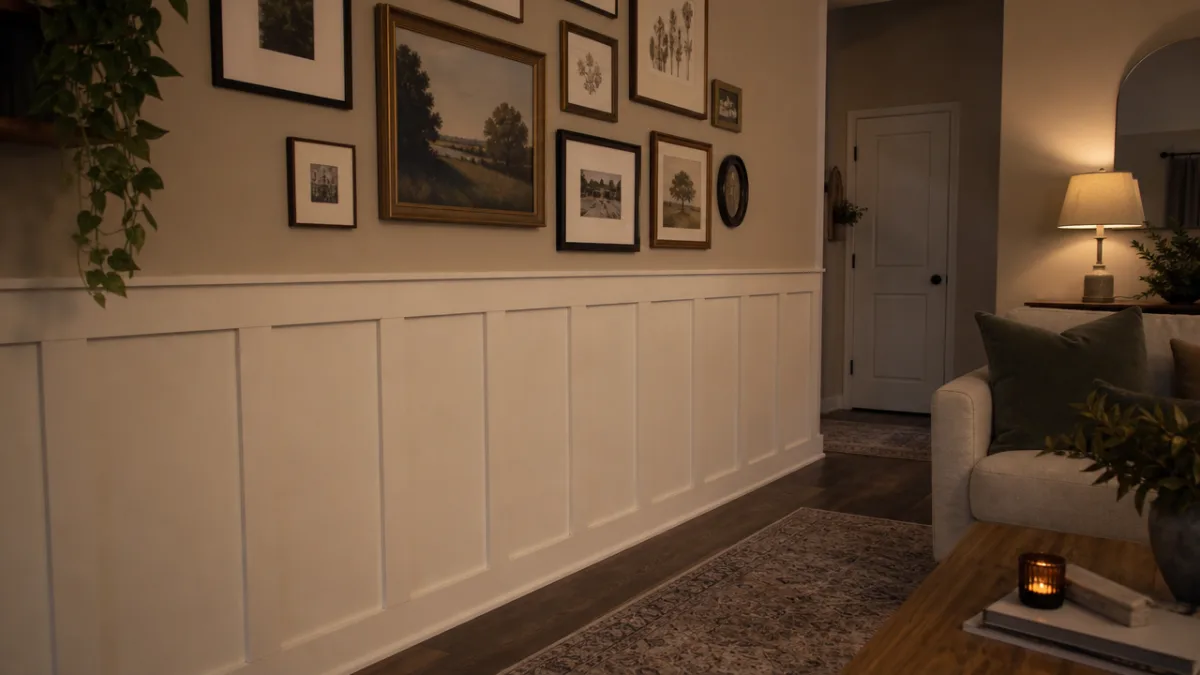
The beauty of this entire project lies not just in the finished result, but in what it represents: proof that a rented space is still your home, worthy of care, creativity, and personal expression. Wainscoting has historically been the domain of homeowners with contractors on speed dial, but these renter-friendly techniques have genuinely democratized one of interior design’s most elegant features. With a weekend, a modest budget, and a little patience, you can have walls that stop visitors in their tracks — walls that look like they cost thousands and took weeks, but that you achieved yourself for the price of a few dinners out. That’s the real magic of DIY, and it’s entirely within your reach.








What do you think?
It is nice to know your opinion. Leave a comment.