










Anthurium Problems: 5 Mistakes with Flamingo Flower Care
Introduction to the Flamingo Flower and Why It Struggles Indoors
The anthurium, affectionately known as the flamingo flower, is one of the most visually striking houseplants you can bring into your home. With its glossy, heart-shaped spathes that come in shades of red, pink, white, and even burgundy, it has a sculptural quality that few other plants can match. Native to the tropical rainforests of Central and South America, the anthurium has evolved to thrive under a very specific set of environmental conditions — conditions that most indoor environments simply do not replicate naturally. This fundamental mismatch between its origins and our homes is the root cause of most anthurium problems.
Despite being marketed as a relatively low-maintenance plant, anthuriums are surprisingly particular about their care requirements. Many plant owners are drawn in by their dramatic appearance, only to find the plant declining within weeks of bringing it home. The leaves may turn yellow, the blooms may fade without being replaced, or the roots may begin to rot in ways that are not immediately visible. Understanding why these problems occur is the first and most important step toward giving your flamingo flower the environment it truly needs to flourish over the long term.
What makes anthurium care especially tricky is that many of the most common mistakes look like logical, even conscientious decisions. Overwatering, for example, often comes from a place of good intention — the plant looks beautiful and the owner wants to keep it healthy. But anthuriums are epiphytes in the wild, meaning they grow on the surfaces of other plants and trees with their roots exposed to air. They are accustomed to drying out between moisture events, and standing water around their roots can be catastrophic. By learning the five most critical mistakes people make, you can dramatically improve your plant’s health and longevity.
Mistake One: Overwatering and Poor Drainage
Overwatering is, without a doubt, the single most common and most damaging mistake that anthurium owners make. Because the plant looks lush and tropical, it is easy to assume it wants constant moisture, much like the jungle environments we picture when we imagine its homeland. However, the conditions under which wild anthuriums grow are quite different from a soggy pot of standard potting mix sitting on a windowsill. In nature, excess water drains rapidly through organic debris and bark, and roots are never submerged in standing water for any meaningful length of time. In a home setting, mimicking that rapid drainage is essential.
The signs of overwatering can be subtle at first and are often mistaken for signs of other problems. Yellowing leaves are the most frequently reported symptom, but they can indicate several different issues, which leads many plant owners to diagnose incorrectly. Root rot, which develops when roots sit in waterlogged soil, can progress significantly before it becomes visible at the surface. By the time you notice soft, mushy stems at the base of the plant or a foul smell coming from the potting medium, the damage may already be extensive. Catching overwatering early — before root rot takes hold — is critical to saving the plant.
To avoid this mistake, always allow the top one to two inches of soil to dry out completely between waterings. Use a well-draining potting mix specifically designed for epiphytic plants, such as an orchid bark blend mixed with perlite and a small amount of peat or coco coir. Ensure your pot has drainage holes that are not blocked, and never leave your anthurium sitting in a saucer full of water for more than an hour after watering. During winter months, when the plant’s growth slows considerably, reduce watering frequency even further, as the roots take up moisture far more slowly during this period of relative dormancy.
- Check the soil moisture with your finger before watering — the top inch or two should feel dry to the touch.
- Use pots with drainage holes and empty saucers promptly after watering.
- Choose a chunky, well-aerated potting mix rather than dense, moisture-retaining soil.
- Reduce watering frequency significantly during autumn and winter months.
- If root rot is suspected, unpot the plant, trim affected roots with sterile scissors, and repot in fresh, dry mix.
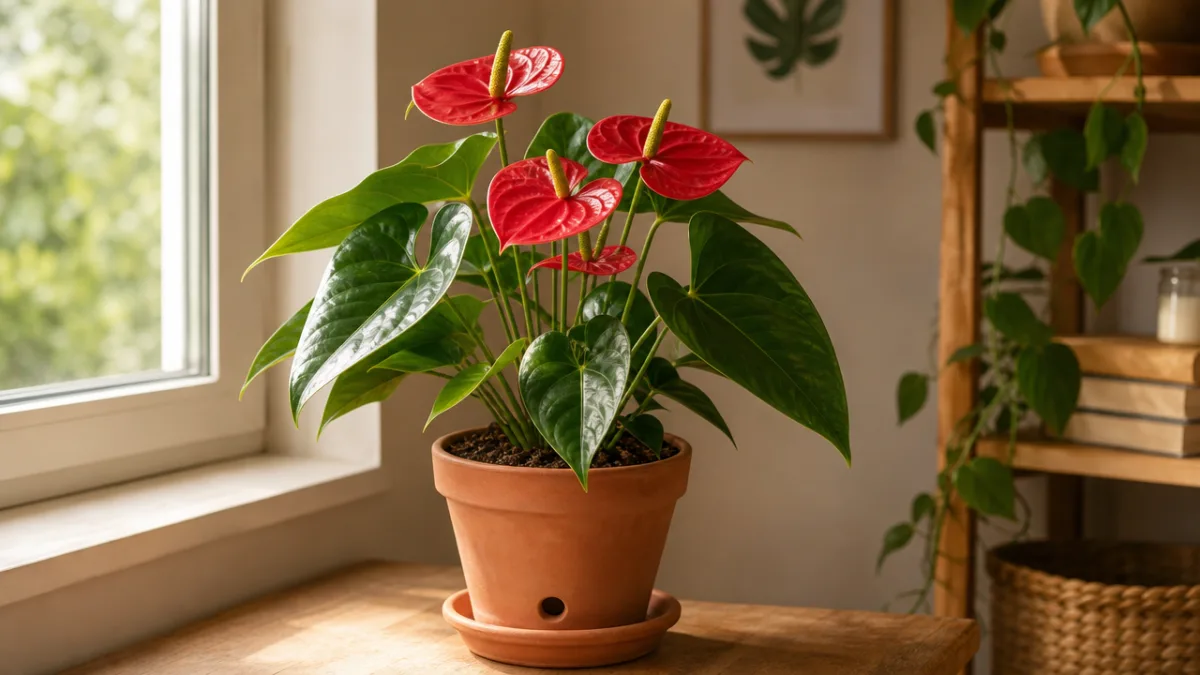
Mistake Two: Incorrect Light Conditions
Light is the second most commonly misunderstood aspect of anthurium care, and getting it wrong can have consequences that are just as severe as overwatering. Anthuriums are understory plants in their native habitat, which means they grow beneath the dense canopies of tropical forests, receiving bright but filtered light throughout the day. They are not adapted to tolerate direct sunlight for extended periods, and placing them in a south-facing window with unfiltered midday sun will scorch their leaves quickly, leaving brown, papery patches that will never recover. At the same time, placing them in deep shade will cause the plant to stop blooming and to grow very slowly, producing pale, weak foliage.
The ideal light condition for an anthurium is bright, indirect light — and understanding what that means in a practical sense is important. A spot near an east-facing window, where the plant receives gentle morning sun that does not intensify beyond mid-morning, is often perfect. A north-facing window can work in brighter climates or during summer months, though it may not provide enough light for consistent flowering in lower-light regions. West-facing windows can be acceptable if the plant is set back several feet from the glass to avoid the intensity of afternoon sun. South-facing windows are generally too bright unless sheer curtains diffuse the light effectively throughout the day.
Artificial lighting can be a valuable tool for anthurium owners who live in apartments with limited natural light, or those in climates where winter light levels drop dramatically. Full-spectrum LED grow lights positioned twelve to eighteen inches above the plant and run for twelve to fourteen hours per day can replicate the kind of bright, consistent illumination an anthurium would receive in its natural habitat. When transitioning an anthurium from one light environment to another — particularly from low light to brighter conditions — do so gradually over two to three weeks to allow the plant to acclimatize without experiencing shock or leaf burn.
Mistake Three: Using the Wrong Soil and Pot
The potting medium and container you choose for your anthurium have a profound impact on its overall health, yet many plant owners simply reach for a bag of standard all-purpose potting soil and the nearest available pot without giving either choice much thought. Standard potting soil is formulated to retain moisture, which benefits many common houseplants but is entirely wrong for an epiphytic plant like the anthurium. When used for anthuriums, it stays wet for far too long, compacts over time, and deprives roots of the air circulation they need to function properly. The result is almost always root rot, slow growth, and a plant that never truly thrives.
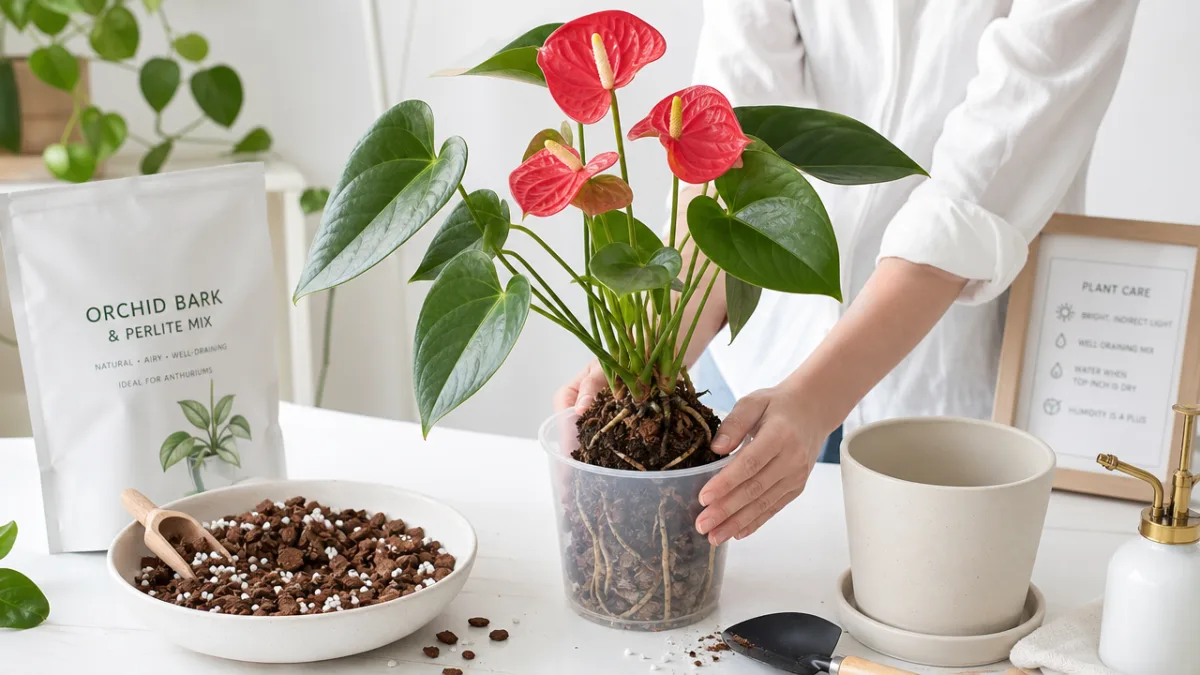
A well-constructed anthurium potting mix should feel light and open in your hand, with visible chunks of organic material and excellent drainage capacity. A popular and effective recipe combines equal parts orchid bark, perlite, and a finer organic component such as coco coir or peat moss. This mixture drains quickly while still holding enough moisture for the roots to absorb between waterings, and it maintains adequate air pockets around the root system to prevent suffocation. Some experienced growers even add small pieces of horticultural charcoal to the mix to help prevent bacterial growth and keep the root environment fresh over time.
The choice of pot is equally important. Terracotta pots are widely recommended for anthuriums because their porous walls allow excess moisture to evaporate through the sides, reducing the risk of waterlogging even if you water slightly too generously. Plastic and glazed ceramic pots retain moisture much longer and require more careful watering discipline to avoid problems. Whatever pot material you choose, size matters considerably as well. An anthurium planted in a pot that is too large will have its roots surrounded by a large volume of moist soil that they cannot quickly absorb, dramatically increasing the likelihood of root rot. Choose a pot that leaves only one to two inches of space around the root ball.
Mistake Four: Neglecting Humidity and Temperature Needs
Anthuriums come from environments where relative humidity routinely exceeds seventy percent, and while they are adaptable enough to survive in the lower humidity levels typical of most homes, they will not truly thrive without adequate moisture in the air. The average indoor environment, particularly in climates with cold winters and central heating, can have relative humidity levels as low as twenty to thirty percent — well below what anthuriums prefer. In these conditions, you may notice the edges and tips of leaves turning brown and crispy, a symptom often mistaken for underwatering or fertilizer burn. Increasing ambient humidity is one of the most impactful improvements you can make for your flamingo flower’s overall health and appearance.
There are several practical ways to raise humidity around your anthurium without creating conditions that promote mold or other moisture-related problems in your home. Using a small ultrasonic humidifier placed near the plant is one of the most effective and consistent methods, allowing you to maintain a steady humidity level between fifty and sixty percent. Grouping your anthurium together with other tropical houseplants creates a localized microclimate with higher humidity, as plants collectively release moisture through transpiration. Placing the pot on a tray filled with pebbles and water — ensuring the bottom of the pot sits above the waterline and does not contact the water directly — also provides a gentle, passive humidity boost through evaporation.
Temperature is the other environmental factor that is frequently overlooked. Anthuriums prefer consistently warm temperatures between sixty-five and eighty-five degrees Fahrenheit and are extremely sensitive to cold drafts, temperature fluctuations, and exposure to air conditioning vents. Temperatures below fifty degrees Fahrenheit can cause cold damage to the leaves and roots, presenting as dark, water-soaked patches that eventually turn black. Keep your anthurium away from exterior doors, drafty windows, and the direct flow of heating or cooling vents. Consistency is key — the plant thrives when its environment remains stable and predictable, closely mimicking the steady warmth of its tropical origins throughout the year.
- Aim for indoor humidity levels between fifty and sixty percent using a humidifier or pebble tray method.
- Keep temperatures consistently between sixty-five and eighty-five degrees Fahrenheit year-round.
- Never place the plant near air conditioning vents, radiators, or drafty windows.
- Monitor for cold damage during winter, especially near exterior walls or windows.
- Group tropical plants together to create a naturally more humid microclimate around all of them.
Mistake Five: Improper Fertilizing Practices
Fertilizing is an area where anthurium owners tend to err in one of two directions: either they never fertilize at all, assuming the plant will manage on whatever nutrients are in the potting mix, or they fertilize too heavily and too frequently, causing fertilizer burn that damages roots and foliage. Both extremes are harmful, and finding the right balance is essential for promoting healthy growth and, most importantly, consistent flowering. An anthurium that is never fertilized will eventually exhaust the nutrients in its potting medium and begin to show signs of deficiency, including pale leaves, reduced vigor, and a complete cessation of blooming that can persist for months or even years.
Anthuriums are not heavy feeders by the standards of many other tropical houseplants, but they do benefit significantly from regular, diluted fertilization during their active growing season, which typically runs from spring through early autumn. A balanced, water-soluble fertilizer with a ratio such as 10-10-10, diluted to one-quarter of the recommended strength, applied once every four to six weeks is a conservative and effective approach. Some growers prefer a fertilizer with a higher phosphorus content — the middle number in the ratio — because phosphorus plays a key role in flower production and root development, which can be particularly beneficial for encouraging the plant to produce its stunning spathes more reliably.
It is equally important to flush the potting medium with plain water every two to three months to prevent the gradual accumulation of mineral salts from fertilizer residue. Salt buildup in the soil can cause root damage that closely mimics the symptoms of drought stress or disease, leading to brown leaf tips and wilting even when watering practices seem correct. During autumn and winter, when the plant’s metabolic activity slows, reduce fertilization frequency to once every two months or stop entirely until growth resumes in spring. Always water the plant thoroughly before applying fertilizer to ensure the roots are hydrated, which helps protect them from the chemical concentration that fertilizer solutions can present to dry root tissue.
Diagnosing and Recovering from Common Anthurium Problems
Even with the best intentions and careful attention to the five mistakes outlined above, anthuriums can still encounter problems, and learning to diagnose them accurately is a skill that develops over time. Yellowing leaves remain the most ambiguous and frequently misread symptom, because they can result from overwatering, underwatering, excessive light, nutritional deficiency, or root rot — conditions that require very different corrective actions. The key is to consider the context: if yellowing is accompanied by soft, mushy stems or a foul smell, root rot is the likely culprit. If the yellowing leaves are those in the lowest position on the plant and the rest of the foliage looks healthy, this is simply normal leaf senescence and not a sign of any problem at all.
Brown leaf tips and edges most commonly indicate low humidity, over-fertilization, or salt accumulation in the soil. The pattern and texture of the browning can help distinguish between causes — dry, papery browning along margins typically suggests humidity or salt issues, while dark, water-soaked browning is more consistent with cold damage or bacterial infection. Lack of flowers is one of the most frustrating problems for anthurium owners and is usually attributable to insufficient light, inadequate fertilization, or temperatures that are too cool. Moving the plant to a brighter location and beginning a consistent fertilizing routine in spring will often trigger new blooms within two to three months.
Pest infestations, while less commonly the primary cause of anthurium decline, can exacerbate existing stress and introduce additional damage. Spider mites, mealybugs, scale insects, and thrips are the most frequently encountered pests on anthuriums and tend to proliferate when the plant is already weakened by poor growing conditions. Regular inspection of both the upper and lower surfaces of leaves, particularly in the joints where leaves meet stems, will help catch infestations before they become severe. Treatment with insecticidal soap, neem oil, or isopropyl alcohol applied with a cotton swab is effective for most soft-bodied pests when caught early and applied consistently over several weeks to break the pest life cycle completely.
Building a Long-Term Care Routine for a Thriving Anthurium
The most successful anthurium owners are those who develop a consistent, seasonal care routine rather than reacting to problems as they arise. Understanding that the plant’s needs shift with the seasons — requiring more water and fertilizer in spring and summer, and significantly less of both in autumn and winter — is foundational to this approach. Setting a regular schedule for checking soil moisture, inspecting for pests, wiping down leaves to remove dust that blocks light absorption, and evaluating the overall appearance of the plant will help you catch any emerging issues before they escalate into serious problems that are difficult or time-consuming to reverse.
Repotting is another aspect of long-term anthurium care that deserves careful attention. Anthuriums generally benefit from being repotted every two to three years, or whenever roots begin to emerge from the drainage holes at the base of the pot or circle visibly at the surface of the soil. Spring is the ideal time to repot, as the plant is entering its most active period of growth and will recover quickly from the disturbance. When repotting, take the opportunity to inspect the root system carefully, trim any dead or damaged roots, and refresh the potting medium entirely rather than simply moving the plant into a larger container with the old soil left intact around the root ball.
With patience, observation, and a willingness to adjust your care approach based on what the plant is telling you, the flamingo flower can be a deeply rewarding long-term companion in your home. Anthuriums that are grown in appropriate conditions are known to bloom repeatedly throughout the year, producing their distinctive, waxy spathes in cycles that can last for months at a time. The relationship between a plant owner and a well-cared-for anthurium is one that rewards attentiveness — the more closely you observe and respond to your plant’s signals, the more confidently you will be able to meet its needs and enjoy the spectacular results that follow when those needs are truly fulfilled.








What do you think?
It is nice to know your opinion. Leave a comment.