










100 Craft Room Storage Ideas to Organize Your Creative Space
Why Craft Room Organization Changes Everything
A well-organized craft room is so much more than just a tidy space — it’s really the foundation for genuine creative freedom. When your tools, materials, and supplies are easy to find and make logical sense where they live, you spend less time hunting for scissors or untangling ribbon and more time actually doing what you love. Clutter places an invisible tax on your creative energy, and a good organization system removes it entirely, letting your imagination run free without that low-level stress humming in the background.
If you’ve ever abandoned a project halfway through because you couldn’t find a specific color of thread or the right size brush, you know exactly what I mean. Those interruptions break your creative flow, and over time they can genuinely discourage you from sitting down to craft at all. Thoughtful storage prevents those small but frustrating setbacks and keeps your momentum alive from the first spark of an idea all the way to the finished piece.
What I love most about craft room organization is how personal it is. Unlike a kitchen or bathroom, where storage needs follow pretty predictable patterns, a craft room has to reflect your specific disciplines — whether you’re a quilter, a scrapbooker, a painter, a jewelry maker, or someone who happily dabbles in all of the above. The best storage systems grow and evolve right alongside your practice, making room for new materials and techniques as your skills develop.
Smart Furniture Choices That Maximize Space
The furniture you choose sets the whole structural foundation of your craft room storage strategy. A large worktable with built-in drawers is immediately useful — you get a generous surface for spreading out projects and dedicated compartments for the tools you reach for constantly. If you work across multiple disciplines, it’s worth looking for tables with adjustable heights. Standing height for cutting fabric, seated height for detailed paper crafting — that ergonomic flexibility makes a real difference during long creative sessions.
Pegboards mounted above your main workstation are honestly one of the best investments a crafter can make. They turn blank wall space into a dynamic, completely customizable storage system where hooks, shelves, bins, and holders can be rearranged whenever you feel like it — no tools, no commitment. Keeping your most-used scissors, rulers, tape dispensers, and pens hanging at eye level means every tool is a single effortless reach away, which speeds up your workflow more than you’d expect.
Rolling carts deserve a lot more credit than they typically get. A well-stocked rolling cart can function as a mobile supply station that travels with you from your main work table to a cutting mat across the room, or even wheels into the living room for a crafting session on the couch. Look for carts with multiple tiers and drawers that you can sort by project type, supply category, or how often you use things. A lot of crafters dedicate one tier to active projects, one to tools, and one to works-in-progress — and it just works.
Built-in cabinetry is a bigger investment, but it offers unmatched storage density and a clean, streamlined look that can make even a small craft room feel polished and intentional. Floor-to-ceiling cabinets with a mix of open shelving and closed doors let you display the pretty or frequently used stuff while tucking bulkier or less attractive supplies out of sight. If built-ins aren’t in the budget right now, a couple of freestanding bookcases flanking a central work area can get you surprisingly close to the same effect for a fraction of the cost.

Categorizing and Sorting Your Supplies
Before any storage system can really work, you need a categorization strategy that actually makes sense to your particular crafting brain. Some people organize by material type — all paper products together, all fabric together, all adhesives in one zone. Others prefer to organize by project type, keeping everything for card-making in one dedicated area and everything for sewing in another. Neither approach is better than the other; what matters is that the logic feels natural enough that you’ll actually maintain it without having to think too hard about it.
Color coding is a genuinely powerful organizational tool that a lot of crafters underestimate. Assigning a specific container color or label color to each supply category creates a visual shortcut that lets your eye find what you need in seconds, even when you’re working quickly or deep in a creative zone. Solid-colored bins, washi tape labels, or even paint swatches stuck to shelf edges can all do the job beautifully without requiring any expensive specialty products. It works because it taps into visual memory, which tends to be much faster and more reliable than trying to remember text-based labels.
Before you build any new storage infrastructure, do a thorough audit of what you actually have. You’d be surprised how often you’ll uncover duplicate tools, expired adhesives, materials from long-abandoned projects, or things you simply don’t enjoy working with anymore, all buried under more current supplies. Donating, selling, or recycling those items frees up valuable real estate and makes sure your storage system is serving your current practice rather than just archiving your past one. It’s a bit of a ruthless process, but it’s genuinely one of the best gifts you can give your future creative self.
Storage Solutions for Specific Craft Supplies
Different materials really do demand different storage approaches, and matching the solution to the material makes a huge difference in both accessibility and preservation. Here are some tailored ideas for the most common craft supply categories:
- Paper and cardstock: Store flat in vertical file organizers or desktop paper sorters, sorted by color family. Try to avoid horizontal stacking whenever you can — digging a specific sheet out from the middle of a pile leads to bent corners, creased edges, and a lot of unnecessary frustration.
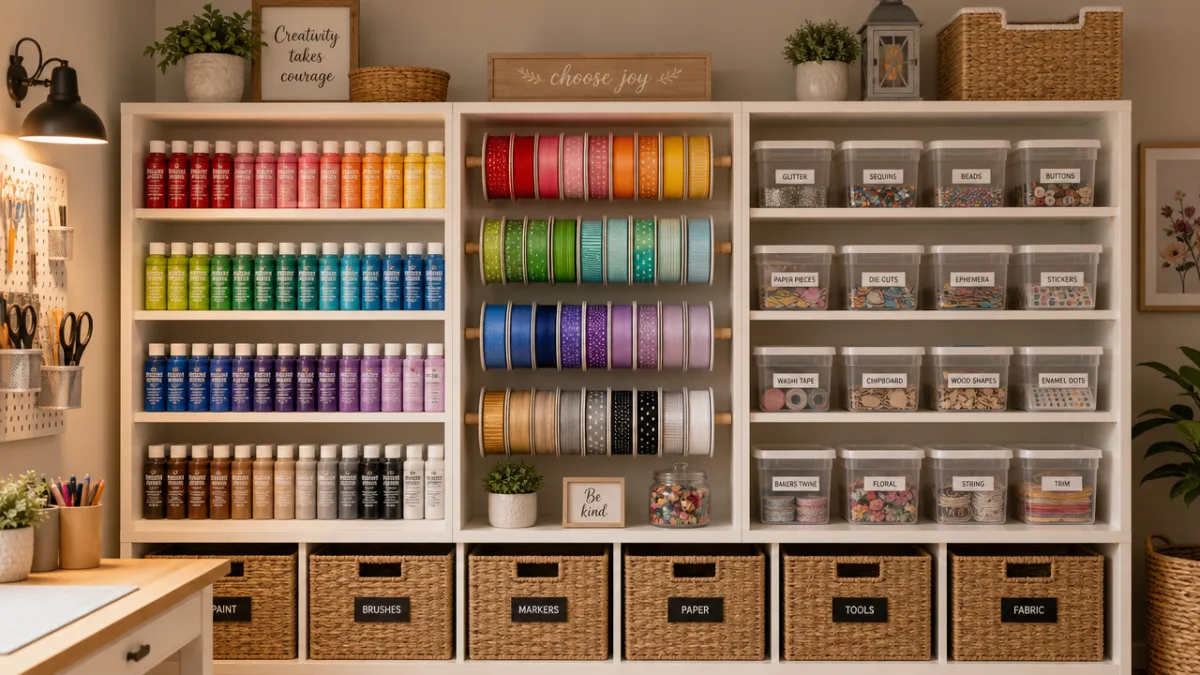
- Ribbon and twine: Thread spools onto wooden dowels mounted inside a cabinet door, or hang a clear shoe organizer on the wall and tuck individual rolls into the pockets. Either approach keeps everything visible and separated, which prevents the tangling that drives ribbon crafters absolutely crazy.
- Stamps and dies: Mount clear stamps onto acrylic blocks and store them in photo album sleeves or CD cases so you can see the stamp image at a glance. Metal dies are a perfect fit for magnetic sheets inside a binder or on a dedicated magnetic board.
- Paint and ink: Stand bottles upright on tiered shelf inserts with labels facing forward so you can see every color at once. Ink pads do best stored on their side to keep the ink evenly distributed. Group by color family or brand depending on how your brain tends to reach for them mid-project.
- Yarn and fiber: Clear lidded bins or open baskets let you see your collection at a glance while protecting it from dust. For whatever you’re actively working on, a yarn bowl keeps your working ball contained and feeds the strand smoothly instead of letting it roll across the floor.
- Beads and small embellishments: Small hardware drawers with transparent fronts, or stackable clear containers with divided interiors, are ideal for tiny items. Label every drawer or compartment right away — after even a few days, you genuinely won’t remember what’s in each one.
Washi tape deserves its own moment here, because it sits right at the intersection of tool and decorative object, and its storage should honor both. A lot of crafters display their washi collections on wooden dowels, custom dispensers, or tension rods strung between two points — creating a colorful, visually striking display that doubles as instant inspiration. Being able to see your full collection at a glance also means you’ll actually use what you have, rather than buying duplicates of colors you forgot you owned.
For fabric crafters, a well-organized fabric stash might just be the most satisfying storage achievement in the entire room. Folding pieces around comic book boards or scraps of cardboard creates uniform, stackable bundles that stand upright in clear bins and can be sorted by color or weight. Fat quarters and smaller cuts work beautifully in open wire baskets where you can fan through them quickly. And if you have a closet in the space, hanging a clear over-the-door organizer on the back of the door gives rolled fabric or batting pieces an instant home.
Creative Vertical Storage Strategies
Vertical space is the most underused real estate in almost every craft room, and tapping into it can effectively multiply your storage without needing a single extra square foot of floor space. Most crafters leave a huge amount of wall space — from baseboard all the way to the ceiling — largely untouched. Installing open shelves at varying heights and using the full wall height (with a small step stool for the top shelves) can transform a modest craft room into a storage powerhouse that punches well above its weight.
Floating shelves in a staggered or asymmetrical arrangement add both storage capacity and real visual interest, giving the room a gallery-like quality that feels intentionally designed rather than just functional. They’re especially nice for displaying beautiful supplies — glass jars of buttons, colorful thread spools, rows of artisan paints — where the materials themselves become part of the decor. Just make sure they’re properly anchored into wall studs, because craft supplies can get surprisingly heavy once you pile them on.
Over-door organizers are an affordable, no-installation-required vertical storage solution that a lot of crafters overlook because they mentally file them under “bathroom” or “pantry.” But a sturdy over-door organizer on a craft room closet door can hold an impressive amount — tools in the upper pockets, medium supplies in the middle, and heavier items lower down to balance the weight. Clear pocket versions are especially great because you can see everything at a glance without having to read a single label.
Budget-Friendly DIY Storage Hacks
Beautiful, functional craft room storage really doesn’t require a big budget or a special trip to a pricey organizing store. Some of the most effective solutions come from repurposing everyday household items and inexpensive finds from thrift stores, dollar stores, and the hardware aisle. The crafting mindset — seeing potential in unexpected objects — applies perfectly to organizing the space where that creativity lives. When you treat storage as its own creative project, you often end up with the most personalized and satisfying results.
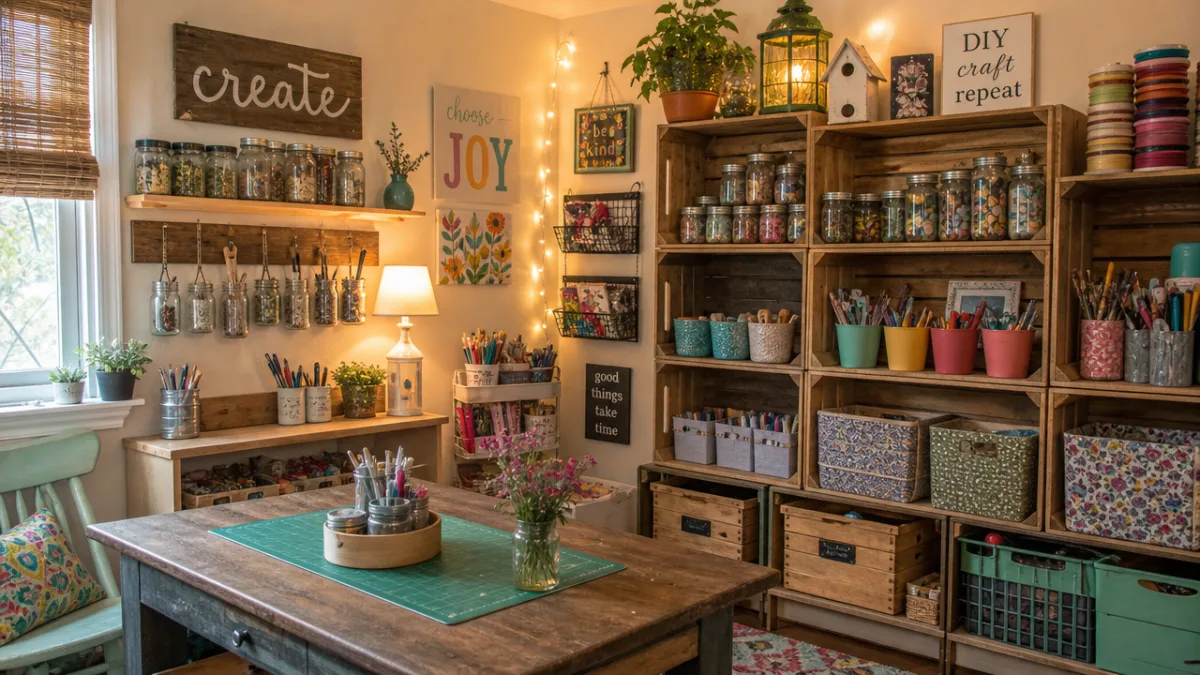
Glass jars in every size are among the most useful and attractive free storage containers available to anyone who cooks, cans, or simply buys pasta sauce. Cleaned up and relabeled, mason jars and repurposed food jars become perfect homes for buttons, beads, pom-poms, brads, eyelets, and dozens of other small embellishments. Arrange them on a shelf or suspend them from a mounted wooden strip using metal pipe clamps, and you’ve got beautiful visible storage that costs almost nothing. A handwritten or printed label on the lid means you can identify contents even when the jars are tucked away in a drawer or up on a high shelf.
Tension rods installed vertically inside a cabinet or deep drawer create instant dividers that can be repositioned any time without tools or damage. This works especially well for storing rolls of tape, ribbon spools, or bottles of paint and glue upright rather than lying on their sides. A tension rod placed horizontally beneath a shelf creates a quick hanging bar for spray cans, rolls of wrapping paper, or even a row of scissors hanging by their handle loops.
Repurposing a vintage suitcase, a salvaged wooden crate, or a thrifted filing cabinet brings character to a craft room that no off-the-shelf organizer can replicate. A filing cabinet painted in a favorite color and fitted with new decorative drawer pulls becomes a charming storage piece that holds a huge amount of paper, templates, and project files in a very space-efficient way. Wooden crates stacked and secured to a wall become open shelving with warmth and texture that manufactured units rarely achieve. These found-object solutions also tend to spark conversation, and they make a craft space feel genuinely yours rather than showroom generic.
Maintaining Your Organized Craft Room Over Time
Even the most beautifully organized craft room will slide into chaos without maintenance habits that are actually realistic for your life. The single most effective practice is what professional organizers call “one in, one out” — for every new supply you bring into the space, you let one go. It sounds simple, but this habit is what prevents the slow, silent accumulation that quietly undermines even the most thoughtfully designed storage system and keeps your space reflecting your current creative interests rather than your entire crafting history.
Building a quick end-of-session reset into your crafting routine — we’re talking five to ten minutes — pays enormous dividends in how you feel when you walk back in next time. Returning tools to their spots, capping markers and paints, tossing scraps, clearing the work surface: doing this at the end of each session means your next creative session starts with a clean slate and full mental bandwidth for making, not tidying. That small investment of time is almost always easier than facing a multi-session pile-up before you can even begin.
Seasonal reviews of your storage let you adjust as your practice evolves. Supplies that were front-and-center during holiday card-making season can migrate to less accessible storage once January rolls around, making room for whatever’s inspiring you right now. This kind of intentional rotation keeps your storage system responsive and alive rather than rigid and gradually out of sync with how you actually work. Try treating each seasonal review as a small celebration of how your creativity has grown — and as a chance to refresh both your space and your motivation.
Labeling, unglamorous as it is, might just be the most important single maintenance practice in any organized craft room. A storage system full of unlabeled containers is a storage system that gets abandoned within weeks — the mental effort of remembering what’s where without any visual cues is just too high to sustain alongside the cognitive demands of actual creative work. Get yourself a simple label maker, pick a consistent style and stick to it throughout the space, and commit to labeling every container, drawer, bin, and basket the moment it gets a designated purpose. Clear, honest labels are genuinely what separates a system that lasts for years from one that collapses the first time life gets busy.








What do you think?
It is nice to know your opinion. Leave a comment.