










Pressed Flower Lanterns: A Complete Guide to Creating Luminous Botanical Art
The Timeless Art of Pressed Flower Lanterns
Pressed flower lanterns sit at a beautiful intersection of two ancient crafts: the centuries-old tradition of flower pressing and the art of creating decorative light. When candlelight or soft LED glow passes through translucent petals, it transforms ordinary blooms into something almost otherworldly, casting delicate botanical shadows across walls and surfaces. The effect is nothing short of magical, and the process of creating these lanterns is deeply meditative and rewarding in its own right.
The history of pressed flowers stretches back to sixteenth-century Japan, where the practice was known as oshibana, and independently to Victorian England, where collecting and pressing botanical specimens became a beloved pastime among naturalists and hobbyists alike. Today, this tradition has been beautifully reimagined in the form of lanterns and luminaries, blending preservation with illumination to create home décor that feels both timeless and deeply personal. Each lantern you make carries within it the memory of a specific garden, season, or moment in time.
What makes pressed flower lanterns particularly appealing as a craft project is their accessibility. You do not need an expensive studio, specialized training, or a vast collection of tools. Most of the materials are either foraged from nature or inexpensive to purchase, and the techniques involved are forgiving enough for beginners while still offering plenty of creative depth for experienced crafters. Whether you want a simple afternoon project or an elaborate centerpiece for a special event, pressed flower lanterns can be adapted to suit your ambitions and skill level.
Choosing and Pressing Your Flowers
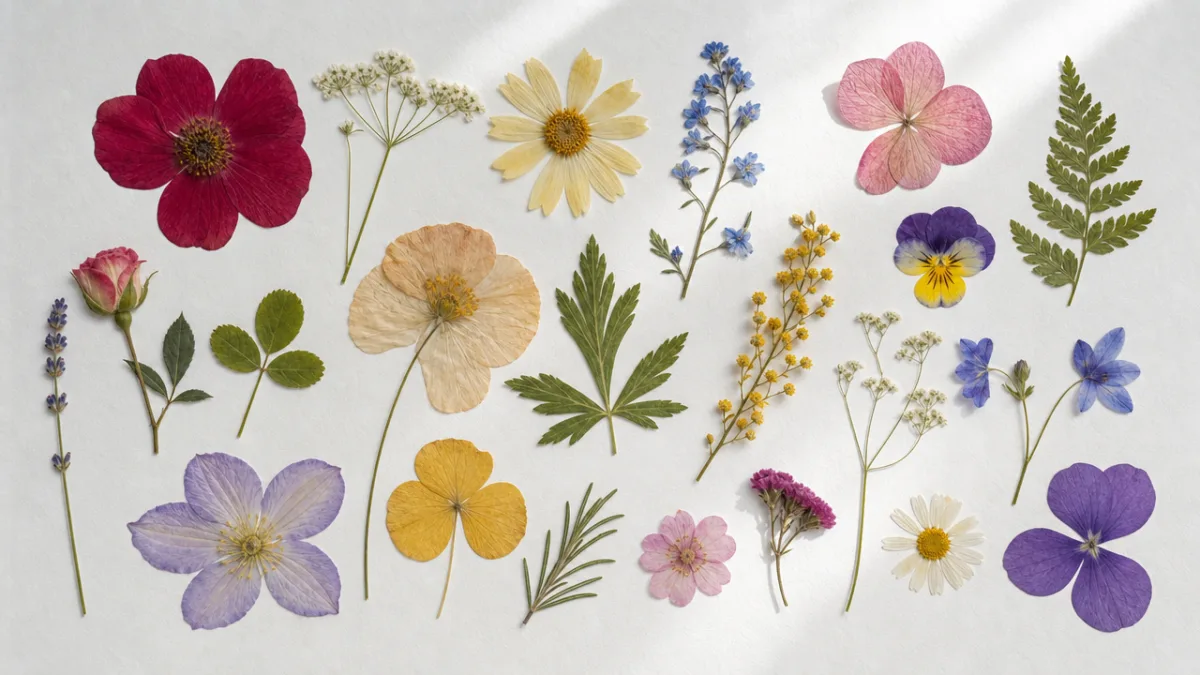
The foundation of any beautiful pressed flower lantern is, of course, the flowers themselves. Selecting the right blooms is both a practical and an aesthetic decision. For translucency, you want flowers and foliage with relatively thin petals and leaves, as thick, fleshy flowers tend to retain moisture and may not press cleanly. Some of the most stunning results come from unexpected sources: the papery wings of a pansy, the delicate lacework of Queen Anne’s lace, the jewel-toned petals of a viola, or even the feathery fronds of a fern. Roses can work beautifully too, but you will need to use individual petals rather than the whole bloom.
Timing your harvest matters enormously. The best time to pick flowers for pressing is mid-morning on a dry day, after the dew has evaporated but before the afternoon heat causes wilting. Choose specimens at their peak or just slightly before full bloom, since fully open flowers can lose petals during pressing. Avoid any blooms that show signs of disease, pest damage, or excessive moisture. Once you have gathered your flowers, work quickly, as the fresher they are when they go into the press, the better your final results will be.
There are several effective methods for pressing flowers, from traditional flower presses to heavy books lined with absorbent paper. For lantern making specifically, a microwave flower press can be a wonderful time-saver, reducing the typical two-to-four week pressing time down to just a few minutes. Whatever method you choose, the key principles remain the same: even pressure, good absorption of moisture, and patience. Arrange your flowers face-down on absorbent paper such as blotting paper or plain newsprint, being careful not to overlap petals, then cover them and apply weight. Check periodically and replace damp paper as needed until the flowers are completely flat and papery dry.
Materials and Tools You Will Need
Gathering your materials before you begin saves frustration and keeps the creative process flowing. The core material for pressed flower lanterns is typically either wax paper, vellum paper, or thin Japanese rice paper, all of which allow light to pass through while providing a surface to which pressed flowers can adhere. Wax paper is the most accessible and budget-friendly option, readily available in any grocery store. Vellum offers a slightly more refined, semi-transparent finish, while rice paper gives the most authentically artisanal appearance and often the most beautiful light diffusion.
For the lantern structure itself, you have several options depending on your desired aesthetic. Simple glass jars or votive holders make excellent beginner lanterns because they provide stability and protection for the delicate botanical elements. More advanced crafters often construct geometric lantern frames from balsa wood, copper wire, or even repurposed metal hardware, then apply their pressed flower panels to the sides. Pre-made paper lantern kits are also available and can be deconstructed and rebuilt with botanical panels, offering a nice middle ground between full DIY construction and a purely decorative approach.
Here is a checklist of the essential materials you will want to have on hand before starting your project:
- Pressed and fully dried flowers, leaves, and botanical specimens in a variety of sizes and colors
- Wax paper, vellum, or Japanese rice paper cut to your desired panel dimensions
- A lantern base such as a glass jar, wire frame, or wooden lantern structure
- Mod Podge, craft glue, or a dedicated decoupage medium for adhering botanicals
- Small paintbrushes or foam applicators for applying adhesive
- Scissors and a craft knife with a cutting mat for precise trimming
- LED tea lights or battery-operated fairy lights to illuminate the finished lantern safely
- Tweezers for handling delicate pressed specimens without damage
- A brayer or soft cloth for smoothing panels and removing air bubbles
One important note on lighting: always use LED or battery-operated Candles inside pressed flower lanterns rather than real flames. Even though the flowers and paper have been dried, they remain flammable, and a real candle creates a fire risk that simply is not worth taking. Fortunately, modern LED tea lights do an extraordinary job of mimicking warm candlelight, and many are now available with realistic flickering effects that make it nearly impossible to tell the difference from across a room.
Step-by-Step Construction Techniques
With your materials assembled and your pressed flowers ready, you can begin the actual construction of your lantern. The first step is to prepare your translucent paper panels. Measure and cut your wax paper or vellum to the dimensions required for each side of your lantern, adding a small margin of roughly half an inch on each side to allow for overlap or folding. If you are working with a cylindrical jar, you will need to measure the circumference and height of the jar and cut a single rectangular panel that will wrap around the outside.
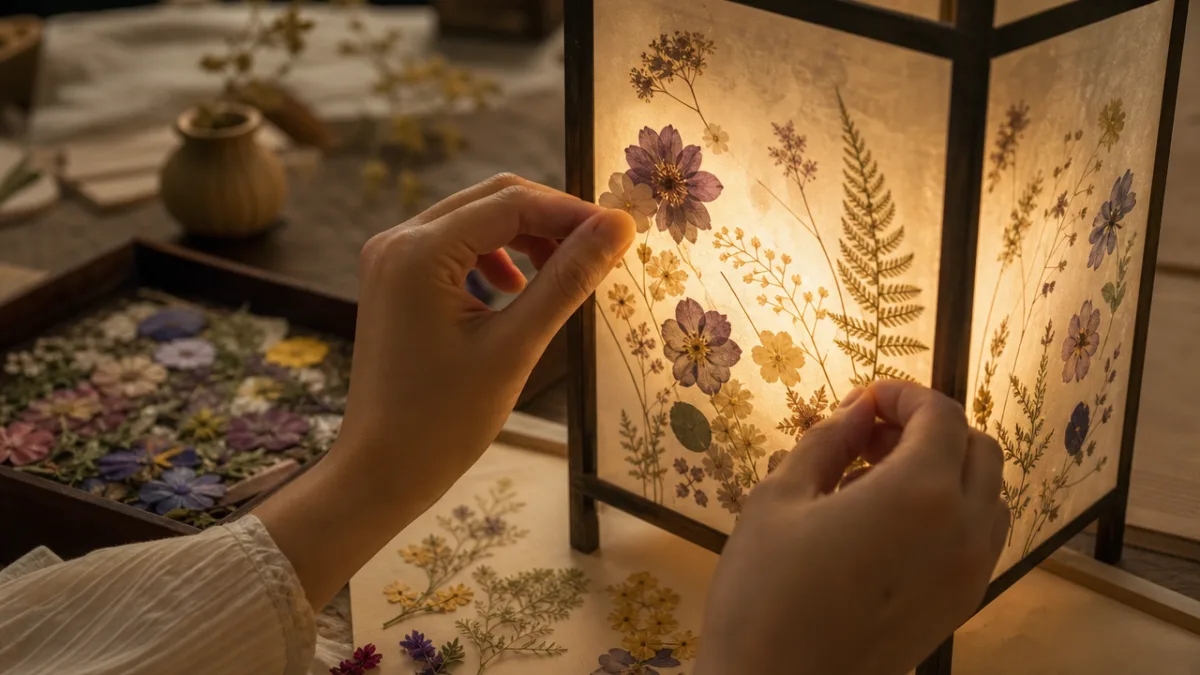
Lay your paper panels flat on a clean, protected work surface. Using your tweezers, begin arranging your pressed flowers on the panels without any adhesive first. This planning stage is crucial and should not be rushed. Think about color balance, varying the scale of your botanical elements, and creating a sense of natural flow and movement across the design. Smaller flowers and individual petals can fill gaps and create a denser, more abundant feel, while a few larger statement blooms provide visual anchors. Step back frequently to assess your arrangement from a distance, as what looks good up close does not always translate well when the lantern is lit from within.
Once you are happy with your arrangement, begin adhering the botanicals one piece at a time. Apply a thin, even layer of Mod Podge or decoupage medium to the back of each flower using a small brush, then press it gently into position on the paper. Work from the center outward to avoid disturbing previously placed elements. After all flowers are adhered, apply a final sealing coat of decoupage medium over the entire panel, brushing it out smoothly to avoid streaks or bubbles. Allow this to dry completely, which typically takes thirty minutes to an hour depending on humidity. For added durability and a more polished finish, you can apply two to three sealing coats, allowing each to dry fully before adding the next.
Wrapping and Assembling the Lantern
Once your panels are fully dry and sealed, it is time to assemble the lantern. For a jar lantern, carefully wrap your botanical panel around the outside of the glass, securing it with a thin line of craft glue or double-sided tape along the seam. You can finish the top and bottom edges with a strip of ribbon, twine, dried grass, or decorative washi tape to create a clean, polished border and add another layer of Texture to the design. The rustic charm of natural twine pairs beautifully with wildflower designs, while velvet ribbon elevates the lantern into something more formal and elegant.
For geometric or box-shaped lanterns with structural frames, each panel is typically attached individually to the frame using craft glue, small wire wraps, or even tiny binder clips while the adhesive sets. Take care to align panels precisely at the corners for a clean finish. If you find that your panels are slightly too stiff to conform easily to a curved or angled surface, a very light misting of water can make them more pliable for a short period without damaging the botanicals.
Hanging vs. Standing Lanterns
Pressed flower lanterns can be displayed in two primary ways, and each creates a very different visual effect. Standing lanterns, placed on a mantle, shelf, or tabletop, allow the light to radiate outward in all directions, casting botanical shadows onto surrounding surfaces. Hanging lanterns, suspended from a hook or a branch, create a more ethereal quality, especially when grouped in clusters at varying heights. For hanging displays, ensure your lantern is lightweight and that your hanging mechanism is securely attached to a structural element of the frame rather than just to the paper panels.
Design Variations and Creative Inspirations
One of the most exciting aspects of pressed flower lanterns is the sheer breadth of creative possibilities they offer. A monochromatic design using only white and cream flowers creates a ghostly, romantic aesthetic that is particularly striking when lit. Think white pansies, baby’s breath, and silvery dusty miller against a creamy vellum background. Conversely, a riot of jewel-toned blooms in deep purples, saturated pinks, and vivid oranges creates a festive, joyful lantern that feels like a celebration of the garden at its most exuberant peak.
Seasonal themes offer another rich avenue for creative exploration. Spring lanterns might feature cherry blossoms, tulip petals, and tender young fern fronds in soft pinks and greens. Summer designs could showcase zinnias, black-eyed Susans, and the brilliant blue of bachelor’s buttons. Autumn calls for pressed maple leaves in their full fiery glory, alongside dried seed heads and the russet tones of late chrysanthemums. Winter lanterns, while botanically limited, can be strikingly beautiful when they incorporate preserved holly, dried citrus slices, and the skeletal elegance of bare branches against white paper.
Beyond flowers, consider incorporating other botanical and natural elements to add texture and visual interest. Pressed fern fronds create beautiful lacework backgrounds. Lichen and moss, though challenging to press flat, add wonderful organic texture when used sparingly. Seed heads from plants like allium, poppy, and lotus add architectural interest. Even non-botanical elements like tissue paper overlays, watercolor washes applied to the background paper before pressing, or gilded details added with metallic paint pens after assembly can elevate your lantern from a simple craft project to a genuine work of art.
Caring for and Displaying Your Pressed Flower Lanterns
Pressed flower lanterns are surprisingly durable when properly made and cared for, but they do benefit from a little thoughtful attention. The most important thing to remember is that pressed botanicals, especially those that retain natural pigment, are sensitive to prolonged direct sunlight. UV exposure causes fading over time, which can be beautiful in its own right as colors soften to gentle pastels, but if you want to preserve the original vibrancy of your blooms for as long as possible, display your lanterns away from windows that receive strong direct sun.
Dust is the other primary enemy of pressed flower lanterns. Over time, dust can settle into the textured surfaces of the petals and prove difficult to remove without damaging the delicate botanicals. A very gentle pass with a soft artist’s brush or a can of compressed air used from a distance can help keep your lanterns looking fresh. For deeper cleaning, a barely damp cloth can be used on the outer surface of the sealing medium, but avoid getting moisture near any unsealed edges or joins, as this can cause the paper to warp or the botanicals to lift.
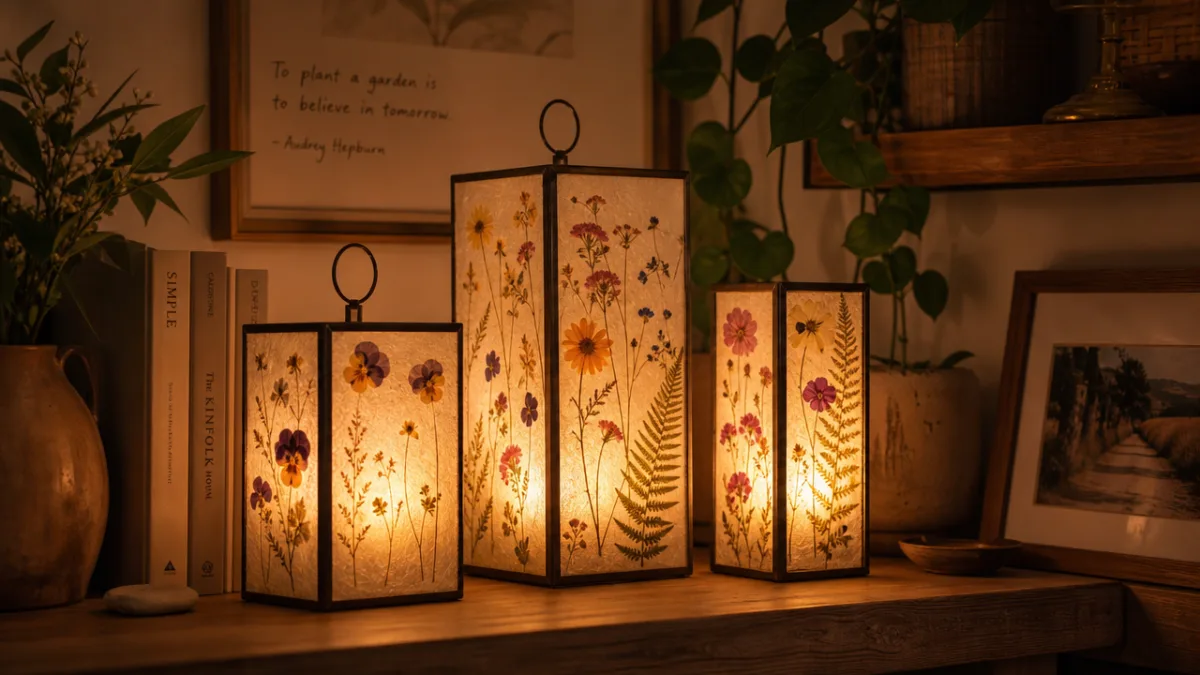
When it comes to displaying pressed flower lanterns in your home, think about clustering multiple lanterns together for maximum impact. A grouping of three to five lanterns in varying heights and sizes creates a much more dramatic visual statement than a single lantern in isolation. They work beautifully as centerpieces for dining tables, wedding receptions, or garden parties, and as permanent home décor they bring a gentle, organic warmth to bookshelves, bathroom windowsills, bedroom nightstands, and entryway console tables. Their soft, diffused light is universally flattering and creates an atmosphere of calm and quiet beauty wherever they are placed.
Gifting and Sharing the Craft
Pressed flower lanterns make extraordinarily thoughtful and personal gifts, particularly because they can be so easily customized to reflect the recipient’s taste, favorite colors, or even flowers gathered from a meaningful location. Imagine a lantern made from blooms picked in a grandmother’s garden, or one crafted from the flowers used in a wedding bouquet. These are not just decorative objects but vessels of memory and sentiment, and the time and care invested in making them communicates something that a purchased gift rarely can.
If you enjoy making pressed flower lanterns, consider sharing the craft with others through workshops or collaborative crafting sessions. These projects are wonderfully social activities, well-suited to gatherings where people can bring their own flowers, share materials, and exchange techniques and creative ideas. They are equally appropriate for children and adults, for complete beginners and experienced crafters, and for casual afternoon get-togethers and more structured creative workshops. The process of pressing and arranging botanicals is calming and meditative, making it an especially welcome activity in an era when many people are seeking more slow, mindful creative pursuits.
Pressed flower lanterns also photograph exceptionally well, making them natural subjects for creative social media content and a lovely way to share the beauty of your garden with a wider community. Photographing your lanterns lit from within against a dark background captures their luminous, jewel-like quality most effectively. Natural daylight photography with the lanterns placed near a bright window highlights the botanical details and translucency of the paper. However you choose to share them, pressed flower lanterns have a way of inspiring others to slow down, look more closely at the natural world, and find beauty in the small, ephemeral things that make up the texture of daily life.








What do you think?
It is nice to know your opinion. Leave a comment.