










Fern Plant Care: The Complete Guide to Growing Lush, Thriving Ferns
Understanding Ferns: Ancient Plants for Modern Homes
Ferns are among the oldest plant families on Earth, having existed for more than 360 million years. These remarkable survivors predate dinosaurs, flowering plants, and even most trees. Their enduring success as a species speaks volumes about their adaptability and resilience, though many home gardeners find them surprisingly particular about their growing conditions. Understanding a fern’s natural origins is the first step toward giving it the care it truly deserves.
In their native habitats, most popular houseplant ferns grow beneath the dense canopies of tropical and subtropical forests. They thrive in dappled shade, surrounded by decomposing organic matter, and in environments where humidity is constantly high. The forest floor where they live receives filtered light, steady moisture from rainfall and mist, and temperatures that rarely swing dramatically. Replicating these conditions in your home is the fundamental challenge and joy of fern care.
There are over 10,000 known species of ferns, ranging from tiny aquatic varieties to tree ferns that can tower several meters tall. Common houseplant varieties include the Boston Fern, the Maidenhair Fern, the Bird’s Nest Fern, the Staghorn Fern, and the Kimberly Queen Fern. Each has its own personality and slightly different care preferences, but all share a common love of moisture, indirect light, and well-draining yet consistently damp soil. Knowing your specific variety helps you fine-tune your care routine for the best results.
Choosing the Right Fern for Your Space
Before purchasing a fern, take an honest look at your living space. Boston Ferns, one of the most popular varieties, are beautiful but demanding — they need consistent humidity that many centrally heated or air-conditioned homes struggle to provide. The Bird’s Nest Fern, on the other hand, is considerably more tolerant of lower humidity and inconsistent watering, making it a friendlier choice for beginners or for drier climates. Matching the fern to your environment will save you considerable frustration.
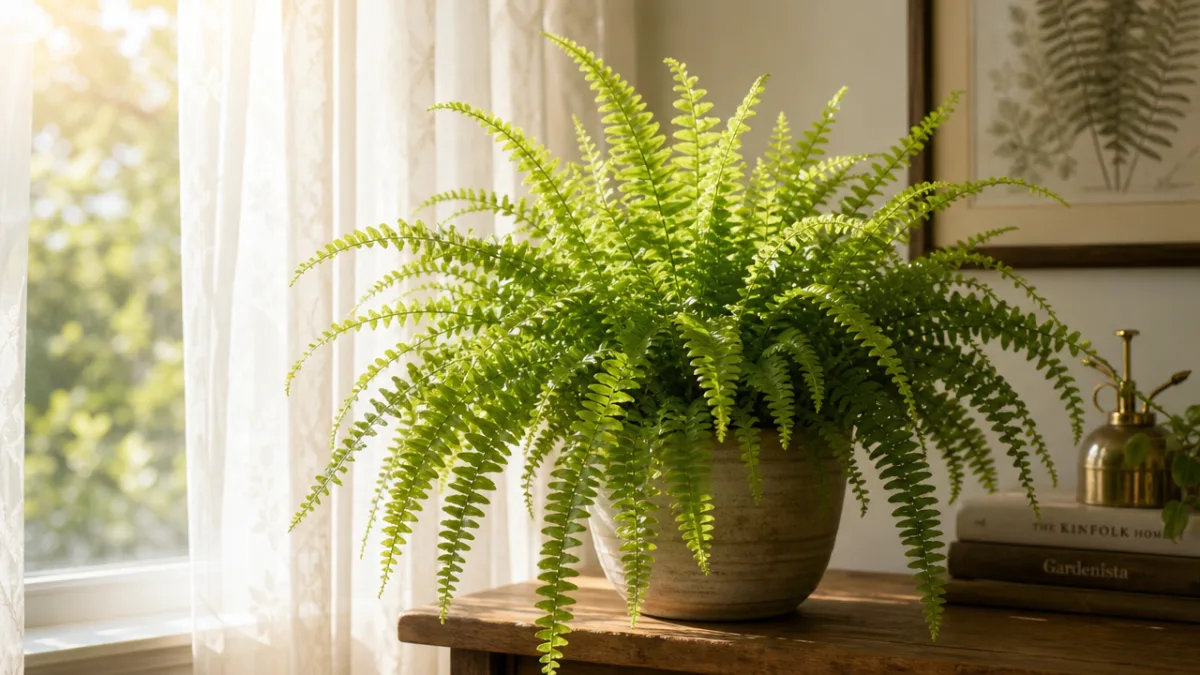
Consider the light conditions in your home. Rooms with north-facing or east-facing windows tend to offer the gentle, indirect light that ferns prefer. South or west-facing windows can work if the fern is placed several feet away from the glass or behind a sheer curtain. Avoid any spot where direct sunlight falls on the leaves for extended periods, as this will quickly scorch and yellow the delicate fronds. The right light placement is one of the most important decisions you will make for your fern’s health.
Space and aesthetic considerations also matter. Hanging baskets are a classic way to display Boston Ferns, allowing their graceful arching fronds to cascade beautifully. Bird’s Nest Ferns, with their large rosette-shaped growth, look stunning on shelves or as a tabletop centerpiece. Staghorn Ferns are dramatic mounted on wooden boards and hung on walls, creating an almost sculptural effect. Think not just about what the fern needs, but how it will contribute to the beauty and atmosphere of your home.
Light Requirements: Finding the Perfect Balance
Light is one of the most commonly misunderstood aspects of fern care. Many people assume that because ferns like shade, they can survive in dark corners with almost no natural light. While ferns are more tolerant of low light than many houseplants, they still need a meaningful amount of indirect or filtered light to maintain their vibrant green color and produce new growth. A fern kept in near darkness will slowly decline, losing its luster and eventually failing to thrive no matter how well you water or fertilize it.
The ideal light for most houseplant ferns is bright, indirect light. This means positioning the plant near a window where it receives good ambient light throughout the day without ever being struck by direct sun rays. A few feet back from a well-lit window is often ideal. East-facing windows are particularly excellent because they provide gentle morning sun that is warm enough to encourage growth but not intense enough to cause leaf burn. This is the closest equivalent to the dappled forest-floor light that ferns evolved to love.
Seasonal light changes are worth paying attention to. In winter, when the sun is lower in the sky and days are shorter, you may need to move your fern closer to the window to ensure it gets enough light. In summer, if your fern has been near a south or west window, it may need to be moved farther back or given some additional shading as the sun’s angle and intensity increase. Many experienced fern growers make these small seasonal adjustments as part of their routine, and they make a noticeable difference in the plant’s overall health and appearance throughout the year.
Supplementing with Artificial Light
If your home doesn’t have ideal natural light, full-spectrum grow lights can be an excellent solution for fern care. LED grow lights in particular have become affordable, energy-efficient, and highly effective at supplementing or even replacing natural sunlight for indoor plants. When using grow lights for ferns, aim for a moderate light intensity and keep the lights on for around 12 to 14 hours per day to mimic natural day length. Avoid placing the grow light too close to the fern, as even artificial light can cause scorching if the source is too intense or too near.
Position your grow light so it illuminates the plant from above at a distance of roughly 12 to 18 inches. This mimics the overhead quality of natural light and encourages even, balanced growth across all of the fronds. If you notice your fern growing lopsided or leaning strongly in one direction even under a grow light, rotate the pot slightly every week or two to ensure all sides receive equal illumination. Even growth patterns are a sign that your fern is receiving well-distributed light.
Some growers combine natural and artificial light by placing ferns near a window during the day and supplementing with a grow light in the morning or evening hours. This hybrid approach can be especially helpful in northern climates during winter months when natural light is scarce. The key is consistency — ferns do not respond well to erratic changes in light levels, so once you find a setup that works, maintain it as steadily as possible. Consistency in light, as in most aspects of fern care, is what separates thriving specimens from struggling ones.
Watering Ferns: Moisture Without Overwatering
Watering is where most fern owners stumble, and it is the single most common cause of fern decline in home settings. Ferns need consistently moist soil, but they absolutely cannot tolerate sitting in waterlogged conditions. The roots of a fern need oxygen as much as they need water, and when soil remains saturated for extended periods, the roots begin to rot, cutting off the plant’s ability to absorb nutrients and water. Paradoxically, a fern with root rot will often show symptoms of dehydration — wilting, browning fronds — because its damaged roots can no longer function.
The best approach to watering ferns is to check the soil regularly by pressing your finger about an inch deep into the growing medium. If it feels barely moist or beginning to dry out, it is time to water. If it still feels damp, wait another day and check again. When you do water, water thoroughly, allowing water to flow freely through the drainage holes until you are confident the entire root zone has been moistened. Then empty the saucer beneath the pot so the plant is not sitting in standing water. This thorough-but-not-constant approach mimics the natural cycle of tropical rainfall that ferns evolved alongside.
The quality of water you use matters more for ferns than for many other houseplants. Tap water in many areas contains chlorine, fluoride, or high levels of dissolved minerals that can cause tip burn and browning on fern fronds over time. If possible, use filtered water, rainwater, or water that has been left out overnight to allow chlorine to dissipate. Some fern enthusiasts use only collected rainwater for their plants and report noticeably healthier, more vibrant growth. If you live in an area with very hard tap water, this simple switch can make a remarkable difference in the appearance of your ferns.
Seasonal Watering Adjustments
Like most living plants, ferns have seasonal rhythms that influence how much water they need. During the active growing season — typically spring and summer — ferns are putting out new fronds, absorbing nutrients, and generally operating at their most vigorous. During this time, they will require more frequent watering to keep pace with their increased activity. You may find yourself watering every two to three days during warm, bright periods, particularly if your fern is in a terracotta pot or a breezy location that dries out soil quickly.
In autumn and winter, ferns naturally slow their growth, and their water requirements decrease accordingly. Continuing to water at the same frequency you used in summer during the cooler months is one of the most reliable ways to develop root rot. Scale back your watering and let the soil approach the edge of dryness more than you would in summer, while still never allowing it to completely dry out. Even in their slower season, ferns should not be treated like succulents — they do not appreciate true drought conditions at any time of year.
Bottom watering is a technique that many fern enthusiasts swear by. Rather than pouring water over the top of the soil, you place the fern’s pot in a shallow tray of water and allow the soil to absorb moisture from below through the drainage holes. After about 20 to 30 minutes, you remove the pot and let it drain fully. This method encourages roots to grow downward toward the water source, creates more even moisture distribution throughout the root ball, and avoids getting water on the crown or fronds of the plant — which can sometimes lead to rot or fungal issues in certain species.
Humidity and Temperature: Creating a Tropical Microclimate
If there is one care parameter that defines fern health more than any other, it is humidity. Ferns evolved in environments where relative humidity regularly exceeds 70 percent, and most homes — especially during winter when heating systems dry out indoor air — hover between 30 and 50 percent. This gap between what ferns want and what most homes naturally offer is responsible for the crispy brown frond tips that plague so many indoor fern growers. Addressing humidity is not optional if you want your ferns to truly thrive; it is essential.
There are several effective methods for increasing humidity around your ferns. Grouping plants together creates a small humid microclimate as each plant transpires moisture into the air around it. Placing your fern’s pot on a tray filled with pebbles and water — ensuring the bottom of the pot sits above the waterline — allows water to evaporate slowly around the plant throughout the day. Running a cool-mist humidifier nearby is perhaps the most effective single intervention you can make, particularly in winter. Some growers place their ferns in bathrooms or kitchens where ambient humidity from showers and cooking keeps the air naturally more moist.
Misting is a popular suggestion for increasing humidity around ferns, but its effectiveness is debated among experienced growers. A fine mist of water applied in the morning can temporarily raise humidity around the plant, but the effect dissipates within an hour or two. More importantly, misting can sometimes leave water sitting on fronds, which in certain conditions encourages the development of fungal diseases. If you choose to mist, do so lightly and in the morning so fronds have time to dry before cooler evening temperatures arrive. A dedicated humidifier is generally a more reliable and safer solution.
Temperature Considerations for Healthy Growth
Most common houseplant ferns prefer temperatures between 60 and 75 degrees Fahrenheit (15 to 24 degrees Celsius) and will tolerate the typical range found in most homes without difficulty. What ferns genuinely dislike are sudden temperature fluctuations and exposure to cold drafts or dry heat sources. Placing a fern near an air conditioning vent, a heating register, or a frequently opened exterior door subjects it to the kind of stressful temperature swings that can cause rapid browning and frond drop. Scout your chosen location carefully before committing your fern to it.
Cold windowsills in winter can be problematic even if the room temperature is comfortable. The glass of a window radiates cold in winter, and fern leaves or fronds resting against the glass can sustain cold damage. Keep ferns pulled back a few inches from window glass during colder months. Similarly, the soil in pots sitting on cold floors or windowsills can become chilled, which slows root function and water uptake. A simple cork or bamboo mat beneath the pot can provide enough insulation to make a meaningful difference in the plant’s comfort.
Ferns are generally not frost-tolerant, though a small number of species are surprisingly cold-hardy and can survive outdoors in temperate climates. The vast majority of popular houseplant varieties should be kept well above freezing at all times. If you move your ferns outdoors for the summer — which can result in spectacular growth — bring them back inside well before the first frost is expected, ideally when nighttime temperatures begin to approach 50 degrees Fahrenheit (10 degrees Celsius). Give them time to readjust to indoor conditions before the full stress of a cold winter arrives.
Soil, Fertilizing, and Repotting: Nurturing Root Health
The growing medium you choose for your fern has a significant impact on how easy it is to maintain the right moisture balance. Ferns need a soil that retains moisture well but also drains freely enough to prevent waterlogging. Standard potting soil on its own is often too dense and compacts over time, reducing aeration in the root zone. A better approach is to use a peat-based or coco coir-based potting mix amended with perlite or orchid bark to improve drainage and aeration. Many gardeners also add a small amount of organic material such as worm castings to provide gentle, slow-release nutrients.
A well-structured fern mix might consist of two parts high-quality peat or coco coir, one part perlite, and one part fine orchid bark or compost. This combination holds enough moisture to keep fern roots happy while allowing excess water to drain freely and air to circulate through the root zone. Avoid mixes that contain a lot of synthetic slow-release fertilizer pellets, as ferns are sensitive to over-fertilization and can suffer chemical burn if fertilizer concentrations become too high. Starting with a relatively lean mix gives you more control over the nutrients your fern receives.
Repotting is necessary when your fern becomes root-bound — when roots are visibly circling the bottom of the pot or emerging from drainage holes. For most ferns, this happens every one to two years. When repotting, choose a new pot only slightly larger than the current one — about one to two inches larger in diameter. A pot that is dramatically oversized will hold far more soil than the roots can use, and that excess soil will stay wet for too long, increasing the risk of root rot. Spring is the ideal time to repot, just as the plant is beginning its active growing season and will recover most quickly from the disturbance.
Fertilizing Ferns for Vibrant, Healthy Growth
Ferns are not heavy feeders, and less is genuinely more when it comes to fertilization. Over-fertilizing is one of the more common mistakes made by enthusiastic fern growers. Too much fertilizer — particularly nitrogen — causes rapid but weak growth, and the buildup of salts in the soil can burn roots and cause the brown leaf tips that many mistake for drought stress. A balanced, diluted liquid fertilizer applied at half the recommended strength once a month during the growing season is a safe and effective approach for most fern varieties.
Look for a balanced fertilizer with roughly equal parts nitrogen, phosphorus, and potassium — a formula like 10-10-10 or 20-20-20 diluted to half strength works well. Some growers prefer fertilizers formulated specifically for foliage plants, which typically have a higher nitrogen ratio to promote lush, green leafy growth. Organic liquid fertilizers such as fish emulsion or seaweed extract are gentler options that release nutrients more slowly and carry less risk of over-fertilization. They may smell unpleasant during application but are excellent for long-term soil health.
Stop fertilizing entirely in autumn and throughout winter when the plant’s growth naturally slows. Feeding a plant that is not actively growing simply allows nutrients to accumulate in the soil without being used, eventually reaching concentrations that can harm the roots. Resume feeding in early spring when you first notice new growth emerging. Flushing the soil with plain water every few months — running a large volume of water through the pot to wash out accumulated salt deposits — is a healthy practice that keeps the root environment fresh and prevents the gradual buildup of mineral residues from both water and fertilizer.
Common Problems and Troubleshooting
Brown frond tips are the most frequently reported problem among fern growers, and the cause is almost always related to one of three factors: low humidity, inconsistent watering, or buildup of minerals from tap water. Before reaching for any treatment, diagnose the likely cause by evaluating your current care routine honestly. If humidity is the issue, invest in a humidifier or move the fern to a more humid location. If watering is erratic, commit to a more consistent schedule. If mineral buildup is suspected, switch to filtered or rainwater and flush the soil thoroughly.
Yellowing fronds can indicate overwatering and root rot, but they can also signal underwatering, too much direct light, or a nutrient deficiency. The pattern of yellowing often provides clues: yellowing that starts from the bottom up and affects older fronds first is often a natural process as the plant sheds its oldest growth and not necessarily a cause for alarm. Widespread yellowing across new and old fronds simultaneously is more concerning and warrants a closer examination of the roots. Healthy roots should be white or cream-colored; dark, mushy roots indicate rot.
Pests can also be a concern for ferns, though they are generally less susceptible than many other houseplants. Scale insects, mealybugs, and spider mites are the most common culprits. Spider mites in particular thrive in dry conditions — another reason why maintaining good humidity is so beneficial. If you spot pests, isolate the affected plant immediately to prevent spread to other plants. Treat the fern by gently wiping affected areas with a damp cloth and applying insecticidal soap or neem oil solution. Be cautious with neem oil on ferns, as some species are sensitive to it; test on a small area first before treating the whole plant.
Propagating Ferns and Long-Term Care
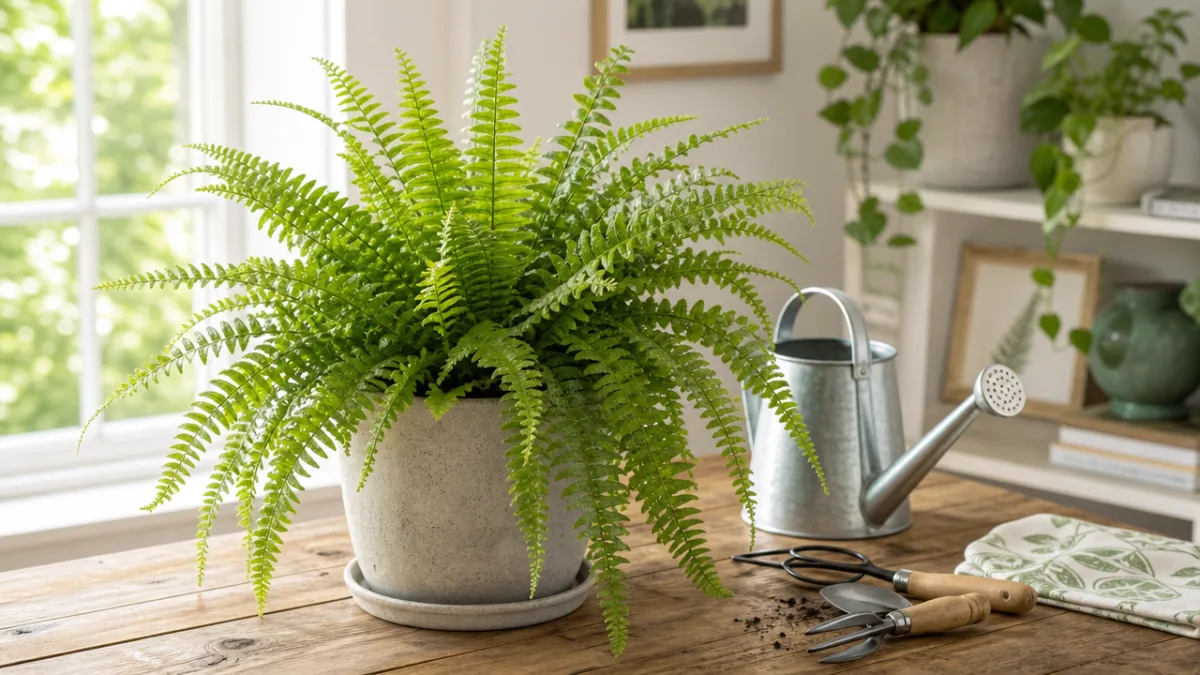
Growing new ferns from existing plants is a rewarding aspect of fern keeping that many growers overlook. Unlike many houseplants that are easily propagated from stem cuttings, ferns require slightly different techniques. The most accessible method for home growers is division — separating a mature fern into two or more sections, each with their own root systems and fronds. This works best during repotting in spring. Gently shake the soil from the root ball and look for natural divisions in the root structure where you can separate sections without excessive damage. Each division should have healthy roots and several fronds to sustain itself.
Ferns can also technically be propagated from spores — the tiny reproductive structures that appear as brown dots or streaks on the underside of mature fronds. Growing ferns from spores is a fascinating process but also a slow and somewhat specialized one, requiring sterile conditions, specific humidity levels, and considerable patience, as it can take a year or more to grow a plant of meaningful size. It is more of a hobby within a hobby than a practical propagation method for most indoor gardeners. Division remains by far the simplest and most reliable way to multiply your fern collection.
Some fern varieties produce runners or offshoots that can be rooted separately. The Boston Fern, for example, sends out long stolons that will occasionally produce small plantlets at their tips. These can be pinned to a small pot of moist growing medium while still attached to the parent plant, and once they have developed their own root system — usually after several weeks — they can be separated. This is essentially the same principle as propagating strawberries from runners and is a satisfying, low-effort way to create new plants from your existing collection.
Seasonal Care and Long-Term Maintenance
Caring for a fern is not a one-time setup but an ongoing relationship that evolves across seasons and years. Establishing good habits and a regular observation routine will serve you far better than any single intervention. Make a habit of examining your fern closely every few days — look at the soil moisture, the color of the fronds, the undersides of leaves for signs of pests, and the overall posture and vitality of the plant. A healthy fern has an upright, vibrant quality to it; a stressed fern looks drooping, dull, or sparse even when recently watered.
Regular grooming keeps your fern looking its best and also promotes overall plant health. Remove dead, yellowing, or brown fronds by cutting them off at the base with clean scissors or pruning shears. Do not pull fronds off, as this can damage the crown of the plant. Removing dead material prevents it from decaying and potentially harboring fungal pathogens. Some growers cut back their ferns quite dramatically in early spring — removing a significant portion of old fronds — to encourage a fresh flush of vigorous new growth as the growing season begins. This can be especially helpful for Boston Ferns that have become straggly over winter.
With the right care, ferns can be extraordinarily long-lived houseplants, rewarding years of attention with increasingly lush, generous growth. Some Boston Ferns have been kept as beloved household plants for decades, passed down through generations as living heirlooms. The key to that kind of longevity is not perfection but consistency — consistent moisture, consistent humidity, consistent light, and consistent observation. Ferns communicate their needs clearly to a gardener who is paying attention, and learning to read those signals is one of the most satisfying skills a plant lover can develop. Treat your fern as the ancient, magnificent living thing it is, and it will fill your home with beauty for years to come.








What do you think?
It is nice to know your opinion. Leave a comment.