










Wine Rack Made From Upcycled Vinyl Records: A Creative Guide to Recyclart
The Art of Upcycling: Giving Vinyl Records a Second Life
We’re all thinking a little harder these days about what we throw away — and upcycling has become one of the most satisfying ways to do something about it. Unlike basic recycling, upcycling takes something worn out or forgotten and turns it into something genuinely useful and beautiful. Vinyl records are one of the best materials you can work with for exactly this reason. Their circular shape, grooved texture, and undeniable nostalgic pull make them endlessly interesting to repurpose. Turn them into a wine rack and you’ve got something that tells a story every time someone walks into the room.
The vinyl record wine rack has built up a real following in the Recyclart community, and it’s not hard to see why. It brings together two things a lot of people love — music and wine — and turns their symbols into something you can actually use. Every record in a project like this has a history: who made it, when it came out, whose hands held it over the years. Giving it a new life as part of your home is a pretty wonderful way to add a new chapter to that story.
There’s also a solid environmental case for doing this. Vinyl is made from PVC, which doesn’t break down and is notoriously tricky to recycle through conventional channels. Meanwhile, thrift stores are drowning in old records from collections no one wants anymore, and plenty of them end up in landfills. Redirecting even a handful of those records into a creative project like this one keeps plastic out of the waste stream and means one less mass-produced item needs to be made and shipped. A small act, sure — but a meaningful one.
Materials and Tools: Everything You Need to Get Started
Before you get into the fun part, it’s worth getting everything together first. For a rack that holds six to twelve bottles, plan on eight to twelve records in decent structural shape — surface scratches are totally fine since the grooves just become part of the visual texture anyway. You’ll also need a heat source to soften the vinyl, which in most cases means a regular kitchen oven set to somewhere between 200 and 250 degrees Fahrenheit. Grab a baking sheet, line it with parchment paper so the records don’t stick, and have your oven mitts ready, along with whatever mold you’re going to use to shape the warmed vinyl.
That mold is really the heart of the whole process. A lot of people use wooden dowels, cardboard tubes, or even wine bottle molds to create the curved cradle shape that holds each bottle in place. Whatever you choose, aim for something close to the diameter of a standard wine bottle — roughly 3 to 3.5 inches — so the cradle actually grips the bottle once the vinyl cools. If you’re making a rack with multiple identical tiers, it’s worth building or buying a simple wooden jig so each cradle comes out the same shape. Consistency matters a lot once you start stacking things together.
Beyond that, you’ll want some strong adhesive or mounting hardware, a bit of fine-grit sandpaper to smooth out any sharp edges from the heating process, and optionally a wall bracket or base plate depending on whether you want this on a wall or a countertop. Some people also finish their rack with a clear coat spray for extra protection, though that’s entirely up to you. Having everything laid out and ready before you start is genuinely important here — once a record comes out of the oven, you’re working against the clock, and fumbling around for tools in that moment is no fun.
Step-by-Step Construction: Shaping Records Into a Functional Rack
Start by preheating your oven to around 200 to 220 degrees Fahrenheit. You might be tempted to crank it up to speed things along, but going above 250 degrees is where you start to risk uneven warping or, worse, releasing fumes from the PVC — so patience really does pay off here. Lay one record flat on your parchment-lined baking sheet and slide it in. Keep an eye on it, because within two to four minutes you’ll see the edges start to droop a little. That drooping is your signal that the vinyl is ready to work with.
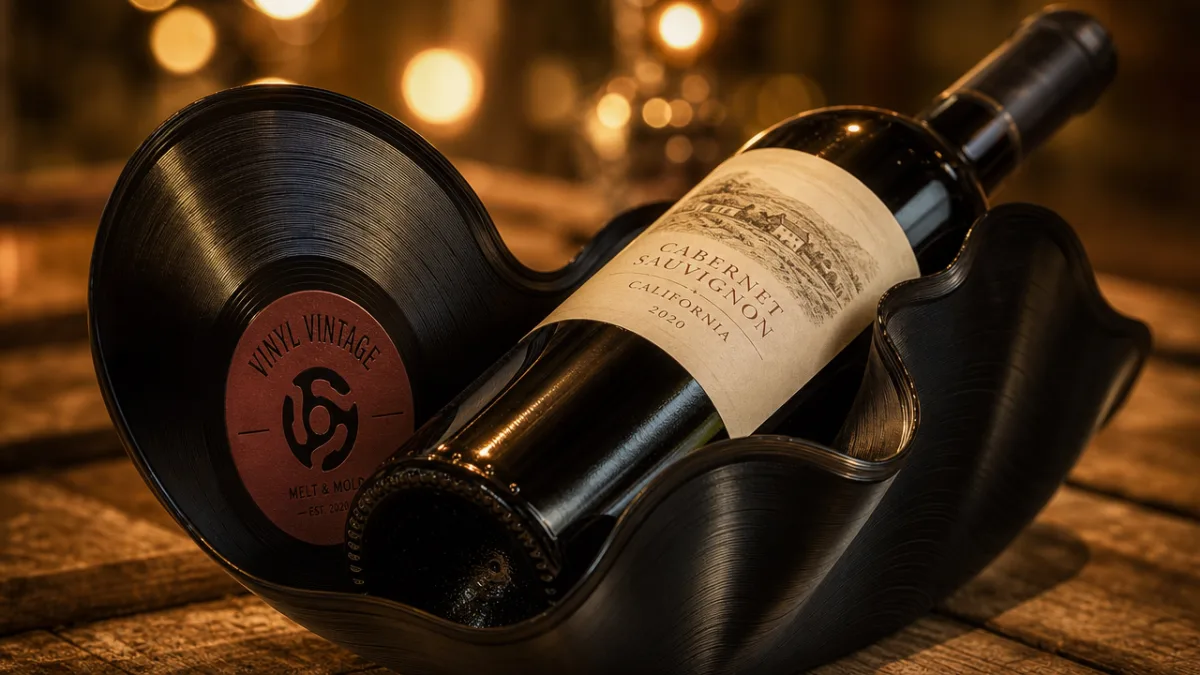
Pull the record out carefully with your oven mitts and move quickly — you’ve got maybe thirty to sixty seconds before it starts to firm up again. Center it over your mold and press both sides down gently so it forms a U-shaped cradle. The paper label in the middle tends to stay a bit stiffer and will naturally become the base of the cradle, while the grooved outer sections drape over the sides of the mold. Hold it there firmly for about sixty to ninety seconds until it cools and sets into shape. Once you lift it off the mold, you should have a clean, solid wine bottle cradle.
Do this for every record you’re incorporating into the rack. If you’re building a freestanding version, a simple wooden or metal frame works well — drill small holes near the edges of each shaped cradle and thread them onto horizontal rods or dowels attached to vertical side panels. This approach is nice because it’s modular, so you can adjust the spacing between tiers to fit different bottle sizes, from a standard Bordeaux to a bigger Champagne magnum.
Before you lock everything in place, test each cradle with a real bottle. You want the bottle to sit securely without wobbling, and a slight inward tilt — just enough to keep the cork in contact with the wine — is both a good look and genuinely better for storage. Once you’re happy with the angles, go around with fine-grit sandpaper and smooth out any rough or sharp edges, especially around the outer rim of each record where the vinyl sometimes spreads a bit during shaping.
Design Variations and Personalization Options
This is where the project really gets fun, because the possibilities are pretty much endless. You can be very intentional about which records you use — jazz albums from the 50s and 60s often have rich, earthy label colors in deep blue, gold, and burgundy that look stunning against wine bottles. 70s rock records tend to have bolder, more graphic designs that make a real statement when grouped together. Or you could go the other direction and hunt for records with matching or complementary label colors for a more curated, cohesive look.
The framing structure is its own design opportunity too. Reclaimed pallet wood or barn wood gives the whole thing a rustic, farmhouse feel that pairs naturally with the vintage vibe of the records. Steel pipes and industrial fittings push it in a completely different direction — more loft apartment than country kitchen. And if you want something really minimal, you can skip the frame entirely and mount individual record cradles straight onto the wall, letting them float in a row like notes on a musical staff. Same basic components, wildly different results.
Don’t overlook color and finish either. The natural black of vinyl is genuinely elegant on its own, but plenty of makers experiment with metallic spray paint for a gold or silver look, or use chalkboard paint so guests can write on them at parties. Some people go further and decoupage song lyrics, wine labels, or other images onto the flat sections of the shaped records — building up a layered visual story that’s completely personal to them. Follow whatever instinct feels right to you.
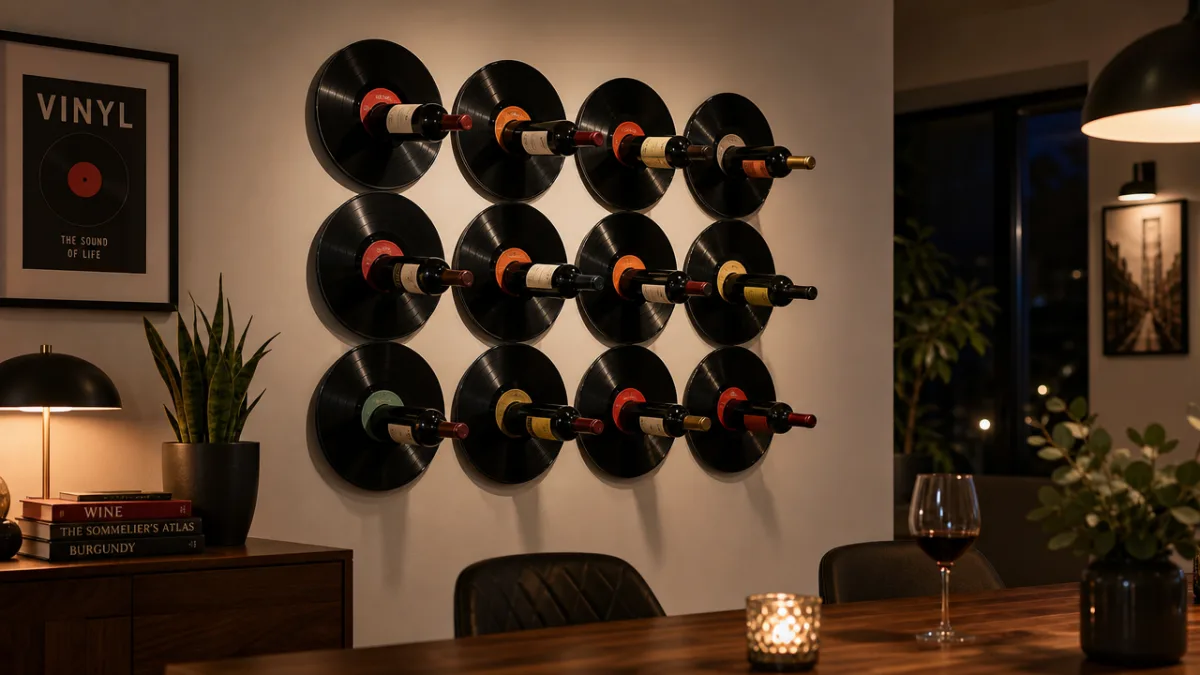
Wall-mounted configurations are especially popular in smaller spaces where floor real estate is tight. A single row of six cradles across a kitchen or dining room wall creates an immediate focal point that’s both practical and genuinely striking. Scale it up to a three-by-four grid and you’ve got storage for twelve bottles that functions as real wall art. If you really want to elevate the look, try tucking LED strip lights behind the rack so the record labels glow and the bottles catch the light — at that point you’ve crossed from storage solution into actual design statement.
Sustainability and the Broader Recyclart Philosophy
This project fits into something much bigger than a single wine rack. Recyclart has long been built around a simple but powerful idea: discarded objects aren’t dead ends, they’re starting points. What makes vinyl records especially compelling in this context is that they’re not anonymous industrial waste — they carried music into people’s lives. They filled rooms with sound and feeling. Giving them a new purpose doesn’t erase that history; it honors it.
The environmental upside goes well beyond keeping records out of landfill. Every time we make something at home from reclaimed materials, we’re cutting out a whole chain of environmental costs — raw material extraction, factory processing, long-distance shipping, packaging — all of which add up fast for any commercially manufactured product. A handmade vinyl record wine rack involves none of that. Its carbon footprint is a fraction of anything you’d buy in a store, and it comes with something no store-bought product can match: the time, thought, and care of the person who made it.
There’s something valuable about the communities that form around this kind of making, too. People share techniques, help each other troubleshoot, and push each other to try new things. Platforms like Recyclart act as gallery, tutorial library, and forum all at once — they lower the barrier for beginners and give experienced makers an audience that actually appreciates what they’re doing. One person posting their vinyl wine rack can easily spark a dozen others to dig out their own record collections and give it a try. That ripple effect is part of what makes this kind of creative community genuinely worthwhile.
Tips for Success and Common Mistakes to Avoid
Even a project that looks this straightforward has its traps. The most common one is overheating the vinyl. When things are moving slowly it’s tempting to bump up the temperature, but that’s how you end up with bubbling, discoloration, or warping that can’t be fixed once the vinyl cools. Start at the lower end of the temperature range and only nudge it up if you really need to. Also try not to keep opening the oven door to check on things — the temperature fluctuations don’t help. Set a timer and trust it.
The other mistake people run into is hesitating after pulling the record from the oven. You have a very short window to shape the vinyl before it starts setting again, and any extra seconds of indecision can result in a cradle that’s crooked or uneven. Before you heat your first record, run through the shaping motion with a cold one so your hands already know what to do. Have the mold in position and ready, keep your workspace clear, and if you can rope in a second person to hold the mold steady while you press the vinyl into shape, even better. Preparation makes all the difference.
It’s also worth thinking about where this rack will live once it’s done. Vinyl is sensitive to heat and direct sunlight, which can fade the labels and — in extreme cases — cause the cradles to deform over time. This makes vinyl wine racks a great option for short-term or everyday bottle storage, but probably not the best choice for long-term wine cellaring. Keep it away from windows, radiators, and anything else that throws off heat. For a quick-reference checklist, here are the key things to keep in mind:
- Always use oven mitts and work in a well-ventilated area when heating vinyl records to avoid inhaling any fumes.
- Test your mold dimensions against an actual wine bottle before shaping any records to ensure a proper fit.
- Work with one record at a time rather than heating multiple records simultaneously, which makes quality control much easier.
- Allow each cradle to cool completely before removing it from the mold, typically at least two to three minutes.
- Inspect each finished cradle carefully for sharp edges and sand them smooth before assembling the rack.
- Store the finished rack away from direct heat and sunlight to prevent deformation or label fading over time.
One last thing: don’t stress about imperfection. No two records will shape exactly the same way, and the slight variations in curvature, drape, and label positioning are part of what gives a handmade object its warmth and personality. Mass-produced things aim for uniformity; handmade things celebrate the quirks of real materials and the people who worked with them. The small irregularities in your finished rack aren’t flaws — they’re the fingerprints of the person who made it, and proof that something the world had given up on got a second chance. That’s what Recyclart is all about, and it’s absolutely worth celebrating with a glass of something good, held in a cradle that used to be a song.








What do you think?
It is nice to know your opinion. Leave a comment.