










Upcycled Meter Sticks Box: A Creative Guide to Transforming Vintage Measuring Tools into Beautiful Storage
The Art of Upcycling: Why Meter Sticks Deserve a Second Life
Upcycling has become one of the most rewarding creative movements of our time, blending sustainability with artistry in ways that breathe new purpose into discarded or forgotten objects. Meter sticks, those long wooden measuring tools that once lined the walls of classrooms and workshops, carry an undeniable nostalgic charm. Their bold numerical markings, aged wood grain, and satisfying heft make them uniquely suited for transformation into something both functional and visually striking. When you choose to upcycle rather than discard, you participate in a tradition of thoughtful craftsmanship that has deep roots in human culture.
The beauty of working with meter sticks lies in their inherent structure. Each stick is precisely cut, uniformly sized, and typically made from hardwood or high-quality pine that has already proven its durability over decades of use. Antique meter sticks often feature hand-painted or embossed numbering, brass fittings, and a patina that no amount of artificial aging can truly replicate. These details become the decorative soul of any upcycled project, lending authenticity and character that mass-produced alternatives simply cannot offer. Crafters who discover the potential of meter sticks rarely look at them the same way again.
Beyond aesthetics, upcycling meter sticks aligns with a broader philosophy of reducing waste and honoring materials that were crafted with intention. A wooden meter stick that might otherwise end up in a landfill or gathering dust in a garage can be reborn as a storage box that becomes a conversation piece in any home. This project invites you to slow down, appreciate the history embedded in each piece of wood, and channel your creativity into something genuinely useful. The satisfaction of completing such a project is matched only by the pride of displaying the finished piece in your living space.
Gathering Your Materials: What You Need Before You Begin
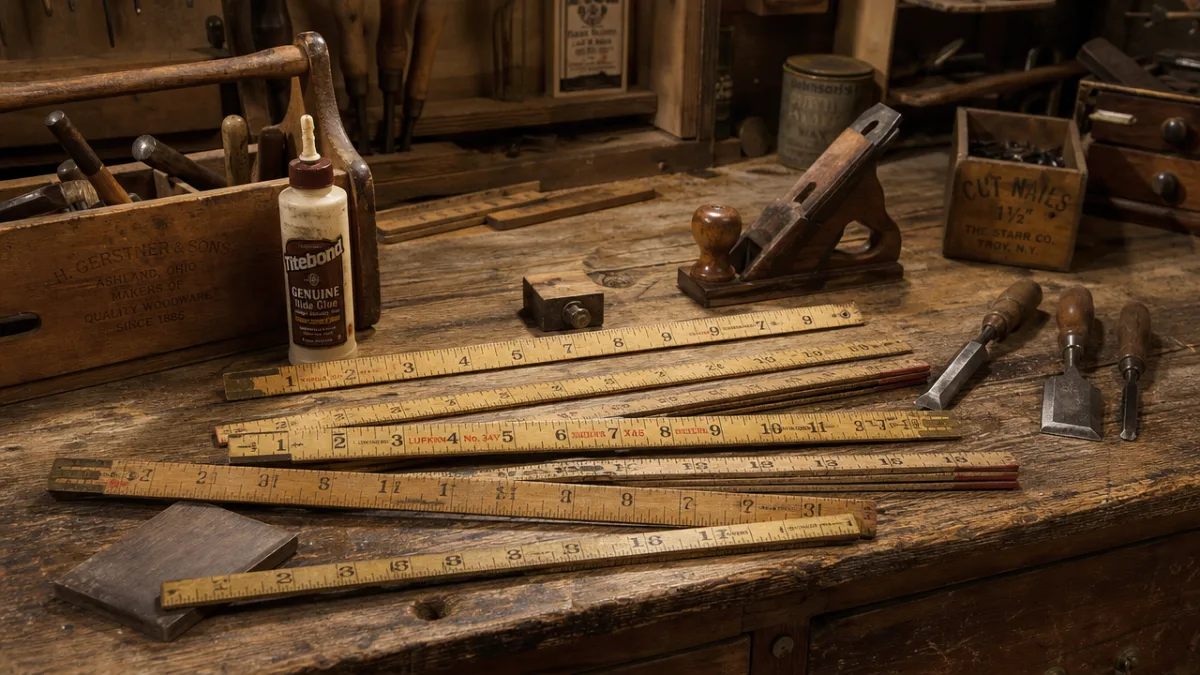
Starting any upcycling project on the right foot means assembling all your materials before a single cut is made. For a meter stick box, you will need a collection of meter sticks — typically between twelve and twenty depending on the size of box you envision. Sourcing these can be an adventure in itself. Thrift stores, estate sales, online marketplaces, and school supply liquidations are all excellent hunting grounds. Try to select sticks that are reasonably straight and free of major cracks, though minor imperfections only add to the rustic appeal of the finished piece.
In addition to the meter sticks themselves, you will need a few essential tools and supplies. A fine-tooth saw or miter box will allow you to make clean, precise cuts when shortening sticks or preparing corner pieces. Wood glue forms the primary bonding agent for this project, and a quality carpenter’s glue will create joints strong enough to hold the box together through years of use. Clamps are indispensable for holding pieces in place while the glue cures, and sandpaper in several grits — from coarse to fine — will help you achieve smooth, professional edges. Small finish nails or brad nails can provide additional structural support at the corners.
You will also want to think about finishing materials from the outset. Depending on the look you want to achieve, options include clear wood sealant to preserve the original appearance of the sticks, linseed oil for a warm amber glow, or a light stain to unify sticks of varying wood tones. If your meter sticks have painted markings, a clear matte or satin varnish will protect those details while keeping them visible. Don’t overlook hardware: small hinges for a lid, decorative corner brackets, a clasp or latch, and felt pads for the bottom will all elevate your finished box from a craft project to a polished piece of furniture.
Designing Your Box: Planning the Layout and Dimensions
Before you make any cuts or apply any glue, taking the time to design your box thoughtfully will save you frustration and wasted materials. Start by deciding on the intended purpose of the box. Will it serve as a decorative keepsake container on a bookshelf, a functional storage box for art supplies, or perhaps a wine crate-style holder for bottles? The purpose will dictate the dimensions, depth, and overall structure. Sketching your design on paper — even a rough thumbnail — gives you a reference point and helps you visualize how the meter stick segments will align along each face of the box.
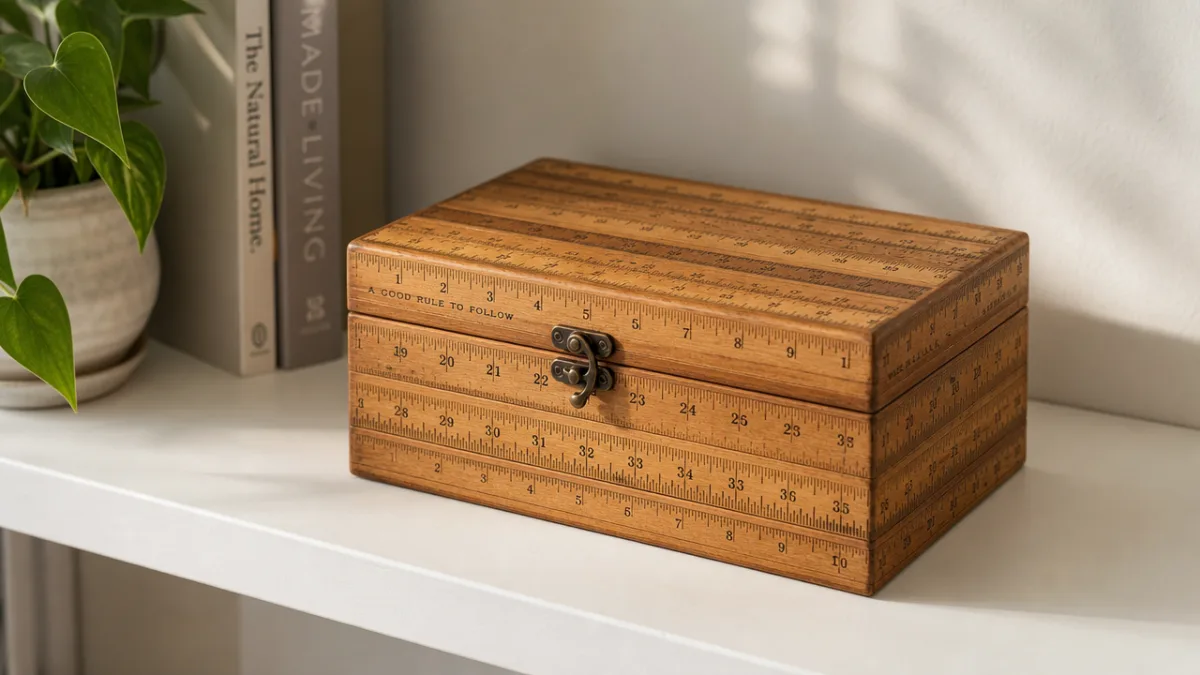
One of the most appealing design approaches is to arrange the meter sticks so that their numbered faces are visible on the exterior of the box. This creates a patchwork of sequential measurements that feels both playful and geometric. You can choose to align the numbers in order for a clean, linear effect, or deliberately mix up the sequence for an eclectic, collage-like appearance. Another popular option is to alternate the direction of adjacent sticks, so that some face outward with their markings showing while others present their smooth back side, creating a pleasing striped contrast of texture and detail.
Structural planning is equally important. The box walls are built by layering or arranging cut sections of meter stick side by side, bonded with wood glue, and reinforced at the corners. You can use a simple butt joint at the corners for a clean modern look, or a more traditional staggered log-cabin joint where alternating layers overlap for added strength. Decide early whether you want a fixed base or a removable bottom, and whether you will add a hinged lid or leave the box open-topped. Drawing a simple cut list — a written inventory of every piece you need and its measurements — will streamline the building process considerably.
Step-by-Step Construction: Building Your Meter Stick Box
With your design finalized and your materials assembled, construction can begin. The first step is to cut your meter sticks to the lengths required for each wall of the box. Use a miter box or a fine-tooth saw to ensure clean, square cuts, and sand each cut end smooth before assembly. Lay out all your pieces on a flat surface in the arrangement you planned, checking that corners align properly and that the visual pattern you envisioned reads the way you hoped. This dry-run assembly is your last chance to adjust the design before committing to glue.
Begin gluing the bottom layer of each wall, clamping pieces firmly together and allowing the glue to cure fully before moving to the next layer. Work methodically and patiently — rushing this step is the most common source of boxes that warp, gap, or come apart over time. As you build up the walls layer by layer, check frequently with a carpenter’s square to ensure your corners remain at true right angles. If you are using the log-cabin joint method, remember to offset each layer so the overlapping ends provide mutual reinforcement. Wipe away any glue squeeze-out with a damp cloth before it dries, as dried excess glue will resist stain and finish unevenly.
Once all four walls have reached their intended height and the glue has fully cured, attach the base. Depending on your design, this might be a panel of thin plywood, a sheet of craft board, or additional meter stick segments laid across the bottom and glued in place. Sand the entire exterior of the box progressively through the grits, starting with 80-grit to remove any rough spots and finishing with 220-grit for a silky smooth surface. Pay particular attention to the corners and top edges, rounding them very slightly to prevent splintering and give the box a refined, handcrafted quality. If you are adding a lid, now is the time to attach the hinges and clasp.
- Always dry-fit every component before applying glue to confirm alignment and fit.
- Use at least two clamps per joint and allow a minimum of two hours of cure time before moving to the next assembly step.
- Sand with the grain of the wood to avoid visible scratches in the finished surface.
- Apply finish in thin, even coats, allowing each coat to dry fully before lightly sanding with 320-grit and applying the next.
- Install felt pads on the bottom four corners to protect the surfaces the box will rest on.
Finishing Touches: Personalizing and Protecting Your Creation
The finishing stage is where your meter stick box truly comes to life and takes on its final personality. Once the construction is complete and the sanding is done, you have a canvas that is ready for your personal creative vision. A simple clear satin varnish applied in two or three thin coats is often the most elegant choice, allowing the natural wood tones and printed measurement markings to remain the stars of the show. This approach celebrates the history of each stick and lets the varied wood grains create an organic, warm tapestry across the box’s surface.
For those who want to add a more decorative dimension, consider light embellishments that complement rather than compete with the inherent beauty of the meter sticks. Thin strips of contrasting wood inlaid along the top edge create a refined border. Small decorative brass corner brackets not only add structural support but give the box a vintage trunk aesthetic that suits its antique materials perfectly. A hand-lettered or stamped label on the inside of the lid — perhaps noting the year the box was made or a meaningful phrase — adds a personal touch that transforms the piece into something that could be passed down through generations.
Protection is as important as decoration when it comes to ensuring your box stands the test of time. Apply at least two coats of a durable topcoat, whether oil-based polyurethane for maximum hardness or a water-based alternative for lower odor and faster drying. Between coats, a light pass with fine steel wool or 400-grit sandpaper will knock down any dust nibs and leave a beautifully smooth foundation for the next layer. For boxes that will hold heavy items or be frequently handled, consider a third coat on the interior base. Once the finish has fully cured — typically 72 hours for most polyurethanes — your box is ready to be put to use.
Creative Uses and Display Ideas for Your Finished Box
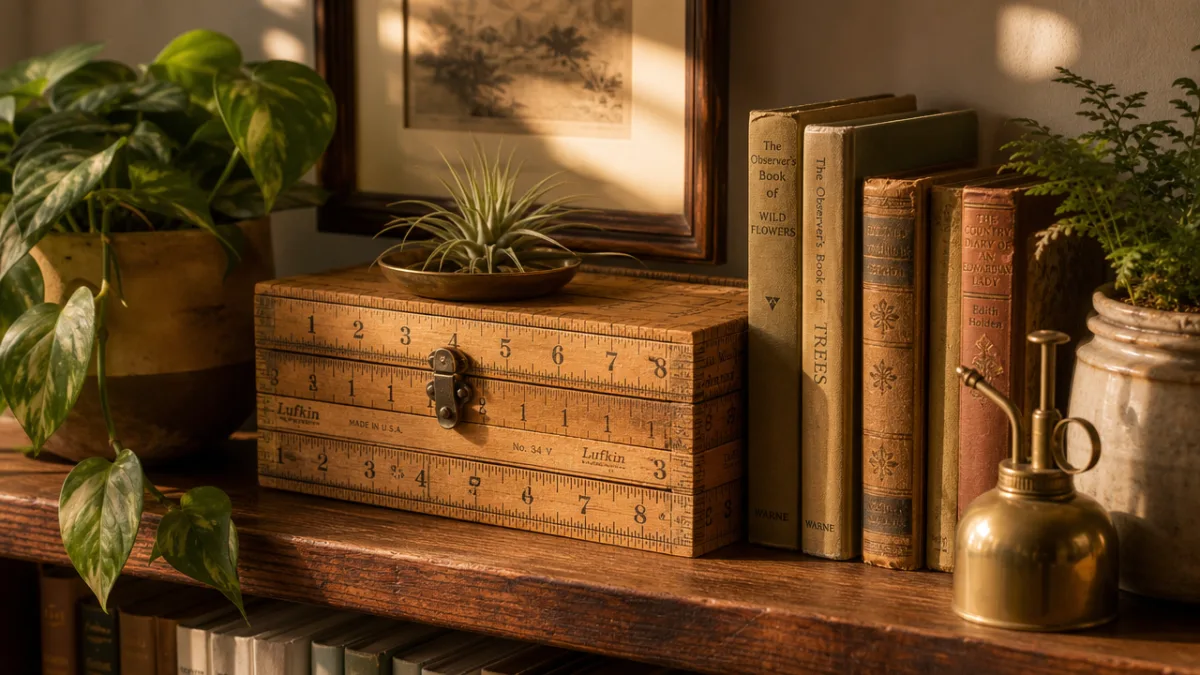
A completed meter stick box is far more than a storage solution — it is a functional piece of art that deserves a thoughtful home in your living space. In an entryway, it serves beautifully as a catch-all for keys, mail, and small accessories, its graphic patterning making a bold first impression on anyone who enters. On a bookshelf, it brings warmth and texture to a collection of spines, particularly when paired with other vintage or handcrafted objects. In a home office, it offers an organized home for pens, scissors, rulers, and other tools while doubling as an object of visual interest on a desktop.
For those with a more artistic sensibility, the meter stick box can anchor a styled vignette that tells a broader creative story. Nestle it among stacked vintage books, a small potted succulent, and a worn leather journal for a scholar’s corner aesthetic. Use it to store rolled art prints or large brushes in a studio setting, where its workshop origins feel especially at home. In a child’s room, a meter stick box holding colored pencils or building blocks makes learning materials feel special and inviting. The graphic language of measurements and numbers has an inherent educational charm that children tend to find genuinely fascinating.
Beyond personal use, a meter stick box makes an exceptional handmade gift for virtually any occasion. Graduations, housewarmings, retirements, and milestone birthdays are all moments where a thoughtfully crafted, one-of-a-kind object speaks far more eloquently than anything purchased from a store. You can customize the box for the recipient by incorporating sticks from a meaningful source — an old school, a grandfather’s workshop, a beloved teacher’s classroom — embedding personal history directly into the gift. Presenting it with a handwritten card explaining the origin of the materials and the care that went into construction makes the gift a complete, deeply personal experience that the recipient will treasure indefinitely.
- Entryway organizer for keys, mail, and daily essentials
- Desktop storage for art supplies, pens, and scissors
- Keepsake box for letters, photographs, and mementos
- Wine or bottle holder for rustic kitchen or bar displays
- Planter box liner for small indoor herb gardens
- Gift box for handmade or artisan goods
- Bookshelf accent piece styled with vintage objects
Sustainability and the Broader Upcycling Movement
Creating a meter stick box is not merely a craft project — it is a small but meaningful act of environmental stewardship. Every year, vast quantities of usable wood end up in landfills simply because the objects they once formed have outlived their original purpose. By intercepting these materials and giving them new function, upcyclers like you reduce demand for newly harvested timber, decrease the volume of waste sent to landfills, and model a more thoughtful relationship with material goods. The environmental impact of a single project may seem modest, but when multiplied across a community of makers, the collective effect is genuinely significant.
The upcycling movement has gained considerable momentum in recent years, driven by a confluence of environmental awareness, economic pragmatism, and a cultural hunger for authenticity and individuality. In a marketplace flooded with identical, mass-produced objects manufactured to minimal tolerances and sold at the lowest possible price, handmade upcycled pieces stand apart as genuine artifacts with traceable histories and irreproducible character. The imperfections that might once have been considered flaws — a slightly uneven measurement marking, a small knot in the wood, a variation in color between adjacent sticks — become the very features that make each piece unique and valuable.
Sharing your completed meter stick box project online through social platforms, craft communities, or local maker groups contributes to a growing culture of creative sustainability that inspires others to look at discarded materials differently. When you post a photograph of your finished piece alongside the before image of the raw meter sticks, you demonstrate visually that transformation is possible and that beautiful, functional objects can emerge from what might otherwise be considered trash. This kind of visible, accessible inspiration is one of the most powerful drivers of cultural change, turning individual creative acts into a collective reimagining of how we relate to the material world around us.








What do you think?
It is nice to know your opinion. Leave a comment.