










How To Crochet An Outdoor Rug (For Beginners) – A Complete Guide
Introduction: Why Crocheting Your Own Outdoor Rug Is Worth It
There is something deeply satisfying about creating a functional piece of home décor entirely with your own hands. Crocheting an outdoor rug is one of those projects that sits right at the intersection of practical craftsmanship and creative expression. Whether you want to add a pop of color to your front porch, define a cozy seating area on your patio, or simply give your backyard a more polished look, a handmade crochet rug delivers all of that and more. The best part? Even complete beginners can pull this off with the right guidance and a little patience.
Unlike many crochet projects that require delicate yarn and intricate stitch patterns, an outdoor rug is wonderfully forgiving. You will be working with thick, durable materials using large hooks, which means your stitches are big enough to see clearly and easy to count. Mistakes are simple to spot and even simpler to fix. This makes the outdoor rug one of the most beginner-friendly large-scale crochet projects you can attempt, and the end result looks far more impressive than the skill level required to make it.
Beyond the craft itself, making your own outdoor rug offers significant financial advantages. Store-bought outdoor rugs that are well-made and stylish can cost anywhere from fifty to several hundred dollars. A handmade version using polypropylene or cotton rope yarn can come in well under that price point while being entirely customized to your size, color palette, and aesthetic preferences. You choose the colors, you choose the dimensions, and you end up with something truly one of a kind that perfectly matches your outdoor space.
Choosing the Right Materials for an Outdoor Rug
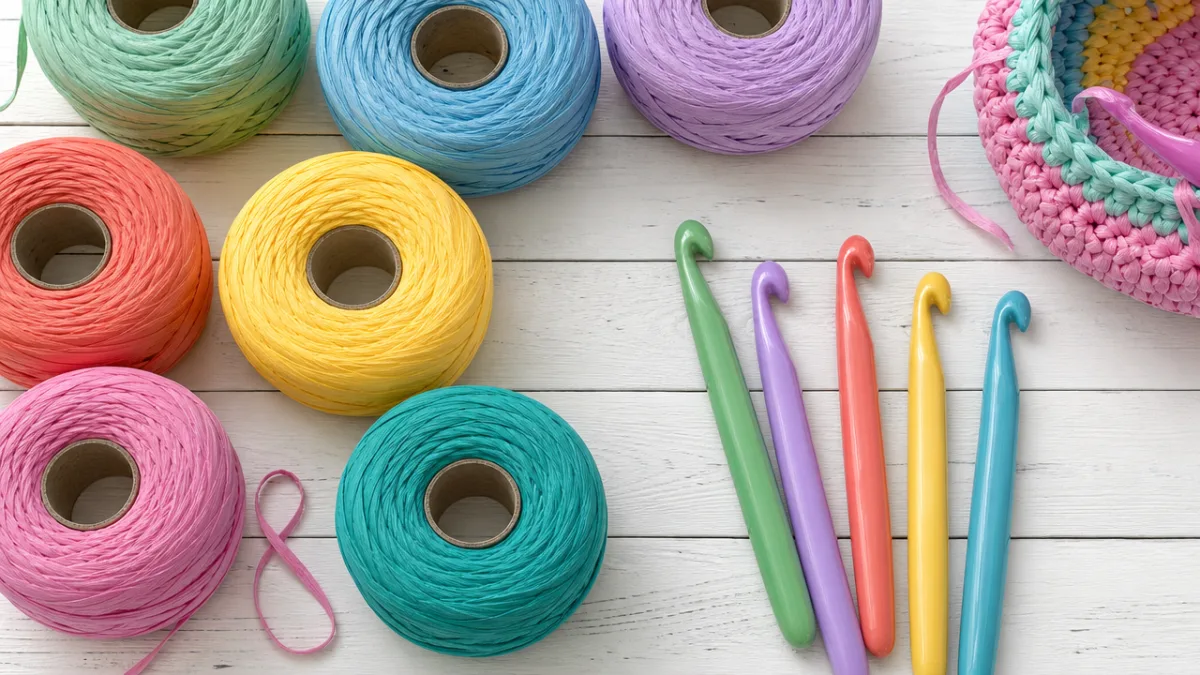
The single most important decision you will make when crocheting an outdoor rug is choosing the right yarn. Not all yarn is created equal, and standard wool or acrylic yarn simply will not hold up to outdoor conditions like moisture, UV exposure, foot traffic, and the occasional garden hose rinse. For outdoor rugs specifically, you want a yarn that is weather-resistant, mold-resistant, and durable enough to withstand repeated use. The most popular and recommended options are polypropylene yarn, outdoor cotton rope, and nylon twine, all of which are designed to be used in conditions that would destroy a typical skein of craft store yarn.
Polypropylene yarn, sometimes sold under brand names like Bobbiny or labeled specifically as outdoor or macramé cord, is widely regarded as the gold standard for this type of project. It is a synthetic fiber that repels water naturally, dries quickly when it does get wet, and resists fading from sun exposure far better than natural fibers. It comes in a wide range of colors, holds its shape well under repeated foot traffic, and is surprisingly comfortable underfoot for a synthetic material. Many crafters also use it for indoor projects like baskets and plant holders, so it is relatively easy to find both online and in larger craft stores.
In terms of hook size, you will want to match your hook to your yarn weight. Most outdoor rug projects using thick rope or cord call for a hook somewhere between 8mm and 15mm. A larger hook creates a more open, relaxed stitch structure and works up faster, while a smaller hook gives you tighter stitches and a denser finished fabric. For a first-time project, somewhere around a 10mm or 12mm hook tends to be a comfortable middle ground that works up efficiently without straining your hands. Here is a quick checklist of materials you will need before you begin:
- Polypropylene or outdoor cotton rope yarn (typically 3mm to 5mm cord thickness)
- A crochet hook sized 10mm to 15mm depending on your cord weight
- Scissors with sharp blades suitable for cutting thick cord
- A tapestry or yarn needle with a large eye for weaving in ends
- A lighter or fabric glue to seal cut ends of synthetic cord (prevents fraying)
- Measuring tape to check dimensions as you work
- Rug pad or non-slip backing (optional but recommended for safety)
Color selection is another element that deserves thoughtful consideration before you start. Outdoor spaces tend to look best with colors that either complement the surrounding natural environment or make a bold, intentional statement against it. Neutral tones like natural white, sand, gray, and charcoal are timeless and versatile, blending with virtually any outdoor furniture or landscaping. Alternatively, bright, saturated colors like cobalt blue, terracotta orange, or deep forest green can anchor a seating area and give the space a vibrant, energetic personality. Many beautiful outdoor rugs feature two or three alternating colors worked in stripes or concentric rounds for visual interest without overwhelming complexity.
Understanding Basic Crochet Stitches for This Project
Before picking up your hook and cord, it is worth taking a moment to understand the fundamental stitches you will be using throughout this project. The great news is that a basic outdoor rug does not require any advanced or complicated stitch work. The vast majority of patterns rely almost entirely on just two stitches: the chain stitch and the single crochet. If you can master these two techniques, and trust us when we say that most people do so within the first hour of practice, you have everything you need to complete a beautiful, professional-looking outdoor rug from start to finish.
The chain stitch is your starting point, literally. Every crochet project begins with a foundation chain, which is simply a series of interlocking loops pulled through one another. To make a chain stitch, you start with a slip knot on your hook, then wrap the cord over your hook (this is called a yarn over) and pull it through the loop already on the hook. That creates one chain stitch. You repeat this process until you have the number of chains your pattern requires for the foundation row. For a rectangular rug, the number of foundation chains determines the width of your finished piece, so take a moment to measure your target area and calculate accordingly before you begin.
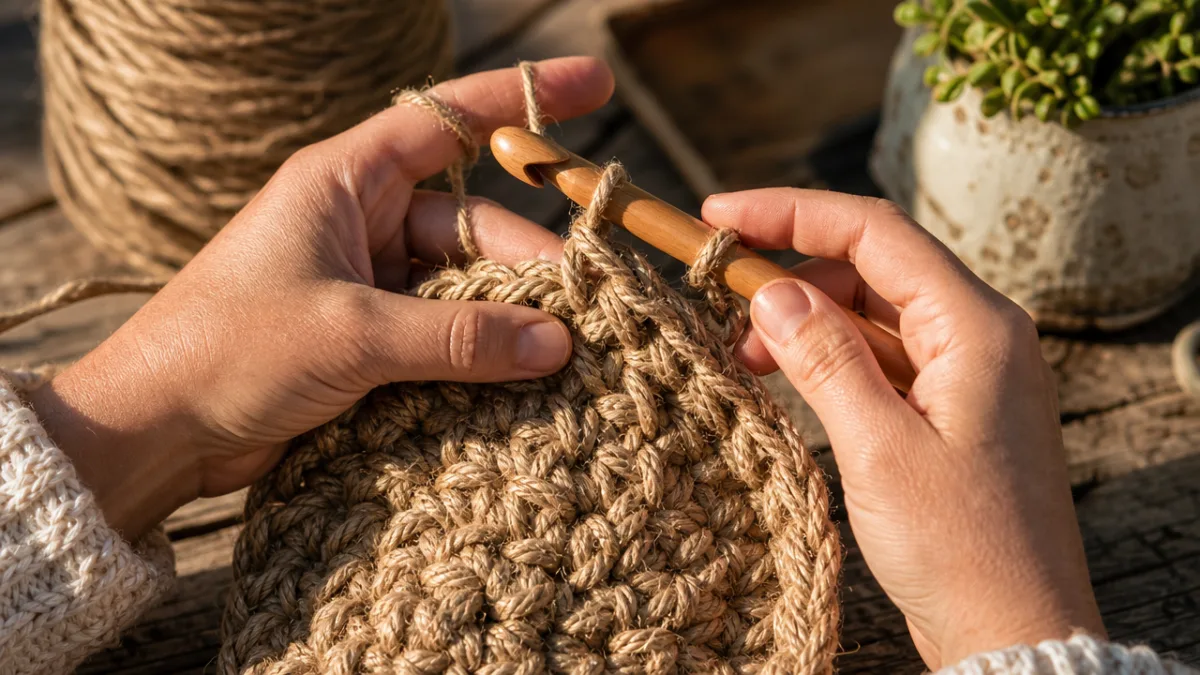
The single crochet stitch is the workhorse of this project. It is a short, tight stitch that creates a dense, sturdy fabric, which is exactly what you want in a floor covering meant to handle daily use outdoors. To make a single crochet, insert your hook into the desired stitch, wrap the cord over the hook and pull it through that stitch (you now have two loops on your hook), then wrap the cord over the hook one more time and pull it through both loops at once. That is one complete single crochet stitch. The rhythm of this stitch becomes almost meditative once you get comfortable with it, and working with thick cord on a large hook means the rug grows noticeably with every row, which is enormously satisfying.
For those who want to add a little more visual texture to their rug, the half double crochet and double crochet stitches are natural next steps. These taller stitches create a slightly more open fabric that can give the rug a lighter, breezier look while still maintaining durability. However, for an absolute beginner, sticking entirely to single crochet is a perfectly valid choice that will produce a beautiful result. Here are the core stitches in summary:
- Slip Knot: Creates the initial loop on your hook to begin any project.
- Chain Stitch (ch): Forms the foundation row and is used to turn at the end of rows.
- Single Crochet (sc): The primary stitch used throughout most of this rug pattern.
- Half Double Crochet (hdc): An optional stitch for added height and texture.
- Slip Stitch (sl st): Used to join rounds seamlessly when working in the round.
Step-by-Step Instructions for Crocheting Your Outdoor Rug
Now that you understand your materials and your stitches, it is time to get into the actual process of making the rug. The method described here produces a rectangular rug worked in rows, which is the most straightforward approach for beginners. A standard welcome mat size of approximately two feet by three feet is a great first goal, though you can scale up or down simply by adjusting your starting chain length and the number of rows you complete. Begin by making a slip knot and placing it on your hook, then pull your cord snugly but not so tight that the hook cannot move freely through the loop.
Create your foundation chain by chaining the appropriate number of stitches for your desired width. As a general rule, with a 5mm cord and a 12mm hook, roughly thirty chain stitches will give you a width of approximately two feet. Once your foundation chain is complete, you will begin your first row by working single crochet stitches into the chain. Insert your hook into the second chain from the hook (skipping the very first chain, which serves as your turning chain), complete a single crochet stitch, and then continue working one single crochet into each chain across the entire row. When you reach the end of the row, chain one and turn your work so the other side faces you.
Continue working rows of single crochet back and forth, chaining one and turning at the end of each row, until your rug reaches the desired length. Check your measurements periodically with a tape measure to ensure you are on track. As you work, you will notice that the rug builds up relatively quickly with thick cord on a large hook. A two-by-three-foot rug might take anywhere from two to five hours depending on your speed, the size of your hook, and the thickness of your cord. When you reach your target length, cut your cord leaving a tail of about six inches, and pull that tail all the way through the last loop to secure it. Use your tapestry needle to weave the tail into the back of the rug so it is hidden from view.
If you want to add a finishing border, which elevates the look of the rug considerably, simply join your cord at any corner of the finished piece and work single crochet stitches evenly all the way around the perimeter of the rug. At each corner, work three single crochet stitches into the corner stitch to allow the border to turn neatly without puckering. When you arrive back at your starting point, slip stitch into the first stitch to close the round, then fasten off and weave in the ends. A border in a contrasting color can be a beautiful finishing touch that makes the rug look polished and intentional.
Tips for Getting the Best Results and Avoiding Common Mistakes
Even with a beginner-friendly project like this, there are a handful of common pitfalls that can cause frustration or lead to a finished rug that does not quite look the way you envisioned. One of the most frequent issues beginners encounter is that their rug gradually gets wider or narrower as they work, which happens when stitches are accidentally added or skipped at the ends of rows. The fix is simple but requires attentiveness: always count your stitches at the end of each row, especially the first few, to make sure you have the same number as your foundation chain. Consistent stitch counts are the foundation of a rug with clean, straight edges.
Another common mistake is working your stitches too tightly. With thick cord and a large hook, it can be tempting to pull each stitch very snug in an effort to make the fabric feel more stable and dense. In reality, overly tight tension creates a stiff, rigid fabric that is uncomfortable underfoot and harder to work with as the project progresses. Your stitches should be firm but not strangled. A good test is whether your hook slides in and out of each stitch with reasonable ease. If you find yourself wrestling the hook into every stitch, loosen your grip on the cord slightly and allow it to flow more freely through your fingers as you work.
Finishing and sealing the cut ends of synthetic cord is a step that beginners sometimes skip but absolutely should not. When you cut polypropylene or nylon cord, the cut end will begin to fray and unravel over time, especially once the rug is outdoors and exposed to moisture and friction. To prevent this, briefly touch the cut end of synthetic cord to a lighter flame, just close enough to melt the fibers slightly and fuse them together. Do this carefully and quickly, as you only need a second of heat to seal the end. If you prefer not to use an open flame, a small dab of fabric glue or clear-drying craft glue works as an alternative, though the lighter method is faster and more effective for synthetic materials.
Caring for your finished outdoor rug properly will extend its life significantly. Here are some best practices to keep in mind:
- Shake or sweep the rug regularly to remove dirt and debris before it becomes embedded in the fibers.
- Rinse the rug with a garden hose periodically and allow it to dry completely in the sun before placing it back down.
- For deeper cleaning, scrub with a mild dish soap and a stiff brush, then rinse thoroughly.
- Bring the rug indoors or store it during prolonged rain, snow, or freezing temperatures to maximize longevity.
- Use a non-slip rug pad underneath, particularly on smooth surfaces like decking or tile, for safety.
- Avoid leaving the rug in direct, unrelenting sunlight for months at a time if possible, as even UV-resistant materials will eventually fade.
Creative Variations and Ideas to Inspire Your Next Rug
Once you have completed your first outdoor rug and experienced the satisfaction of stepping onto something you made yourself, it is almost certain that you will want to make another one. The beauty of this type of project is that the basic technique remains the same from rug to rug, but the creative possibilities are genuinely endless. Color combinations, stitch variations, shapes, and surface embellishments can all transform a simple rectangular rug into something that feels entirely fresh and different each time you sit down to start a new one.
One of the easiest ways to add visual interest to a subsequent project is to work with two colors in alternating rows or sections. Stripes are a classic choice for good reason: they are graphic, bold, and surprisingly easy to achieve. To change colors in your crochet work, simply stop at the end of a row before completing the last pull-through of your final single crochet, then use the new color for that final pull-through and continue the next row with the new color. The old color hangs at the edge and can be carried up a few rows by crocheting over it before cutting, which reduces the number of ends you have to weave in. Color-blocked rugs using three or four bold shades can look absolutely stunning on a neutral-toned patio or deck.
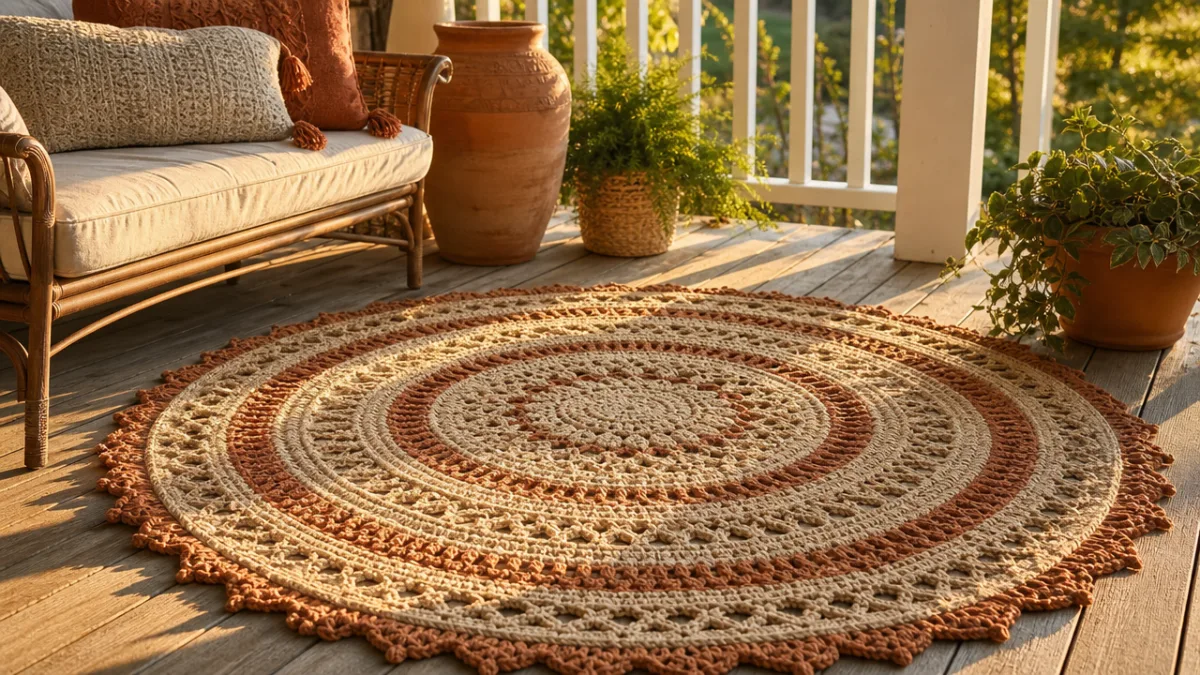
For crafters who feel comfortable with their single crochet and want to explore new territory, working in the round rather than in rows opens up a whole new world of rug shapes. Oval rugs worked from a foundation chain and increased at each end are a popular choice for entryways and hallways. Round rugs worked from a magic ring in the center and increased by a consistent number of stitches each round create striking, mandala-like patterns when worked in multiple colors. Hexagonal rugs, rectangular rugs with rounded corners, and even novelty shapes like sunbursts or geometric mosaics are all achievable with a solid foundation in the basics.
Texture is another dimension worth exploring as your skills grow. The moss stitch, which alternates single crochet and chain stitches to create a pebbly, raised surface, gives a rug a tactile quality that looks beautiful and feels wonderful underfoot. The waistcoat stitch, worked by inserting the hook through the center of the V of each stitch rather than under the top loops, creates a woven, herringbone-like appearance that looks almost too refined to be hand-made by a beginner. Even simple additions like a fringe border, created by cutting equal lengths of cord and knotting them through the edge stitches, can completely transform the look of an otherwise straightforward rug.
Conclusion: Your Outdoor Space Deserves a Handmade Touch
Crocheting an outdoor rug is one of those projects that delivers disproportionate reward relative to the skill it requires. The process is rhythmic and accessible, the materials are durable and widely available, and the finished product adds genuine warmth and personality to any outdoor space in a way that a mass-produced, store-bought alternative simply cannot replicate. Whether you are a true beginner picking up a crochet hook for the very first time or a lapsed crafter looking for a project to ease yourself back into the craft, this is an ideal place to start or restart your crochet journey.
The outdoor rug you make will not just be a floor covering. It will be a conversation piece, a point of pride, and a tangible reminder that making things with your hands is one of the most fulfilling ways to spend your time. Guests will ask where you bought it. Neighbors will admire it from the sidewalk. And every time you walk out your front door and feel it under your feet, you will feel the quiet satisfaction of knowing that you made that. That feeling never quite gets old, and it is the reason so many people who complete their first crochet project immediately start planning the next one.
So gather your materials, find a comfortable place to sit, and give yourself permission to take it slowly and enjoy the process. Remember that every expert crafter was once a beginner who made wobbly stitches, lost count of their rows, and had to unravel and start again. That is not failure; it is how the skill is built. With the guidance in this article and a little dedicated practice, you will have a beautiful, durable, completely personalized outdoor rug to show for your efforts, and the confidence to take on whatever crochet project calls to you next.








What do you think?
It is nice to know your opinion. Leave a comment.