










Upcycled Furniture Projects: Transforming Trash Into Treasure
There is something deeply satisfying about looking at a battered, forgotten piece of furniture and seeing not what it is, but what it could become. Upcycling furniture is the art of taking old, worn, or discarded items and transforming them into something more beautiful, more functional, and more valuable than they were before. It is a practice that sits at the crossroads of creativity, sustainability, and practical craftsmanship, and it has never been more relevant than it is today. As landfills swell with discarded household goods and environmental consciousness grows, more and more people are turning to upcycling as a meaningful way to furnish their homes while reducing their environmental footprint.
Unlike simple restoration, which aims to return a piece to its original condition, upcycling invites you to reimagine it entirely. A Victorian dresser can become a bathroom vanity. A wooden pallet can evolve into a stylish coffee table. A set of mismatched dining chairs can be unified with a bold coat of paint into a cohesive, eclectic set that no furniture store could ever replicate. The creative possibilities are genuinely limitless, and that open-ended nature is precisely what draws so many people into the craft. Each project is a puzzle that rewards both careful planning and spontaneous inspiration.
Beyond the creative rewards, upcycling furniture carries real financial benefits. High-quality solid wood furniture, the kind built to last generations, is increasingly expensive when purchased new. But that same quality can often be found at thrift stores, estate sales, and curbside pickups for a fraction of the cost. With a little skill, some basic tools, and a modest investment in materials, a worn-out piece worth twenty dollars can become a statement furniture item worth several hundred. It is one of the few hobbies that pays for itself, and often handsomely so.
Getting Started: Tools, Materials, and Mindset
Every successful upcycling project begins long before the first brush stroke or saw cut. It begins with preparation — understanding what tools you need, what materials will serve your vision, and how to approach the work with patience and flexibility. Many beginners make the mistake of rushing into a project without proper preparation, only to encounter problems midway through that could have been easily avoided. Taking time to assess a piece thoroughly, researching the best techniques for the specific materials involved, and gathering everything you need before you start will make every project far more enjoyable and successful.
The foundational toolkit for furniture upcycling does not need to be expensive or extensive. A good set of sandpaper in multiple grits, a selection of quality paintbrushes, a reliable electric sander for larger surfaces, and a sturdy workbench or sawhorse setup will carry you through the majority of projects. As you grow in skill and ambition, you can add tools like jigsaws, routers, and upholstery staplers. The key is to start with what you have, learn the basics thoroughly, and expand your toolkit gradually as your projects demand it. Buying a new specialized tool for each project is actually one of the joys of growing as a maker.
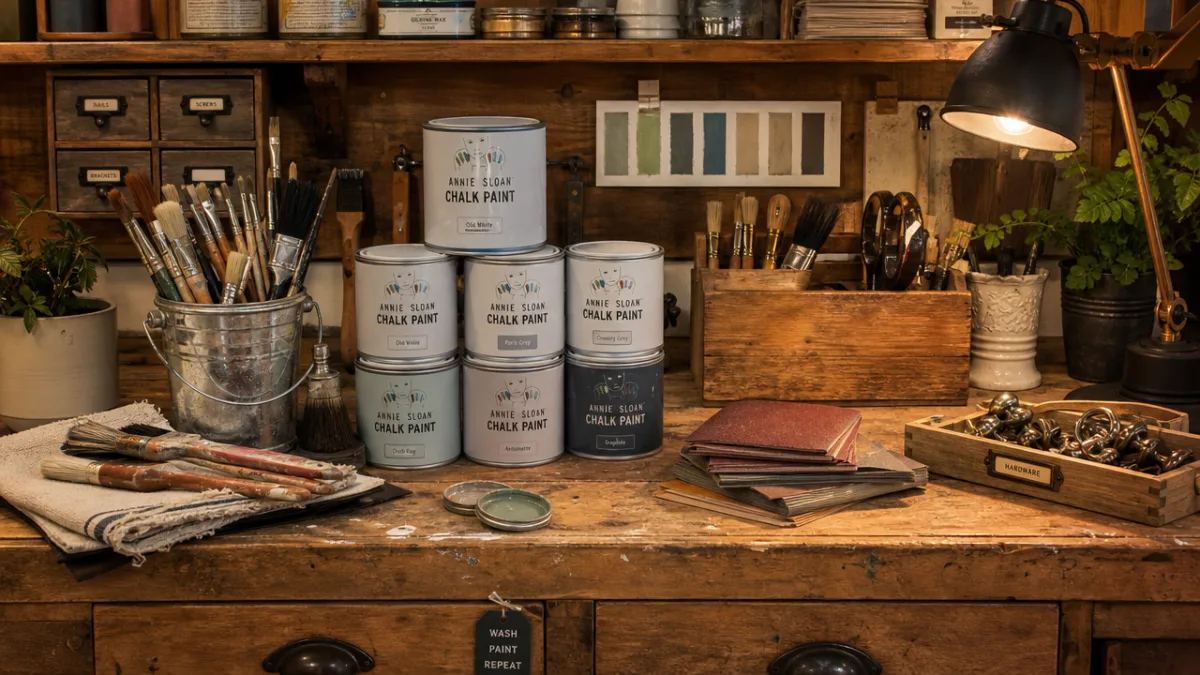
The materials you choose will define the character of your finished piece. Chalk paint has become enormously popular in upcycling circles because it adheres to almost any surface with minimal preparation, dries to a beautiful matte finish, and is highly receptive to distressing techniques that create an aged, artisan look. Milk paint offers similar advantages with a more organic, slightly translucent quality. For a more durable, contemporary finish, water-based eggshell or satin paints sealed with a hard wax or polyurethane topcoat are excellent choices. Hardware — drawer pulls, hinges, and handles — can completely transform the personality of a piece, so never underestimate the power of swapping out old hardware for something unexpected and bold.
- Chalk paint, milk paint, or water-based satin for surface color
- Sandpaper in grits ranging from 80 to 220
- Wood filler and wood glue for structural repairs
- Hard wax, polyurethane, or varnish for sealing and protection
- New hardware including knobs, pulls, and hinges
- Upholstery fabric, foam, and a staple gun for seating
- Wood stain for natural finishes and color enhancement
Painting Techniques That Elevate Any Piece
Paint is the single most transformative tool in the upcycler’s arsenal. The right color applied with the right technique can turn a mundane, forgettable piece into something that looks deliberately designed and professionally finished. Before you even open the paint tin, however, surface preparation is everything. Cleaning the piece thoroughly to remove grease, wax, and grime, filling any cracks or dents with wood filler, and sanding the surface to create tooth for the paint to grip will be the difference between a finish that chips after a month and one that lasts for years. This unglamorous prep work is what separates consistently great results from frustrating inconsistency.
The distressed finish, sometimes called the shabby chic or farmhouse look, remains one of the most popular and forgiving techniques for beginners. The process involves applying a base coat of one color, allowing it to dry completely, then applying a second coat in a contrasting color on top. Once dry, you use sandpaper to gently wear away the top coat at corners, edges, and raised details, revealing the base color beneath and creating the illusion of natural age and wear. The beauty of this technique is that imperfection is built into the aesthetic — small inconsistencies and variations in coverage only add to the charm of the finished piece.
For those seeking a cleaner, more contemporary result, the color blocking technique has become extremely fashionable in modern upcycling. This involves painting different sections of a piece in two or more distinct, contrasting colors — perhaps painting the body of a bookcase in a deep navy while keeping the interior shelves in a warm blush pink, or painting the legs of a side table in brass-toned gold while the top surface remains a clean white. When executed well, color blocking transforms furniture into something that feels artistic and intentional. The key is selecting a color palette in advance and committing to it, using painter’s tape to achieve crisp, clean lines between colors.
Stenciling and hand-painted decorative details are another dimension of painted furniture that reward patience and practice. Geometric patterns, botanical motifs, and folk-art-inspired designs can be applied using stencils and a small amount of paint on a barely-loaded brush, a technique known as dry brushing that minimizes bleeding under the stencil edges. Freehand painted details — vines, flowers, abstract brushwork — require more confidence but no special equipment beyond a steady hand and a thin artist’s brush. These decorative elements are what elevate an upcycled piece from merely refreshed to genuinely one-of-a-kind, carrying a personality that mass-produced furniture simply cannot replicate.
Structural Repairs and Wood Working Basics
Many of the most rewarding upcycling finds come with structural challenges — a wobbly chair, a dresser with a missing drawer, a table with a cracked top. Learning to address these structural issues confidently not only expands the range of pieces you can work with but also dramatically increases the value you can add to each project. Basic woodworking skills are not as difficult to acquire as many beginners assume. With a willingness to learn, access to some online tutorials, and a spirit of careful experimentation, most common furniture repairs are well within the reach of a dedicated beginner.
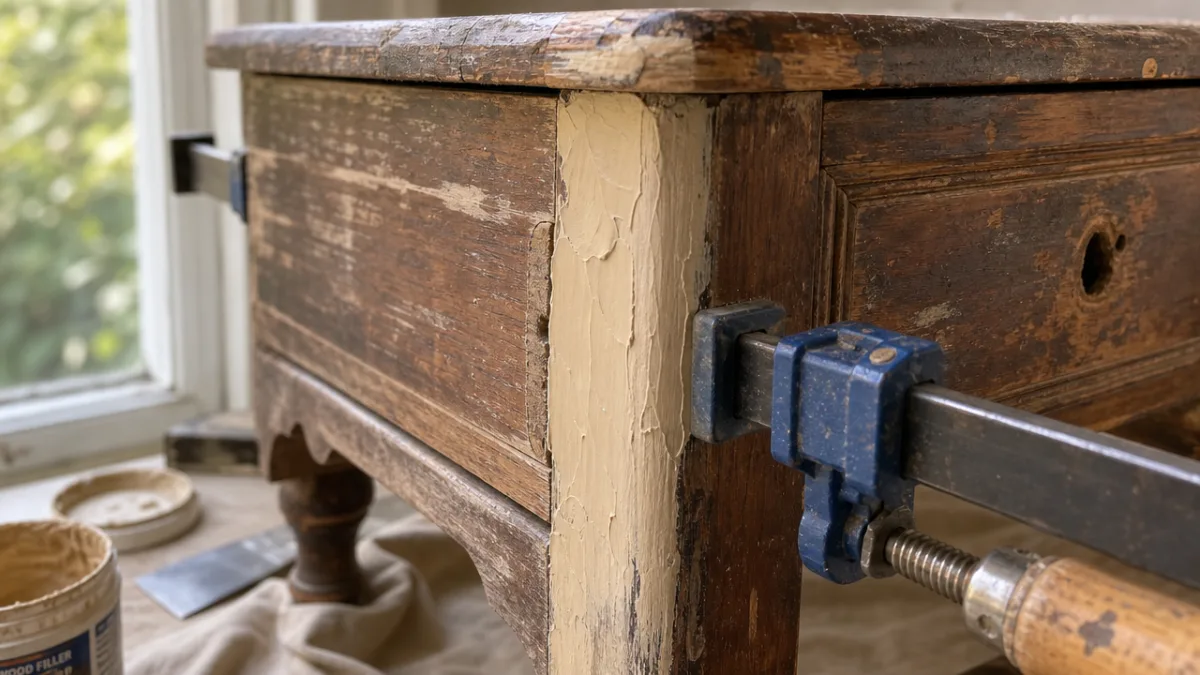
Loose joints are among the most common structural problems in older wooden furniture, particularly in chairs and table legs. The fix is often elegantly simple: disassemble the joint if possible, clean away old dried glue with a chisel or sandpaper, apply fresh wood glue, reassemble, and clamp firmly while it cures. For joints that cannot be disassembled, injecting wood glue with a syringe and clamping can work surprisingly well. In cases where the joint has been damaged beyond simple regluing, wooden dowels or metal fasteners drilled into place and hidden beneath the surface provide a discreet and durable reinforcement.
Working with wood filler opens up a wide range of restorative possibilities. Gouges, dents, knot holes, and surface cracks that might otherwise disqualify a piece from consideration can be filled, shaped, and sanded to near-invisibility. Water-based wood fillers are easy to work with, accept paint beautifully, and dry hard enough to be sanded and shaped. For larger repairs, an epoxy-based wood filler offers superior strength and can even be carved and shaped once set. The ability to look at a damaged piece and accurately assess what is fixable versus what is genuinely beyond repair is a skill that develops with experience, and it is the foundation of efficient, rewarding project selection.
- Assess the piece thoroughly before purchase — check joints, drawers, and surfaces for damage
- Disassemble as much as is practical before beginning any repairs or painting
- Address all structural repairs before starting cosmetic work
- Fill holes and gouges with appropriate wood filler and sand flush when dry
- Sand the entire piece in the direction of the grain before applying any finish
- Apply primer if using oil-based or difficult-to-adhere-to paints
- Reassemble with new hardware as the final step
Upholstery Refreshes: Fabric, Foam, and Finishing
Upholstered furniture represents one of the most impactful categories in the world of upcycling. A dining chair with a tired, stained seat pad can be transformed in under an hour with fresh foam and a yard of new fabric, at a cost of just a few dollars per chair. Sofas, armchairs, and ottomans require more skill and time, but the reward is proportionally greater — a solid-framed sofa in excellent structural condition but with dated or damaged upholstery can be obtained cheaply and reupholstered into something magazine-worthy for a fraction of the cost of a new piece. The frame is the investment; the fabric is just an expression of your taste at a given moment in time.
Fabric selection is where personality truly enters the project. In the upcycling community, unexpected fabric choices are celebrated rather than avoided. A formal antique chair upholstered in a bold contemporary geometric pattern creates a delightful tension between old and new. A plain modern dining bench gains richness and character with a traditional botanical linen. Online fabric retailers offer an extraordinary range of options at competitive prices, and sourcing fabric from curtains, vintage garments, or even grain sacks and feed bags gives a project a genuinely distinctive provenance story. The only practical considerations are durability — upholstery-weight fabric will outlast drapery-weight by years — and the color or pattern’s relationship to the rest of the finished piece.
For simple drop-in seat pads, the reupholstering process is beginner-friendly and requires only a staple gun, scissors, and a screwdriver to remove the seat from the chair frame. Remove the old fabric, assess the foam beneath and replace it if compressed or damaged, cut your new fabric generously, pull it taut across the top of the foam pad, and staple it firmly to the underside of the seat board, working from the center of each side outward and mitering the corners neatly. Reattach the seat to the chair frame, and the transformation is complete. More complex jobs — tight-back chairs, tufted pieces, furniture with piping or pleated skirts — require more skill and patience, but each project teaches techniques that carry directly into the next.
Beyond traditional fabric, the upholstery world has expanded to embrace a range of creative surface treatments. Rattan webbing inserts in chair backs and cabinet doors have surged in popularity, bringing a warm, natural texture that works beautifully in both bohemian and mid-century modern interiors. Leather and faux leather offer durability and a luxurious tactile quality ideal for heavily used pieces. Outdoor performance fabrics, which resist moisture, staining, and fading, have found their way indoors as practical choices for family homes with young children or pets. Exploring these materials broadens the vocabulary of any upcycler and opens up a wider range of project possibilities.
Sourcing the Perfect Pieces and Building a Sustainable Practice
The hunt for source material is often cited by experienced upcyclers as one of the most enjoyable aspects of the entire practice. Thrift stores, charity shops, and secondhand marketplaces like Facebook Marketplace and Craigslist are the obvious starting points, offering a constantly rotating inventory of donated and sold furniture at low prices. Estate sales and house clearances are particularly fruitful hunting grounds, as they often yield high-quality older pieces — solid hardwood construction was standard in furniture made before the 1980s, before flat-pack and particleboard became dominant — at prices well below their potential value. The discerning eye that can identify a structurally sound piece beneath layers of neglect and outdated styling is a skill worth cultivating.
Curbside finds, sometimes called freecycling, represent the most economically sustainable form of sourcing. Many people discard perfectly good furniture simply because it is no longer to their taste, because they are moving house, or because a small repair feels beyond their capability. Learning to recognize these opportunities — checking curbsides on council collection days, keeping an eye on neighborhood social media groups where people post items they are leaving out for free — can yield extraordinary finds at zero cost. It is not unusual for experienced upcyclers to source pieces entirely for free and sell them finished for hundreds of dollars, creating a genuinely self-sustaining creative practice.
Building a sustainable upcycling practice means thinking holistically about materials, processes, and outcomes. Choosing water-based, low-VOC paints and finishes reduces your exposure to harmful chemicals and lessens environmental impact. Properly disposing of or recycling solvents, old paint, and unusable materials keeps them out of waterways and landfills. Sourcing hardware and supplies secondhand when possible — vintage markets are full of beautiful old drawer pulls and hinges — extends the sustainability philosophy beyond just the main piece of furniture. Even the wood offcuts and fabric scraps from your projects can be repurposed into smaller decorative items, cushion covers, or organizers, minimizing waste at every stage of the process.
Perhaps most importantly, upcycling furniture connects us to a longer tradition of making, repairing, and valuing the things we own. In an era of disposable consumption, choosing to invest time and creativity into extending the life of an object carries a quiet but powerful meaning. The scratch-and-dent dresser that you transformed with your own hands carries a story that no flat-pack alternative can match. It represents hours of your attention, a specific moment of creative problem-solving, and a conscious choice to participate in a more thoughtful relationship with material culture. That is the deepest reward of upcycling — not just the beautiful object at the end, but the practice of paying attention, adapting, and making something worth keeping.
Inspiring Project Ideas to Spark Your Creativity
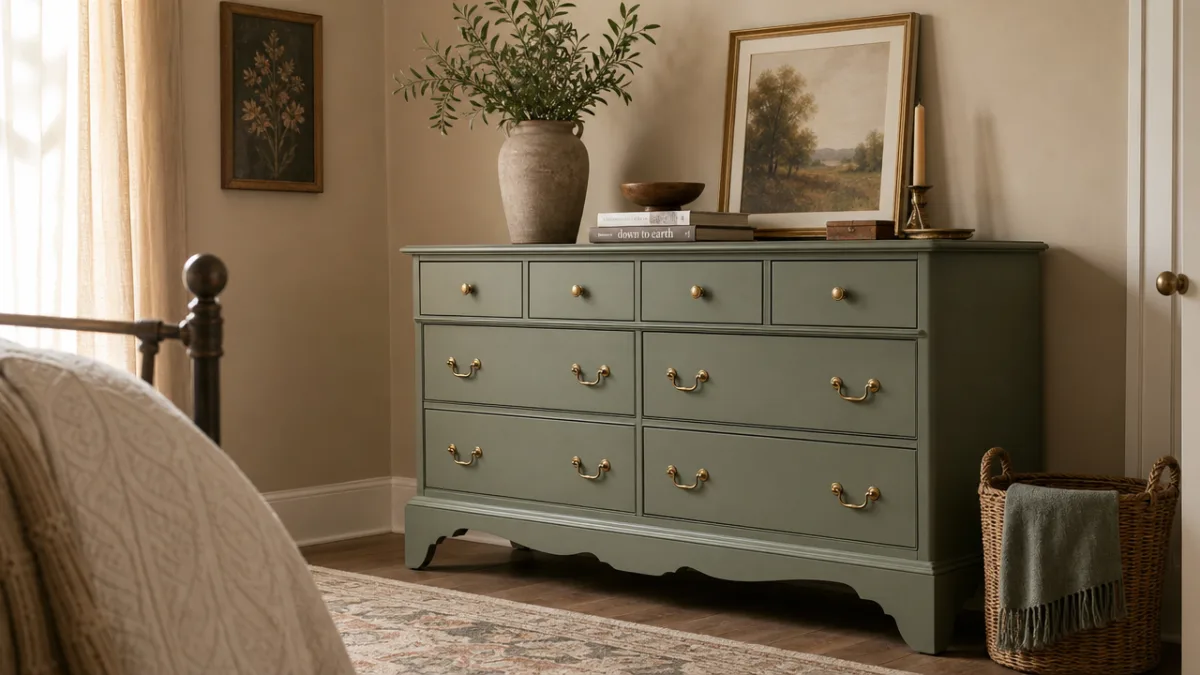
If you are looking for a starting point, a few project archetypes have proven themselves over and again as ideal entry points for beginners while still offering room to grow in complexity and ambition. The humble wooden side table is perhaps the single best beginner project — small enough to complete in an afternoon, inexpensive to source, and versatile enough to absorb almost any technique or finish you want to practice. A set of mismatched wooden dining chairs painted in a unifying color, perhaps with reupholstered seats in a coordinating fabric, is another excellent early project that teaches both painting and basic upholstery while delivering a genuinely impressive and practical result.
Pallets have become something of a cliché in the upcycling world, but the reason for their popularity is straightforward — free, abundant, and made of surprisingly good structural timber. Pallet wood can be used to build coffee tables, garden furniture, bed frames, shelving units, and wall art. The key to elevating pallet projects beyond their reputation for looking rustic to the point of rough is thorough preparation: sanding the timber extensively, filling any gaps or cracks, and finishing with the same care and attention you would give to a piece of manufactured furniture. Treated with this level of attention, pallet wood furniture can look genuinely designer in quality.
For the more adventurous, repurposing furniture for an entirely different function than its original design is one of the most creative and satisfying directions upcycling can take. Old wooden ladders become bathroom towel racks or blanket ladders for the bedroom. Vintage suitcases are stacked and fitted with legs to create side tables with built-in storage. Antique doors are mounted horizontally on hairpin legs to create desks or dining tables with extraordinary character. A cast-iron bathtub, fitted with cushions and throw pillows, becomes a highly original sofa or garden daybed. These unexpected transformations are the projects that earn double-takes and genuine admiration, and they begin with nothing more than the willingness to see every object as a raw material waiting for a new purpose.
The upcycling community itself is one of the most generous and supportive creative communities you will find, both online and in person. Social media platforms are rich with tutorial content, before-and-after inspiration, and honest accounts of projects that did not go as planned — which are just as instructive as the successes. Local workshops and maker spaces frequently run courses in specific skills like upholstery, woodworking joinery, and specialist paint techniques. Engaging with this community accelerates your learning, connects you with people who share your values around sustainability and creativity, and reminds you that every expert was once a complete beginner staring at a rickety thrift store chair and wondering what they had gotten themselves into. Start with one small project. See what happens. It is very likely the beginning of something you will love for a long time.








What do you think?
It is nice to know your opinion. Leave a comment.