










Revamp Wine Bottles to Candle Holders: A Complete Guide to Stunning DIY Transformations
The Art of Upcycling: Why Wine Bottles Make Perfect Candle Holders
There is something deeply satisfying about transforming an ordinary wine bottle into a beautiful, functional piece of home décor. Wine bottles possess a natural elegance in their shape — the gentle curve of the neck, the satisfying weight of thick glass, and the rich colors ranging from deep emerald green to warm amber and clear crystal. Rather than sending these vessels to the recycling bin, upcycling them into candle holders allows you to give them an entirely new life while creating genuinely unique pieces that cannot be purchased in any store.
The sustainability angle of this craft project cannot be overstated. Glass production is energy-intensive, and while recycling is certainly better than landfill disposal, repurposing is always the more environmentally conscious choice. Every wine bottle candle holder you create represents one fewer item in the waste stream and one fewer mass-produced decoration purchased. When guests admire your home décor and you explain that the stunning centerpiece on your dining table was once a bottle of Cabernet Sauvignon, it sparks conversations about creativity, sustainability, and the hidden potential in everyday objects.
Beyond the environmental benefits, wine bottle candle holders carry an aesthetic appeal that complements virtually every interior design style. A cluster of rustic, twine-wrapped bottles suits a farmhouse kitchen beautifully. Sleek, label-free bottles with elegant taper candles elevate a minimalist dining room. Painted and gilded bottles add glamour to bohemian or eclectic spaces. The versatility of this single base material means that with different techniques and finishes, you can create an entirely cohesive collection tailored specifically to your home’s personality and your personal taste.
Gathering Your Supplies and Preparing Your Bottles
Before diving into any creative project, proper preparation makes the difference between a frustrating experience and an enjoyable one. For wine bottle candle holders, your first task is collecting bottles in varying shapes, sizes, and colors. Standard 750ml Bordeaux-style bottles are the most common and offer a classic silhouette, but Burgundy bottles with their broader shoulders create a different visual weight. Champagne bottles, with their distinctive punt and heavier glass, make particularly dramatic candle holders. Collect several over time, keeping an eye out for interesting label designs, unusual glass colors, or distinctive shapes.
Removing labels cleanly is one of the most important preparatory steps and can be achieved with patience and the right approach. Fill a sink or large basin with hot water and add a generous squirt of dish soap along with a few tablespoons of baking soda. Submerge the bottles completely and allow them to soak for at least thirty minutes — longer for labels with particularly stubborn adhesive. Most paper labels will slide off easily after soaking, but plastic or foil labels may require gentle scrubbing with a non-scratch pad. For any remaining adhesive residue, rubbing alcohol or cooking oil applied with a cloth works remarkably well to dissolve the sticky film without scratching the glass surface.
Cleaning the interior of bottles is equally important, especially if you intend to place candles inside rather than on top. Pour a small amount of white vinegar and uncooked rice into the bottle, cover the opening, and shake vigorously to scrub away any residue or mineral deposits from the wine. Rinse thoroughly with warm water and allow the bottles to dry completely — ideally overnight — before beginning any decorative work. A bottle that is not fully dry will cause paint to bubble and adhesive to fail, so patience during this stage pays dividends later when your finished project looks polished and professional.
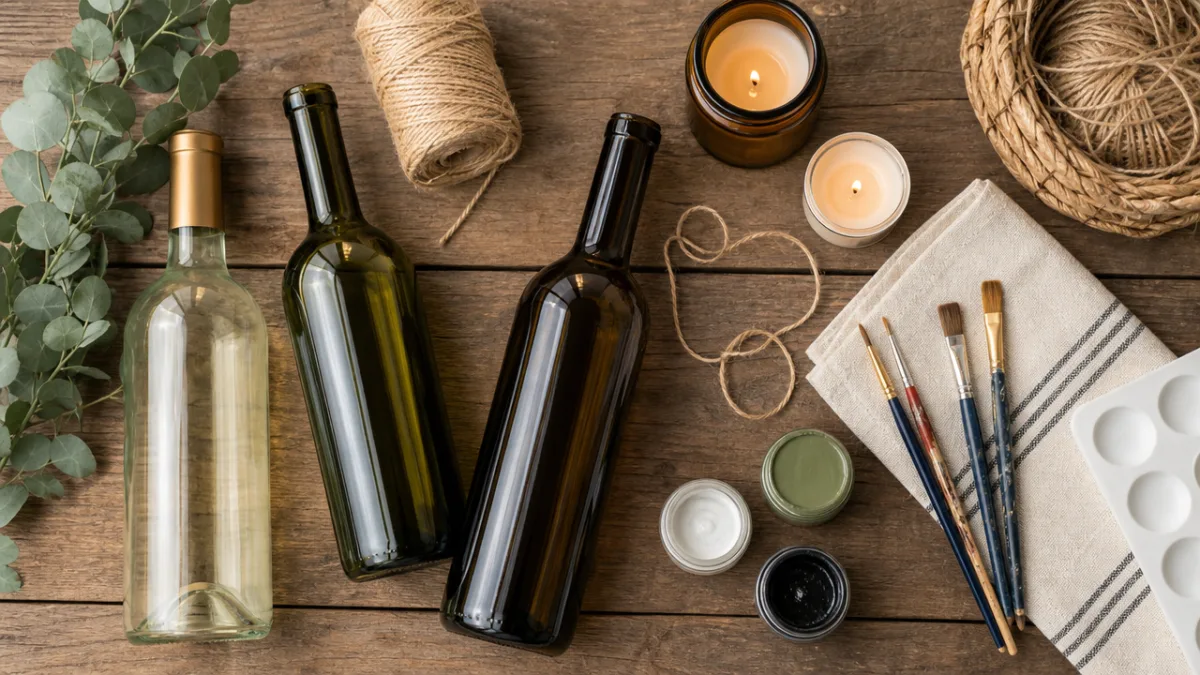
Here is a comprehensive list of supplies you may want to gather before beginning your project:
- Clean, dry wine bottles in assorted shapes and colors
- Taper candles, pillar candles, or tea light candles depending on your chosen style
- Glass paint or chalk paint in your desired color palette
- Painter’s tape for creating crisp geometric designs
- Natural twine, jute rope, or leather cord for wrapping
- Strong waterproof adhesive suitable for glass surfaces
- Metallic spray paint in gold, silver, or copper tones
- Frosted glass spray for a diffused, ethereal effect
- Decorative elements such as dried flowers, beads, or charms
- Fine-grit sandpaper for surface preparation before painting
- Protective sealant or Mod Podge for finishing painted surfaces
Painting Techniques for Breathtaking Results
Paint transforms a plain glass bottle more dramatically than almost any other technique, and the range of looks achievable is genuinely staggering. Chalk paint has become a favorite among DIY enthusiasts for glass projects because it adheres without priming, dries to a beautiful matte finish, and can be distressed to create a charming antique effect. Simply brush on two or three thin coats, allowing each to dry completely between applications. Once dry, lightly sand the raised areas and edges with fine-grit sandpaper to reveal hints of the glass beneath, creating a look that suggests decades of gentle use rather than an afternoon’s craft project.
Ombre and gradient effects have become enormously popular and are surprisingly achievable even for beginners. Begin by applying your lightest color to the bottom third of the bottle, then immediately apply the darker color to the middle section before the first coat dries. Using a dry brush or a damp makeup sponge, gently blend the two colors together in the overlap zone using short, tapping motions rather than strokes. Repeat with the darkest shade at the top third of the bottle, blending again at the transition zone. The result is a seamlessly graduated wash of color that looks professional and intentional. This technique works beautifully in navy-to-white for coastal themes, dusty rose-to-burgundy for romantic settings, or sage-to-forest green for naturalistic décor.
Metallic finishes bring a completely different energy to wine bottle candle holders, lending them a glamorous, celebratory quality that suits dinner parties and special occasions perfectly. Gold and copper spray paints in particular complement the warm light of candle flames in a way that creates a genuinely magical table setting. For a partial metallic effect, submerge the bottom half of the bottle into a container and spray only the top, or use painter’s tape to create a precise diagonal or geometric line of demarcation. Two-tone bottles combining matte chalk paint below with a shimmering metallic neck are among the most visually striking results achievable with minimal technical skill and only a few minutes of active work time.
Stenciling opens up even more creative possibilities, allowing you to add botanicals, geometric patterns, monograms, or seasonal motifs to your bottles. Adhesive craft stencils available at most hobby stores adhere directly to the curved surface of the bottle, and while working on a curved surface requires slightly more care than a flat canvas, the results are well worth the extra attention. Apply paint with a stencil brush using a stippling — or dabbing — motion rather than brushing strokes, which would push paint under the stencil edges and blur your crisp design. Remove the stencil carefully while the paint is still slightly damp for the cleanest lines, and touch up any imperfections with a fine detail brush once everything has dried completely.
Creative Wrapping and Texture Techniques
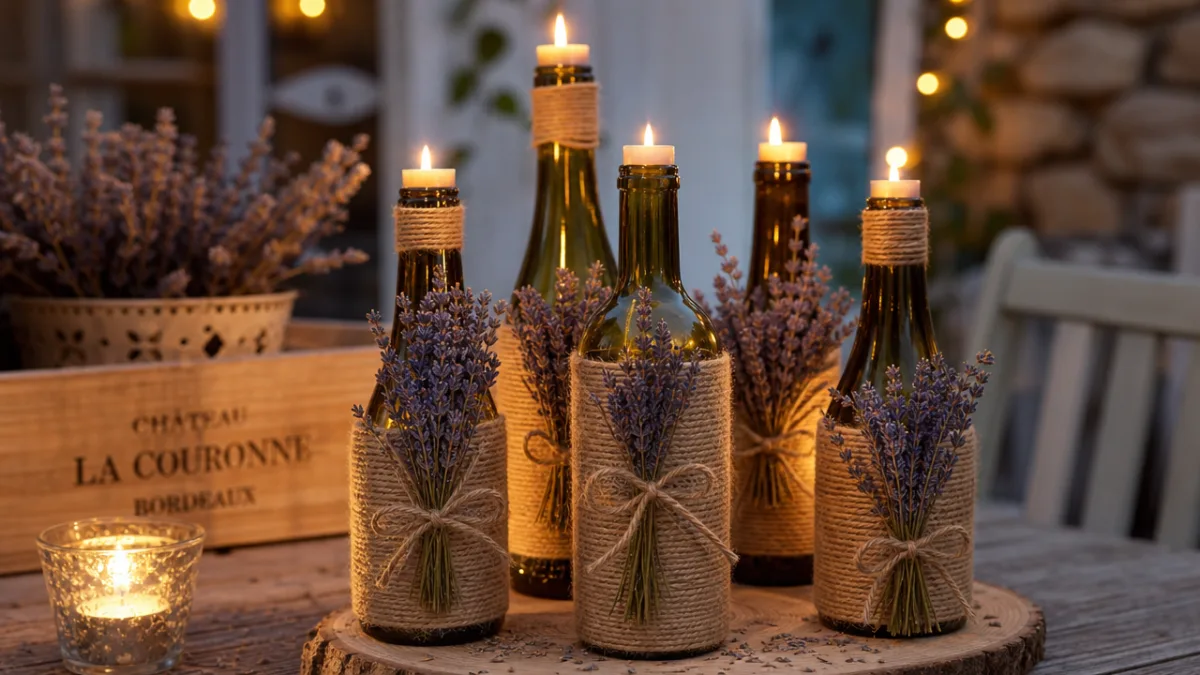
Not every beautiful wine bottle candle holder requires paint at all. Wrapping techniques using natural fibers create warmth, texture, and organic beauty that painted surfaces simply cannot replicate. Natural jute twine is the most commonly used material because of its affordability, availability, and the wonderfully rustic character it imparts. Begin at the base of the bottle, applying a line of waterproof craft adhesive and pressing the twine firmly into place. Work upward in tight, even rows, applying adhesive as you go and pressing each row snugly against the last. The result can cover the entire bottle or be limited to the lower half, leaving the glass neck exposed to catch and refract candlelight beautifully.
Macramé-style knotting creates a more intricate and textural effect than simple wrapping and has experienced a significant revival in recent years as bohemian and earthy interior styles have become increasingly popular. Using thicker cotton cord or a combination of jute and leather, you can create basic square knots and half-hitch patterns directly onto the bottle. These techniques require slightly more patience to learn but can be mastered from online tutorials in a single afternoon. The tactile quality of a macramé-wrapped bottle is particularly appealing — guests will inevitably reach out to touch the texture, making these pieces as much a sensory experience as a visual one. Clusters of three or five macramé bottles in varying heights make extraordinary centerpieces that feel handcrafted and intentional.
Dried florals and botanical elements add a romantic, ethereal quality to wine bottle candle holders that suits cottagecore, garden-party, and vintage-inspired aesthetics especially well. Dried lavender bundles, eucalyptus sprigs, preserved baby’s breath, or small dried rose heads can be tucked into twine wrapping, secured with hot glue, or simply inserted into the bottle neck alongside a taper candle. The combination of delicate dried botanicals and soft candlelight is particularly beautiful at twilight, when the warm glow illuminates the translucent petals and creates delicate shadows across the surrounding surfaces. This style of decoration is also wonderfully long-lasting — unlike fresh flowers, dried botanical arrangements maintain their beauty for months or even years with minimal care.
Choosing the Right Candles and Ensuring Safety
The type of candle you choose dramatically affects both the visual outcome and the practical safety of your wine bottle candle holder. Taper candles inserted directly into the bottle neck are the most classically elegant option and create the most dramatic, romantic silhouette. Standard taper candles with a 7/8-inch base fit most wine bottle necks perfectly, though slightly wider tapers may need gentle warming of the base to fit snugly. Beeswax tapers are particularly beautiful because of their natural honey color and clean-burning properties — they drip far less than paraffin alternatives and fill the room with a subtle, pleasant fragrance without the use of synthetic additives.
Tea light candles placed inside the bottle rather than on top create an entirely different and equally stunning effect, particularly with green or amber glass that glows richly when illuminated from within. To place a tea light inside a bottle, you will need a bottle with a wide enough opening — typically a bottle that has had its neck cleanly removed using a bottle-cutting kit. These inexpensive kits, available online and in craft stores, use a scoring tool and alternating hot and cold water to create a clean break in the glass. The resulting open-topped vessel can hold a tea light, a votive candle, or even a small pillar candle, depending on the diameter of the bottle. Sand the cut edge carefully with wet-dry sandpaper until it is completely smooth before placing any candles inside.
Candle safety must be taken seriously regardless of how beautiful your finished holders look. Never leave burning candles unattended, and always ensure that bottles are placed on a stable, non-flammable surface. Wine bottles are relatively stable due to their weighted bases, but clustering several together on a tray or decorative plate adds extra security and prevents any individual bottle from being accidentally knocked over. Keep candles away from flammable materials including dried botanical decorations — if you have adorned your bottles with dried flowers or grasses, ensure the candle flame cannot reach them under any circumstances. Battery-operated LED taper candles have become remarkably realistic in recent years and offer a completely safe alternative, particularly for households with children, pets, or any surface where open flames are inadvisable.
Styling and Displaying Your Wine Bottle Candle Holders
The impact of wine bottle candle holders multiplies significantly when they are grouped and styled thoughtfully rather than placed in isolation. The classic rule of odd numbers applies beautifully here — groupings of three, five, or seven bottles feel more dynamic and visually interesting than even-numbered arrangements. Vary the heights within your grouping by choosing bottles of different sizes, or by placing some bottles on small wooden blocks, stacked books, or upturned bowls to create varying elevations. This layered approach draws the eye through the arrangement rather than landing flatly on a single plane and gives your display a professional, editorial quality.
Consider the contexts in which your wine bottle candle holders will shine most brightly — quite literally. A long dining table centerpiece featuring a row of five bottles in graduated heights, alternating between painted and clear glass, creates a memorable focal point for dinner parties that guests will comment on throughout the evening. Mantelpiece arrangements benefit from the asymmetry of odd-numbered groupings flanked by trailing greenery or stacked books. Outdoor entertaining areas are transformed by clusters of bottle candle holders on picnic tables, patio surfaces, or garden walls at dusk, when the warm flickering light creates an atmosphere that no overhead lighting can replicate. Even a single well-crafted bottle on a bedside table makes a bathroom or bedroom feel considered and intentional.
Seasonal updates keep your wine bottle candle holder collection feeling fresh and relevant throughout the year without requiring you to create entirely new pieces each season. The bottles themselves remain constant — it is the styling around them that shifts. In autumn, nestle your bottles among small gourds, dried corn husks, and cinnamon sticks. For winter holidays, wrap twine-covered bottles with fairy lights, tuck sprigs of holly or frosted pine between them, and choose candles in deep red or forest green. Spring arrangements might incorporate fresh or dried tulip stems, pastel-painted rocks, and pale yellow candles. Summer calls for shells, sea glass, coastal grasses, and simple white or aqua candles. This seasonal approach maximizes your investment in a single collection of handcrafted pieces while keeping your home décor feeling current and thoughtfully curated.
Gifting handmade wine bottle candle holders is one of the most personal and memorable ways to share your craft with others. A beautifully made bottle, thoughtfully decorated to suit the recipient’s home and personality and accompanied by two or three quality taper candles, makes a gift that communicates genuine care and creativity. Present it in a simple kraft paper box with tissue paper and a handwritten note explaining the upcycling story behind the piece. Unlike most store-bought gifts, a handcrafted item carries the story of its creation — the afternoon spent sanding and painting, the deliberate choice of colors, the care taken in the wrapping and finishing. Recipients understand instinctively that this kind of thoughtfulness cannot be replicated by spending more money, and that understanding is precisely what makes handmade gifts so enduringly meaningful.

Expanding Your Skills: Advanced Techniques and Variations
Once you have mastered the foundational techniques of painting, wrapping, and styling, a world of more advanced possibilities opens up that can take your wine bottle candle holders to genuinely artisanal levels of sophistication. Alcohol ink poured into clear glass bottles creates abstract, stained-glass-like effects of extraordinary beauty. Pour several drops of two or three complementary alcohol ink colors into a clean, dry bottle, then rotate and tilt the bottle slowly to allow the inks to flow across the interior surface. Each piece is completely unique — the inks behave unpredictably and organically, creating patterns that no two people could replicate exactly. When a candle is placed behind this treated glass, the light passes through the swirling colors and casts prismatic patterns across surrounding walls and surfaces.
Decoupage techniques open up another avenue of creative expression, allowing you to adhere paper napkins, tissue paper, or botanical illustrations directly to the glass surface. Choose napkins or papers with patterns, textures, or motifs that complement your interior — vintage botanical prints for a traditional space, geometric tissue paper for a modern one, or delicate marbled paper for a maximalist, artistic environment. Separate the printed layer of decorative napkins from the backing layers, apply a thin coat of Mod Podge to the area of the bottle, lay the paper gently onto the surface and smooth out bubbles with a soft brush, then seal with additional coats of Mod Podge once dry. The glass beneath gives decoupaged surfaces an almost luminous quality that flat paper cannot achieve.
For those comfortable with more specialized tools, glass etching cream opens up remarkable possibilities for permanent, professional-looking designs. Etching cream, available at craft supply stores, chemically frosts the glass wherever it is applied, creating designs that are truly permanent and completely resistant to chipping, peeling, or fading — unlike any paint-based finish. Apply etching cream through adhesive stencils following the manufacturer’s safety instructions carefully, as the cream contains mild acid and requires gloves and eye protection. The resulting frosted designs — whether monograms, geometric borders, or intricate botanical silhouettes — have a sophisticated quality that elevates wine bottle candle holders from simple craft projects to genuine decorative art that could easily be mistaken for expensive designer pieces found in upscale home furnishing boutiques.
Building a cohesive collection over time is one of the most rewarding aspects of this craft. Rather than attempting to create everything at once, allow your collection to grow organically — one beautifully finished bottle at a time. Experiment freely with techniques, and do not be discouraged if early attempts do not meet your vision perfectly. Every imperfect bottle teaches you something valuable about how paint behaves on glass, how tightly twine needs to be wrapped to stay secure, or how much pressure to apply when working with adhesive stencils on a curved surface. The techniques covered here — from basic painting to metallic finishes, from twine wrapping to alcohol ink and glass etching — form a comprehensive toolkit that will serve you through countless creative projects beyond wine bottle candle holders, enriching your home, your gift-giving, and your creative life for years to come.








What do you think?
It is nice to know your opinion. Leave a comment.