










How to Make T-Shirt Yarn: The Ultimate Guide to Upcycling Old Tees
What Is T-Shirt Yarn and Why You Should Make It
T-shirt yarn — or “tarn,” as crafters tend to call it — is pretty much exactly what it sounds like: yarn made from old t-shirts that you cut into long strips and gently stretch until they take on a soft, chunky, totally workable shape. It lives somewhere between fabric and traditional yarn, and it gives finished projects this wonderfully distinctive texture and satisfying weight that you just can’t get from anything off a store shelf. Whether you’re into knitting, crocheting, or weaving, tarn genuinely opens up a new world of possibilities.
But the appeal goes well beyond how it feels in your hands. Making tarn is one of the most accessible and genuinely satisfying forms of upcycling you can do at home. Every old, stained, or hopelessly out-of-style shirt that would otherwise end up in a landfill becomes a raw material instead. And in a world that’s increasingly reckoning with textile waste — the fashion industry is one of the biggest polluters around — turning what you already own into something beautiful and useful feels like a small but meaningful thing to do.
From a purely practical angle, tarn is also a great way to save money. Premium chunky yarn at a craft store can run anywhere from ten to thirty dollars a skein, and big projects can chew through several skeins fast. A bag of old t-shirts from your closet, or a thrift store run that costs you a few dollars, can yield enough yarn for a solid market bag, a placemat, or even a small rug. The economics alone are pretty compelling — and the creative satisfaction makes it even better.
Gathering Your Materials and Choosing the Right T-Shirts
Before you cut a single strip, it’s worth thinking about which shirts will actually work well. Fiber content matters more than you might expect. One hundred percent cotton t-shirts are the gold standard for tarn. When you cut and stretch a cotton strip, the edges curl inward naturally, giving you that smooth, rounded look that’s the hallmark of well-made t-shirt yarn. Synthetic blends can work in a pinch, but they tend to fray instead of curling, so your finished yarn ends up looking a little rough around the edges.
The weight and structure of the fabric matter too. A classic jersey knit — that slightly stretchy, fine-knit material most t-shirts are made from — is exactly what you want. Skip anything with heavy graphic prints made from thick, rubbery ink, since those sections will be stiff and annoying to work with. It’s also worth sorting your shirts into two piles early on: those with side seams and those without, since the cutting technique is a little different for each. Thicker shirts give you chunkier yarn, which is great for rugs and bags, while thinner shirts produce something more delicate and better suited to smaller projects.
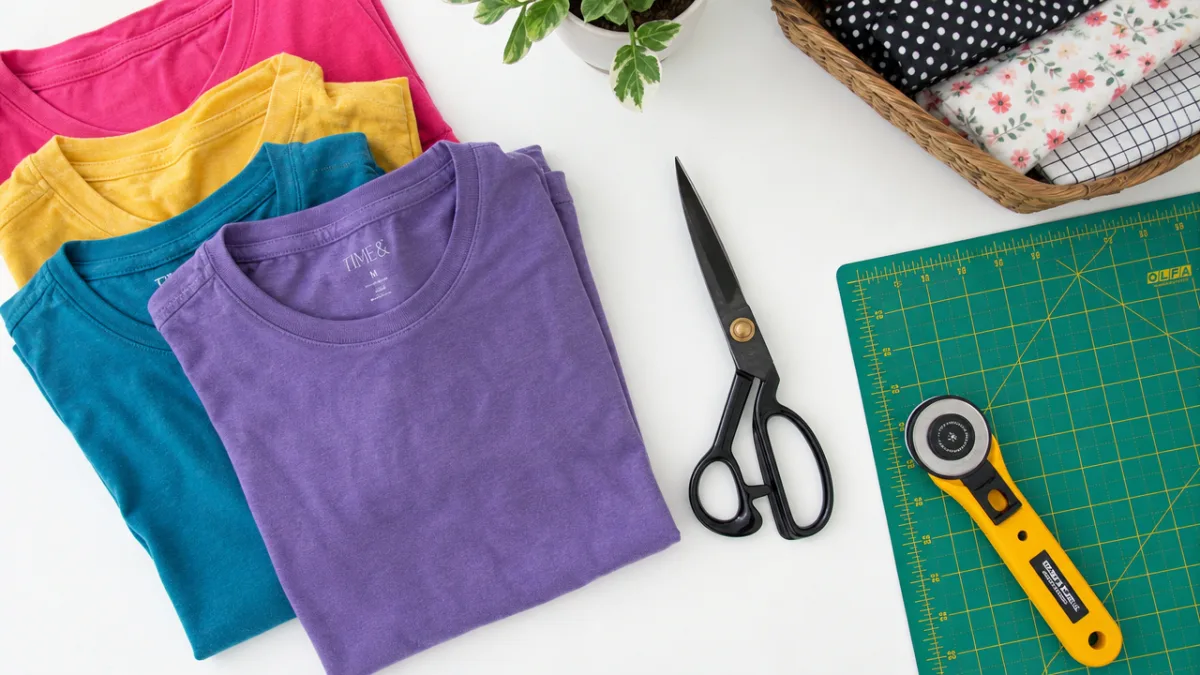
As for tools, the good news is you really don’t need much. A sharp pair of fabric scissors is the most important thing — dull scissors will drag and chew through the fabric instead of cutting cleanly, which makes the whole process maddening. If you’re planning to make tarn in large quantities, a self-healing cutting mat and a rotary cutter will save you a lot of time. A ruler or a strip of cardboard cut to your target width is handy for keeping your strips consistent. Beyond that, this is a craft that genuinely requires almost no upfront investment.
The Basic Cutting Method for Seamless T-Shirts
Seamless, tube-style t-shirts are the easiest place to start, and once you understand the logic of the method, it’s almost elegantly simple. Start by laying your shirt flat and cutting off the bottom hem — just toss that strip. Then cut away the entire top portion just below the armholes, taking off the sleeves and shoulder seams in one go. What you’re left with is a clean fabric tube, open at both ends, with no seams in sight.
Fold the tube in half lengthwise so the two side edges meet up. Now cut horizontal strips across the width of the folded fabric — somewhere between three-quarters of an inch and one inch wide, depending on how chunky you want your yarn. Here’s the part that trips people up the first time: stop each cut about an inch before you reach the folded edge. Don’t cut all the way through. You’re making a series of parallel cuts that leave the fabric connected along one side, like the fringe on a scarf.
Once all your cuts are done, carefully unfold the tube. You’ll see a strip of uncut fabric running along one side, connecting all those horizontal cuts. Lay it out flat. Now, starting at one end, cut diagonally from the first strip across to the second strip at that connected edge, then diagonally across to the third strip, and so on in a zigzag pattern all the way down. That diagonal cutting is the trick that turns all those individual loops into one single, long, continuous strand of yarn. Give it a gentle stretch along the whole length and watch the edges curl inward into beautifully rounded tarn.
Adapting the Method for T-Shirts With Side Seams
Most t-shirts actually have side seams, which means instead of one continuous tube, you’ve got two separate panels stitched together. This calls for a slightly different approach, but the result is just as good — and honestly, the technique might even be easier to get your head around. Start the same way: cut off the hem, remove the top section along the armholes. Then, instead of working with the shirt folded into a tube, open the body out flat into one large rectangle of double-layered fabric.
From there, you’ve got two options. The first is to cut straight horizontal strips from edge to edge, giving you a series of individual loops rather than one continuous strand. These loops can then be joined using a simple technique: fold two loops together at a right angle, pull one through the other, and thread the second loop back through itself to make a flat, secure join. Work your way through as many loops as you need, and you end up with a long, continuous length of tarn that’s only slightly less seamless than the tube-shirt version.
The second option is to cut in a continuous spiral. Open the shirt into a single layer by cutting along one side seam. Then, holding the fabric at an angle, start cutting from one corner in a spiral, keeping a consistent width as you work your way across the whole piece. It takes a little practice and a steady hand, but you get a truly continuous strand with no joins at all. Once you’ve done it a few times, you’ll find you can get through even a large shirt in just a few minutes.
Winding, Storing, and Working With Your Tarn
Once you’ve got your continuous strip of tarn, you’ll want to wind it into a ball or skein for storage. Winding into a center-pull ball is especially nice for knitting and crocheting, since the yarn feeds smoothly from the inside without the ball rolling all over the floor. You can do this by hand — wrapping figure-eight style around your thumb and forefinger at first, then building up into a ball shape — or with a yarn winder if you happen to have one. Either way, don’t wind too tightly; overstretching the yarn during storage can mess with its elasticity and how it looks once you start working with it.
Storage is worth thinking about a little because tarn, being cotton-based, can be prone to mildew in damp conditions. A breathable cotton bag or an open basket is a much better bet than a sealed plastic container. If you’ve wound up multiple balls from different shirts, it doesn’t hurt to label them with the fiber content and approximate weight, especially if you’re planning a project that needs consistent yarn throughout. A little organization up front saves a lot of headache later.
Working with tarn feels a bit different from working with regular yarn, and it’s worth making a few adjustments. Because it’s thick and heavy, you’ll usually want larger hooks or needles — a size N or P crochet hook, or US size 15 or bigger knitting needles, are a solid starting point. Your tension will be looser than you might be used to, and the fabric you create will be dense and sturdy. Always swatch before starting a project, because gauge can vary quite a bit depending on how wide your strips are and how stretchy the original fabric was.
Creative Projects to Make With T-Shirt Yarn
The range of things you can make with tarn is genuinely impressive, and there’s something for every skill level. If you’re just starting out, a simple crocheted market bag is probably the most satisfying first project you can pick. It only requires a basic understanding of single crochet, it works up fast because of the large hook and chunky fabric, and you end up with something you’ll actually use. A tarn bag is also surprisingly strong — it can handle a full load of groceries no problem — and it washes beautifully.
Rugs are another natural fit, especially if you’ve accumulated a stash of tarn in coordinating colors. A simple round rug worked in continuous rounds of single crochet is a classic for a reason — tarn gives it a softness and thickness that rivals anything you’d find in a store. More adventurous crafters can play with tapestry crochet to add geometric patterns, or try weaving on a simple frame loom for a flat-woven rug with a totally different look and feel.
Beyond bags and rugs, things branch out in some fun directions. Pot holders, trivets, and coasters are great small gifts and use up even the shortest leftover bits of tarn. Macramé fans will find that tarn works beautifully for wall hangings, plant hangers, and decorative knots — it’s a chunkier, more colorful alternative to traditional cotton cord. Knitters can make chunky baskets and storage bins, and weavers can weave tarn in as weft alongside traditional yarns for a mixed-media, textural piece. Honestly, the only real limit is your imagination and how many old shirts are sitting in your closet.
Tips for Getting the Best Results Every Time
Like any craft, making and working with tarn rewards a little attention to detail. The most consistent piece of advice you’ll hear from experienced tarn makers is to focus on keeping your strip width consistent above almost everything else. Uneven strips produce lumpy, unpredictable yarn that’s genuinely hard to work with and gives you a finished fabric that looks sloppy rather than charmingly handmade. Whether you cut by eye or use a cardboard guide, take the extra time to keep things as even as you can — ideally within a quarter inch of your target width for the whole shirt.
Washing your shirts before cutting is another step that’s really worth building into your routine, especially if you’re sourcing from thrift stores or pulling things out of storage. Pre-washing gets rid of any sizing or coatings applied during manufacturing, softens up the fibers, and means your finished project won’t shrink dramatically the first time it gets wet. It also gives you a chance to spot any hidden damage, stains, or weak spots that might cause the yarn to snap while you’re working with it.
And finally, don’t overlook the creative fun of color planning. One of the best things about making your own tarn is that you get to build a palette that’s completely personal to you. Sorting shirts by color family before you start cutting, then sequencing different colors as you join strips or wind balls, lets you create yarn with beautiful gradients or deliberate color transitions that show up organically in your finished piece. Some crafters even overdye their tarn with fabric dye or natural dyeing methods to hit colors their shirt collection just can’t provide. With a little planning and some creative vision, a pile of old t-shirts can become a genuinely expressive medium.








What do you think?
It is nice to know your opinion. Leave a comment.