










How To Plant Anemone Flowers: A Complete Growing Guide
Understanding Anemone Flowers
If you’re looking for a flower that earns its place in just about any garden, anemones are hard to beat. They come in a surprising range of colors, shapes, and bloom times — more variety than most plants can offer. Part of the Ranunculaceae family, these perennials and annuals have been grown for centuries across Europe, Asia, and North America. Their name actually comes from the Greek word for wind, which is why they’re often called “windflowers” — a pretty fitting name when you watch those delicate petals flutter in even the faintest breeze.
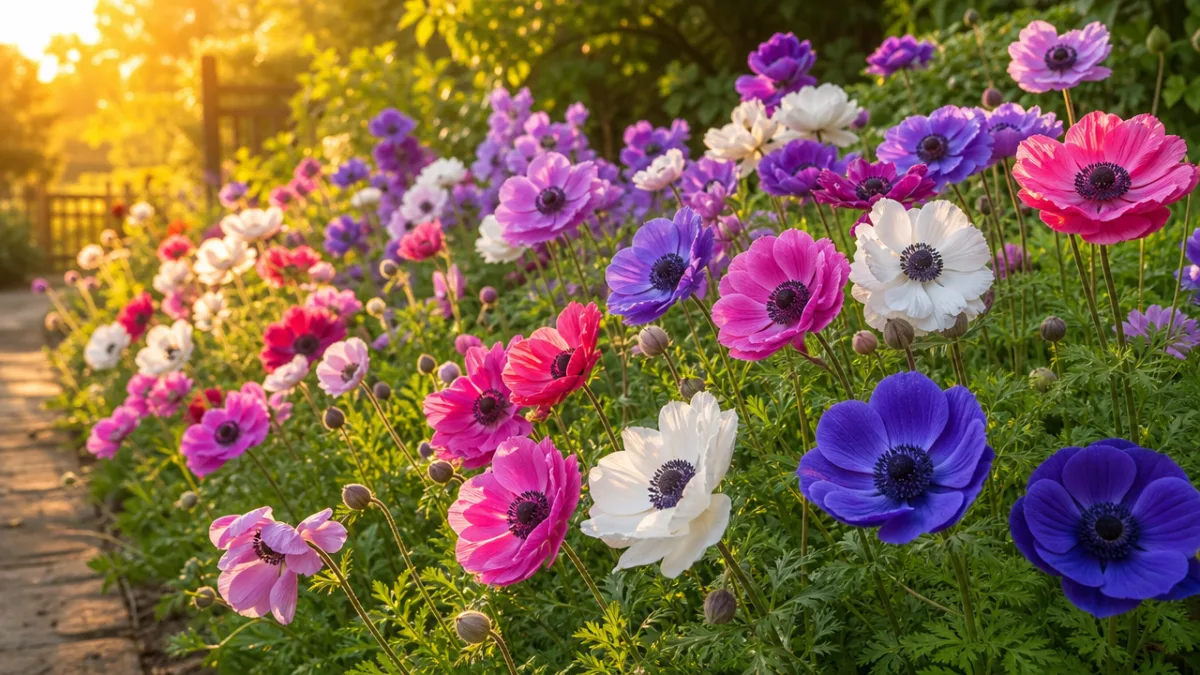
There are dozens of species in the Anemone genus, and each one has its own character and quirks. The favorites among home gardeners tend to be Anemone coronaria, which puts on a bold, poppy-like show in rich reds, blues, purples, and whites; Anemone blanda, a sweet little spring bloomer that naturalizes wonderfully beneath trees; and Anemone x hybrida, the Japanese anemone, which brings a soft, elegant presence to autumn borders. Knowing which species you’re working with really is the most important thing to sort out before you dig a single hole.
Anemones aren’t just pretty — they’re genuinely useful in the garden too. They’re generally deer-resistant, which is a real relief if you’re gardening anywhere that deer are a regular nuisance. Many species also bring in pollinators, especially bees, who love the open, easy-to-access flower centers. Whether you’re putting together a cutting garden, a shaded woodland corner, or a mixed perennial border, there’s almost certainly an anemone that fits the bill.
Choosing the Right Time and Location to Plant
Getting the timing right makes a big difference with anemones. For corm-based varieties like Anemone coronaria, your climate zone largely determines when you plant. If you’re in a warmer area — USDA zone 7 or above — you can plant corms in autumn and enjoy flowers from late winter into spring. In cooler zones, wait until early spring after the last frost and you’ll see blooms by midsummer. Japanese anemones are a bit different since they’re grown from potted divisions rather than corms, and they do best when transplanted in spring or early autumn, when temperatures are mild and the plants aren’t fighting heat stress while trying to settle in.
Location matters just as much as timing. Most anemones like a spot with full sun to partial shade, though the specifics depend on the variety. Anemone coronaria and blanda really want at least six hours of direct sun a day — that’s what keeps their stems sturdy and their flowering generous. Japanese anemones are more laid-back about shade and actually do beautifully under the canopy of deciduous trees, which makes them natural companions for hostas and ferns. One thing to avoid with any anemone is a spot that gets harsh afternoon sun in hot climates — that kind of heat scorches the foliage and cuts the blooming period short.
Good drainage is non-negotiable, no matter which variety you’re growing. Anemones are genuinely susceptible to root rot when they sit in waterlogged soil, and poor drainage is probably the single most common reason they fail to come back year after year. If your soil holds water after a rain, you have a few options: raised beds, mounded planting areas, or working a generous amount of coarse sand and organic matter into the soil before you plant. Even a gentle slope can naturally improve drainage and create a much friendlier environment for these plants.

Preparing the Soil for Planting
Anemones really do reward you for putting in the effort before planting. What they’re after is loose, fertile, well-draining soil with a pH that’s slightly acidic to neutral — somewhere between 5.6 and 7.0. Start by digging the planting area to at least twelve inches deep, breaking up any compacted layers as you go. That deep loosening is especially worth doing for Japanese anemones, which develop substantial root systems and can grow into impressive garden plants over time.
Working organic matter into your soil is one of the best things you can do before planting. Well-rotted compost, aged leaf mold, or composted bark all help improve soil structure — they’ll loosen up clay and help sandy soil hold onto moisture a little longer. Mix two to four inches of your chosen amendment into the top foot of soil until you have a consistent, workable growing medium. If you’ve done a soil test and your pH is outside that ideal range, now is also the time to fix it — sulfur to bring it down, garden lime to bring it up, following the package directions.
If you’re planting anemone corms, there’s one more step worth considering: soaking the corms in room-temperature water for a few hours before you plant them. It’s optional, but it rehydrates the dried corms and can get them sprouting several days — sometimes even a week — sooner. Some gardeners like to soak overnight; others find two to four hours does the trick. Either way, after soaking the corms will look slightly plumper, and their irregular, bumpy surface becomes easier to read, which helps when you’re trying to figure out which end goes up.
Step-by-Step Planting Instructions
Planting depth and spacing are the two things that really matter when you’re putting anemone corms in the ground. The general rule is to plant them about two to three inches deep, measured from the top of the corm to the soil surface. For spacing, four to six inches apart gives you that lush, cottage-garden look, while up to twelve inches apart lets each plant stand out more individually. Wider spacing also means better airflow, which cuts down on fungal problems down the road.
Figuring out which way to orient the corms can be genuinely puzzling — they’re lumpy and irregular and don’t have an obvious top or bottom. The standard advice is to place them with the pointed end facing up, if you can tell which end that is. If after soaking they still look the same all around, don’t stress about it. Many gardeners just plant them on their sides, and the emerging shoot finds its way up regardless. Plants are pretty good at sorting that out on their own.
Planting Japanese anemone divisions or nursery-grown specimens works a bit differently. Dig a hole roughly twice as wide as the root ball and deep enough that the plant sits at the same level it was in its container. Before setting it in, gently loosen any roots that are circling the root ball. Backfill with your amended soil, press it down lightly around the roots, then water well right away. That initial watering is important — it settles the soil and closes up any air pockets around the roots that could stress the plant early on.
Follow these key steps for successful anemone planting:
- Soak corms in water for two to four hours before planting to encourage faster sprouting and more uniform germination across your planting area.
- Dig planting holes two to three inches deep for corms, or wide enough to accommodate the full root ball for nursery-grown divisions without crowding or bending the roots.
- Space corms four to twelve inches apart depending on your desired density, keeping in mind that anemones multiply over time and fill in gaps naturally.
- Orient corms with the pointed end upward when identifiable, or plant on their sides if orientation is unclear after soaking.
- Backfill holes with amended soil, firm gently, and water thoroughly to eliminate air pockets and initiate root-to-soil contact.
- Apply a two-inch layer of mulch after planting to conserve moisture, moderate soil temperature, and suppress competing weeds.

Watering, Fertilizing, and Ongoing Care
Once your anemones are in the ground, keeping up with watering becomes your most important job. For the first two to three weeks while they’re getting established, keep the soil consistently moist — not soggy, just evenly damp. Deep, infrequent watering works better than frequent shallow watering, because it encourages roots to grow downward where they’re less exposed to heat and drought. About an inch of water per week is a good target, though you’ll want to adjust based on rainfall and how hot it’s been.
Once plants are settled and actively growing, you can let the soil dry out a bit between waterings. Anemones aren’t fans of constantly wet conditions around their crowns or corms, so it’s fine — actually better — to let things dry slightly before watering again. A soil moisture meter can be handy if you’re not sure when to water. During the blooming period, steady moisture helps keep the flowers coming and supports new bud development. Once flowering wraps up and the foliage starts yellowing and dying back on its own, gradually ease off on the water so the corms can rest undisturbed.
Anemones don’t need a lot of fertilizer compared to many other flowering plants. A balanced slow-release granular fertilizer worked into the soil at planting time gives them a solid start. Once they’re growing actively, a monthly liquid feed with something balanced like 10-10-10 keeps things chugging along nicely. Skip the high-nitrogen fertilizers — those push leafy growth at the expense of flowers, which is the opposite of what you want. For established Japanese anemones, a top dressing of compost around the base each spring is a simple, gentle way to keep them well-fed without any fuss.
Managing Pests, Diseases, and Common Problems
Anemones are pretty easygoing plants, but they’re not completely trouble-free. Aphids are one of the more common nuisances — they like to cluster on tender new growth and flower buds and suck out the plant sap. For established plants, a strong blast of water from the hose is often all it takes to knock them off. If the infestation is more stubborn, insecticidal soap spray handles it effectively without doing much harm to the beneficial insects you want to keep around.
Fungal diseases are a more serious concern, especially in humid climates or where plants are crowded together without much airflow. Powdery mildew shows up as a white or grayish coating on the leaves and tends to appear when days are warm and nights are cool. Downy mildew causes the foliage to yellow and brown and is more associated with cool, wet conditions. Both can be managed by improving air circulation, avoiding watering from overhead, and applying a suitable fungicide at the first sign of trouble. That said, the best approach is preventive — choose resistant varieties when you can, and clean up infected plant debris promptly so it doesn’t spread.
Root rot from waterlogged soil is probably the worst thing that can happen to an anemone, and unfortunately once it takes hold, there’s not much you can do to reverse it. That’s why getting the site right from the start is so important. If you have plants that are wilting but not recovering after watering, with yellowing lower leaves or a bad smell coming from the soil, those are red flags. Dig one up and take a look at the roots — healthy ones are firm and white or tan, while rotted roots are soft, dark brown, or black. Remove and discard affected plants, fix the drainage issue, and start fresh with amended soil before replanting in that spot.
Overwintering and Dividing Anemones
How you handle your anemones over winter really comes down to which species you’re growing and where you live. Anemone coronaria corms can’t handle frost, so in zones colder than zone 7, you’ll need to either treat them as annuals and replace them each year, or dig them up and store them inside over winter. If you want to save them, wait until the foliage has completely died back, then carefully lift the corms, brush off the loose soil, and let them dry out in a warm, airy spot for a week or two. Once they’re dry, store them in paper or mesh bags with dry peat moss or vermiculite somewhere cool and dry — ideally between 40 and 50 degrees Fahrenheit — until it’s time to plant again in spring.
Japanese anemones are much hardier and can stay in the ground through winter in zones 4 to 9 with a little protection. After the first hard frost kills back the foliage, cut the stems down to about three inches above soil level and cover the area with a generous four to six inch layer of mulch. Straw, shredded leaves, or wood chips all work well. That layer of insulation is what protects the crown and roots from the freeze-thaw cycles that can literally push plants up out of the ground over winter. Come spring, remove the mulch gradually as temperatures rise and you start seeing new growth peeking through.
Dividing your anemone clumps every few years is one of those maintenance tasks that pays off in a big way. It keeps aging plantings vigorous, prevents overcrowding, and gives you extra plants to expand your garden or pass along to other gardeners. Japanese anemones in particular spread readily by underground runners and really benefit from being divided every three to four years. Early spring, just as new growth is starting to emerge, is the best time to do it. Use a sharp spade to cut through the root mass, lift out sections, and replant them at the same depth in freshly amended soil. Water the newly divided plants consistently for the first few weeks while they’re settling into their new spots.








What do you think?
It is nice to know your opinion. Leave a comment.