










Home Decor DIY: Transform Your Space with Creative, Budget-Friendly Ideas
The Power of DIY Home Decor: Why Making It Yourself Changes Everything
There is something deeply satisfying about walking into a room and knowing that the beautiful piece hanging on the wall, the artful arrangement on the shelf, or the custom cushion on the sofa was made by your own hands. DIY home decor has exploded in popularity over the past decade, and for good reason. It gives homeowners and renters alike the freedom to create spaces that feel genuinely personal, without the eye-watering price tags that often come attached to designer furniture and boutique home goods stores.
When you choose to decorate your home yourself, you gain complete control over color, texture, scale, and style. No more settling for a lamp that is almost right, or a print that is nearly the shade you wanted. DIY decor means the finished product matches your vision precisely because you are the one executing it. This creative autonomy is something that no store-bought item, however beautiful, can replicate. Your home becomes a genuine reflection of who you are rather than a catalog page brought to life.
Beyond the emotional and aesthetic rewards, the financial benefits of DIY home decor are undeniable. A hand-painted canvas that costs you fifteen dollars in acrylic paint might retail for two hundred dollars in a gallery. A macramé wall hanging assembled over a weekend with twenty dollars of cotton rope could easily sell for a hundred and fifty dollars in a boutique shop. When you invest your time rather than your money, you walk away with something beautiful and a story to tell about how you made it.
Essential Tools and Materials Every DIY Decorator Should Own
Before diving into any home decor project, assembling a reliable toolkit will save you time, frustration, and multiple trips to the hardware store. The good news is that most foundational DIY tools are affordable and reusable across dozens of different projects. A quality hot glue gun is arguably the single most versatile tool in any DIY decorator’s arsenal. It bonds fabric, wood, ribbon, shells, rope, dried flowers, and countless other materials quickly and securely, making it indispensable for everything from wreath-making to lampshade restoration.
Beyond the glue gun, a few key materials will carry you through an enormous variety of projects. Chalk paint deserves special mention because it adheres to almost any surface without priming, dries quickly, and creates a beautiful matte finish that can be distressed, waxed, or sealed depending on the look you want. A good set of artist’s brushes in varying widths allows you to tackle everything from painting furniture to adding delicate botanical details to a plain ceramic vase. Sandpaper in multiple grits, a measuring tape, a level, and a reliable staple gun round out the essentials that serious DIY decorators reach for again and again.
Sourcing materials creatively is half the fun of DIY decorating. Thrift stores, estate sales, and online marketplace apps are goldmines for raw materials and upcycling candidates. A worn wooden picture frame becomes a chic tray with a coat of gold paint and a piece of decorative paper on the inside. An outdated mirror gets a dramatic makeover with air-dry clay shaped into leaf or shell motifs pressed along its border. Learning to see the potential in discarded and overlooked objects is a skill that develops quickly once you commit to the DIY mindset, and it makes your finished pieces all the more meaningful.

Wall Decor Projects That Make an Instant Impact
Walls are the largest canvas in any room, and transforming them with DIY projects delivers some of the most dramatic visual results for the least amount of effort and expense. Gallery walls remain one of the most beloved and enduring interior design trends, and assembling one yourself costs a fraction of what a professional stylist would charge. The key is to commit to a cohesive element — whether that is a consistent frame color, a shared color palette in the artwork, or a unified theme — while allowing enough variation in frame size and shape to keep the arrangement feeling dynamic and curated rather than rigid and corporate.
Macramé and fiber art have made a stunning comeback in contemporary interiors, and learning basic knotting techniques opens up a world of creative possibilities. A simple square knot wall hanging requires only a wooden dowel, natural cotton rope, and a basic tutorial, yet the finished product adds warmth, texture, and bohemian elegance to any wall. More experienced crafters can progress to intricate patterns incorporating fringe, beads, and colored threads, creating statement pieces that become genuine focal points in a room. The meditative, repetitive nature of knotting also makes macramé a wonderfully relaxing craft to practice in the evenings.
Painted wall treatments offer another avenue for dramatic, low-cost transformation. Color blocking — painting geometric sections of a wall in contrasting or complementary hues — can make a small room feel architecturally interesting and intentionally designed. Ombre effects, created by blending two paint colors while the paint is still wet, add a dreamy, artistic quality to a bedroom or nursery wall. Stenciling is another accessible technique that allows you to achieve the look of expensive wallpaper at a fraction of the cost, using nothing more than a store-bought or hand-cut stencil, a roller, and a contrasting paint color. The results can range from subtle and sophisticated to bold and graphic depending on your color choices.
Furniture Upcycling: Giving Old Pieces a Stunning New Life
Furniture upcycling is perhaps the most transformative category of DIY home decor, capable of turning a twenty-dollar thrift store find into a conversation-starting centerpiece. The process begins with seeing furniture not as it is, but as what it could become with the right intervention. A tired wooden dresser with outdated brass hardware is an opportunity waiting to happen. Sand it lightly, apply two coats of deep forest green chalk paint, swap the hardware for sleek matte black pulls, and you have a piece that looks like it belongs in an expensive boutique hotel room. The cost? Typically under fifty dollars in materials.
Reupholstering chairs and sofas is a slightly more advanced skill, but one that pays enormous dividends in terms of results. Dining chairs with padded seats are the ideal starting point for beginners. The process involves removing the seat pad, laying it face-down on your chosen fabric, cutting the fabric with several inches of overlap on each side, and using a staple gun to pull the fabric taut and secure it underneath. A bold printed fabric or a rich velvet in an unexpected color can completely transform the personality of a plain dining chair. Doing all six chairs in a set yourself rather than hiring an upholsterer can save several hundred dollars while producing equally beautiful results.
Decoupage is another wonderfully accessible technique for furniture transformation that requires minimal skill and investment. By applying decorative paper, fabric, or even pages from vintage books to furniture surfaces using a mixture of white glue and water, and then sealing the finished surface with varnish, you can create intricate, layered designs that look far more complex than they actually are. A plain side table covered in overlapping botanical illustrations becomes a charming accent piece. A basic wooden tray decoupaged with vintage maps or sheet music pages makes a unique and personal gift. The possibilities are limited only by your imagination and your paper supply.
Textile and Soft Furnishing DIY: Adding Warmth and Personality
Textiles are the layer of a room that makes it feel genuinely lived-in and loved, and creating your own soft furnishings is one of the fastest ways to inject personality and warmth into a space. Cushion covers are the perfect starting project for anyone new to sewing, requiring only straight seams and delivering maximum visual impact. Choosing a striking fabric — a bold geometric, a rich botanical print, or a luxurious textured boucle — means the finished cover immediately elevates the sofa or armchair it lands on. Even without a sewing machine, no-sew cushion covers can be assembled using iron-on hem tape, making this project truly accessible to everyone.
Hand-painted or block-printed textiles offer another beautiful avenue for DIY soft furnishing. Using fabric paint and a simple foam stamp or hand-carved potato stamp, you can create custom-printed curtains, table runners, tea towels, and pillowcases that look like they came from an artisan market. Geometric patterns, leaf shapes, and simple abstract motifs translate beautifully onto fabric and require no artistic training to execute. Setting the finished design with a hot iron makes it washable and durable. The result is a home filled with textiles that are genuinely one of a kind — something no mass-market homeware brand can offer.
Knitting and crochet, long associated with traditional crafts, have been enthusiastically reclaimed by a new generation of home decorators who recognize their potential for creating beautiful, functional home objects. A chunky knit throw made from oversized wool yarn adds incredible texture to a bedroom or living room and requires only the most basic knitting knowledge to produce. Crocheted plant pot covers, bathroom storage baskets, and even simple rugs are achievable weekend projects that add handmade warmth to every corner of a home. The growing availability of online tutorials and pattern libraries means that learning these skills has never been easier or more welcoming for beginners.
Bringing the Outside In: Nature-Inspired DIY Decor
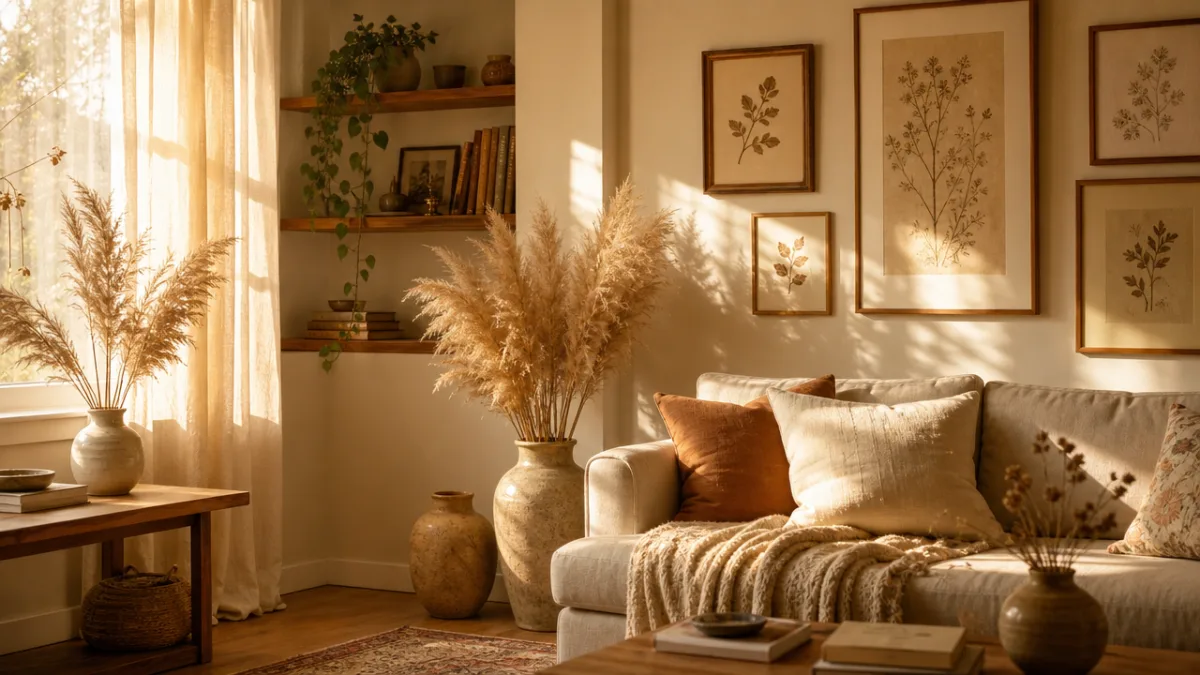
One of the most consistently beautiful and cost-effective approaches to DIY home decor involves incorporating natural materials — and nature has a remarkable way of providing them freely or cheaply. Dried botanicals have surged in popularity as a decorating element because they bring organic texture and color to a space without requiring any maintenance. Bundles of dried pampas grass, eucalyptus, lavender, or wheat displayed in a tall ceramic vase create an effortlessly stylish arrangement that lasts for months or even years. You can dry your own botanicals simply by hanging fresh cuttings upside down in a warm, dry space for two to three weeks.
Pressed flower art is another beautiful way to bring the natural world indoors, and the process is simpler than most people imagine. Collecting flowers and leaves at their peak, pressing them between heavy books for several weeks, and then arranging and framing them behind glass creates pieces of botanical art that feel genuinely precious and personal. A collection of matching frames displaying pressed specimens from your own garden or a beloved landscape makes for a deeply meaningful gallery wall that changes with the seasons as your collection grows. Pressed flower art also makes extraordinarily thoughtful gifts, particularly when the botanicals carry personal significance.
Working with foraged materials like driftwood, pine cones, seed pods, shells, and smooth river stones opens up yet another dimension of nature-inspired DIY creativity. A piece of driftwood suspended horizontally from a ceiling becomes a beautiful hanging planter when small air plants or trailing succulents are attached along its length. A flat basket filled with pine cones and seed pods collected on autumn walks makes a sculptural and fragrant table centerpiece. Smooth stones painted with simple patterns or inspirational words in gold or white paint become charming decorative accents for shelves and windowsills. These projects cost almost nothing in materials, yet they create the kind of warm, layered, story-filled interiors that designers spend enormous budgets trying to achieve.
Styling and Displaying Your DIY Creations: The Art of the Finished Room
Creating beautiful individual DIY pieces is only half the story — knowing how to style and display them within a room is what elevates a collection of crafts into a genuinely designed interior. The principle of odd numbers is one of the most reliable rules in decorative styling: groupings of three or five objects almost always look more pleasing and organic than even-numbered arrangements. When styling a shelf or a coffee table, gather your DIY pieces in groups of three at varying heights, combining a tall element, a medium element, and a low or flat element to create visual rhythm and interest that the eye naturally wants to follow.
Layering is the technique that separates a styled room from a merely tidy one. In practice, layering means placing objects at different depths — leaning a framed piece of your own artwork against the wall at the back of a shelf, placing a plant or candle in front of it, and resting a small handmade ceramic piece in front of that. This depth and dimension gives shelves and surfaces a curated, collected-over-time quality that feels lived-in and intentional rather than staged. The same principle applies to beds styled with multiple pillow sizes, throws, and cushion covers in complementary but not matching fabrics — including your own handmade versions.
Perhaps the most important piece of advice for anyone embarking on a DIY home decor journey is to embrace the process of evolution. A room does not need to be finished all at once, and in fact the most beautiful interiors are those that accumulate character gradually as objects are made, gifted, found, and loved. Give yourself permission to rearrange, to change your mind, to paint over something that no longer works, and to try again. The skills you build along the way — an eye for color, a feel for proportion, a confidence with materials — are gifts that will serve you in every home you ever make. And the home you create through this ongoing creative practice will be something genuinely, irreplaceably yours.








What do you think?
It is nice to know your opinion. Leave a comment.