










Flooring with Upcycled Pallets: A Complete Guide to Transforming Reclaimed Wood into Beautiful Floors
Introduction: Why Pallet Wood Flooring Is Having a Moment
In an era where sustainability meets style, pallet wood flooring has emerged as one of the most exciting trends in home renovation and interior design. What was once considered industrial waste — those rough, weathered wooden platforms used to ship goods around the world — has been reimagined as a versatile, character-rich building material that can completely transform a living space. Homeowners, DIY enthusiasts, and professional designers alike are discovering that upcycled pallet flooring offers something that expensive hardwood simply cannot replicate: genuine history, texture, and soul embedded in every plank.
The environmental argument for choosing pallet wood flooring is compelling on its own. Standard wooden pallets are typically made from hardwoods like oak, pine, and maple — the very same species sold at premium prices in flooring showrooms. Rather than allowing these materials to rot in landfills or be chipped into mulch, upcycling them into flooring gives the wood a second life while reducing demand for freshly harvested timber. With deforestation remaining a critical global concern, every decision to reclaim and repurpose existing wood represents a small but meaningful contribution to environmental stewardship.
Beyond the ecological benefits, there is a deeply personal and creative dimension to pallet flooring that mass-produced materials simply cannot offer. No two pallet wood floors are ever identical. The variations in grain pattern, color, knot placement, and even the occasional nail hole or paint stain tell a story — of journeys made, goods transported, and a material that has lived a life before arriving beneath your feet. This article will walk you through everything you need to know to plan, execute, and maintain a stunning pallet wood floor in your own home.
Sourcing and Selecting the Right Pallets
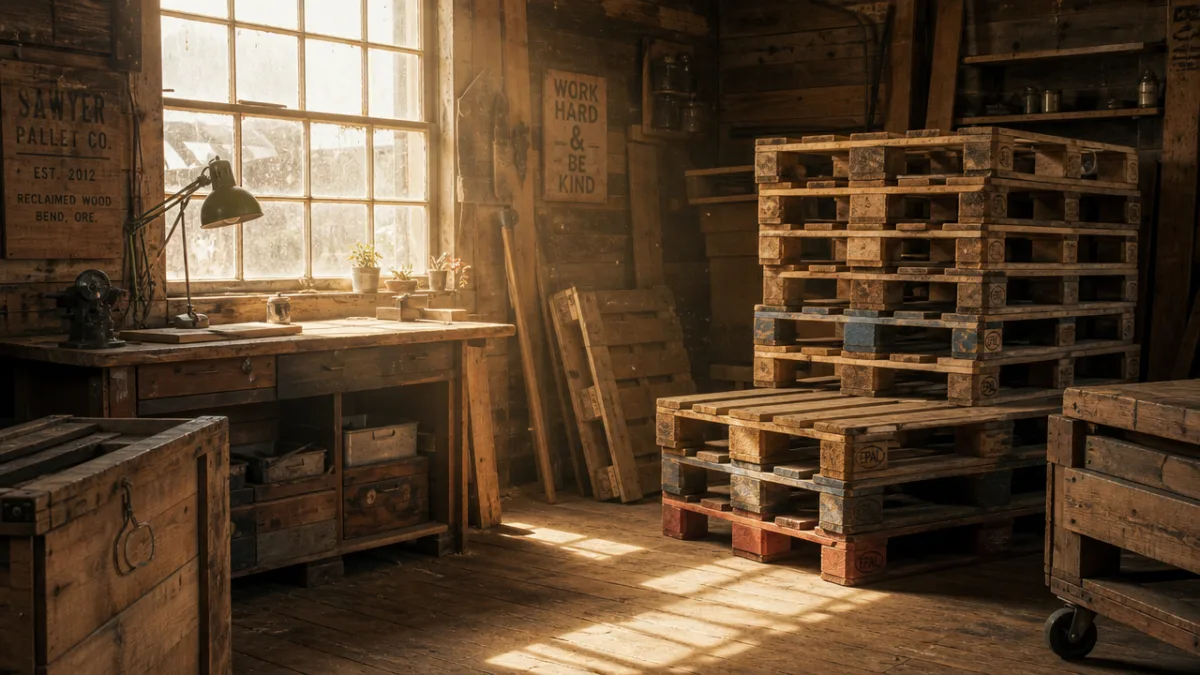
Not all pallets are created equal, and choosing the right ones is arguably the most important step in the entire process. The first thing to understand is the difference between heat-treated and chemically treated pallets. Look for the IPPC (International Plant Protection Convention) stamp on the side of any pallet you intend to use. Pallets stamped with “HT” have been heat-treated to eliminate pests and are safe for indoor use. Pallets stamped with “MB” have been treated with methyl bromide, a toxic pesticide, and should be avoided entirely when working on flooring or any project that will be inside a living space.
When it comes to sourcing pallets, the options are more plentiful than most people realize. Garden centers, hardware stores, furniture warehouses, grocery distribution centers, and manufacturing facilities routinely discard pallets or make them available for free or at very low cost. Online platforms such as Craigslist, Facebook Marketplace, and Freecycle are excellent resources for locating pallets in your area. It is worth calling ahead to businesses and explaining your project, as many are happy to set aside clean, quality pallets rather than paying for disposal.
Quality assessment is crucial before you begin collecting in bulk. Look for pallets that are relatively clean and dry, with no signs of mold, oil staining, or chemical spills. Boards should be solid with minimal warping, cracking, or rot. Hardwood pallets — often identifiable by their weight and density — will produce a more durable finished floor than softwood alternatives, though both can be used successfully with proper preparation. Aim to gather significantly more pallet wood than your square footage calculations suggest, because waste from cutting, grading, and working around knots or damage is inevitable.
Preparing Pallet Wood for Flooring Installation
Preparation is where the real labor of a pallet flooring project lives, and cutting corners at this stage will undermine everything that comes after. Once you have gathered your pallets, the first task is disassembly. This can be done with a pry bar and hammer, though a specialized pallet buster tool makes the process significantly faster and reduces the risk of splitting boards. Work slowly and methodically, supporting boards as you remove them to avoid cracking. Remove all nails and staples using pliers or a nail punch, and inspect each board individually for structural soundness before moving it to your working stack.
Cleaning is the next essential phase. Pallet boards should be scrubbed thoroughly with a stiff brush and a diluted solution of wood cleaner or even diluted white vinegar to remove dirt, grime, and surface contaminants. Allow the boards to dry completely — ideally for several days in a well-ventilated area — before proceeding. Acclimation is equally critical: wood expands and contracts with changes in temperature and humidity, so your pallet boards need to spend at least 72 hours, and preferably a full week, inside the room where they will be installed. This allows the wood to reach equilibrium with its new environment and dramatically reduces the risk of post-installation warping and gapping.
Milling and sizing the boards brings them closer to a uniform thickness and width, which is important for achieving a level, professional-looking floor. A thickness planer is the ideal tool for this task, allowing you to run each board through and bring it to a consistent depth. If you do not own a planer, many lumber yards and tool rental shops offer access to one. After planing, sort your boards by thickness into groups — using boards of similar thickness together minimizes height variations in the finished surface. A table saw or circular saw with a ripping fence can be used to cut boards to consistent widths, giving your floor a cleaner, more intentional look.
Installation Techniques and Layout Options
Planning your layout before you begin nailing a single board is time well spent. The arrangement of pallet planks has an enormous impact on the visual character of the finished floor, and there are several approaches to consider. A traditional straight lay, with all boards running parallel in the same direction, creates a clean and classic look that works in most spaces. A herringbone or chevron pattern adds geometric sophistication and visual movement, though it requires more precise cutting and a higher skill level. Random width installations, where boards of varying widths are laid in an organic pattern, tend to celebrate the rustic nature of pallet wood most fully and are often the most forgiving of slight imperfections in the material.
Subfloor preparation determines whether your finished floor will look and perform beautifully or cause headaches for years to come. The subfloor must be clean, dry, level, and structurally sound before any pallet wood goes down. Use a long straightedge to identify high and low spots, filling depressions with floor leveling compound and sanding down any high areas. If you are installing over a concrete slab, a moisture barrier is absolutely essential, as concrete releases moisture that will cause wood to swell, buckle, and grow mold. A layer of roofing felt or a dedicated vapor barrier membrane should be rolled out and taped at the seams before installation begins.
There are three primary methods for fastening pallet flooring, each with its own advantages. Nail-down installation, using a flooring nailer or finish nailer, is the most traditional approach and works well over wooden subfloors. Glue-down installation uses a construction adhesive spread with a trowel and is particularly suitable for concrete subfloors where nailing is not practical. A floating floor installation, where boards are glued to each other along their edges but not fastened to the subfloor, allows for natural wood movement and is a good option for DIYers concerned about subfloor imperfections. Many installers choose a combination approach, using both adhesive and nails for maximum stability.
- Straight lay pattern: Boards run parallel in one direction — classic, simple, and suitable for any room size or shape.
- Herringbone pattern: Boards are cut at 45-degree angles and laid in a zigzag formation — visually striking but more complex to execute.
- Random width layout: Varying plank widths are mixed organically — celebrates the natural character of reclaimed wood beautifully.
- Brick bond pattern: Each row is offset by half a plank length, similar to brickwork — creates a balanced, structured look with a rustic feel.
- Diagonal installation: Boards run at a 45-degree angle to the walls — makes rooms appear larger and adds a dynamic, unexpected element.
Sanding, Finishing, and Sealing Your Pallet Floor
Once all the boards are installed, the transformation from rough workshop project to polished living space begins with sanding. This is one of the most satisfying stages of the entire process, revealing the true character of the wood beneath its weathered surface. Begin with a coarse-grit sandpaper (36 or 40 grit) on a drum or belt sander to remove significant surface irregularities, old finishes, and height differences between adjacent boards. Work methodically across the entire floor, moving in the direction of the grain. Follow with medium grit (60 to 80 grit) to remove the scratches left by the coarse pass, then finish with fine grit (100 to 120 grit) for a smooth, even surface that will accept stain and finish beautifully.
Edge sanding is an often-overlooked but critical step that brings the entire floor together. Drum and belt sanders cannot reach into corners or along baseboards, so a dedicated edge sander is needed for these areas. Take your time along the perimeter, blending the edge-sanded areas into the field-sanded sections so that no lines of demarcation are visible in the finished floor. A hand scraper or detail sander can be useful for working into particularly tight corners. Once all sanding is complete, vacuum the floor thoroughly and wipe it down with a slightly damp cloth or tack cloth to remove every trace of dust before applying any finish.
The choice of finish has a significant impact on both the appearance and durability of your pallet floor. Oil-based polyurethane provides outstanding hardness and a warm, slightly amber tone that complements the natural colors of reclaimed wood. Water-based polyurethane dries faster, produces less odor, and imparts a cleaner, more neutral tone that keeps the wood looking natural. Hard wax oils, such as those made by Rubio Monocoat or Osmo, penetrate into the wood rather than forming a surface film, offering a matte, natural appearance that is easier to spot-repair over time. For a deliberately rustic aesthetic, some installers choose to leave the floor unsealed or apply only a light coat of tung oil, embracing the organic patina that develops with use.
Design Inspirations and Creative Possibilities
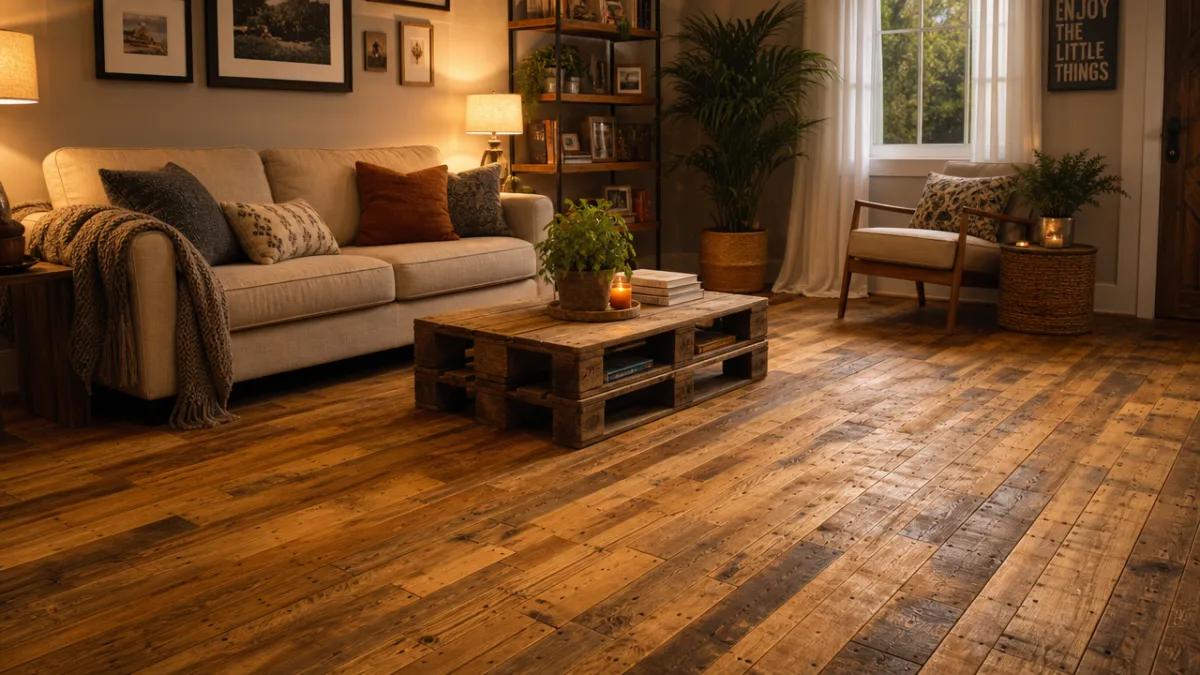
One of the greatest pleasures of working with pallet wood flooring is the sheer breadth of aesthetic directions it can support. In industrial-style lofts and urban apartments, raw pallet wood laid in a straight or staggered pattern and finished with a matte sealer creates an authentically gritty, textural floor that anchors exposed brick walls and metal fixtures with effortless confidence. The imperfections — the nail holes, the saw marks, the variations in plank width — are not flaws to be hidden but design features to be celebrated, each one adding to the sense of genuine material history that polished commercial flooring can never replicate.
For those pursuing a warmer, farmhouse-inspired aesthetic, pallet wood flooring treated with a whitewash or light gray stain creates a beautiful, airy atmosphere that pairs perfectly with shiplap walls, linen textiles, and vintage-inspired fixtures. Whitewashing is achieved by diluting white paint with water and brushing it across the sanded wood surface, then wiping away the excess to allow the grain to show through. The result is a pale, almost driftwood-like appearance that floods rooms with light and creates an immediate sense of relaxed, coastal warmth. This approach works particularly well in bedrooms, sunrooms, and any space where a soft, tranquil atmosphere is desired.
Pallet flooring is not limited to full-room installations. Some of the most striking applications involve using reclaimed pallet wood as an accent floor in a single area — a kitchen island surround, a bathroom feature floor, a study or home office, or even a bold area rug effect created by inlaying a differently patterned section within a larger expanse of contrasting flooring. Creative mixed-material installations, where pallet wood alternates with concrete tiles, painted sections, or metal inlays, push the medium into genuinely contemporary artistic territory. The low cost of the raw material means that experimentation carries relatively low financial risk, encouraging a spirit of creative adventure that expensive materials rarely permit.
Maintenance, Longevity, and Sustainability Considerations
A well-installed and properly sealed pallet wood floor can last for decades with the right care, and in many respects the maintenance requirements are no more demanding than those of conventional hardwood flooring. Regular sweeping or vacuuming to remove grit and debris is the single most important daily habit, as abrasive particles tracked in on shoes cause the majority of surface scratching over time. Use a soft-bristle attachment rather than a beater bar when vacuuming, and place felt pads under all furniture legs to prevent scratching when pieces are moved. Entry mats at doorways and area rugs in high-traffic zones significantly extend the life of the finish.
For routine cleaning, a slightly damp mop with a pH-neutral wood floor cleaner is all that is needed. Avoid saturating the floor with water, as prolonged moisture exposure can cause swelling, staining, and eventual structural damage regardless of the finish applied. Spills should be wiped up immediately rather than left to pool. For floors finished with hard wax oil, periodic reapplication of the oil — typically every one to three years depending on traffic — refreshes the surface and deepens the natural beauty of the wood. Polyurethane-finished floors may need a full recoat after five to ten years, but a light scuff-sand and recoat can restore their appearance without the need for complete resanding.
The sustainability credentials of pallet wood flooring are among its most compelling attributes, and they extend well beyond the simple act of diverting material from landfill. Consider the embodied energy calculation: a pallet board that has already been harvested, milled, dried, and transported requires none of those energy-intensive processes to be repeated. Its carbon has already been sequestered, and by extending its useful life as flooring, that carbon remains locked in solid form for additional decades. Furthermore, at the end of the floor’s life, pallet wood can be repurposed again — as garden furniture, wall cladding, or fuel — completing a truly circular material lifecycle that stands in sharp contrast to the vinyl, laminate, and composite flooring products that ultimately end up as non-recyclable waste.

Cost Analysis and Project Planning
One of the most frequently cited advantages of pallet wood flooring is its remarkably low material cost, though a realistic budget must account for more than just the price of the pallets themselves. The pallets, as discussed earlier, can often be obtained for free or at minimal cost. However, the tools and consumables required — sandpaper in multiple grits, drum sander rental, finish coats, adhesive or nails, moisture barrier, and various hand tools — add up, and these costs should be calculated carefully before beginning. A rough rule of thumb for a moderately skilled DIYer is to budget approximately one to three dollars per square foot for materials excluding the pallets themselves, compared to ten to twenty dollars per square foot or more for comparable commercial hardwood flooring installed professionally.
Time investment is the other major factor in the overall cost calculation. Disassembling, cleaning, drying, planing, and sorting pallet boards is labor-intensive work that can easily amount to twenty to thirty hours for a medium-sized room before a single plank is laid. The installation itself, followed by sanding and finishing, adds further significant time. Those with limited time but a desire for the aesthetic might consider purchasing pre-processed pallet wood boards from specialty reclaimed wood suppliers, which eliminates the preparation work at the cost of a higher material price. This hybrid approach — buying processed reclaimed wood rather than starting from raw pallets — still delivers most of the environmental and aesthetic benefits while fitting more realistically into a busy schedule.
Project planning should also account for the learning curve inherent in any first-time installation. Reading and watching instructional resources is valuable, but nothing substitutes for hands-on practice. Before beginning on your primary floor, consider practicing your disassembly, planing, and installation techniques in a low-stakes area such as a garage, basement, or outbuilding. This allows you to encounter and resolve common problems — boards that split during removal, inconsistent planer settings, gaps caused by poor acclimation — in a context where the consequences are minimal. Document your process with photographs, note what works and what does not, and approach the main installation with the confidence that comes from genuine experience rather than theory alone.
- Planning and sourcing (Weeks 1–2): Calculate square footage, source and inspect pallets, gather tools and materials, prepare the subfloor.
- Preparation phase (Weeks 2–4): Disassemble pallets, clean and dry boards, plane to consistent thickness, sort and grade by quality.
- Acclimation (1 week minimum): Store prepared boards inside the installation room to allow moisture equilibration before laying begins.
- Installation (Weekend 1–2): Lay boards according to chosen pattern, cut borders and transitions, fasten using preferred method.
- Sanding and finishing (Weekend 3): Sand in progressive grits, edge-sand perimeter, apply chosen finish in multiple coats with drying time between each.
- Curing and final touches (1–2 weeks): Allow finish to cure fully before replacing furniture, install baseboards and transition strips.
Pallet wood flooring represents a remarkable convergence of environmental responsibility, creative expression, and practical craftsmanship. It asks more of its maker than a trip to a flooring showroom, but what it gives in return — a floor that is genuinely unique, personally meaningful, and aligned with a more thoughtful relationship with materials and resources — is something that no commercial product can replicate. Whether you are a seasoned woodworker or a motivated first-time DIYer, the process of transforming discarded pallets into a beautiful, lasting floor is one of the most rewarding home improvement projects you can undertake. The effort is real, the learning curve is genuine, and the result is extraordinary.








What do you think?
It is nice to know your opinion. Leave a comment.