










Chair Seat Reupholstery: A Complete Guide to Transforming Your Furniture
Understanding the Art of Reupholstery
If you’ve ever looked at a worn-out dining chair and thought “I wish I could just fix that,” reupholstery might be exactly the skill you’ve been missing. At its heart, it’s a pretty straightforward process — you strip off the old fabric and padding, take stock of what’s underneath, and replace everything with fresh materials. The result is a chair that looks and feels brand new, without the cost of actually buying one. It takes some patience and a willingness to learn as you go, but the transformation you end up with makes it more than worth it.
Upholstery itself has been around for centuries — craftspeople have been figuring out better ways to pad and cover furniture frames for a very long time. What used to be a purely professional trade has become genuinely accessible to home DIYers, mostly thanks to good online tutorials, affordable tools, and a much wider selection of materials available at fabric stores and online. Knowing that you’re tapping into a real craft tradition actually makes the whole thing feel a little more meaningful when you pick up that staple gun for the first time.
Chair seats are hands-down the best place to start if you’re new to this. Compared to reupholstering a full armchair or sofa, a simple drop-in seat pad or dining chair cushion is manageable — the surface area is small, the structure is simple, and there’s a lot of room to course-correct before anything is permanently set. The materials don’t cost much either, so if you make a mistake, it’s not the end of the world. One successful chair seat gives you the confidence and the core skills to take on bigger things down the road.
Gathering Your Tools and Materials
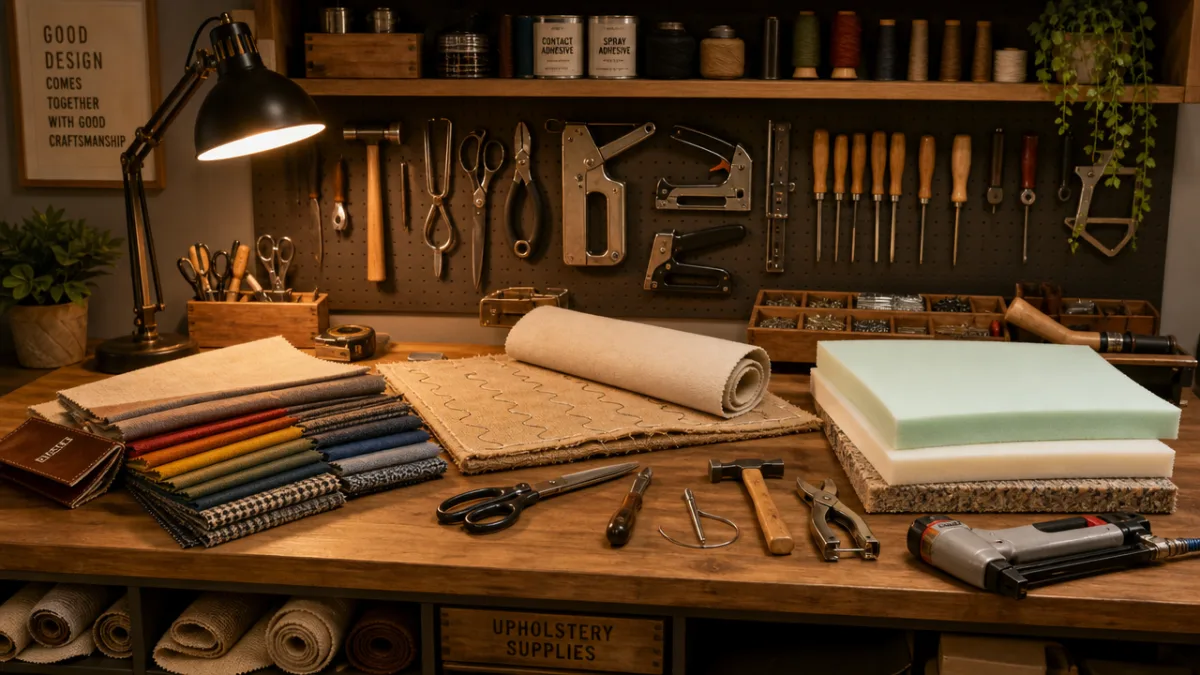
Getting your tools together before you start makes a real difference. The most important one is a heavy-duty staple gun — either electric or pneumatic — that can actually drive staples firmly into a wooden frame. A regular office stapler won’t cut it; you need something with real holding power. You’ll also want a staple remover or a flathead screwdriver for taking out the old fasteners, a good pair of fabric scissors or shears, a measuring tape, and a rubber mallet for tapping any staples flush when needed.
A few extra items will make your life noticeably easier. Upholstery needles and heavy-duty thread come in handy if you need to make any hand-sewing adjustments. Chalk or a fabric marker is great for tracing your cutting lines. Dacron batting — that fluffy polyester wrap — goes over the foam and gives your finished seat a softer, more rounded look. A hot glue gun is surprisingly useful for keeping corners and trim in place. Lay everything out before you begin so you’re not scrambling for supplies mid-project and losing your momentum.
Fabric choice is worth thinking carefully about, because it determines how the seat looks and how long it actually holds up. Upholstery-grade fabrics are woven tighter and treated to handle the wear and friction of daily use much better than regular curtain fabric or craft cloth. If these are dining chairs, a performance fabric with stain resistance is a smart move — especially if kids or pets are in the picture. Foam density matters just as much: look for foam rated at 1.8 pounds per cubic foot or higher, because cheaper foam compresses and breaks down much faster. Spending a little more on good materials upfront means you won’t be redoing this project again in a year.
- Heavy-duty staple gun (electric or pneumatic, with 3/8-inch or 1/2-inch staples)
- Staple remover or flathead screwdriver
- Sharp fabric scissors or upholstery shears
- Measuring tape and fabric marker or tailor’s chalk
- High-density upholstery foam (cut to size)
- Dacron batting or polyester fiberfill wrap
- Upholstery-grade fabric (with at least 3 inches of overhang on all sides)
- Hot glue gun and glue sticks
- Rubber mallet
Stripping the Old Upholstery
The first thing you’ll actually do is pull off the old fabric and padding, and this part is more useful than people expect. As you work through it, pay attention to how the original upholstery was put together — how the fabric was attached, how the corners were handled, how the tension was distributed across the seat. You’re essentially getting a free tutorial from whoever did it before, and you’ll pick up on both what worked and what you’d want to do differently.
Use a flathead screwdriver or a dedicated staple remover to pry up each staple one at a time, working steadily around the perimeter. Don’t try to yank the fabric off before all the fasteners are out — that’s a good way to splinter or gouge the wooden frame, and any damage there will make it harder to get a smooth, taut result later. Take your time and try to keep the old fabric in one piece. It makes a surprisingly handy pattern when you’re cutting your new material.
Once the fabric is off, take a close look at the foam underneath. Old foam tends to crumble, compress in weird spots, or develop odors — and honestly, replacing it is almost always the right call rather than trying to salvage it. While you’re at it, look over the wooden seat frame for any cracks, loose joints, or structural issues. If anything looks shaky, now is exactly the right time to fix it with wood glue, clamps, or a reinforcing bracket. Trying to reupholster over a frame that’s already failing just means you’ll be doing this whole thing over again sooner than you’d like.
Cutting and Preparing New Foam and Fabric
With the old stuff off and the frame in good shape, you’re ready to cut and prep your new materials. Start with the foam: flip the seat frame face-down onto the foam sheet, trace around it with a marker, then cut along that line using an electric carving knife, a serrated bread knife, or proper foam cutters. Any of those will give you a much cleaner edge than regular scissors. For a slightly domed, professional-looking profile, cut the foam just a hair larger than the traced outline — it’ll compress slightly when the fabric pulls tight, and the result looks really polished.
A light coat of spray adhesive on the top of the seat frame before you press the foam down will keep everything from shifting while you work. Once the foam is in place, wrap it in dacron batting. This stuff does a few things: it softens the edges of the foam, adds a nice tactile layer, and gives you that full, rounded look you see on quality upholstery. Staple the batting loosely to the underside of the seat — just enough to hold it in place without compressing it unevenly, which would create lumps you’d see through the fabric.
Cutting the fabric is where you want to slow down and be precise. Lay it face-down on a clean flat surface, then set the padded seat on top of it, also face-down. Measure out three to four inches of overhang beyond the seat frame on every side — that’s what you’ll be pulling and stapling underneath, so you need enough to get a good grip and real tension. Cut your lines cleanly, and if your fabric has a pattern or a directional design, double-check that it’s centered and running the right way before you make any cuts. It’s a quick thing to verify and saves a lot of frustration later.
- Place the seat frame face-down on the foam and trace the outline with a marker.
- Cut the foam slightly larger than the traced outline for a gently domed profile.
- Adhere the foam to the frame using upholstery spray adhesive.
- Wrap the foam in dacron batting, smoothing it over the edges and stapling loosely underneath.
- Center the padded seat face-down on the wrong side of your chosen fabric.
- Mark and cut the fabric, leaving a 3–4 inch overhang on all sides.
- Check that any pattern or grain is centered and aligned before cutting.
Stapling, Tensioning, and Finishing the Seat
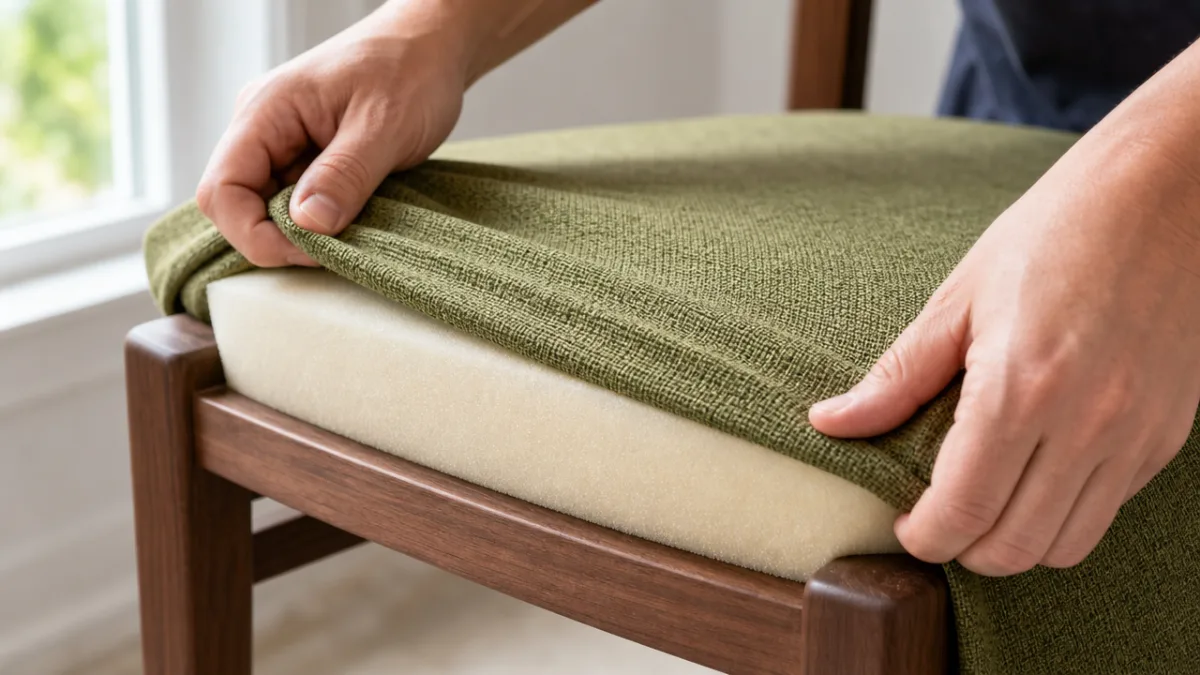
This is the step where you actually upholster the seat — pulling the fabric over the padding and stapling it to the underside — and it’s also where the difference between a clean result and a messy one really shows up. The trick is working in an opposing sequence rather than going straight around the perimeter. Start with one staple at the center of one side, then go to the exact center of the opposite side and pull the fabric snug before stapling. Then do the same for the other two sides. From there, work outward from each center point toward the corners in small increments.
This cross-tensioning approach keeps the fabric centered and smooth across the top, which is what everyone actually sees. As you get closer to the corners, you’ll probably notice small puckers or pleats starting to form along the edges — that’s completely normal and nothing to panic about at this stage. The important thing is not to over-staple one section before the others are tensioned. Keep rotating around all four sides, adjusting as you go, and flip the seat over regularly to check the top surface. Smooth out any wrinkles by hand before they get locked in by more staples.
Corners are where most beginners have to slow down and think, and that’s fine — they take a bit of practice to get right. For square or rectangular seats, a clean hospital-style fold where the fabric is folded flat to one side and then wrapped neatly tends to work really well. For curved or rounded corners, small evenly-spaced pleats are usually the better approach. Either way, the goal is the same: the top of the seat should look smooth and tight, with no visible bulk when you look at it from the front or side. Once all your staples are set, trim any extra fabric from the underside and you’re done with the hardest part.
Reinstalling the Seat and Caring for Your Work
With the fabric stapled, trimmed, and looking good, it’s time to put the seat back in the chair. On most dining chairs, the seat attaches from underneath with screws that run through the frame rails and into the seat board — so reinstallation is pretty quick. Use the original screws if they’re still in decent shape, or swap them out for new ones of the same size if any look rusty or stripped. Tighten them down firmly, but don’t go overboard — too much force can crack the seat board or strip the threads.
Once it’s back in place, step back and look at it from a few different angles. Is the fabric pattern visually centered? Are there any pulls or wrinkles on the top? Do the corners look consistent on all four sides? Small imperfections are completely normal, especially on a first attempt, and they’re worth noting as things to refine next time rather than beating yourself up over. The improvement from chair to chair is real, and you’ll see it.
Taking care of the finished seat will go a long way toward making your work last. A fabric protector spray is a great first step, especially for dining chairs that are going to see spills. Vacuuming regularly with a soft brush attachment keeps dust and debris from grinding into the fibers over time. When something does spill, blot it immediately with a clean dry cloth — rubbing just spreads the stain and can damage the weave. Treat it well and a solid reupholstery job can easily last ten years or more before it needs attention again.
Scaling Up: From One Chair to a Full Set
Finishing that first chair seat almost always makes you want to do the rest of them — and that’s exactly how it should go. By the time you’ve worked through the first one, the process starts to feel familiar. The tensioning sequence, the corner folds, the stapling rhythm — your hands start to remember it, and each subsequent seat gets faster and more satisfying. A lot of people find they can get through a set of four to six dining chairs in a single weekend once they’ve got their confidence up.
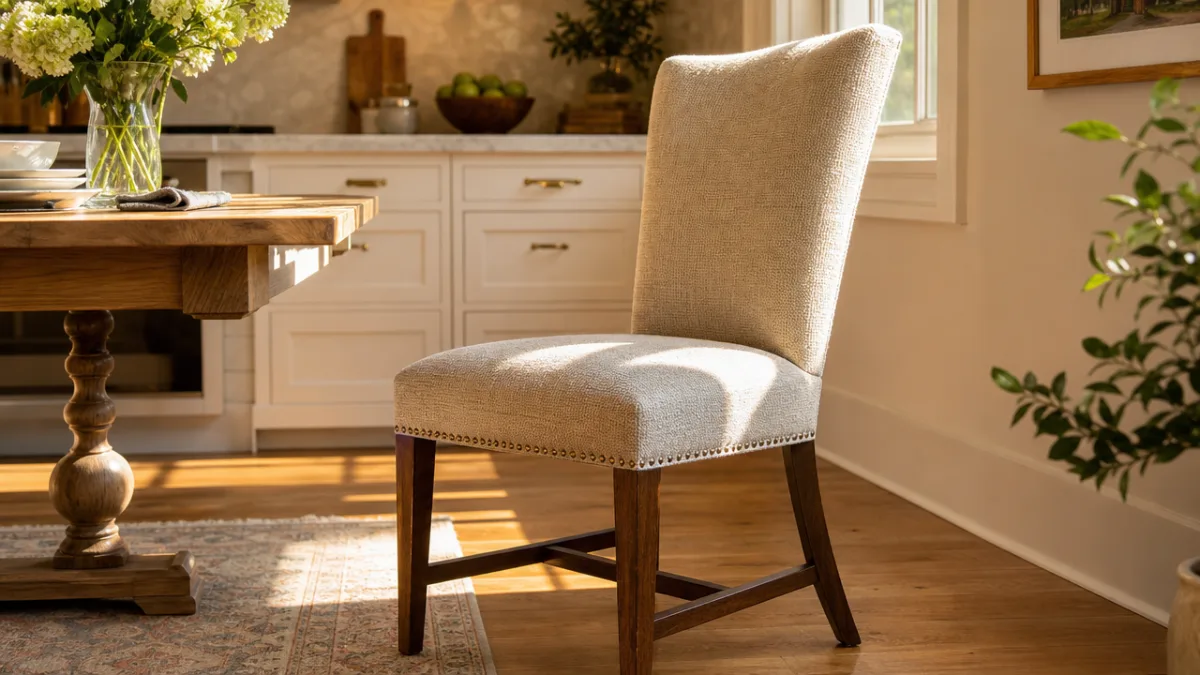
When you’re working through a set, consistency is the thing to focus on. Cut all your foam pieces at the same time from the same sheet so the thickness is uniform across every chair. Do the same with the fabric — cutting all your pieces from the same length ensures the color and pattern match up. If your fabric has a repeating motif, take the time to center it identically on each seat. When all the chairs are grouped around the table, that visual consistency is what makes the whole thing look intentional and professionally done rather than thrown together.
And once you’ve done a set of dining chairs, you’ll find the same core skills translate to a lot of other projects — upholstered headboards, window seat cushions, footstools, bench pads, the cushioned backs of certain chair styles. Each one brings its own little challenges, but the fundamentals stay the same: prep the surface, choose good materials, and apply even tension to the fabric. Reupholstery is one of those skills that genuinely compounds over time. Every project teaches you something the last one didn’t, and before long you’re looking at furniture differently — seeing potential instead of wear.
- Cut all foam and fabric pieces simultaneously when working on a matching set to ensure consistency.
- Center repeating patterns identically on each seat for a cohesive, professional appearance.
- Apply fabric protector spray to all finished seats before returning them to use.
- Keep leftover fabric from your project for future repairs or touch-ups.
- Document your process with photos to refine your technique and guide future projects.








What do you think?
It is nice to know your opinion. Leave a comment.