










28 DIY Coffee Table Makeover Ideas You Can Do This Weekend
Why Your Coffee Table Deserves a Fresh Start
The coffee table is often the unsung hero of the living room. It holds your morning cup, your remote controls, your favorite books, and occasionally your feet after a long day. Despite being one of the most used pieces of furniture in the home, it rarely gets the attention it deserves. A worn, scratched, or simply outdated coffee table can drag down the entire aesthetic of a room, even when everything else looks polished and intentional. The good news is that a makeover does not require a trip to a furniture store or a large budget.
DIY coffee table makeovers have surged in popularity in recent years, and for good reason. With a free weekend, some basic supplies, and a little creative ambition, you can completely transform a piece that once felt like an eyesore into something you are genuinely proud to show off. Whether your table is a thrift store find, a hand-me-down from a family member, or simply a piece that has seen better days, the bones are often still good enough to work with. In most cases, the structure is the most expensive part, and the surface is entirely changeable.
This guide draws inspiration from dozens of creative DIY projects shared by makers and home decorators, bringing together twenty-eight distinct ideas organized into approachable categories. From painting and staining to tiling and upholstering, there is something here for every skill level and design style. You do not need to be a professional carpenter or an experienced crafter. You just need the willingness to try, a little patience, and the vision to see what a piece could become rather than what it currently is.
Paint and Finish Transformations
Chalk Paint for a Vintage Look
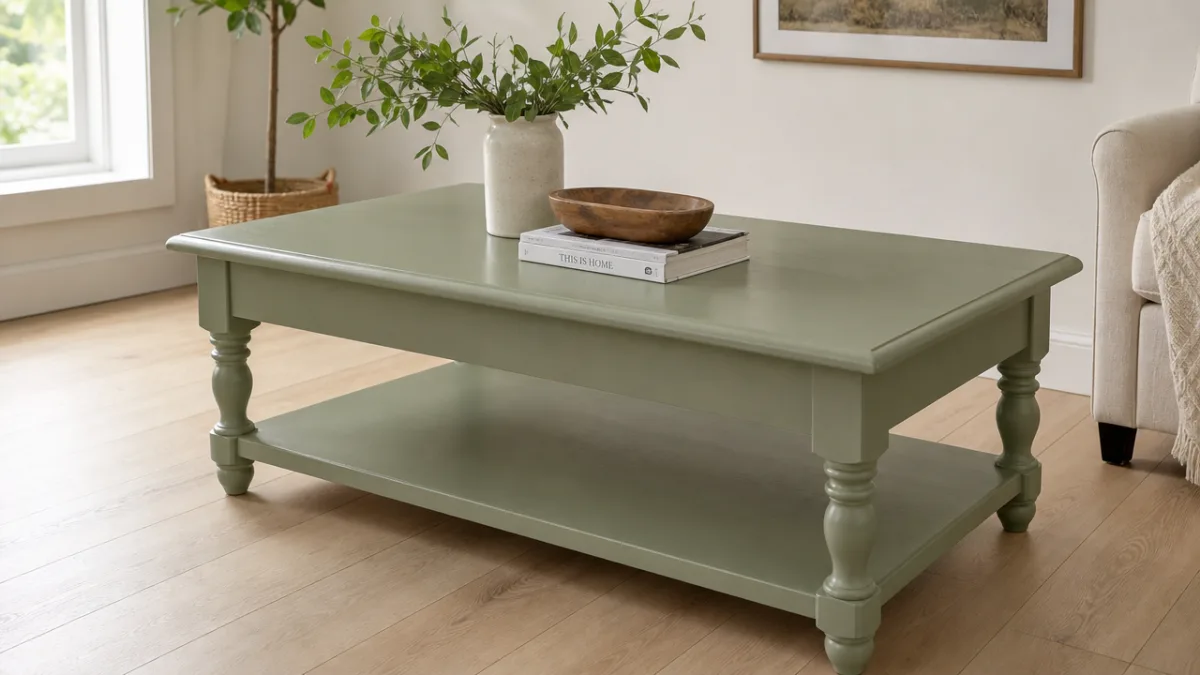
Chalk paint remains one of the most beginner-friendly options for transforming wood furniture, and coffee tables are ideal candidates. Unlike traditional paint, chalk paint adheres to most surfaces with minimal prep work, meaning you can often skip sanding and priming entirely. The matte, velvety finish it produces gives furniture a soft, aged quality that works beautifully in farmhouse, cottage, and eclectic interiors. A single quart is typically enough to cover a standard coffee table with two coats, and the drying time between coats is surprisingly fast, often under an hour.
To complete the vintage look, many DIYers distress the edges of the table after the paint dries using fine-grit sandpaper. This technique reveals the wood or original paint color beneath and gives the piece an authentically worn character that looks intentional rather than accidental. Finishing with a coat of clear wax or a water-based topcoat protects the surface and adds a subtle sheen. Popular chalk paint colors for coffee tables include creamy whites, dusty sage greens, soft navies, and warm charcoals, all of which can anchor a living room with quiet confidence.
Bold Colors and Two-Tone Techniques
If the understated vintage look is not your style, consider going bold with a rich, saturated color. Deep emerald, burnt terracotta, inky black, and dusty rose are all trending in interior design and translate beautifully to furniture. A coffee table painted in a statement color can serve as the focal point of a living room, especially if the rest of the decor is relatively neutral. The key is choosing a quality furniture paint with good coverage so that the color reads as intentional and confident rather than patchy or thin.
Two-tone coffee table makeovers are another popular approach, where the top surface is painted one color and the legs or base are painted a complementary or contrasting shade. For example, a white tabletop with matte black legs creates a sleek, modern look, while a wood-stained top with painted white legs feels fresh and Scandinavian. This technique works especially well on tables with interesting structural details, as the contrasting paint draws attention to the shape of the piece itself. Tape off the sections cleanly before painting for sharp, professional-looking lines.
Staining and Wood Grain Enhancement
Stripping Old Finish and Restaining
Sometimes a coffee table does not need a dramatic transformation — it just needs to be brought back to its natural best. If your table is solid wood or has a thick veneer, stripping away the old finish and restaining it can reveal a genuinely beautiful surface underneath. The process involves applying a chemical stripper or using a heat gun to remove the existing varnish, followed by sanding the surface smooth, working through progressively finer grits until the wood feels silky and uniform. This part of the project takes patience, but the results are worth every careful pass of the sandpaper.
Once the surface is bare and smooth, you can choose a stain that enhances the natural grain of the wood. Light honey stains brighten a room and give a Californian or mid-century modern feel, while deep espresso and walnut tones feel luxurious and dramatic. For a trendy, organic look, whitewash stains diluted with water allow the grain to show through a soft, bleached finish that pairs perfectly with linen, rattan, and other natural textures. Always seal the final stain with a durable polyurethane or oil-based topcoat to protect it from daily wear.
Cerusing and Liming Techniques
Cerusing, also known as liming, is a wood finishing technique that creates a striking, silvery-white effect by pushing a white paste or wax into the open grain of the wood. It works best on open-grained woods like oak, ash, and elm, where the grain channels are deep enough to hold the paste. The result is a two-toned effect where the natural wood color contrasts against white-filled grain lines, creating incredible visual texture and depth. It looks expensive and artisan, but the supplies are widely available and the technique is accessible to beginners with a little guidance.
To achieve the effect, the wood is first brushed or wire-brushed along the grain to open it up, then a liming wax or white paste is applied and worked into the surface. After a brief drying period, the excess is wiped away with a cloth, leaving white only in the recessed grain lines. The piece is then sealed with a clear wax or lacquer. This technique pairs beautifully with modern, coastal, and Nordic-inspired interiors, and it can be applied over a light stain base to add even more complexity to the finished surface.
Surface Detail and Decoupage Ideas
Decoupage with Maps, Fabric, and Wallpaper
Decoupage is one of the most versatile and forgiving DIY techniques available, and it opens up an enormous range of creative possibilities for coffee table surfaces. The basic method involves gluing paper or fabric to a surface using a decoupage medium like Mod Podge, then sealing the top with several additional coats to create a smooth, unified finish. The real creative freedom lies in what you choose to apply. Vintage maps, botanical prints, sheet music, foreign-language newspapers, and decorative wallpaper scraps are all popular choices that add personality and storytelling to a table.
For a cohesive look, many makers arrange their chosen papers to cover the entire tabletop seamlessly, overlapping pieces slightly so the edges blend together. Others prefer a more collage-like approach, leaving visible gaps between pieces or layering different materials for a textured, eclectic result. Once sealed with enough coats of Mod Podge or a water-based varnish, the surface becomes surprisingly durable and wipeable. This technique works beautifully for updating a plain, inexpensive IKEA table or for giving a vintage thrift store find a completely new identity without obscuring its original structure.
Stenciling and Geometric Patterns
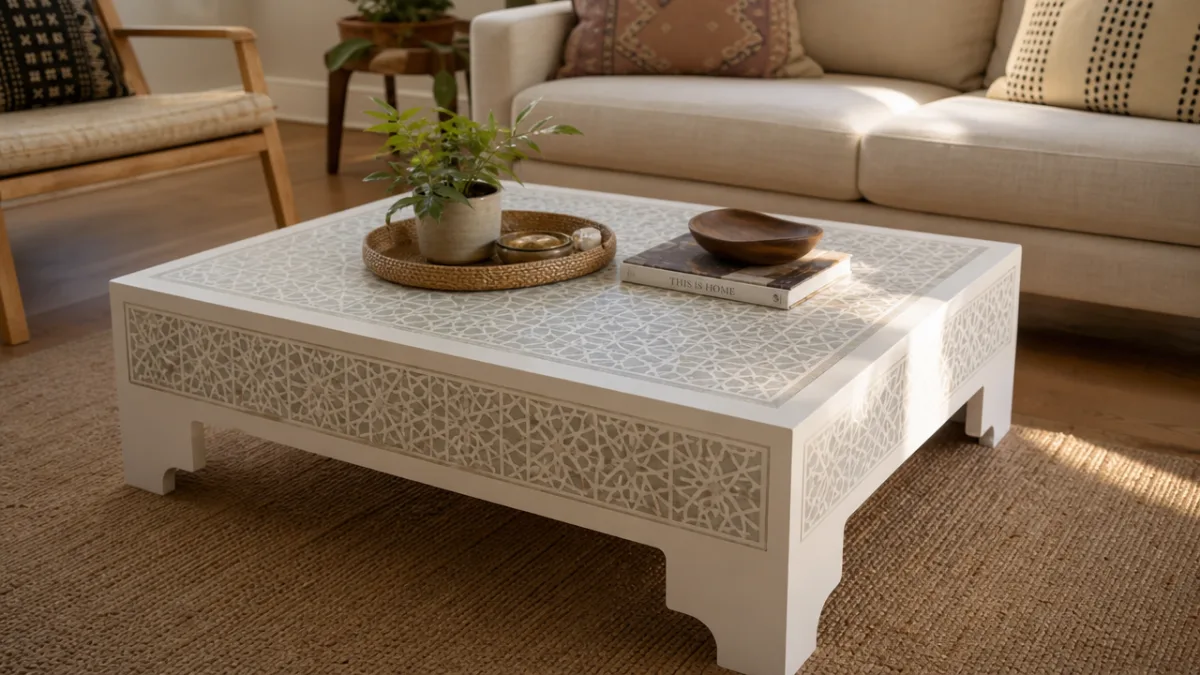
Stenciling offers a way to add intricate pattern and visual interest to a painted coffee table surface without requiring freehand artistic skill. Pre-cut stencils in Moroccan, geometric, botanical, and mandala patterns are widely available at craft stores and online, and they can be combined with any paint color to create a custom look. The process is straightforward: tape the stencil down firmly, apply paint using a dense foam roller or a stencil brush with a stippling motion, then lift the stencil carefully to reveal the pattern. Repeating the process across the tabletop creates a seamless, tile-like design.
Two-color stenciling, where a background color and a contrasting stencil color are used together, produces results that look almost like professional tilework. Navy on white creates a classic Delft pottery effect, while gold on black feels glamorous and luxurious. Stenciling can also be applied to table legs and aprons for a fully decorated, artisan-inspired piece. Sealing the finished surface with a hard-wearing topcoat is essential for longevity, especially if the table gets heavy daily use. The investment in a quality sealant is what separates a temporary craft project from a lasting piece of furniture you will keep for years.
Tiling, Mosaic, and Inlay Projects
Tile Top Coffee Tables
Few DIY upgrades are as striking or as durable as tiling the top of a coffee table. Whether you use traditional ceramic tiles, encaustic cement tiles, handmade Talavera tiles, or sleek marble-look porcelain, the effect is immediately transformative. Tiled surfaces are water-resistant, heatproof to a reasonable degree, and easy to clean, making them a highly practical choice for a piece of furniture that sees so much daily activity. The process involves preparing the tabletop surface, applying tile adhesive, setting the tiles with even spacing, and grouting the gaps once the adhesive has fully cured.
The design possibilities with tile are virtually endless. You can use a single large-format tile to create a seamless, stone-like surface, or combine smaller tiles in a pattern, such as a herringbone, basket weave, or chevron arrangement. Mix-and-match patterns using contrasting tiles create a playful, handcrafted look, while a consistent pattern of identical tiles reads as crisp and architectural. Grout color plays a significant role in the final aesthetic: white grout keeps things clean and bright, while dark grout emphasizes the individual tiles and adds drama. Frame the finished tile surface with wooden or metal edging strips for a polished, professional finish.
Penny and Mosaic Inlay Techniques
For those who want a truly one-of-a-kind coffee table, a penny top or mosaic inlay project is a remarkable undertaking that results in a piece unlike anything available in stores. Penny tops involve gluing hundreds of coins in a tight arrangement across the tabletop surface, then pouring a clear epoxy resin over them to create a smooth, glassy finish that permanently encases the coins. The metallic shimmer of copper pennies beneath a thick, crystal-clear epoxy layer is genuinely stunning and catches light beautifully from every angle. The process requires patience and careful preparation of the surface, but the result is a true conversation piece.
Mosaic inlay works similarly but uses broken ceramic, glass tiles, mirror fragments, or even pebbles and shells as the decorative material. Creating a mosaic design requires a bit more artistic planning, as the pieces are arranged to form a pattern or image before being grouted and sealed. A simple geometric arrangement of mirror tiles creates a glamorous, eclectic effect, while a nature-inspired mosaic using blue and green glass pieces can evoke the feeling of water or sky. Both penny and mosaic techniques work best on tables with a solid, flush-edged top that creates a natural border for the materials.
Upholstery, Fabric, and Soft Surface Upgrades
Upholstered Ottoman Coffee Tables
One of the most elegant and functional coffee table makeover ideas is transforming a solid wood piece into an upholstered ottoman-style table. This involves padding the top surface with high-density foam, wrapping it in a layer of batting for softness, and then covering the whole assembly with an upholstery fabric of your choice. The result serves all the functions of a traditional coffee table while also providing a soft, comfortable surface that can be used as additional seating, a footrest, or even a play surface for children. It completely changes the feel of a living room, softening the space and adding texture and warmth.
Fabric choice is where this project gets really exciting. Velvet in jewel tones like sapphire, emerald, or plum adds instant luxury. A neutral linen or ticking stripe keeps the look classic and versatile. A bold geometric or floral pattern in an indoor-outdoor fabric is both durable and stylish. Adding a tufted detail — where buttons are pulled through the foam at regular intervals to create dimples in the fabric — elevates the project considerably and creates that tailored, designer look. The base and legs of the table can be painted or stained to complement the fabric for a fully coordinated result.
Rope Wrapping and Woven Accents
Natural fiber wrapping is a beautiful and tactile way to update a coffee table, particularly one with turned or cylindrical legs. Wrapping legs tightly in jute, sisal, manila rope, or even macrame cord transforms plain furniture legs into something that looks organic, handcrafted, and coastal. The technique is straightforward: secure the rope at the top of the leg with a strong adhesive, then wrap it tightly downward, keeping each row snug against the last, and secure the end at the bottom. Different rope gauges and textures produce different effects, from chunky and rustic to fine and refined.
Beyond the legs, rope can also be used to create a woven shelf underneath a coffee table, replacing a solid lower shelf with an open, hammock-like surface made from twisted or braided cord. This is particularly appealing in coastal and boho-inspired interiors where natural textures are layered freely. A table that combines painted wood, natural rope-wrapped legs, and a woven lower shelf becomes a genuinely original piece that reflects a specific aesthetic vision. These techniques require no specialized tools, only rope, glue, and time, making them some of the most accessible projects in this entire collection.

Functional Upgrades and Creative Repurposing
Adding Storage and Hidden Compartments
A coffee table makeover does not have to be purely cosmetic. Adding functional features like additional storage, lift-top mechanisms, or hidden compartments can make a simple piece dramatically more useful without requiring advanced carpentry skills. Lift-top hardware kits are available from hardware stores and online retailers and can be fitted to most flat-top coffee tables, allowing the top surface to pivot upward and forward to create a convenient workspace or reveal a deep storage cavity underneath. This upgrade is particularly popular in small living spaces where multifunctionality is essential.
Open storage can also be added to a coffee table by attaching a lower shelf, installing side baskets, or adding caster wheels so that the table rolls aside easily. Painting the interior of a lower shelf in a contrasting color draws the eye downward and makes the storage feel intentional and designed. Adding small hooks to the underside of the tabletop allows remotes, headphones, or charging cables to hang neatly out of sight. These kinds of practical upgrades transform a simple weekend paint project into a real investment in how a living room functions day to day.
Repurposing Unexpected Objects as Coffee Tables
Some of the most creative coffee table makeovers do not start with a table at all. Old wooden crates stacked and secured together, vintage suitcases on hairpin legs, reclaimed door panels on decorative bases, industrial cable spools sanded and sealed, wine barrels cut in half — these are all objects that have been successfully repurposed as coffee tables with beautiful results. The appeal of this approach is that the piece itself tells a story. A coffee table made from an old crate carries history and texture that no new piece of furniture can replicate.
When repurposing an object, the key considerations are height, stability, and surface suitability. The finished piece should sit at a comfortable height relative to the sofa, typically between sixteen and eighteen inches for a standard-height couch. The base must be stable enough to hold weight without wobbling, which may require adding rubber feet, cross-bracing, or a weighted base. The surface should be smooth enough to hold a cup without tipping, or a tray can be placed on top to create a flat, functional surface area. With these basics covered, almost any interesting object can become the most talked-about piece in the room.
Hairpin Legs and Base Replacement
Swapping out the legs of an existing coffee table is one of the most impactful changes you can make with minimal effort. Hairpin legs, which are slender metal legs with a characteristic double-rod design, have become synonymous with mid-century modern style and remain enduringly popular. They are available in a range of heights and finishes including raw steel, matte black, brass, copper, and white powder coat. Attaching them to an existing tabletop typically requires only a screwdriver and takes under an hour. The transformation from heavy, traditional legs to sleek hairpin supports is often startling in its effectiveness.
Beyond hairpin legs, tapered wooden legs in natural or painted finishes can give a table a Scandinavian feel, while chunky square legs in a contrasting color add a bold, graphic quality. Pipe fittings from the hardware store can be assembled into industrial-style bases that are rugged and visually distinctive. Before purchasing replacement legs, measure your existing tabletop carefully to ensure the new leg placement will be balanced and stable. If the tabletop itself is in good condition, a simple leg swap may be all the makeover it truly needs to feel current, purposeful, and fresh in the room.








What do you think?
It is nice to know your opinion. Leave a comment.