










Get Creative With Wonderful DIY Bottle Lamps: Ideas and Projects
The Art of Transforming Bottles Into Beautiful Lamps
There is something deeply satisfying about taking an object destined for the recycling bin and turning it into a stunning piece of home décor that draws compliments from every visitor. DIY bottle lamps have become one of the most beloved upcycling trends in recent years, and for good reason. Whether you are working with a classic wine bottle, a vintage liquor bottle, a mason jar, or even a beautifully shaped olive oil vessel, the possibilities for creating warm, ambient lighting are virtually endless. The act of crafting your own lamp connects you to the material in a meaningful way, giving you a finished product with a story behind it.
What makes bottle lamp projects particularly appealing is their accessibility. You do not need to be an electrician or an experienced crafter to bring one of these projects to life. With a basic lamp kit — which typically includes a socket, a cord, and a switch — and a few simple tools, anyone can wire up a bottle and have it glowing within an afternoon. The creative decisions come not in the technical complexity but in the aesthetic choices: which bottle speaks to you, what shade or bulb will complement it, and how it will fit into the room where it will live. These are questions that make the process genuinely personal and rewarding.
Beyond the aesthetic and creative appeal, bottle lamps represent a meaningful commitment to sustainability. Glass bottles are one of the most reused and recycled materials on the planet, but upcycling takes that commitment one step further by giving an object a second life as functional art rather than simply melting it down. Every bottle lamp you create keeps one more piece of glass out of the waste stream and adds beauty and character to your living space in its place. In a world increasingly conscious of consumption and waste, this kind of thoughtful making feels especially relevant and worthwhile.
Choosing the Right Bottle for Your Lamp Project
The foundation of any great bottle lamp is, naturally, the bottle itself. Selecting the right vessel is the most important creative decision you will make in the entire project, as it determines the silhouette, the color of the light, the overall mood, and the story your lamp tells. Wine and spirits bottles are perennially popular choices because they tend to have elegant proportions, pleasing curves, and satisfying weight. A dark green Bordeaux bottle will cast a rich, jewel-toned glow, while a clear vodka bottle with a geometric shape will throw clean, bright light in all directions. Antique and vintage bottles found at flea markets or estate sales often have irregular shapes and beautiful patinas that make them especially compelling subjects.
Beyond the wine and spirits category, the world of potential bottle lamp vessels is remarkably wide. Large olive oil bottles with their elongated necks and warm amber glass make gorgeous table lamps. Soda bottles from decades past, especially those with embossed lettering or unusual colors, carry a nostalgic charm that suits certain interiors perfectly. Industrial glass bottles — the kind once used for chemicals or laboratory supplies — have a cool, minimalist aesthetic that pairs beautifully with modern and industrial-style spaces. Even oversized mason jars, which technically are not bottles in the traditional sense, work wonderfully as lamp bases, particularly when filled with decorative elements like fairy lights, stones, or dried botanicals.
When evaluating a bottle for use as a lamp, there are a few practical considerations to keep in mind alongside the aesthetic ones. The neck of the bottle needs to be wide enough to accommodate the lamp hardware, typically a threaded nipple or lamp pipe that runs through or sits atop the opening. The bottle should be clean, structurally sound, and free of chips or cracks that could weaken it over time. If you plan to drill into the side of the bottle for cord routing — which gives a cleaner finished look — you will want glass that is thick enough to drill without shattering. Bottles with flat bases will stand steadily on their own; those with curved bottoms may need to be set into a purpose-built base or cradle.

Essential Tools and Materials for DIY Bottle Lamps
Once you have chosen your bottle, assembling the right tools and materials will set you up for a smooth and successful build. The centerpiece of the electrical component is the lamp kit, which you can find at any hardware store or online. A standard lamp kit includes a threaded rod or nipple, a socket with a keyless or switched mechanism, a cord set with a plug, a strain relief fitting, and often a few decorative nuts and check rings. It is worth spending a little more on a quality kit, both for safety and for the finished appearance — cheap hardware has a way of looking cheap, and you want your handcrafted lamp to look polished from every angle.
If you want to route the cord through the bottle rather than up the outside, you will need to drill a hole in the glass. This requires a diamond-tipped drill bit designed specifically for glass and tile, a steady hand, and patience. The technique involves keeping the drill at a low speed, applying light pressure, and continuously cooling the drilling site with water to prevent the glass from cracking from heat buildup. Many crafters use a small dam made from plumber’s putty around the drill site to hold a pool of water. It sounds intimidating at first, but with a little practice it becomes quite straightforward, and the cleaner look of an internally routed cord is well worth the effort.
Beyond the drilling equipment and lamp hardware, you will want to gather a few additional supplies to complete your project beautifully. A selection of these items will serve you well across multiple lamp builds:
- Lamp shade and harp assembly in a size and style appropriate to your bottle’s proportions
- Decorative bulbs such as Edison-style filament bulbs, globe bulbs, or tinted options that complement the bottle color
- Decorative lamp cord in fabric-wrapped or colored styles, which can become a design feature in itself
- Adhesive felt or rubber feet for the base to protect furniture surfaces and prevent the lamp from sliding
- Wire stripper and needle-nose pliers for working with the electrical components safely
- Sandpaper or a glass file for smoothing any rough edges around a drilled hole
- Decorative filler materials such as sea glass, pebbles, wine corks, or sand if you want to add visual interest inside the bottle
Safety should always be the first priority when working with electrical components. If you have any doubt about your ability to wire the socket correctly, consult an electrician or follow video tutorials from reputable sources very carefully. Always make sure the lamp kit you purchase is rated for the wattage of the bulb you intend to use, and consider using LED bulbs, which run cooler and draw less power than incandescent alternatives. A handmade lamp that is both beautiful and safe is the only acceptable outcome of this kind of project, and taking the time to do the electrical work correctly is never optional.
Step-by-Step Guide to Building Your First Bottle Lamp
Building your first bottle lamp is a process that rewards patience and attention to detail, but it is genuinely achievable for anyone willing to follow the steps carefully. Begin by thoroughly cleaning your bottle inside and out, removing any labels using warm soapy water and a little cooking oil to dissolve stubborn adhesive residue. Allow the bottle to dry completely before proceeding, since any moisture inside the bottle can cause problems down the line. Once clean and dry, decide whether you want to route the cord through a hole drilled in the side near the base or simply run it up and over the neck — the former is more complex but produces a much cleaner result.
If drilling, mark your drill site about an inch above the base on the side of the bottle, ideally where the glass is flattest. Build your water dam, attach your diamond bit to your drill, and begin at a very low speed with minimal pressure, letting the bit do the work rather than forcing it. Once through, smooth the edges of the hole carefully and feed your lamp cord through it, then up through the bottle neck. If running the cord externally, simply begin by threading the cord through the cord grip or strain relief fitting at the base of the lamp rod. In both cases, the cord connects to the socket following the wiring diagram included with your lamp kit — typically, the neutral wire connects to the silver screw and the hot wire to the brass screw.
With the socket wired and assembled, thread the lamp rod through the bottle neck and secure it with the check ring and decorative nut, tightening just enough to hold it firmly without cracking the glass. Attach the harp saddle to the socket, connect your chosen bulb, add the shade via the harp and finial, and plug in your creation to test the light. If everything glows as intended, apply the rubber feet to the base, tuck any excess cord with a cable clip or cord weight, and step back to admire what you have made. Few crafting moments are as satisfying as that first warm glow from something you built entirely yourself.
Creative Variations and Design Ideas to Inspire You
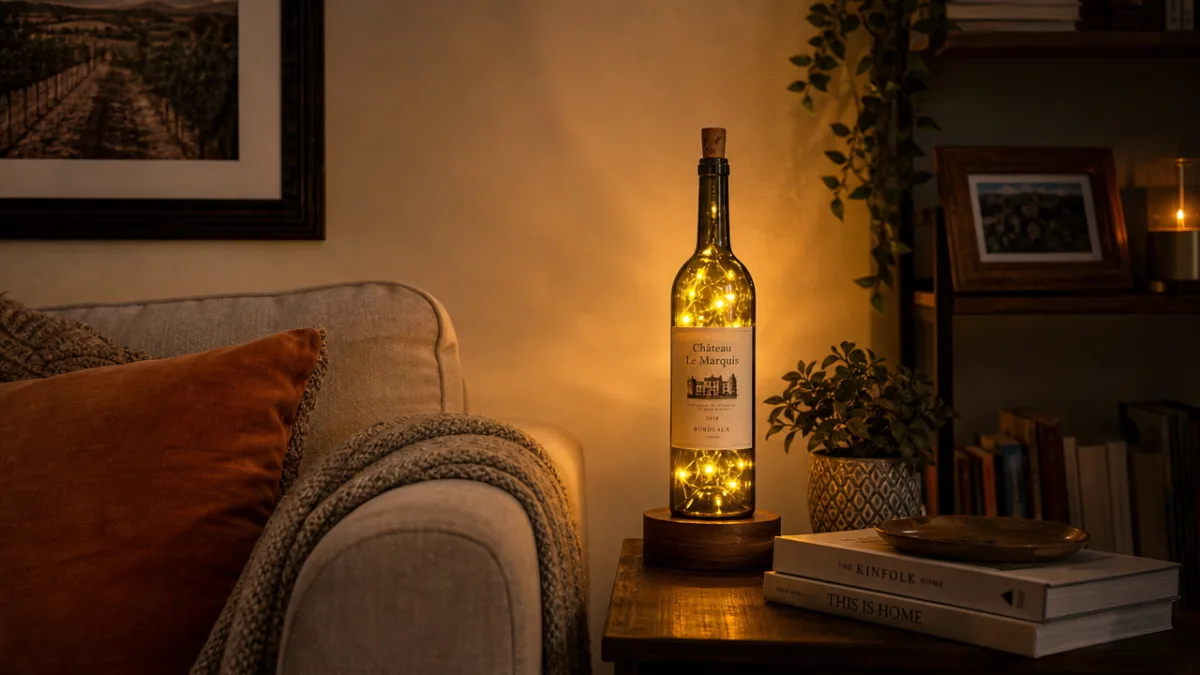
Once you have mastered the basic bottle lamp build, a world of creative variations opens up before you. One of the most popular approaches is filling the bottle with decorative materials before sealing it up. Imagine a clear glass bottle filled to the brim with wine corks — a perfect piece for a kitchen or bar area that tells a story about evenings well spent. A coastal-themed bedroom might feature a large glass bottle filled with white sand and sea glass fragments, its warm light filtered through layers of oceanic color. A botanical enthusiast might layer dried herbs, seeds, and pressed flowers inside a bottle for an effect that is both beautiful and fragrant when the bulb warms the glass.
Pendant lamps represent another exciting variation on the bottle lamp concept. Rather than sitting on a table or shelf, pendant bottle lamps hang from the ceiling, their cords exposed and often celebrated as a design feature by using fabric-wrapped styles in bold colors or natural materials like jute. A cluster of pendant bottle lamps hanging at varying heights above a dining table creates a striking installation effect that rivals anything you might find in an upscale restaurant. This approach works especially well with smaller bottles — bud vases, perfume bottles, or vintage milk bottles — whose diminutive scale becomes charming rather than underwhelming when viewed from below against a lit background.
Painting and etching offer yet another dimension of personalization. Frosted glass spray paint applied to the outside of a clear bottle creates a diffused, glowing effect that is entirely different from the transparency of the original glass. Etching cream, used carefully with a stencil, can create permanent decorative patterns in the surface of the glass — geometric motifs, botanical illustrations, or personalized text. Some crafters use glass paint pens to add freehand designs, which range from simple stripes and dots to elaborate scenes that transform the lamp into a piece of art. These surface treatments can be as simple or as intricate as your skills and patience allow.
Styling and Displaying Your DIY Bottle Lamps at Home
Creating a beautiful bottle lamp is only half the journey — how you display and style it within your home determines how much impact it ultimately has. A single statement bottle lamp with bold colors or an unusual shape can anchor a reading nook or bedside table, providing focused warm light and serving as a conversation piece at the same time. Pairs of matching bottle lamps flank a sofa or bed with elegant symmetry, providing balanced illumination while reinforcing the intentional, curated feel of a well-designed room. Consider the proportion of your lamp relative to the furniture around it — a small bottle on a tall table can look lost, while an oversized floor lamp bottle can feel overwhelming in a compact space.
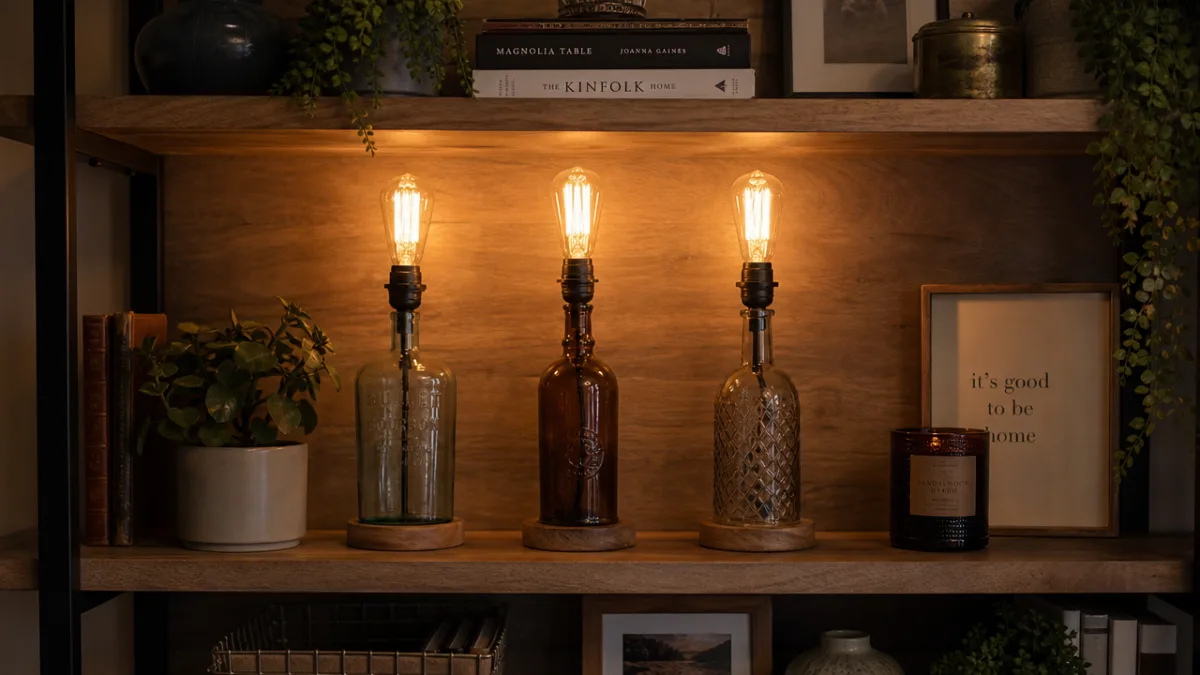
The shade you choose, or the decision to go shade-free with an exposed decorative bulb, will significantly affect both the quality of light and the overall aesthetic. Edison-style filament bulbs without shades create a warm, vintage, industrial mood that suits lofts, farmhouse kitchens, and bohemian living rooms beautifully. A linen or burlap shade softens the light and brings warmth and texture to traditional or rustic spaces. A crisp white drum shade gives the lamp a more contemporary, refined look that blends well with minimalist interiors. Globe shades in smoked glass or clear glass act as a secondary design element, adding visual interest while containing and directing the light.
Grouping multiple bottle lamps together on a sideboard, mantel, or open shelving can create a gallery-like effect that showcases the variety of bottles and styles in your collection. Varying the heights by choosing bottles of different sizes, or by placing some on small risers or books, adds visual dynamism to the arrangement. Surrounding the lamps with complementary objects — a stack of books, a trailing houseplant, a ceramic vase, a framed print — integrates them into a cohesive vignette rather than leaving them isolated as standalone objects. When the light is warm and the arrangement is thoughtful, a collection of handmade bottle lamps becomes the kind of thing that makes a room feel genuinely lived in and loved.
The Joy of Gifting and Sharing DIY Bottle Lamps
One of the great pleasures of making something beautiful with your own hands is the opportunity to share it. A handmade bottle lamp is one of the most thoughtful and personal gifts you can give, especially when the bottle itself carries meaning. Imagine gifting a lamp made from the wine bottle shared at a significant dinner, or from a bottle brought back from a memorable trip. The recipient receives not just a functional and decorative object but a memento with a genuine story, a reminder of a specific moment or relationship rendered in warm, glowing glass. In a world of mass-produced gifts, something handmade and specific cuts through the noise in a way that nothing purchased off a shelf can match.
Bottle lamps also make wonderful projects to undertake in a group setting. A crafting evening with friends or family, where everyone brings a bottle with personal significance and leaves with a finished lamp, creates shared memories alongside tangible objects. These gatherings work particularly well as bachelorette or birthday party activities, as team-building events, or simply as a reason for friends to get together and make something with their hands. The combination of a modest technical challenge, a creative outlet, and a satisfying finished product makes bottle lamp crafting naturally social and enjoyable in a group context.
Sharing your process and results online — through social platforms, crafting communities, or dedicated DIY forums — connects you to an enthusiastic global community of makers who are always eager to see new approaches and ideas. Posting a photo of your finished lamp often inspires others to try the craft for themselves, creating a ripple effect of creativity and sustainability that extends far beyond your own living room. In this way, the simple act of turning a bottle into a lamp becomes something slightly larger: a contribution to a culture of thoughtful making, of seeing potential where others see waste, and of choosing to live with objects that carry beauty, meaning, and intention. That is not a bad return on an afternoon’s worth of work and a lamp kit from the hardware store.








What do you think?
It is nice to know your opinion. Leave a comment.