










DIY Colander Pendant Lamp: Transform a Kitchen Staple into Stunning Lighting
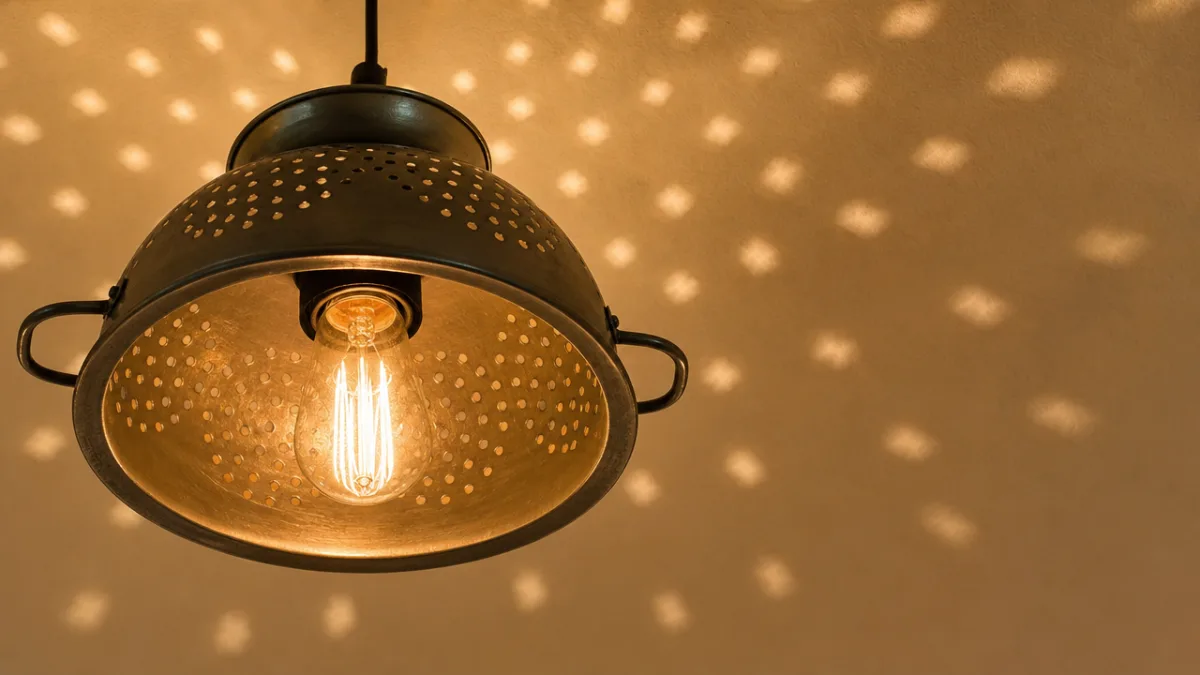
There is something deeply satisfying about looking at an ordinary object and seeing extraordinary potential hiding just beneath its surface. A colander — that humble, hole-punched kitchen workhorse used for draining pasta and rinsing vegetables — turns out to be one of the most surprisingly beautiful bases for a handmade pendant lamp. When light passes through those dozens of small perforations, it creates a constellation of tiny glowing dots across your ceiling and walls, turning any room into something that feels almost magical.
DIY lighting projects have surged in popularity over the past decade, and for good reason. Store-bought pendant lamps can cost anywhere from fifty to several hundred dollars, and they rarely feel personal or unique. A colander pendant lamp, by contrast, costs a fraction of that price and tells a story every time someone notices it. Guests invariably pause, look upward, and say, “Wait — is that a colander?” It becomes a conversation piece, a point of pride, and a genuine work of functional art all at once.
This guide will walk you through everything you need to know to build your own colander pendant lamp from start to finish. Whether you are a seasoned DIY enthusiast with a workshop full of tools or a first-time maker with nothing but enthusiasm and a trip to the hardware store ahead of you, this project is accessible, rewarding, and endlessly customizable. By the time you are done, you will have a one-of-a-kind light fixture that reflects your personality and brightens your home in more ways than one.
Understanding the Appeal: Why a Colander Makes the Perfect Lamp Shade
The genius of the colander lamp lies in its structural design. Colanders are built to be durable, heat-resistant to a degree, and already shaped in a gentle dome or bowl form that perfectly mimics the silhouette of a traditional pendant shade. Unlike repurposing a jar or a basket, a colander requires almost no structural modification. It already has a sturdy rim, a curved interior that reflects light beautifully, and those signature holes that transform a simple bulb into a dazzling light-scattering display.
Metal colanders, particularly stainless steel ones, are especially well-suited to this project. Stainless steel reflects light with a warm, slightly industrial glow and is naturally heat-tolerant, making it a safe choice when used with the appropriate low-heat bulbs. Enamel-coated colanders in bold colors like red, cream, or cobalt blue introduce a vintage farmhouse aesthetic that feels right at home in a kitchen or dining nook. Even plastic colanders in bright hues can work for low-wattage LED installations, though metal remains the preferred material for both safety and longevity.
Beyond practicality, there is a pleasing narrative quality to the colander lamp. It occupies that charming space where function meets reinvention — where something designed for one purpose is thoughtfully redirected toward another without losing the memory of what it once was. Interior designers often speak of “found object” décor as a way of grounding a space in authenticity and personality. A colander lamp does exactly this, connecting the warmth of the kitchen to the ambiance of the living room, the bedroom, or wherever you choose to hang it.
Gathering Your Materials: What You Will Need Before You Begin
Before you pick up a drill or touch a wire, preparation is everything. Having the right materials on hand not only makes the build go smoothly — it also ensures the final product is safe, stable, and beautiful. The good news is that everything you need for this project is either already in your kitchen or available at any hardware or home improvement store for a modest investment. Most builders complete this project for well under thirty dollars, not counting the cost of the colander itself.
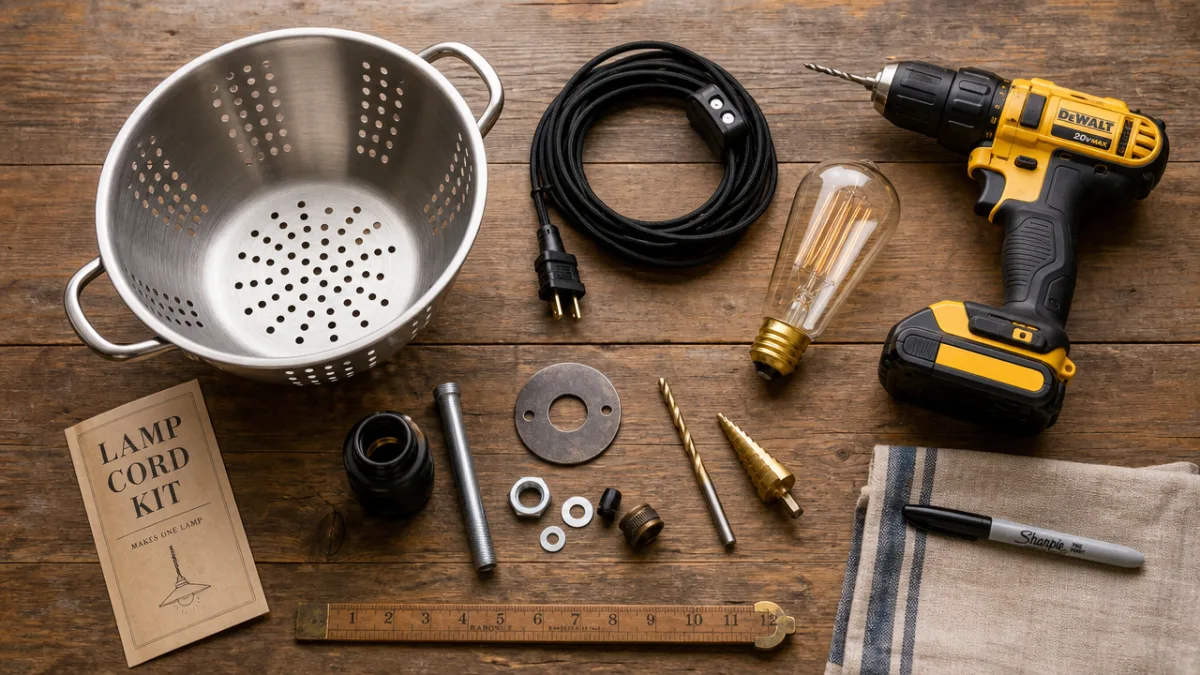
Here is a complete list of materials you will need to assemble your colander pendant lamp:
- One metal or enamel colander, medium to large size (roughly 10–14 inches in diameter works best)
- A pendant lamp cord kit, available at hardware stores or online, which includes the socket, cord, and canopy
- One LED Edison-style bulb (choose a warm white, low-wattage option for both safety and ambiance)
- A drill with a step bit or hole saw sized to fit your lamp socket (usually 1 to 1.5 inches)
- A strain relief connector or rubber grommet to protect the cord where it passes through the metal
- Sandpaper or a metal file to smooth any rough edges after drilling
- Optional: spray paint in a matte or metallic finish if you want to customize the colander’s color
- Optional: a ceiling hook or swag kit if you are hanging the lamp without a hardwired junction box
When selecting your colander, pay attention to the depth and shape of the bowl. A shallower, wider colander will cast light more broadly across the room, while a deeper, narrower one will focus the beam more directly downward — like a spotlight. Consider the intended location of your lamp and what kind of lighting effect you are after. A dining table benefits from a more directed downward glow, while a living room corner might welcome the scattered star-pattern light that a wider colander provides.
Step-by-Step Assembly: Building Your Colander Pendant Lamp
With your materials assembled, it is time to begin the build. This process is broken into four main phases: preparing the colander, threading the cord, wiring the socket, and doing a final safety check before hanging. Each step is straightforward, but taking your time and working carefully — especially during the wiring phase — will ensure a result you are proud of and a fixture that is genuinely safe to use in your home.
Phase One: Drilling the Colander
Turn the colander upside down so its base faces upward. Locate the center of the base — most colanders have a small flat area or a slight indentation at the very center, which makes this step easy. Mark your center point with a permanent marker. Using a center punch or even a nail and hammer, create a small divot at this mark to prevent your drill bit from wandering when you begin drilling. This tiny step saves a great deal of frustration.
Attach your step bit or hole saw to your drill and drill through the center of the colander base at a steady, moderate speed. Apply light, consistent pressure rather than forcing the bit through. If you are drilling through stainless steel, the process will take a little longer and may benefit from a drop of cutting oil to reduce friction and keep the bit cool. Once the hole is through, use sandpaper or a metal file to smooth any burrs or sharp edges around the opening — this is important for protecting your electrical cord from abrasion.
Phase Two: Threading the Cord and Wiring the Socket
Before threading the cord, slip the rubber grommet into the drilled hole to create a smooth, protected channel for the wire. Next, feed the pendant cord through the hole from the outside of the colander (what will be the top of the lamp) downward into the interior bowl. Most pendant cord kits include clear instructions for attaching the socket, which typically involves connecting two wires — one neutral, one hot — to the corresponding terminals on the socket body. If you are not comfortable working with electrical connections, this is the point at which consulting an electrician or a knowledgeable friend is a wise choice.
Once the socket is wired and secured inside the colander’s bowl, screw in your chosen LED bulb to test the fit and make sure nothing feels loose. The bulb should sit comfortably within the interior of the colander without touching the metal sides. If the bulb seems too close to the metal for comfort, consider switching to a smaller bulb or a candelabra-base socket, both of which allow more clearance. Safety and peace of mind are worth the small adjustment.
Phase Three: Final Assembly and the Canopy
Slide the ceiling canopy — the decorative disc that covers the ceiling junction box or hook — up along the cord and set it aside temporarily. Attach the cord to your ceiling hook, swag kit, or hardwired junction box according to your pendant kit’s instructions and your ceiling’s specific setup. If you are using a plug-in swag kit (the simplest option for renters or first-time builders), simply loop the cord over a ceiling hook and run it to a nearby outlet. Lower the canopy into place and secure it, then give the entire assembly a gentle tug to confirm everything is firmly attached before stepping back to admire your work.

Customization Ideas: Making Your Lamp Truly Your Own
One of the greatest joys of this project is that it is almost infinitely customizable. The colander you choose is just the beginning. Once you have mastered the basic build, a world of creative variations opens up. Color, texture, size, cord style, and even the arrangement of multiple lamps in a cluster grouping all offer opportunities to tailor your pendant lamp to your specific space, aesthetic, and personality.
Consider these popular customization approaches that other makers have used to elevate their colander lamps:
- Color transformation: Apply a coat of matte black spray paint to a stainless steel colander for an industrial-modern look, or use a hammered bronze finish spray paint for a vintage apothecary feel. Chalk paint in muted earth tones creates a lovely Scandinavian-inspired aesthetic.
- Cord styling: Pendant cord kits now come in a wide array of fabric-covered styles — braided cotton in navy, burgundy, natural jute, or even striped patterns. The cord is visible as part of the lamp’s design, so choosing one that complements your room’s color palette makes a meaningful difference.
- Cluster installations: Hang three colander lamps of varying sizes at staggered heights above a kitchen island or dining table. Using colanders of the same style but different sizes creates a cohesive yet dynamic installation that feels designed and intentional.
- Vintage colander finds: Scour thrift stores, estate sales, and flea markets for enamelware colanders from the mid-twentieth century. These often come in beautiful cream, red, or blue tones with a charming speckled finish that is impossible to replicate with new materials.
- Pattern layering: Some makers use a small paint pen to add hand-lettered words, botanical drawings, or geometric accents to the outer surface of the colander before hanging it, creating a lamp that doubles as a tiny piece of illustrated art.
Beyond the colander itself, think about the light quality your bulb creates. A warm 2700K Edison LED bulb produces the soft, amber-toned glow associated with candlelight and vintage incandescent lamps — ideal for dining rooms and bedrooms. A slightly cooler 3000K bulb feels crisper and more energizing, suiting a home office or kitchen workspace. Dimmable bulbs paired with a compatible dimmer switch give you total control over the mood, making your colander lamp adaptable to everything from a romantic dinner to a focused work session.
Safety Considerations: Getting This Right the First Time
No DIY electrical project is complete without a serious, sober conversation about safety. The colander pendant lamp is one of the safer electrical DIY projects out there, primarily because it involves low-wattage bulbs and pre-wired pendant cord kits rather than raw electrical work from scratch. That said, a few key principles apply, and respecting them is non-negotiable if you want a lamp that is not just beautiful but genuinely safe for everyday use in your home.
The most important rule is this: always use LED bulbs rather than incandescent or halogen options. Traditional incandescent bulbs generate significant heat during operation, and enclosing them in a metal shade — even one with ventilation holes — creates a potential fire hazard if the bulb sits too close to the metal or if the wattage is too high. LED bulbs, by contrast, generate very little heat, making them the only responsible choice for a repurposed metal colander shade. Stick to bulbs rated at 10 watts or under for maximum safety and longevity.
Before hanging your completed lamp, inspect every component carefully. Confirm that all wire connections inside the socket are tight and properly insulated. Check that the cord grommet is firmly seated in the drilled hole and that no bare wire is in contact with the metal of the colander at any point. Gently pull on the cord where it exits the canopy to ensure it is properly strain-relieved and will not pull loose under the weight of the lamp over time. If anything feels uncertain or improvised, stop and address it before the lamp ever goes live. A minute of caution now prevents problems that are far harder to fix once the lamp is up and in regular use.
Where to Hang It: Finding the Perfect Spot in Your Home
The colander pendant lamp is remarkably versatile in terms of placement. Its rustic-meets-industrial character makes it a natural fit in kitchens, dining rooms, and breakfast nooks, but its charm extends just as easily to entryways, home offices, reading corners, and even outdoor covered porches where a pendant fixture would add warmth and personality to an otherwise functional space. The key is thinking about both the aesthetic contribution the lamp will make and the practical lighting it will provide in that specific location.
In the kitchen, a colander lamp hung above an island or peninsula at a height of about 30 to 36 inches above the counter surface provides both task lighting for food prep and a charming focal point that ties together the room’s culinary theme. In the dining room, hang the lamp lower — around 28 to 34 inches above the tabletop — so it pools light intimately across the table surface without glaring into seated diners’ eyes. For a reading nook or beside a bed, a plug-in swag version hung at shoulder height when seated creates a cozy, personal light source that is both practical and warmly atmospheric.
For those with access to outdoor covered spaces, a colander pendant lamp makes a particularly memorable addition to a porch, pergola, or covered patio. The light pattern it casts on surrounding surfaces — walls, fences, trellises — takes on an almost ethereal quality in the dim evening hours, like a private constellation overhead. Use a properly rated outdoor cord and ensure the fixture is protected from direct rain exposure, and you will have an outdoor lighting feature that guests will remember long after the evening ends. Wherever you choose to hang it, your colander lamp will do what the best DIY projects always do: make the space feel more human, more considered, and more genuinely yours.
The Bigger Picture: DIY Lighting and Sustainable Living
The colander pendant lamp project sits comfortably within a broader movement toward mindful making and sustainable home design. At its heart, this project is about upcycling — taking an object that might otherwise be discarded or forgotten and giving it a new life and purpose. In a consumer culture that often defaults to buying new when something could instead be reimagined, repaired, or repurposed, the decision to make rather than buy carries genuine significance. Each colander lamp is a small but real vote for creativity over consumption.
From an environmental standpoint, the numbers are encouraging. Manufacturing a single new pendant lamp fixture — from raw material extraction through factory production, packaging, and shipping — carries a meaningful carbon footprint. Repurposing an existing colander eliminates most of that footprint entirely. When paired with a long-life LED bulb that uses a fraction of the energy of its incandescent predecessors, the colander pendant lamp becomes a genuinely low-impact lighting solution without sacrificing an ounce of style or function. Small choices, made consistently and thoughtfully, add up.
Beyond sustainability, there is something deeply nourishing about the act of making things yourself. Numerous studies in psychology and occupational therapy point to the emotional and cognitive benefits of craft — increased sense of agency, improved mood, sharper focus, and a satisfying sense of accomplishment that manufactured goods simply cannot replicate. When you flip the switch on a lamp you built with your own hands from an object that once drained your spaghetti, you feel something that no amount of online shopping can provide. That feeling — practical, proud, and a little bit delighted — is perhaps the most compelling reason of all to give this project a try.








What do you think?
It is nice to know your opinion. Leave a comment.