










How to Make Organic Tie-Dye with Natural Items
Tie-dye is one of the oldest textile arts on the planet, with roots stretching back thousands of years across cultures in Asia, Africa, and the Americas. Long before synthetic dyes filled the shelves of craft stores, people looked to their gardens, forests, and kitchen pantries to create stunning, one-of-a-kind patterns on fabric. These days, a growing wave of makers and sustainability-minded crafters is rediscovering these ancient techniques — drawn in by the appeal of non-toxic, eco-friendly color that feels genuinely connected to the natural world.
Making organic tie-dye with natural materials is more than just a craft project — it’s a slow, almost meditative practice that gets you paying attention to the seasons, the plants around you, and the quiet magic that happens when natural materials meet fiber. The results tend to be softer, more nuanced, and honestly more beautiful than anything you’d get from a bottle of chemical dye. Those earthy tones, dusty pinks, warm yellows, and deep indigos carry a depth and warmth that synthetic colors just can’t touch.
Whether you’re a seasoned textile artist or a total beginner looking for a fun weekend project, this guide walks you through everything you need to create stunning, naturally dyed tie-dye pieces. From picking the right fabric and gathering your plant materials to folding, binding, and finishing your work — it’s all here, and you don’t need any special expertise to get started.
Understanding Natural Dyes: Where Color Comes From
Natural dyes come from a surprisingly wide range of sources — plants, roots, bark, berries, flowers, nuts, and even certain insects and minerals. Every region has its own local palette of dye materials, and discovering what grows near you is honestly one of the best parts of getting into natural dyeing. Common materials like onion skins, avocado pits, black walnut hulls, turmeric, indigo, weld, and madder root have been used for centuries to produce colors ranging from pale gold to deep burgundy, forest green to rich blue. Even kitchen scraps you’d normally toss into the compost bin can become a source of genuinely beautiful color.
Getting the most out of natural dyes does involve a little basic chemistry — though you definitely don’t need a science background to jump in. The thing is, most natural dyes aren’t inherently permanent on their own. They need a little help bonding to fabric fibers, and that’s where mordants come in. A mordant is a mineral salt or similar substance that acts as a bridge between the dye molecule and the fiber, helping the color stick and resist fading over time. Common mordants you’ll come across include alum (potassium aluminum sulfate), iron, tannin-rich materials like oak galls or black tea, and even soy milk. Each mordant can shift the final color in subtle ways, which makes experimenting half the fun.
Different fabrics also behave quite differently with natural dyes. Protein-based fibers like wool, silk, and alpaca tend to soak up color most readily and deeply. Plant-based fibers like cotton, linen, and hemp are a bit more resistant and usually need a mordant pre-treatment to achieve rich, lasting results. For tie-dye specifically, cotton is the go-to choice — it’s easy to find, affordable, and it holds folded patterns beautifully. With the right prep work, though, you can get gorgeous results on almost any natural fabric, and the way different fibers take up color differently just adds to the organic, handmade charm of the whole thing.
Gathering Your Natural Dye Materials
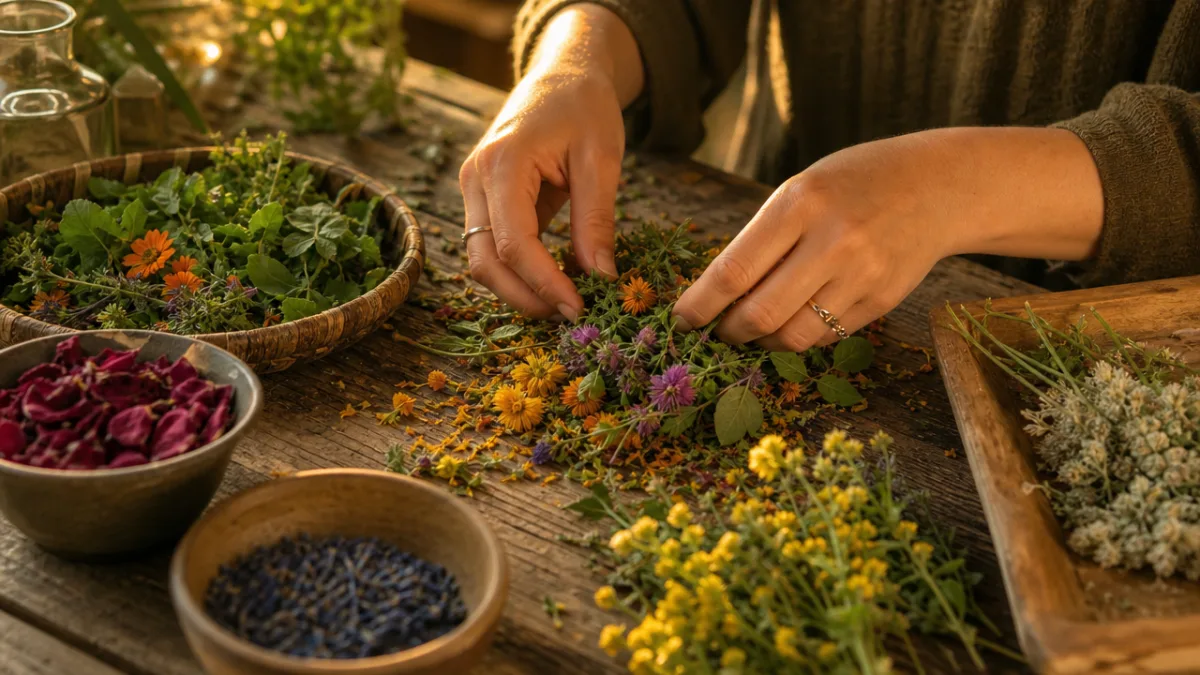
One of the most enjoyable parts of natural dyeing is the gathering process itself. Before you start any project, it’s worth spending a bit of time figuring out what plants and materials are available to you — in your kitchen, your garden, or the landscape around you. Onion skins, both yellow and red, are probably the most accessible and reliable starting point, giving you warm golds and soft greens depending on the mordant you use. Avocado skins and pits — which most people throw away without a second thought — produce a gorgeous range of pinks and dusty roses that seem almost too pretty to come from food scraps.
Beyond the kitchen, the plant world opens up into an almost endless palette. Elderberries, pokeberries, and black beans can yield purples and blues. Black walnut hulls give deep, rich browns. Turmeric produces a bright, intense yellow, though it’s what dyers call a “fugitive” color, meaning it fades faster than most. Woad and indigo — both plants that grow well in temperate climates — are the traditional sources of blue and have been used in natural dyeing for thousands of years. Flowers like marigolds, coreopsis, and chamomile offer a range of yellows and golds, and they’re easy to grow in abundance if you have even a small garden bed to work with.
A few practical things to keep in mind when you’re gathering materials: you’ll generally need a fairly large volume of plant matter — a rough rule of thumb is to use roughly the same weight of plant material as the dry weight of your fabric, or more. Fresh, dried, and even frozen materials all work, so you’re not limited to what’s in season right now. Build up a dye pantry by storing dried materials in labeled jars or bags over time. Always use pots and utensils dedicated to dyeing that you won’t use for food, and make sure you’re working in a well-ventilated spot, especially when you’re heating the dye bath.
Preparing Your Fabric: Scouring and Mordanting
Fabric prep is arguably the most important step in the whole natural dyeing process — and it’s the one beginners most often rush or skip entirely, usually with disappointing results. Before your fabric can take natural dye evenly, it needs to be thoroughly cleaned in a process called scouring. Scouring strips out any oils, finishes, sizing, or manufacturing residues that could cause uneven dye uptake later on. For cotton, this means gently simmering the fabric in water with a small amount of pH-neutral dish soap or soda ash for about an hour, then rinsing thoroughly and keeping it damp until you’re ready for the next step.
Mordanting comes next, and your choice of mordant will have a real effect on both the depth and the exact hue of your finished color. Alum is the most beginner-friendly option — it’s non-toxic, widely available, and produces clean, true colors. To mordant cotton with alum, dissolve roughly 15 to 20 percent of the fabric’s dry weight in alum in warm water, add your wet fabric, and simmer gently for about an hour, keeping the temperature below a full boil to protect the fiber. After mordanting, you can head straight into dyeing, or seal the damp fabric in a bag and refrigerate it for a few days if needed.
If you’d rather skip mineral mordants altogether, tannin-based mordanting is a lovely natural alternative that works especially well on cotton. Strong black tea, oak galls, sumac leaves, and pomegranate rind are all tannin-rich and can be used to pre-treat your fabric. Just simmer your scoured, wet fabric in a strong tannin bath for an hour, rinse, and then move on to an alum mordant or go straight to the dye bath. Tannin mordanting not only helps bind the color but adds its own warm, subtle undertone to the finished result — part of what gives naturally dyed textiles that layered, visually interesting quality that’s hard to put your finger on but impossible to miss.
Folding, Tying, and Creating Resist Patterns
Tie-dye gets its name from the core technique: tying or binding sections of fabric before dyeing so those areas resist the dye and stay undyed, creating patterns when the bindings come off. With natural dyes, this resist approach produces results that feel noticeably softer and more organic than anything you’d get with synthetic dyes — the color bleeds gently at the edges, gradients are subtle, and the whole effect has an earthy, handmade quality that feels perfectly matched to where the color came from. The folding and tying stage is really where you get to be creative.
There are plenty of classic tie-dye folding techniques worth trying, and each one produces a different kind of pattern. The accordion fold — folding the fabric back and forth like a fan, then binding sections with rubber bands or string — gives you stripes. Twisting the fabric from its center outward into a spiral and binding the resulting disc creates that iconic bullseye spiral shape. Scrunching the fabric randomly and binding it tightly produces an all-over mottled texture. Pleating and clamping sections between pieces of wood or flat stones gives you geometric shapes with crisper edges. You can also bundle small objects — pebbles, seeds, or glass beads — into the fabric with string to scatter small circular resist dots across the surface.
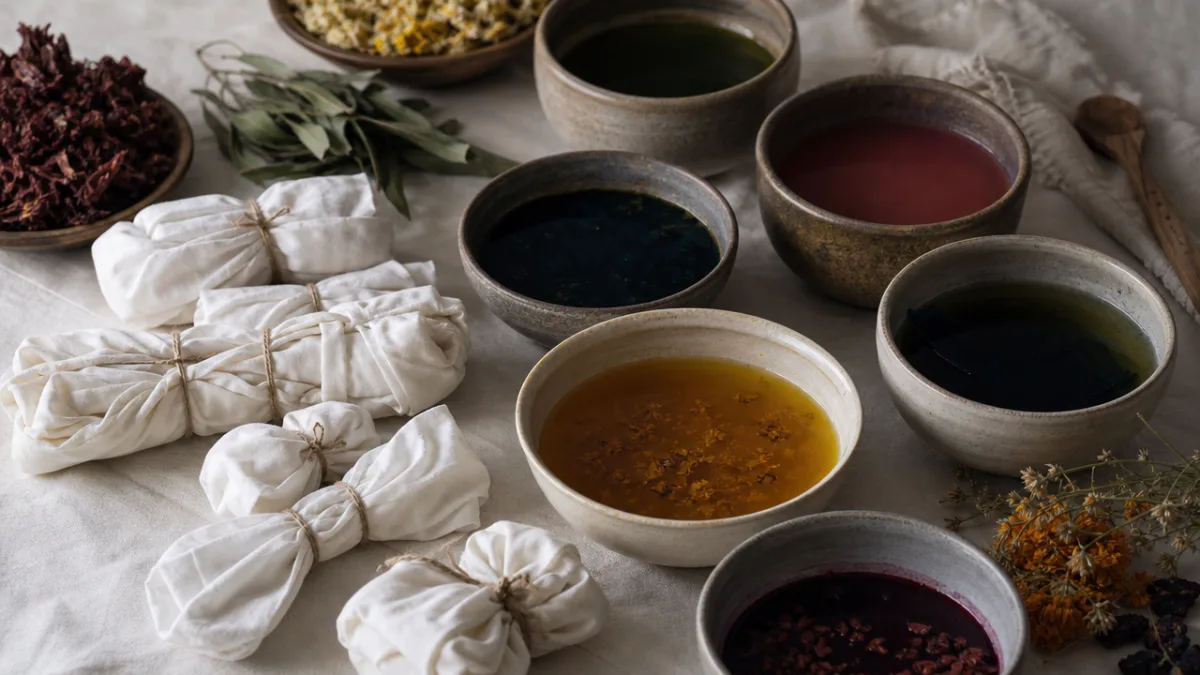
Natural binding materials like hemp twine, raffia, cotton string, and strips of torn fabric are a great match for this kind of organic process. Unlike rubber bands, these materials leave their own subtle marks on the fabric, adding texture and detail to the final pattern. Play around with how tightly you bind — very tight binding gives you sharper, more defined resist areas, while looser binding lets the dye seep in at the edges for softer gradients. It’s worth keeping notes on the folds and bindings you use, since natural dyeing results can vary quite a bit, and having records helps you learn and refine your technique as you go.
The Dyeing Process: From Dye Bath to Finished Color
Making your dye bath is one of the most satisfying parts of the whole process. Start by simmering your plant material in water — use a pot big enough for your fabric to move around freely — for anywhere from 30 minutes to a few hours, depending on the material. The longer you simmer, the more color you’ll pull out, though more delicate things like flower petals should only be simmered briefly to keep their color compounds intact. Once you’re happy with the depth of color in your bath, strain out all the plant material and return the liquid to the pot. You want a clean bath so bits of plant matter don’t interfere with how evenly the fabric takes up the dye.
Add your bound, wet, mordanted fabric to the warm dye bath and bring the temperature up slowly. For most natural dyes, a gentle simmer — never a rolling boil — held for about 45 minutes to an hour gives excellent results. Move the fabric around occasionally so it gets even exposure to the dye, though the bound sections will naturally resist the bath on their own. Watch the color develop in the exposed areas, and keep in mind that colors always look much darker when wet — they’ll lighten noticeably as they dry. That’s completely normal, and part of the organic nature of the whole thing. The dry color will have a beautiful softness to it.
When you’re done dyeing, let the fabric cool in the bath before pulling it out — this helps set the color and avoids any thermal shock to the fiber. Remove the fabric and rinse it gently in water that’s close to the dye bath temperature, then gradually cool your rinse water down. At this point, hold off on removing your bindings — let the fabric drain until it stops dripping, then carefully cut or untie the bindings and open up the folds to see your pattern for the first time. This moment of unfolding is genuinely one of the most exciting parts of the whole process. There’s a particular joy in seeing something beautiful emerge that you made entirely from natural things.
Finishing, Caring for, and Expanding Your Practice
Once you’ve revealed your pattern, give the fabric a final rinse in cool water with a small splash of white vinegar to help set the color and clear out any excess dye. Then wash the piece gently by hand with a mild, pH-neutral soap, rinse it well, and hang it to dry in the shade. Direct sunlight can cause some natural dyes — especially the more fugitive ones like turmeric or berry-based dyes — to fade faster than you’d like. Once it’s dry, iron from the reverse side to help set the color further and restore the fabric’s feel in your hands.
Caring for naturally dyed textiles does take a little more attention than tossing things in the washing machine, but it’s a small trade-off for the beauty and sustainability you get in return. Wash your naturally dyed pieces separately, by hand, in cool water with a gentle soap, and avoid soaking them for long stretches. Keep them out of prolonged direct sunlight when they’re not being used or displayed. Over time, some natural dyes will shift or soften slightly in tone — and honestly, many textile artists see this gentle aging as part of the piece’s character rather than a flaw. It reflects the living, organic origin of the color, and there’s something lovely about that.
As you get more comfortable with the basics, a whole world of techniques opens up to explore. You might try overdyeing — submerging an already-dyed piece in a second dye bath to layer colors and create entirely new hues. You might dive into shibori, the Japanese resist-dyeing tradition that uses stitching, folding, and clamping to produce intricate geometric patterns. You might even start growing your own dye plants — a patch of Japanese indigo, a row of marigolds, a weld plant or two — to deepen your connection to where the color actually comes from. Natural dyeing has a way of becoming a long-term practice once it gets its hooks in you: a living relationship with color, craft, and the world just outside your door that only gets richer the more time you put into it.
- Always label and date your dye experiments so you can reproduce successful results and actually learn from the unexpected ones.
- Keep a dedicated dyeing journal with fabric swatches alongside notes on plant materials, mordants, and process details — you’ll thank yourself later.
- Seek out natural dyeing communities both online and locally; the knowledge that experienced dyers share freely is an incredible resource when you’re just starting out.
- Don’t pour large amounts of strong dye bath down household drains — compost spent plant material and dilute dye baths heavily before disposal.
- Source your mordants from reputable natural dyeing suppliers to make sure you’re getting consistent purity and reliable results in your work.
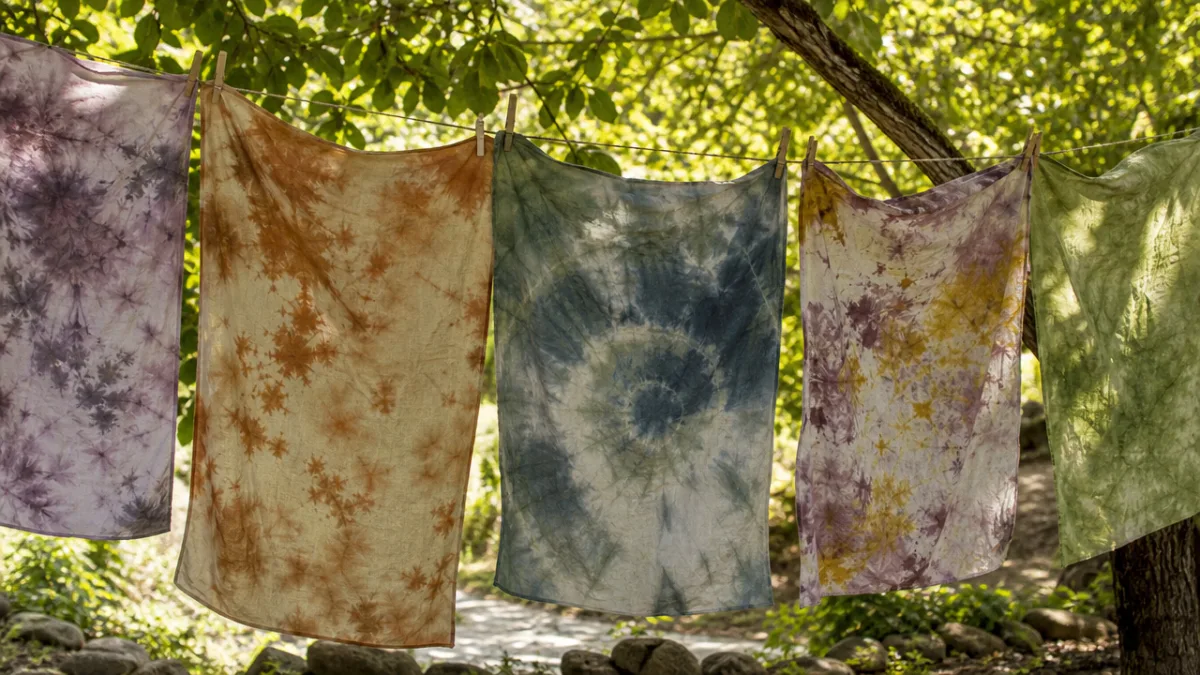
At its heart, making organic tie-dye with natural materials is an act of reconnection — to traditional craft knowledge, to the rhythms of the plant world, and to a slower, more intentional way of making things. In a world saturated with fast fashion and synthetic everything, choosing to dye with onion skins and avocado pits and backyard marigolds is a quietly radical act of care. The colors you end up with won’t look like anything on a store shelf. They’ll carry within them the particular light, soil, and season of the place and moment they were made in. And that, more than any technical skill or perfect pattern, is what makes naturally dyed textiles so enduringly worth making.








What do you think?
It is nice to know your opinion. Leave a comment.