










DIY Vintage Suitcase Table: Transform a Forgotten Relic Into a Stunning Piece of Furniture
There’s something genuinely wonderful about pulling a beat-up old suitcase off a thrift store shelf or digging one out of your grandmother’s attic and thinking, “I could do something with this.” The DIY vintage suitcase table trend has taken off in a big way among upcycling fans, interior designers, and weekend crafters — and honestly, it’s easy to see why. These pieces have a kind of nostalgic charm that no flat-pack furniture will ever come close to matching. Whether you’re decorating a bohemian living room, a cozy rustic bedroom, or a quirky home office, a suitcase table brings the sort of warmth and character that you just can’t pick up at a showroom.
The best part? You don’t need to be a seasoned woodworker or a particularly experienced crafter to make this happen. A few basic tools, some affordable hardware, and a suitcase you actually like the look of — that’s really all it takes to end up with a side table, coffee table, or storage ottoman that looks like it belongs in a boutique hotel. The project is also wonderfully forgiving in a way that more precise builds aren’t. Scuffs, dents, worn leather — none of that is a flaw here. It’s all part of what makes your piece yours.
There’s also a sustainability angle that’s worth mentioning. A staggering number of vintage suitcases end up in landfills simply because nobody can picture a use for them. Choosing to upcycle instead of buying new means you’re keeping something out of the waste stream, skipping the energy and materials that go into producing a conventional table, and embracing a more circular approach to decorating your home. This guide covers everything from picking the right suitcase all the way through to the finishing details that’ll make the whole thing look polished and intentional.
Choosing the Right Vintage Suitcase
Not every old suitcase is going to work well as a table, so it’s worth taking your time with the selection. What you’re looking for is something structurally sound — a frame that holds its shape without warping, with hinges and latches that either still work or can be swapped out cheaply. Hard-sided suitcases made from vulcanized fiber, aluminum, or reinforced cardboard covered in fabric tend to be the best candidates because they can actually hold some weight without buckling. Soft-sided bags can be charming, but they’re rarely rigid enough to support a lamp or a stack of books for long without eventually giving way.
Size is something to think about carefully depending on what role you want the table to play. A large vintage trunk — 30 inches or more across — can work beautifully as a coffee table, and the interior storage is a genuine bonus for blankets, board games, or magazines. Medium-sized cases in the 20-to-24-inch range are perfect as side tables next to a sofa or bed, while smaller cases can become stylish plant stands or accent pieces tucked into a reading nook. Hold the proportions of your existing furniture in mind when you’re browsing, and try to choose something that’ll feel balanced in the space rather than out of place.
For sourcing, thrift stores, estate sales, flea markets, and online marketplaces like eBay or Facebook Marketplace are where you’ll have the most luck. Prices vary wildly — you might pay a few dollars at a charity shop or several hundred for a pristine designer piece — so it helps to set a rough budget before you start. Look for cases with details that catch your eye: brass hardware, interesting fabric linings, old travel stickers, embossed patterns on the exterior. Those are the things that’ll make people stop and ask about it the moment they walk into your room.

Gathering Your Tools and Materials
Before you start drilling anything, it’s worth laying out everything you’ll need so you’re not hunting for a screwdriver halfway through. The main decision upfront is the legs. Hairpin legs are hugely popular for this kind of project — their slender, mid-century look pairs really naturally with the retro feel of a vintage suitcase, and you can find them online in a wide range of heights and finishes, from matte black to polished brass. If you’d prefer something warmer, tapered wooden dowel legs give a more Scandinavian feel. You could also salvage legs from a broken piece of furniture you already have sitting around, which is very much in keeping with the spirit of the project.
Beyond the legs, you’ll need a power drill with a decent set of bits — this is probably the most important tool in the build. A measuring tape, a pencil or chalk for marking, and a flat work surface big enough to support the suitcase while you work are all essential. Depending on the condition of your case, you might also want sandpaper in a couple of different grits, wood glue, a hot glue gun, and some basic cleaning supplies — mild soap and a soft cloth — to get the surface ready before you start putting things together.
Choosing the right hardware is worth a moment of thought too. The screws you use to attach the legs need to be long enough to anchor firmly without punching straight through the floor of the suitcase. For most cases, something between one and one-and-a-half inches hits the sweet spot. If your suitcase has a thin or fragile base, it’s a smart idea to reinforce it from the inside by cutting a piece of plywood to fit snugly on the interior floor before attaching the legs. This spreads the load more evenly and makes a real difference to how stable and solid the finished table feels.
Preparing and Cleaning Your Suitcase
A suitcase that’s been sitting in a garage or attic for decades is going to need a proper clean before it becomes a piece of household furniture. Start by opening it up completely and clearing out anything inside — old paper linings, fabric inserts, mothballs, whatever’s accumulated in there over the years. Run a vacuum with a brush attachment over every corner to get the loose dust and debris out, then wipe down all the interior surfaces with a cloth and a mild soap solution. Let everything dry out fully with the lid open before you move on, because trapping moisture inside is a fast track to mold and bad smells.
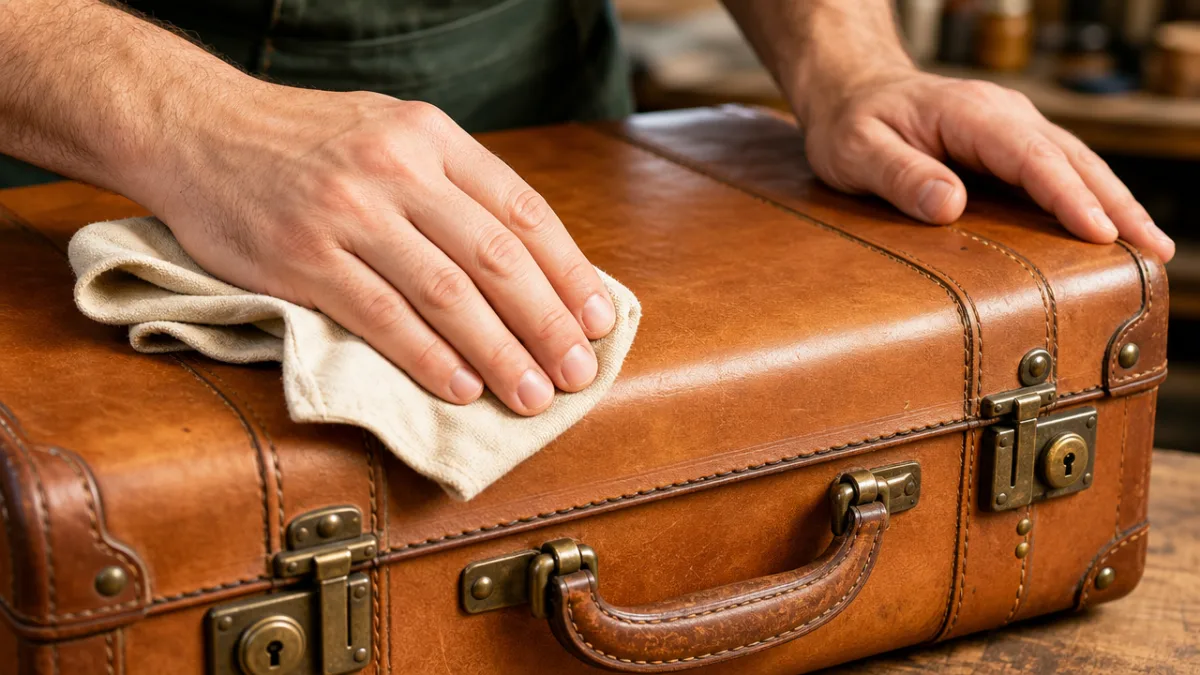
The exterior deserves the same level of attention. If the case is leather or leatherette, a proper leather cleaner followed by a conditioner will make a surprising difference — it brings back suppleness and depth of color in a way that simple wiping won’t. Fabric-covered cases can be spot-cleaned with upholstery cleaner, though it’s always worth testing any product somewhere inconspicuous first to make sure it won’t cause fading or staining. For metal or aluminum cases, a paste of baking soda and water does a great job on oxidation and grime, and a few drops of mineral oil buffed in afterward will bring back a subtle sheen that looks natural rather than fake.
Once the case is clean, give it a thorough inspection for anything structural that needs fixing before assembly. Tighten or replace loose hinges, and swap out broken latches with matching hardware from a craft store or online. If the base feels soft or spongy when you press down on it, that’s a sign the internal material has deteriorated and really needs reinforcing before you attach the legs. Cut a piece of half-inch plywood to fit the interior floor of the case, secure it with construction adhesive, and let it cure fully. It’s a simple step, but it makes an enormous difference to how solid the finished table ends up feeling.
Attaching the Legs and Assembling the Table
This is the part where things start to get exciting — you can actually see the table coming together. Start by flipping the suitcase upside down on your work surface with the latches facing down and the base facing up. Measure and mark your four leg positions, setting each one about two to three inches in from each corner. That inset placement gives the finished piece a more considered, intentional look, and it also means the legs are bearing the weight evenly rather than putting strain on the corners of the case.
Most hairpin-style legs come with pre-drilled mounting plates, which makes installation pretty straightforward. Hold each plate against your marked position, trace the screw holes onto the suitcase base with a pencil, then drill pilot holes carefully at each mark. Go steady and don’t force it — older materials can crack if you rush. Once the pilot holes are done, line the plates back up and drive the screws in until each plate sits flat and the leg feels solid. Give each one a gentle wiggle before moving on. Any looseness you notice now will only get worse once the table is in regular use.
If you’re going with wooden tapered legs instead of metal hairpin legs, the process is a little different. Wooden legs typically attach via a threaded hanger bolt that screws into the leg and passes through a mounting plate on the case, which is a nice system because it lets you remove and swap the legs down the road if you want to. A simpler alternative is to glue and screw a small wooden block to your interior reinforcement board at each corner and then drive the legs in from the outside. Whichever method you go with, always test the completed table on a level floor and press down from a few different angles before you commit to a permanent spot for it in your home.
Personalizing and Styling Your Finished Table
The construction might be done, but this is really where the fun begins. If the exterior of your case is looking a bit flat after cleaning, leather paint or fabric spray paint can completely transform it. Deep navy, forest green, burgundy, and warm mustard are all popular choices that feel era-appropriate without coming across as too costume-y. Apply the paint in thin, even layers with a soft brush or foam roller, and let each coat dry fully before adding the next — rushing this part is the most common way things go wrong.
The interior of the open suitcase is another opportunity to add something personal, especially if you plan to display things inside or use the case as a storage ottoman. Re-lining the interior with fresh fabric is easier than it sounds and the visual payoff is significant. Pick something that works with both the exterior of the case and your room’s overall feel — a bold geometric print for an eclectic space, something delicate and floral for a more romantic look, or a clean stripe for a nautical or coastal vibe. Cut the fabric to size, coat the interior surfaces with Mod Podge or fabric glue, lay the fabric carefully in place, and smooth out any bubbles before the adhesive sets.
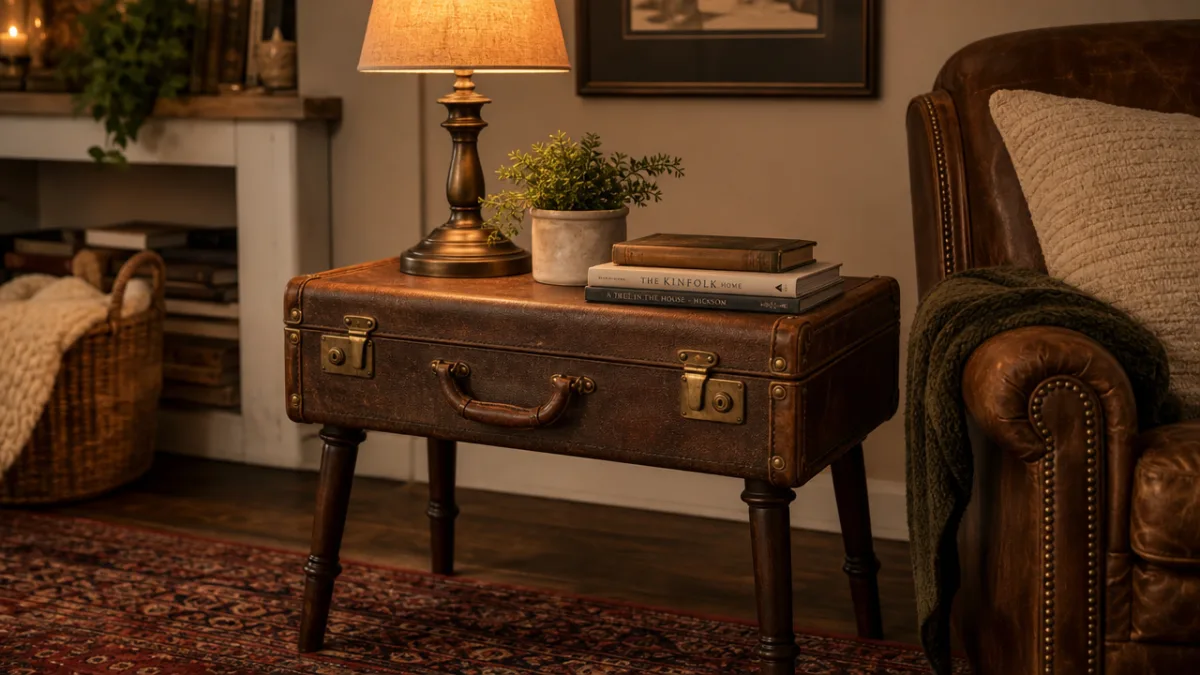
When it comes to styling the table in the room, give the same thought to the objects on top of it that you gave to the build itself. A small stack of coffee table books, a lamp with a warm Edison bulb, a ceramic vase with dried pampas grass, or a few pillar candles at different heights all sit naturally alongside the vintage aesthetic. Try not to crowd the surface too much — restraint almost always reads as more elegant than piling things on. If the suitcase itself has a great-looking exterior, let that be the focal point and keep whatever goes on top simple and easy on the eye.
Care, Maintenance, and Creative Variations
With a little routine care, a well-made suitcase table can look great for years. Leather and leatherette exteriors benefit from a light conditioning treatment every six months or so — heating systems can dry the air out considerably in winter, and without occasional conditioning, the material will start to crack over time. Fabric-covered cases are worth vacuuming occasionally and treating with a fabric protector spray to guard against spills. Keep the table out of direct sunlight as much as you can; UV exposure fades colors and breaks down materials faster than you might expect, especially in fabrics that have already been softened by age.
It’s also good practice to check the legs periodically for tightness, especially during the first few months as everything settles. A quick check with a screwdriver every couple of months will catch any loosening before it becomes an issue. If you notice wobbling, track down which leg is the culprit and retighten or re-glue as needed. And if the suitcase base develops any soft spots over time, adding a second layer of plywood to the interior reinforcement platform will usually sort it out.
Once you’ve finished your first suitcase table, you’ll probably find yourself looking at thrift stores and flea markets completely differently — it becomes very hard to walk past an interesting old case without mentally converting it into furniture. The concept opens up in a lot of directions once you’ve got the basic build under your belt. A pair of small matching cases stacked and secured together makes a great tiered end table with a strong vertical presence. A large steamer trunk on casters becomes a rolling bar cart or a serious craft storage unit. Scale things down, paint them in bright colors, and a suitcase table becomes a delightful little bedside companion for a child’s room. The form has very few real constraints, and what you end up making is really only limited by what you happen to find and where your imagination takes you.








What do you think?
It is nice to know your opinion. Leave a comment.