










DIY Bookshelf Wall: Creative Ceiling Shelves Ideas to Transform Your Space
Why Ceiling Shelves Are the Ultimate Space-Saving Solution
When most people think about adding storage to a room, they look at eye-level walls or the floor. But honestly, one of the most overlooked spots in any home is that stretch of wall just below the ceiling — a surprisingly generous band of vertical space that typically does nothing at all. Ceiling-height shelving and bookshelf walls that go all the way up make real use of that forgotten zone, giving you dramatically more storage without taking up a single extra square foot of floor space.
What makes a floor-to-ceiling bookshelf wall so satisfying is the visual punch it delivers. Shelves that run the full height of a room pull your eye upward, making the space feel taller and more grand than it actually is. Grand libraries and stately homes have leaned on this trick for centuries, but today’s DIY movement has brought it within reach of any homeowner with decent carpentry skills and a free weekend. The finished result looks intentional and built-in — the kind of thing that adds real character to a room.
Beyond the looks and the extra storage, there’s a practical advantage here that freestanding furniture just can’t match. Because a built-in shelf wall is anchored directly into wall studs — and sometimes ceiling joists — it’s far more stable and can handle heavier loads than most standalone bookshelves you’d buy at a store. That makes it a great home for large book collections, vinyl records, board games, decorative pieces, or even pantry goods. Basically anything that benefits from being organized, displayed, and off the floor.
Planning Your DIY Bookshelf Wall: Measurements, Materials, and Layout
Before you touch a single board or drive a single screw, you need a solid plan — this is genuinely not a step to rush through. Start by measuring your wall from floor to ceiling at several points, because ceilings are almost never perfectly level and walls aren’t always perfectly plumb either. Write down the height at each corner and at the midpoint, then design your shelving around the lowest measurement. That way you’ll get a clean, consistent look across the whole installation with no awkward gaps to explain.
Your choice of material will shape both the look and the lifespan of the finished project. Solid hardwood like oak, maple, or walnut is beautiful and incredibly durable, but it costs more and can be tricky for beginners to work with. Cabinet-grade plywood — Baltic birch is a great pick — hits a sweet middle ground: dimensionally stable, reasonably priced, and it finishes beautifully whether you paint or stain it. MDF is the most budget-friendly option and gives you crisp, clean edges when routed, which is why it’s popular for painted built-ins. The trade-off is that it’s heavy and doesn’t love moisture, so keep that in mind depending on where you’re installing it.
Before you buy anything, sketch out your layout on graph paper or play around with free design software like SketchUp. A mix of shelf heights works really well here — taller openings for oversized art books or vinyl records, medium-height sections for standard novels and decorative objects, and smaller cubbies for paperbacks or baskets. Think about whether you want adjustable shelves using pin holes and shelf pins (more flexible long-term) or fixed shelves (cleaner looking but less adaptable).
When you’re calculating materials, add ten to fifteen percent on top of what you think you need — cutting errors happen, wood moves, and surprises are basically guaranteed. Put together a detailed cut list organized by dimension so your trip to the lumber yard is efficient and nothing gets forgotten. If you don’t have a truck or a panel saw, most home improvement stores will make straight cuts on sheet goods for a small fee, which saves you a serious headache when you’re wrestling with full 4×8 sheets of plywood.

Tools You Will Need and Essential Safety Considerations
A ceiling-height bookshelf wall is a genuinely rewarding project to take on, but it does ask for a decent set of tools. You don’t need a full woodworking shop — not even close — but having the right gear makes the difference between a smooth, enjoyable build and a frustrating slog. At minimum, you’ll want a drill/driver, a circular saw or miter saw for crosscuts, a stud finder, a long level (48 inches or more is ideal), a tape measure, clamps, and sandpaper ranging from 80 to 220 grit.
If there’s one tool worth investing in for a project like this, it’s a pocket hole jig — the Kreg jig is the go-to for most DIYers. Pocket hole joinery lets you make strong, hidden connections between shelf boards and vertical supports without needing to master techniques like dadoes or rabbets. Those traditional methods are strong, no question, but they require a router or table saw and a fair amount of practice. For a first or second built-in project, pocket holes give you great strength, speed, and a much gentler learning curve.
Safety really does matter on a build of this scale, so please don’t treat it as an afterthought. Working with large, heavy panels is physically demanding, and the margin for injury is real if you’re not careful. Wear safety glasses whenever you’re cutting, sanding, or driving fasteners. Use hearing protection around power saws. If you’re working solo, a panel carrier or a simple shop-made T-support makes handling full sheets much safer. When you’re working up near the ceiling, use a proper step ladder — not a chair, not a stack of buckets — and have a helper around any time you’re lifting a full-height panel into position.
- Drill/driver with a full set of bits — for pilot holes, countersinks, and driving screws without splitting the wood
- Circular saw or miter saw — for breaking down sheet goods and making clean crosscuts in shelf boards
- Stud finder — non-negotiable; you need to find your wall studs and ceiling joists before fastening anything
- Long level and laser level — keeps every shelf perfectly horizontal, which really matters across long spans
- Pocket hole jig — fast, strong, hidden joinery that’s beginner-friendly
- Brad nailer or finish nailer — speeds up face frame and trim work considerably
- Clamps in various sizes — holds assemblies together while glue dries and keeps panels aligned during installation
- Random orbital sander — a huge time-saver compared to hand sanding large flat surfaces
Step-by-Step Construction and Installation Process
The smartest way to tackle a large bookshelf wall is to build it in sections rather than trying to construct one massive unit. Break your overall design into individual column units — typically 24 to 36 inches wide each — that you can build in your garage or workshop and then carry through doorways to assemble in the room. This modular approach makes the whole project far more manageable, keeps mistakes contained to individual units rather than the whole piece, and lets you work at a comfortable table height instead of assembling everything on the floor.
Start by cutting all your vertical side panels and horizontal shelves to length from your cut list. If you’re using plywood, iron on edge banding to any exposed edges before assembly — it’s a small step that makes a big difference in the finished look once you paint or stain. Lay one side panel flat on your workbench, mark your shelf positions clearly with a pencil and square, and drill pocket holes in the ends of each shelf board. Put a thin bead of wood glue at each joint, then clamp and fasten the shelves with pocket screws, working from bottom to top. Once a unit is assembled, check it for square by measuring diagonally corner to corner — both numbers should match — then clamp it flat while the glue sets up.
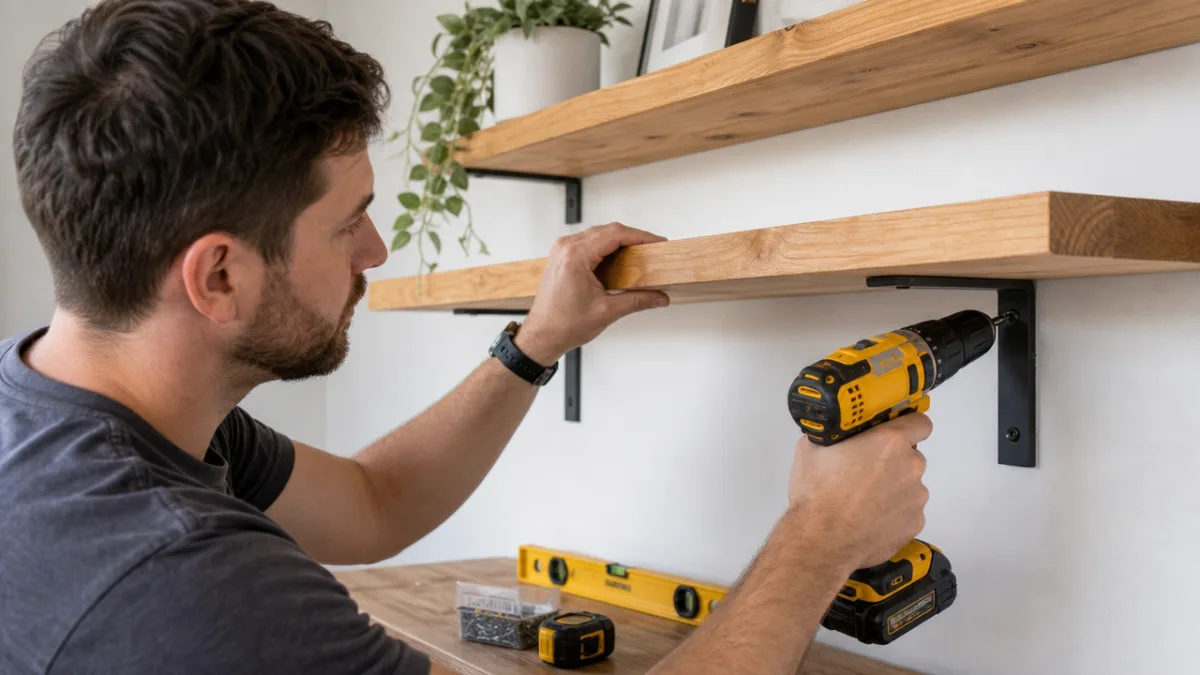
For installation, start by locating every wall stud in the area with your stud finder and snapping a chalk line down the center of each one. Set your first assembled unit against the wall, check it for plumb in both directions with your level, shim the base as needed, and drive long screws — typically 2.5 to 3 inches — through the back of the unit and into the studs. Getting this first unit perfectly plumb and level is critical, because everything else gets aligned off of it. Work your way across the wall from there, fastening units together at the sides and anchoring each one into the studs as you go.
Once everything is up and secured, the finishing work is what pulls it all together into one seamless built-in. Run a continuous face frame of 1×2 or 1×3 strips across the fronts of all the vertical panels, gluing and nailing them in place with a brad nailer. Fill every screw hole and nail hole with wood filler, let it dry completely, and sand everything smooth — start with 120 grit and finish with 220. Brush on a coat of primer formulated for your specific material, sand lightly with 220 grit once it’s dry, then apply two to three thin, even coats of your chosen finish, sanding between each coat for the smoothest result possible.
Styling Your Ceiling Shelves for Maximum Visual Impact
Building the shelves is honestly only half the fun — how you style and fill them is where your personality shows up, and it’s what determines whether the whole thing sings or just looks like a storage wall. The bookshelf walls that really work tend to share a few things in common: they mix books with objects, they play with height and scale, and they leave intentional breathing room rather than packing every inch. Fight the urge to fill everything completely. Empty space isn’t wasted space — it’s a deliberate choice that lets individual pieces stand out and gives the eye somewhere to rest.
Think in terms of small vignettes — curated groupings of three to five objects that share something in common, whether that’s scale, color, or material. A horizontal stack of books can become a little pedestal for a sculpture or a trailing plant. A cluster of vessels in different heights creates rhythm. Framed photos or small artwork pieces add warmth and personal depth. When it comes to the books themselves, try mixing spine-out shelving for everyday practicality with the occasional face-out display for visual interest — or turn some books so only the pages show, which creates a lovely creamy-white texture against painted shelves.
Color is one of the biggest decisions you’ll make when styling ceiling shelves. Painting the back panels in a deep, contrasting color — a rich forest green, moody navy, warm terracotta, or classic black — creates incredible depth and makes everything in front of it pop. It’s one of the most powerful design moves you can make, and it transforms what could be a utilitarian storage unit into something that looks genuinely thoughtful and designed. If paint feels too permanent, wallpapering the back panels with a graphic print or a textured grasscloth is another beautiful option that adds warmth and personality.
- Edit ruthlessly before you display — only things you genuinely love or use often earn a spot on visible shelves
- Vary the heights of objects — lining up items of the same height creates a flat, static look you want to avoid
- Use the rule of odd numbers — groupings of three, five, or seven feel more natural and dynamic than even-numbered arrangements
- Add living plants — trailing varieties like pothos or string of pearls soften the hard lines of shelving beautifully
- Think about lighting — small LED puck lights or strip lights tucked under shelves can dramatically change the mood of the whole wall
- Refresh seasonally — swapping out a few objects now and then keeps the display feeling current and alive
Budget Breakdown, Common Mistakes to Avoid, and Inspiring Variations
The cost difference between hiring out built-ins and doing it yourself is genuinely staggering. A professionally installed bookshelf wall from a cabinetry company can run anywhere from $2,000 to $10,000 or more depending on where you live, the materials used, and how complex the design is. A well-planned DIY version using cabinet-grade plywood and quality hardware typically lands between $300 and $800 in materials for a single wall — savings of somewhere between seventy and ninety percent. Even if you have to buy a few tools, the financial case for doing it yourself is hard to argue with.
That said, a few mistakes come up again and again even among well-prepared DIYers on projects like this. The most common — and most dangerous — is failing to locate studs accurately before fastening. Shelves anchored only into drywall will fail under serious weight, and that’s a genuinely hazardous situation. Always confirm stud locations using multiple methods: an electronic stud finder, a rare earth magnet to find the drywall screws, and a small finish nail to verify. The other mistake that shows up constantly is rushing the finish — skipping primer, laying on paint too thick, or not sanding between coats. The finish is what separates a result that looks professionally done from one that looks like a weekend project in the worst possible way.
What’s great about the ceiling bookshelf concept is how many directions you can take it beyond the classic home library look. A floating shelf variation — where shelves seem to cantilever right off the wall with no visible hardware — is achievable using heavy-duty hidden bracket systems rated for the load. The asymmetric grid design is also having a real moment: cubbies of wildly different sizes create a graphic, almost sculptural pattern across the wall before a single object is placed on them. And an industrial-style build using steel pipe supports and reclaimed wood planks fits perfectly in a loft apartment or a modern farmhouse space.
If a full floor-to-ceiling shelf wall feels like too much for a smaller room or apartment, a partial approach works really well. Run shelves only across the upper portion of the wall — above a desk, sofa, or bed — and you still get the architectural drama and extra storage while keeping the lower half of the room open and breathing. In a bedroom, shelves above the headboard wall create a cozy, cocoon-like reading nook feeling without making the room feel closed in. Tuck in a small reading light or sconce within the arrangement and the whole setup becomes as functional as it is beautiful.
Whether it runs floor to ceiling or just claims a well-chosen stretch of wall, a DIY bookshelf wall is one of the highest return-on-investment projects a homeowner or renter can take on. It adds real storage, genuine character, and measurable value to a space. More than that, it creates a backdrop that actually means something — a place where the books you’ve loved, the objects that tell your story, and the plants that soften every corner can all live together in an arrangement that is unmistakably, specifically yours. Very few things you can buy, at any price, can honestly say the same.








What do you think?
It is nice to know your opinion. Leave a comment.