










Budget-Friendly Nightstand Makeover Tips: Transform Your Bedroom Without Breaking the Bank
Why Your Nightstand Deserves a Second Look
The nightstand is one of the most overlooked pieces of furniture in any bedroom, yet it sits right beside you every single night. It holds your lamp, your book, your glass of water, and often accumulates everything from phone chargers to half-empty lotion bottles. Despite its central role in your daily routine, many people leave their nightstands looking worn, mismatched, or simply boring for years on end without realizing just how much a small refresh could transform the entire feel of the room.
A nightstand makeover does not have to cost a fortune. In fact, some of the most stunning bedroom transformations come from people who spent less than twenty dollars on paint, hardware, and decorative touches. The key is approaching the project with intention, taking stock of what you already have, and being willing to get a little creative. Whether your nightstand is a hand-me-down, a thrift store find, or a flat-pack piece that has seen better days, it has real potential waiting to be unlocked.
Beyond aesthetics, refreshing your nightstand can also improve how functional the space feels. A thoughtfully organized and visually appealing bedside area can contribute to a calmer, more restful environment. Sleep researchers have long noted that the visual environment of a bedroom affects mood and the ease with which we wind down at night. Investing even a small amount of time and money into this corner of your room is, in many ways, an investment in your own wellbeing and sleep quality.
Assessing What You Already Have
Before you spend a single dollar, take a good hard look at your existing nightstand. Pull everything off of it and examine the piece itself. Is the wood scratched but structurally sound? Are the drawer pulls loose or dated? Is the finish peeling in one corner but otherwise intact? Identifying the specific problems gives you a focused action plan rather than an overwhelming overhaul. Most nightstands that look tired are actually in perfectly good structural condition and need only surface-level attention.
Consider also what you want the nightstand to do for you going forward. Do you need more storage, better cable management, or simply a fresher look? Clarifying your functional needs before you start shopping means you will spend money only on things that genuinely solve a problem or add beauty you will actually appreciate. Impulse buying decorative accessories without a clear vision is one of the most common ways small home projects go over budget very quickly.
Paint and Finish: The Biggest Bang for Your Buck
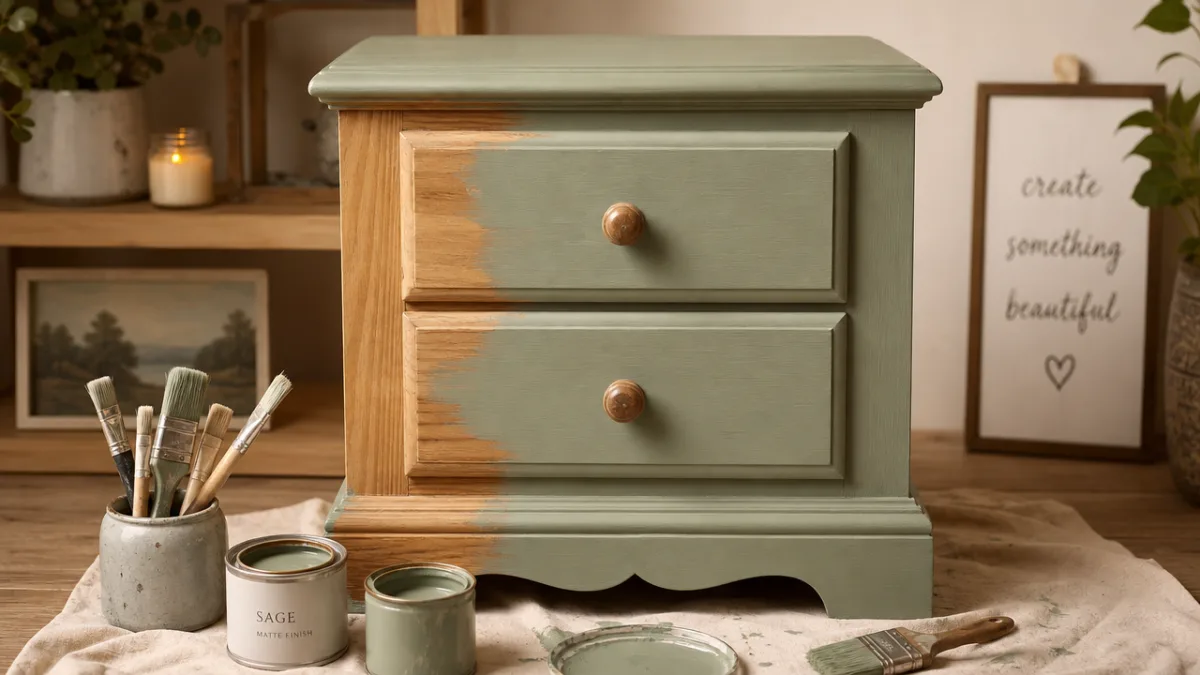
Nothing transforms a piece of furniture more dramatically or affordably than a fresh coat of paint. A single small can of chalk paint, which typically costs between eight and fifteen dollars, is usually more than enough to cover an entire nightstand with two good coats. Chalk paint has become enormously popular for furniture projects because it adheres to almost any surface without extensive prep work, dries quickly, and produces a beautiful matte finish that looks intentional and sophisticated rather than hastily applied.
If you prefer a glossier, more modern finish, consider using a small sample pot of interior latex paint in an eggshell or semi-gloss sheen. Many hardware stores sell sample pots for just a few dollars, and these tiny containers hold more than enough paint for a small furniture piece. Neutral shades like warm white, soft sage green, dusty rose, or deep navy are all enormously popular choices for nightstands right now, and any of these colors can dramatically shift the overall tone of a bedroom without requiring you to repaint walls or replace bedding.
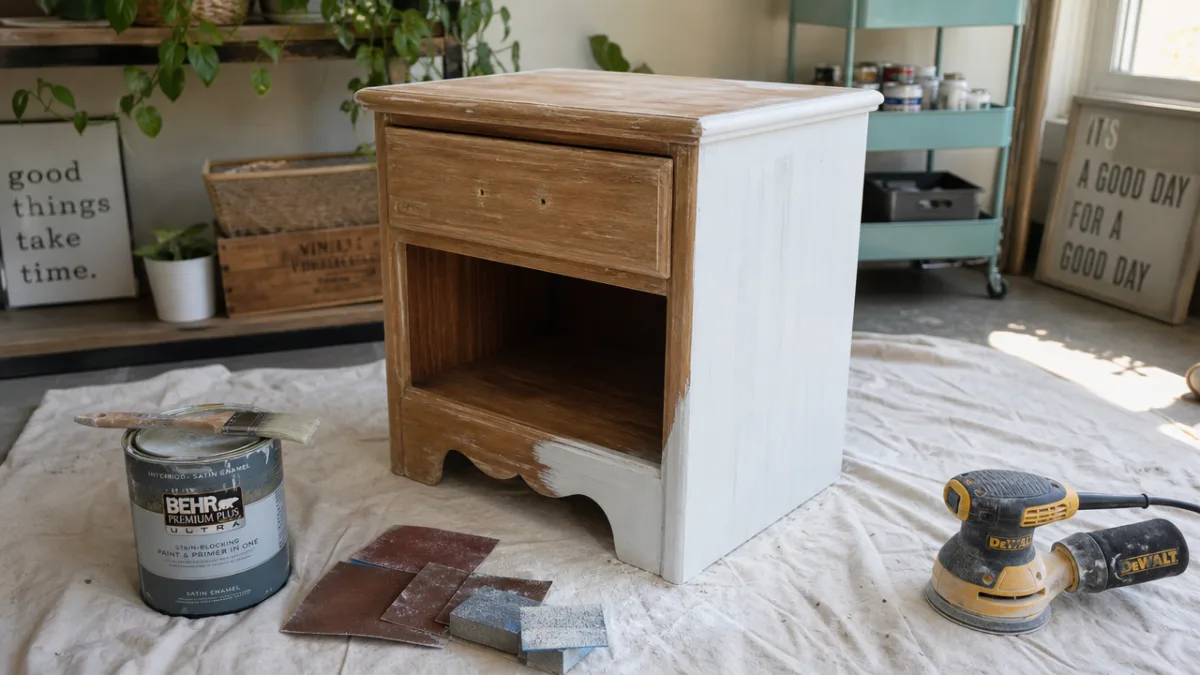
Preparation matters more than most beginners realize. Even with chalk paint’s forgiving properties, taking fifteen minutes to wipe down the surface with a damp cloth, lightly sand any rough patches with fine-grit sandpaper, and fill deep scratches with a bit of wood filler will make the final result look far more polished. After painting, sealing with a clear wax or a water-based polyurethane topcoat protects your work and ensures the finish holds up to the daily use a nightstand inevitably receives, from coffee cups set down in the morning to books dropped onto it at night.
Exploring Creative Finish Techniques
Plain paint is wonderful, but decorative finish techniques can elevate a budget nightstand into something that looks genuinely bespoke. Color blocking, where you paint the body of the nightstand one color and the drawer fronts or legs a complementary shade, is a simple technique that adds visual interest without requiring any special skill. Ombre effects, achieved by blending two shades of the same color family while the paint is still wet, are another approachable option that creates a striking, artistic look.
Limewashing is a technique that has exploded in popularity in recent years, and it translates beautifully to furniture. By mixing white paint with water to create a thin, translucent wash and then brushing it on and wiping back the excess, you create an aged, organic texture that looks like it belongs in a Tuscan villa or a carefully curated boutique hotel room. The materials cost almost nothing if you already have white paint on hand, and the technique is forgiving enough for complete beginners to achieve genuinely beautiful results on their first try.
Hardware Swaps: Small Changes, Big Impact
Replacing drawer pulls and knobs is one of the fastest and most cost-effective ways to give any piece of furniture a completely different personality. Hardware stores and online marketplaces are full of beautiful options at very accessible price points, with many decorative knobs available for just a dollar or two each. Brass pulls give a warm, vintage glamour feel. Matte black hardware reads as modern and minimalist. Ceramic knobs with hand-painted patterns add a whimsical, artisan quality. The right hardware can make a plain, inexpensive nightstand look like a deliberately chosen, carefully styled piece.
When shopping for new hardware, bring your old pulls along or write down the measurements, specifically the distance between the two screw holes on a bail pull. This measurement, called the center-to-center distance, needs to match your existing holes unless you are willing to fill the old holes and drill new ones. Filling and redrilling is actually quite straightforward with a bit of wood filler and a hand drill, and it opens up your hardware options considerably if you fall in love with a style that doesn’t match your existing configuration.
If new hardware is still outside your budget, consider simply cleaning and refinishing the pieces you already have. Old brass hardware can be stripped of its lacquer with nail polish remover and then polished to a warm shine. Painted ceramic knobs can be given a coat of metallic paint for a completely fresh look. Even something as simple as tightening loose screws and cleaning years of grime from hardware you have ignored can make a surprisingly significant visual difference when combined with other elements of your makeover.
Sourcing Affordable Hardware
Some of the best hardware deals come from unexpected places. Habitat for Humanity ReStores often sell salvaged hardware at very low prices, and pieces reclaimed from old furniture have a patina and character that brand-new hardware simply cannot replicate. Estate sales and antique markets are also wonderful sources, and pulling unique hardware from a piece that is otherwise destined for the trash is one of the most sustainable approaches to a furniture refresh project you can take.
Online platforms like Etsy, Amazon, and even Facebook Marketplace frequently offer hardware in bulk lots at prices that work out to just pennies per piece. If you are refreshing multiple pieces of furniture at once, buying a larger lot and using the same hardware throughout creates a cohesive, designer-intentional look throughout a room without the coordinated pieces ever having come from the same original furniture set. This kind of thoughtful repetition is one of the primary ways professional interior designers create rooms that feel pulled-together and serene.
Styling the Surface: Functional Beauty on a Budget
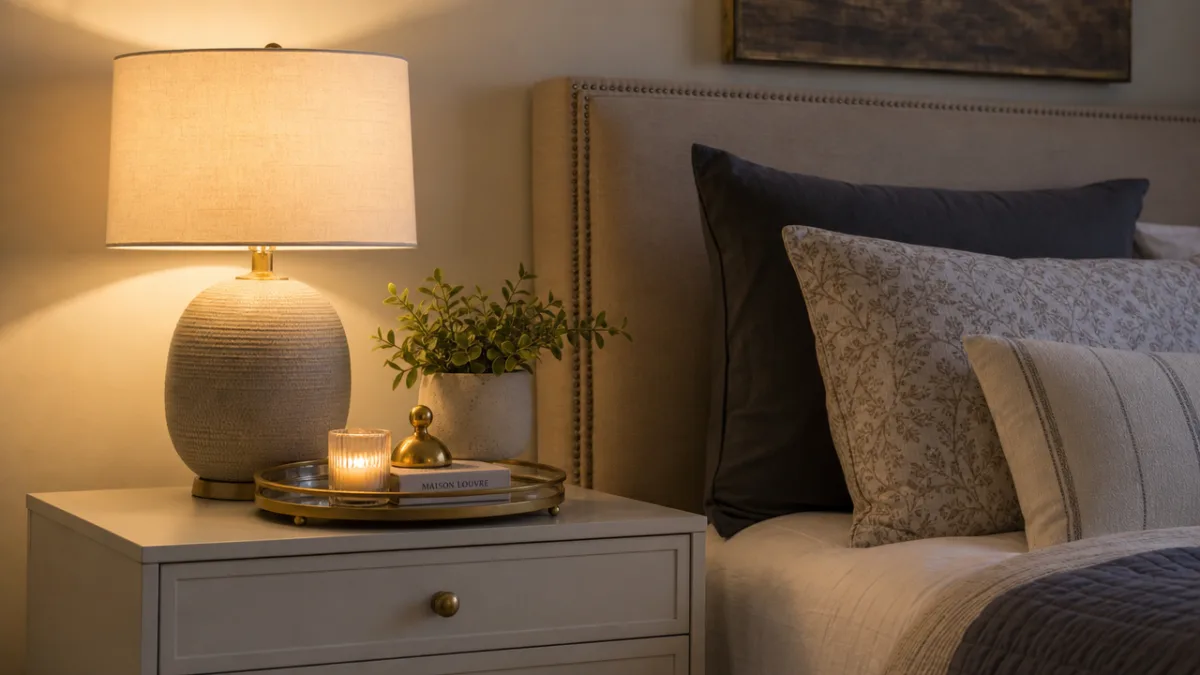
Once the nightstand itself is refreshed, the way you style the surface makes an enormous difference in the overall effect. The goal is to strike a balance between beauty and practicality, keeping the items you genuinely use within easy reach while editing out the clutter that accumulates over time. A styled nightstand typically features no more than three to five intentional objects, each chosen both for function and visual appeal. This restraint is what separates a thoughtfully designed space from one that simply looks busy.
Lighting is the single most important element of nightstand styling, and it does not have to be expensive. A simple plug-in lamp from a thrift store, given a new shade or a coat of metallic spray paint on its base, can look extraordinary for under ten dollars total. Alternatively, battery-operated clip-on lights or inexpensive LED touch lamps provide functional bedside illumination without requiring an outlet nearby, which is a practical solution for nightstands positioned away from wall plugs. The quality and warmth of the light source affects how the entire bedside area looks and feels in the evening hours.
Small plants or a single stem in a bud vase add life and color to a nightstand surface without taking up much space. Succulents are a popular choice because they thrive in the somewhat dry, indoor environment of a bedroom and require very little attention. A small trailing pothos in a simple ceramic pot adds softness and organic texture. Even a single dried flower stem or a sprig of eucalyptus in a narrow glass jar introduces a natural element that feels considered and calming. These additions cost very little and make a significant visual difference in photographs and in real life.
Practical Accessories That Double as Decor
The best nightstand accessories serve a purpose while also looking beautiful. A small ceramic dish or tray corrals daily essentials like rings, earrings, lip balm, and hair ties in a way that keeps them accessible but contained. Small woven baskets or fabric bins handle the less attractive necessities like chargers, notebooks, and medications while adding texture to the space. A beautiful carafe and glass set keeps water within reach in a way that looks intentional rather than haphazard.
- A small tray or dish for jewelry and daily essentials to prevent surface clutter from accumulating
- A fabric or woven bin inside a drawer or on a lower shelf for cable management and miscellaneous storage
- A decorative carafe or pitcher with a matching glass for bedside water that doubles as a design element
- A single candle in a simple holder for evening ambiance that also contributes fragrance to the room
- A slim, hardcover book or a small stack of two or three books that reflect your personality and add visual height
Upcycling and Thrift Store Finds: Starting From Scratch on a Budget
If your current nightstand is beyond saving, or if you simply do not have one and need to acquire something, thrift stores and secondhand marketplaces are genuinely extraordinary resources. Pieces that would cost hundreds of dollars new can be found at Goodwill, Facebook Marketplace, or neighborhood buy-nothing groups for a fraction of the price. The key is learning to look past a piece’s current condition and see its bones, meaning its proportions, its structural integrity, and whether its basic form is appealing to you regardless of finish, color, or hardware.
You do not even need to find something that was originally a nightstand. Many of the most creative and visually interesting bedside setups use unexpected items repurposed for the role. A wooden crate turned on its side provides open shelving and a surface at the right height. A small accent table, a sturdy wooden stool, a painted metal filing cabinet, or even a stack of vintage suitcases can all function beautifully as nightstands while adding far more personality than a standard store-bought piece ever could. The only requirements are that the item is the right height for comfortable use while you are lying in bed and that it provides some surface for your essentials.
When shopping secondhand, a nightstand that is structurally sound but covered in a terrible finish or paint color should actually excite you rather than deter you. An ugly finish is the easiest problem in the world to solve with the techniques described earlier in this article. Conversely, a beautiful-looking piece with wobbly joints, missing drawer slides, or damaged structural elements is a much less appealing project because repairing structural damage requires more skill, time, and investment than surface refinishing does. Always test drawers, wiggle legs gently, and inspect the back panel before purchasing any secondhand furniture.
Creative DIY Nightstand Projects for Under Twenty Dollars
For those who enjoy a more involved creative project, building a simple nightstand from inexpensive materials is surprisingly achievable even for beginners. Hairpin legs, which can be purchased online for as little as fifteen to twenty dollars for a set of four, can be attached to almost any flat surface, including a piece of butcher block, a thick wooden cutting board, or a salvaged slab of wood, to create a minimalist nightstand with real handmade appeal. The aesthetic is clean, modern, and looks far more expensive than the materials involved would suggest.
Floating nightstands, mounted directly to the wall with concealed brackets, are another project that looks high-end but costs very little. A simple wooden shelf bracket from a hardware store, a piece of pine board cut to your desired size, and a few coats of paint are all you need to create a floating bedside surface that frees up floor space and gives the room a sleek, architectural quality. This approach is particularly valuable in small bedrooms where a standard nightstand would feel bulky or where limited floor space makes a freestanding piece impractical.
Maintaining Your Refreshed Nightstand: Making It Last
All the effort and creativity you invest in a nightstand makeover is only worthwhile if the results hold up over time. Protecting your work from the outset is the most important maintenance step you can take. As mentioned earlier, sealing painted surfaces with an appropriate topcoat is essential for durability. For chalk-painted pieces, paste wax buffed on with a soft cloth provides a gentle, beautiful protection. For pieces painted with latex paint, a water-based polyurethane in a matte or satin sheen is more practical and holds up better to moisture from cups and glasses.
Using coasters consistently is one of the simplest habits you can adopt to protect your nightstand surface. Even a sealed paint finish can be damaged by prolonged contact with a wet glass. Small cork coasters, fabric coasters, or simple ceramic trivets cost almost nothing and prevent the water rings and moisture damage that are responsible for a significant proportion of the wear and tear nightstands experience over their lifetimes. Making a coaster part of your nightstand styling arrangement means you are far more likely to actually use it consistently rather than reaching for it as an afterthought.
Periodically reassessing the nightstand’s styling and organization keeps the space from reverting to clutter. Setting aside five minutes every week or two to clear off anything that does not belong, return misplaced items to their proper homes, and dust the surface prevents the gradual accumulation that can make even a beautifully finished nightstand look neglected. Seasonal updates to small decorative elements, such as swapping a summer candle scent for a cozy winter fragrance or replacing a dried flower stem with a fresh one, keep the space feeling current and personally meaningful without requiring any additional investment in the nightstand structure itself.
When to Refresh Again
Even with good maintenance habits, painted furniture surfaces will eventually show wear in high-contact areas, particularly around drawer pulls and on the top surface where items are set down daily. Rather than viewing this as a failure, embrace it as an opportunity. The beauty of having learned these refinishing techniques is that touching up or completely reimagining the piece in a new color costs very little and takes only an afternoon. Many design-conscious homeowners repaint accent furniture every couple of years simply because their tastes evolve, and a nightstand is one of the lowest-risk pieces to experiment with.
Keeping a small supply of your chosen paint color on hand makes touch-ups effortless. Most paints can be stored for several years if the lid is sealed tightly and the container is kept at a moderate temperature. A quick touch-up with a small brush takes only minutes and can restore the fresh appearance of a finish that has developed a few small chips or scuffs. This kind of ongoing, lightweight maintenance prevents the need for a full strip-and-refinish project for many additional years, maximizing the return on your initial investment of time and money.
Ultimately, a budget nightstand makeover is about far more than saving money, though the savings are genuinely significant. It is about developing confidence in your own creative instincts, learning skills that transfer to countless other projects around your home, and creating a living environment that reflects your personal taste and sensibility. The nightstand sitting beside your bed right now is waiting for exactly the attention you are ready to give it, and the transformation you will achieve with a little paint, some new hardware, and thoughtful styling will delight you every single morning when you wake up beside it.








What do you think?
It is nice to know your opinion. Leave a comment.