










13 DIY Kitchen Curtain Ideas That Are Easy and Adorable
Why DIY Kitchen Curtains Are Worth Your Time and Effort
Kitchen curtains are one of those small details that can completely transform the look and feel of your cooking space. Unlike larger renovation projects that require contractors, significant budgets, and weeks of disruption, sewing or crafting your own curtains is a weekend project that delivers immediate, visible results. Whether your kitchen feels too sterile, too dark, or simply lacks personality, the right window treatment can solve multiple aesthetic problems at once without breaking the bank.
The beauty of going the DIY route is the absolute freedom it gives you over every element of the final product. You choose the fabric, the length, the hanging style, and the finishing details. You are not limited to whatever happens to be in stock at a big-box home goods store, and you are not paying a premium for a custom order. With a basic sewing machine — or even without one, thanks to iron-on hem tape — you can produce results that look every bit as polished as anything you might find in a designer showroom.
Beyond aesthetics, DIY curtains also give you practical control over your kitchen environment. You can select fabrics that are easy to launder, since kitchen textiles inevitably attract grease and cooking smells. You can adjust the opacity to balance natural light with privacy. You can even coordinate your curtains with other soft furnishings like dish towels, seat cushions, or a small breakfast-nook tablecloth, creating a cohesive, intentional look that store-bought options rarely deliver.
Choosing the Right Fabric for Your Kitchen Curtains
Fabric selection is arguably the most important decision in the entire curtain-making process, and it deserves careful thought before you head to the fabric store. Kitchen environments are uniquely demanding: humidity from boiling water, grease particles from stovetop cooking, and frequent exposure to sunlight all take a toll on textiles. For these reasons, natural fibers like cotton and linen are perennial favorites. They breathe well, launder easily, and have a relaxed, approachable quality that suits the casual warmth most people want in a kitchen.
Cotton canvas and cotton-linen blends offer a sturdy, slightly structured look that works especially well for café curtains — the half-window style that covers only the lower portion of the glass. These fabrics hold their shape after washing, which means your curtains will not look limp or droopy after their first trip through the laundry. Duck cloth, a tightly woven cotton, is another excellent option if you want something with a little more body and texture. It takes dye beautifully, so you will find it in an enormous range of colors and prints.
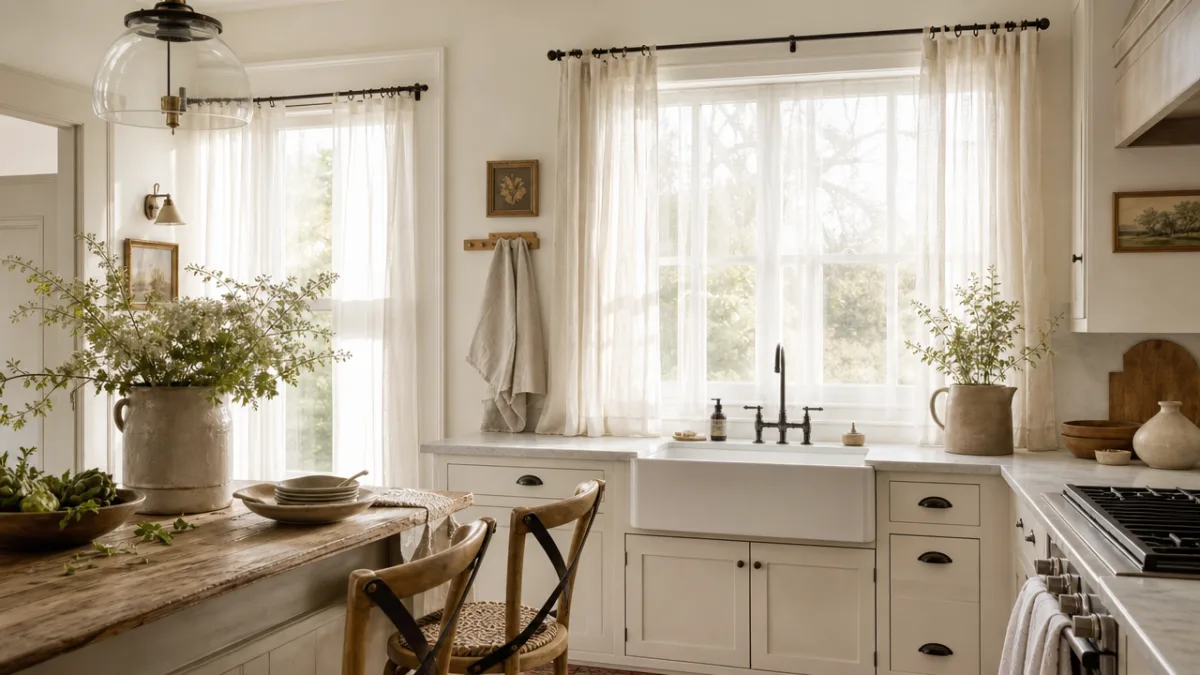
For those who want a softer, more romantic look, sheer fabrics like voile, batiste, or lightweight muslin allow light to filter through while still providing a sense of enclosure and warmth. These work particularly well in east- or south-facing kitchens where morning light pours in and you want to diffuse it rather than block it entirely. One practical tip: always pre-wash your fabric before cutting and sewing. This prevents shrinkage after installation and removes any chemical finishes that might affect how the fabric drapes or how well it accepts additional treatments.
Patterned fabrics deserve a special mention because they can do so much heavy lifting in a kitchen’s visual scheme. A cheerful buffalo check, a classic ticking stripe, a botanical print, or a vintage-inspired floral can establish an entire design personality for your kitchen with just two small panels of fabric. When working with patterns, pay attention to pattern repeat — the distance before a motif begins to duplicate — so you can plan your cuts and purchase the right yardage. A small pattern repeat keeps waste to a minimum and is more forgiving for beginners.
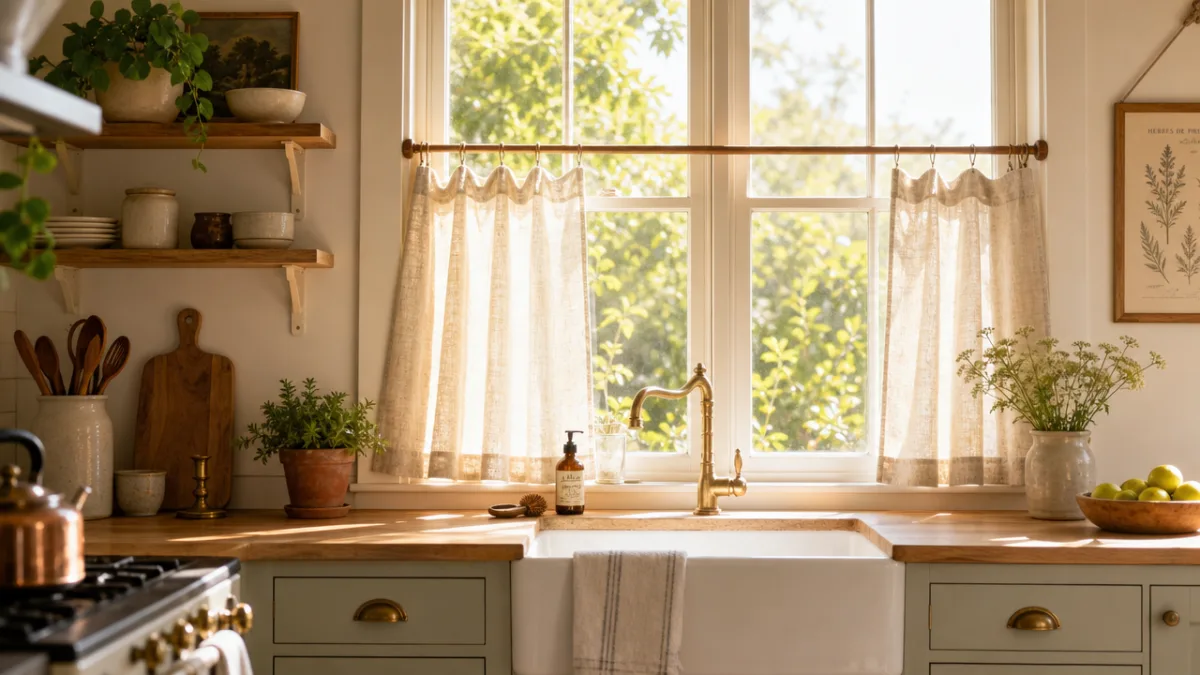
The Classic Café Curtain: A Timeless and Simple Choice
Café curtains are quite possibly the most universally beloved kitchen window treatment, and for very good reason. Originating in the bistros and brasseries of France, where they offered diners a degree of privacy without blocking the view of the street entirely, café curtains cover only the bottom half of a window. This means you get privacy at seated eye level while still enjoying an unobstructed view of the sky and treetops above. It is a genuinely elegant solution to the perennial kitchen dilemma of wanting both light and privacy simultaneously.
Making café curtains is one of the easiest sewing projects imaginable. You need two hemmed rectangles of fabric, a rod pocket or clip rings along the top edge, and a tension rod or lightweight curtain rod positioned at the midpoint of your window. For a truly no-sew version, iron-on hem tape handles all four sides of each panel without a single stitch. The entire project, from cutting to hanging, can be completed in a single afternoon. For a particularly charming variation, try using a piece of vintage or reclaimed fabric — an old linen tablecloth, a grain sack, or even a flour-sack tea towel stretched across a small window.
To give your café curtains a more polished, tailored look, consider adding simple embellishments like a band of contrasting fabric along the hem, a row of pom-pom trim, or a length of eyelet lace at the bottom edge. These details require minimal additional effort but they elevate the finished product considerably. You can also experiment with the header style: a rod pocket creates soft, gathered folds, while clip rings give a flat, graphic look that suits modern or Scandinavian-style kitchens particularly well.
No-Sew and Minimal-Sew Kitchen Curtain Ideas
Not everyone owns a sewing machine, and not everyone has the time or desire to learn to operate one. The good news is that some of the most charming kitchen curtain ideas require absolutely no sewing whatsoever. Iron-on fusible webbing tape, sold at every fabric and craft store, bonds two layers of fabric together with heat alone, creating a hem that is clean, flat, and surprisingly durable through repeated washings. With this single product, you can hem all four sides of a curtain panel, create rod pockets, and even attach trim or ribbon embellishments.
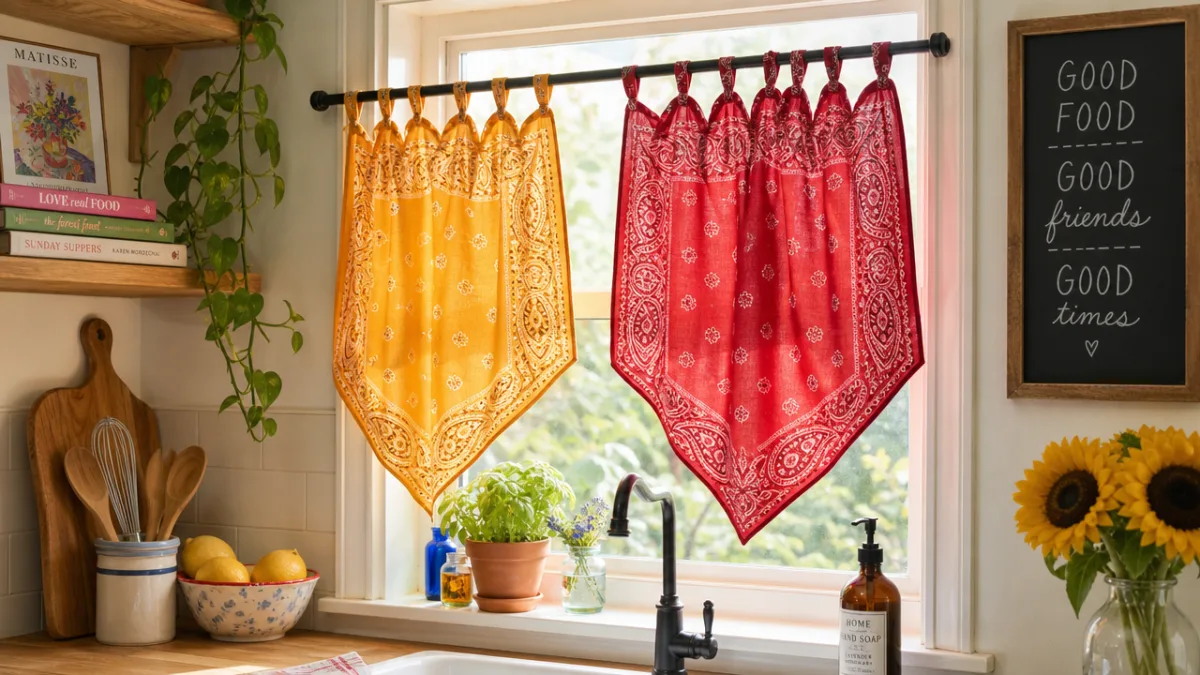
Another wonderfully simple no-sew approach is the bandana or handkerchief curtain. A row of large cotton bandanas clipped to a tension rod with curtain rings or binder clips makes a colorful, bohemian window treatment that requires zero construction whatsoever. You can use all matching bandanas for a graphic, intentional look, or mix different prints within the same color family for a more eclectic, collected feel. The same principle works with vintage tea towels, linen napkins, or even scarves. These items already have finished edges on all sides, which means there is literally nothing to construct.
For those willing to do just a small amount of hand stitching, a simple hem stitch around the edges of a piece of fabric is entirely achievable with a needle and thread, no machine required. The stitch does not need to be perfectly even or invisible — a running stitch in a contrasting thread color can actually become a decorative element in its own right. This approach embraces the handmade aesthetic rather than trying to mimic machine perfection, and it gives the finished curtain a warmth and individuality that cannot be replicated by anything store-bought.
Tension rods deserve special recognition in the no-sew toolkit because they eliminate the need to drill into walls or woodwork. They wedge firmly into a window frame using spring tension alone, which means renters and commitment-phobes alike can hang beautiful curtains without leaving a mark. Pair a tension rod with clip rings and any hemmed piece of fabric, and you have a fully functional window treatment that can be swapped out on a whim as your taste or the season changes. This flexibility is one of the quiet pleasures of the DIY approach to home decor.
Creative DIY Curtain Ideas Beyond the Basic Panel
Once you have mastered the basic hemmed rectangle, a world of more creative possibilities opens up. One of the most visually striking options is the macramé or woven curtain, which can be hung across a window frame to create a bohemian, textural treatment that filters light in a beautifully soft, dappled way. You do not need to be a skilled fiber artist to attempt this — simple square knots and half-hitch knots are the foundation of most macramé patterns, and there are countless beginner-friendly tutorials available online. Natural cotton rope in cream or jute creates a relaxed, organic look that pairs beautifully with wood, stone, and terracotta kitchen elements.
Ribbon curtains are another endlessly customizable option that requires nothing more than cutting lengths of ribbon to your desired curtain length and attaching them to a rod or a length of wooden dowel. You can use grosgrain, satin, velvet, or even strips of fabric cut from a larger piece and finished with pinking shears to prevent fraying. The effect is light and airy, almost like a beaded curtain but with a softer, more romantic quality. This style works particularly well over a small pantry window or a window above a kitchen sink where a full opaque curtain would feel heavy and dark.
Stenciled or block-printed curtains allow you to create a completely custom fabric design without any formal textile-printing knowledge. Start with a length of plain white or natural-colored cotton muslin, and use fabric paint and a foam roller, a carved potato, or a purchased stencil to apply your chosen pattern. Simple geometric designs like stripes, dots, or chevrons are very forgiving for beginners and can look strikingly sophisticated when executed in a considered color palette. Once the paint is heat-set with an iron, the design is permanent and washable, meaning your one-of-a-kind curtains will last for years.
Styling and Hanging Tips for a Professional Finish
Even the most beautifully constructed curtain can fall flat if it is not hung and styled with care. One of the most common mistakes DIYers make is hanging curtains too low. The rod should typically be positioned several inches above the window frame — some designers recommend as high as the ceiling in rooms with standard eight-foot ceilings — to make the window appear taller and the room feel more spacious. In a kitchen, where cabinetry often runs close to windows, you may have less flexibility, but even a couple of inches above the frame makes a noticeable difference.
Curtain length is equally important to the overall aesthetic. For a crisp, casual kitchen look, curtains that end just at or just below the windowsill are tidy and practical — they will not drag on countertops or get caught behind objects. For a more romantic, cottage-style feel, curtains that puddle slightly on the floor create a dramatic softness, though this is best reserved for windows that are not positioned above work surfaces. When in doubt, measure twice and cut conservatively; you can always take a curtain up, but adding length after the fact requires piecing fabric, which is more complicated.
Hardware choices also have a significant impact on the finished look. A simple wooden dowel with cup hooks has an entirely different personality than a wrought-iron rod with scrolled finials, and both are different again from a sleek brushed-brass bar with modern rings. Consider the overall design direction of your kitchen and choose hardware that reinforces rather than contradicts it. For farmhouse and cottagecore kitchens, rustic wooden rods, vintage coat hooks, or even a length of twine strung between two cup hooks can be charming and entirely appropriate choices.
Layering is a technique worth considering even in a small kitchen. A sheer panel behind a more opaque café curtain gives you multiple levels of privacy and light control. A simple valance — essentially a short decorative panel across the top of the window — can be combined with side panels or used alone to add visual interest without overwhelming a small window with too much fabric. Here is a quick checklist of styling considerations before you commit to any single approach:
- Measure the window width and multiply by 1.5 to 2.5 for the total fabric width, depending on how much gather you want.
- Decide on your desired finished length before purchasing fabric, accounting for hem allowances at both top and bottom.
- Consider how the curtain fabric will coordinate with other textiles in the kitchen, including dish towels, rugs, and seat cushions.
- Choose a rod and hardware finish that complements your cabinet hardware, faucet, and light fixtures for a cohesive look.
- Pre-wash and press your fabric before cutting to ensure accurate measurements and prevent post-installation shrinkage.
Finally, do not underestimate the power of simple, well-chosen trim to elevate a basic curtain to something special. Pom-pom fringe, tassel trim, rickrack, eyelet lace, and grosgrain ribbon borders are all easy to apply and can completely change the character of a plain fabric panel. A simple white linen curtain with a band of navy ribbon at the hem feels clean and nautical; the same curtain with a row of pom-pom trim feels playful and bohemian; with eyelet lace, it becomes cottage-sweet. The fabric is your canvas, and the trim is how you sign your name to it.
Maintaining and Refreshing Your DIY Kitchen Curtains
One of the most compelling advantages of making your own kitchen curtains is the ease with which you can maintain and eventually refresh them. Because you chose and prepared the fabric yourself, you know exactly what it is made of and how to launder it properly. Most cotton and linen kitchen curtains can be machine washed on a gentle cycle in cool water and hung to dry or tumble dried on low. Washing them every few months — or more frequently if you do a lot of stovetop cooking — keeps them fresh and free of the accumulated grease and odors that kitchen textiles tend to absorb over time.
When curtains begin to look tired, faded, or simply no longer match an evolved kitchen aesthetic, refreshing them is far easier and more economical than starting from scratch. Consider overdyeing faded curtains in a deeper color using fabric dye — this is an especially satisfying rescue for curtains that have become unintentionally bleached by sunlight. You can also add new trim, appliqué, or embroidery to an existing curtain to give it a fresh look without constructing a new one entirely. A row of hand-embroidered flowers along the hem of a plain white curtain, for example, can transform something ordinary into something genuinely heirloom-quality.
Rotating curtains with the seasons is a lovely habit that keeps your kitchen feeling dynamic and intentional throughout the year. Keep a set of lightweight, breezy sheers for summer, when you want maximum light and airflow, and swap them for something in a warmer, heavier weight for autumn and winter. If you have made your curtains using inexpensive materials, the cost of maintaining two seasonal sets is quite modest, and the pleasure of a kitchen that feels seasonally appropriate is considerable. Folded neatly in a drawer or on a shelf, an off-season set of curtains takes up very little space.
Storage and care between seasons is simple if you take a few basic precautions. Make sure curtains are completely clean and thoroughly dry before storing, since any residual moisture or cooking oils can cause mildew or yellowing over time. Fold them loosely rather than tightly to prevent permanent creasing, and store them in a breathable cotton bag rather than a plastic container. When you bring them back out, a quick press with a steam iron will have them looking fresh and crisp, ready to transform your kitchen all over again. This cycle of making, using, caring, and refreshing is one of the quiet, satisfying rhythms of a home that is tended with intention and creativity.








What do you think?
It is nice to know your opinion. Leave a comment.