










4 Ways to Prune Spirea Shrubs: A Complete Guide to Keeping Your Garden Beautiful
Understanding Spirea and Why Pruning Matters
If you’re looking for a flowering shrub that’s as reliable as it is beautiful, spirea is hard to beat. These plants have become a staple in home gardens across North America for good reason — their arching branches, clouds of white or pink blossoms, and easygoing nature make them a genuine pleasure to grow. Whether you’ve got a classic bridal wreath spirea (Spiraea prunifolia) putting on its spring show or a Japanese spirea (Spiraea japonica) brightening up your summer garden, a little attentive care goes a long way toward keeping the blooms coming year after year.
Pruning is one of the most important things you can do for your spirea, yet it’s also one of the most misunderstood. Plenty of homeowners either skip it entirely because they’re worried about hurting the plant, or they cut at the wrong time and accidentally remove the very buds that were about to bloom. Knowing when, why, and how to prune makes all the difference. Done right, it encourages strong new growth, improves air circulation, clears out dead or diseased wood, and helps your shrub hold onto that naturally graceful shape that makes spireas so appealing in the first place.
Here’s the reassuring part: spireas are tough. They can handle even fairly aggressive pruning without missing a beat, which sets them apart from more temperamental ornamental shrubs that require a delicate touch. They bounce back fast, often responding to hard pruning with a burst of fresh, vigorous growth and a flush of blooms. That resilience makes them great for gardeners who are still building their confidence with pruning tools, while their capacity for dramatic transformation keeps more experienced growers just as invested. With the right approach and a decent pair of pruning shears, you can keep your spirea looking fantastic for decades.
Method One: Deadheading for Continuous Summer Blooms
Deadheading simply means snipping off spent flower clusters before they fade into seed heads, and it’s one of the easiest ways to squeeze more blooms out of your spirea. This is especially worth doing with summer-blooming types like Spiraea japonica and its cultivars — think ‘Anthony Waterer,’ ‘Goldflame,’ and ‘Little Princess.’ When you remove those faded flowers before the plant has a chance to set seed, you’re essentially redirecting its energy. Instead of putting resources into seeds, the shrub channels that energy back into making new flower buds, which often means a longer or even second round of blooming through the warm months.
The process itself couldn’t be simpler. Grab a pair of sharp bypass hand pruners or even sharp scissors for thinner stems, and look for flower clusters that have turned brown, gone papery, or lost their color. Cut just below the spent flower head, right above a set of healthy leaves or a lateral bud. Work your way around the whole shrub, taking off every faded bloom you find. For an average-sized plant, this usually takes fifteen to twenty minutes — easy enough to fold into your regular garden routine during the flowering season.
Beyond the extra blooms, keeping up with deadheading just makes your shrub look better. A spirea dotted with brown, dried-out seed heads can look tired and neglected, even if the foliage underneath is perfectly healthy. Staying on top of it every week or two during bloom time keeps things looking tidy and well cared for. There’s another practical bonus too: by stopping seed formation, you cut down on volunteer seedlings popping up around the base of the plant, which can crowd things out and compete for water and nutrients if left unchecked.
Method Two: Light Shaping After Flowering
Light shaping — sometimes called tipping or tidying — is about removing the outermost branch tips to clean up the shrub’s overall form and encourage a fuller, more compact look. The best time to do this is right after your spirea finishes its main bloom, while it’s still actively growing and ready to push out new lateral shoots in response to being trimmed. For spring bloomers like bridal wreath, that means getting in there shortly after the white flowers fade in late spring or early summer. For summer bloomers, aim for sometime after the main color show winds down in midsummer.
The technique is pretty intuitive, even if you’ve never done it before. With clean, sharp hand pruners, take off about two to six inches from the tips of the outermost branches, cutting just above a leaf node or lateral bud. You’re not going for a dramatic size reduction here — it’s more of a gentle refinement, tidying up the silhouette and reining in any stems that have gotten too long or out of balance. Step back often to see how things look, and take a walk around the whole shrub before you start so you can spot any areas that look lopsided or need extra attention.
One of the real payoffs with light shaping is what happens in the weeks after — each cut you made prompts the plant to send out multiple new shoots from below, which builds a denser, fuller look over time. If your spirea has started looking leggy or sparse, with long whippy stems and foliage bunched only at the tips, this branching response is exactly what you’re after. Building up a stronger internal structure through regular tipping also supports better flowering in the years ahead. Without any pruning at all, spireas can gradually produce fewer and fewer flowers, so even a light touch every year or two makes a real difference.
Method Three: Annual Renovation Pruning for Summer Bloomers
Annual renovation pruning is a more substantial cut — you’re taking your summer-blooming spirea back significantly each year, usually in late winter or very early spring before any new growth appears. This works so well because summer-blooming spireas, including the whole Spiraea japonica group, bloom on new wood they produce during the current season. Cut them back hard in late winter, and the plant responds by pushing out vigorous new stems that will be loaded with blooms come early summer. It’s essentially a reset, clearing out the older, less productive wood before it has a chance to accumulate and drag down the plant’s flowering performance over time.
How far back you cut depends on the size and condition of the shrub. For smaller cultivars, taking the whole plant down to six to twelve inches above the ground is pretty standard and gets great results. Larger varieties might warrant leaving twelve to eighteen inches of stem to give new growth something to work from. Either way, use sharp, clean loppers or pruning shears and aim for smooth cuts just above an outward-facing bud or branch junction. Try to avoid leaving stubs — they can invite disease and don’t regenerate new growth nearly as well as cuts made close to a healthy bud.
The results of doing this consistently year after year are genuinely impressive. Regularly renovated shrubs tend to produce noticeably more flowers than those left to their own devices, because all those vigorous new stems each carry multiple flower clusters. The foliage often looks better too, especially on varieties like ‘Goldflame’ and ‘Magic Carpet’ where the colorful leaves are half the appeal. In the weeks right after a hard pruning, the shrub will look pretty bare and stark — that’s completely normal and nothing to worry about. Give it four to six weeks of warming spring temperatures and you’ll see an explosion of new growth that makes the bare phase feel like a distant memory.
Method Four: Rejuvenation Pruning for Overgrown or Neglected Shrubs
Rejuvenation pruning is the most drastic of the four methods, and it’s really meant for spireas that have gotten away from you — plants that are severely overgrown, choked with old woody canes, or that have simply stopped blooming well despite regular care. Over time, even a reasonably well-maintained spirea can develop a dense tangle of thick, aging wood at its center that chokes airflow, invites pests and disease, and produces fewer flowers with each passing year. Rejuvenation pruning tackles all of that at once by cutting the entire shrub back to just a few inches above the ground and letting it start fresh from the roots.
Timing matters here, and the right window depends on which type of spirea you’re working with. For summer bloomers, late winter or early spring just before new growth kicks in is ideal — the plant will have the whole season to rebuild and might even manage a few flowers that same year. For spring bloomers, you’re facing a bit of a trade-off. Pruning in late winter means giving up that season’s flowers entirely, while waiting until right after flowering lets the shrub recover for a full season but means tolerating one more year of poor performance. Most gardeners opt to prune spring bloomers right after the flowers fade, which minimizes disruption to the garden’s overall look.
Once you’re done, the shrub will look like a collection of short stumps poking out of the ground — which can be a little alarming if you’ve never seen it before. Trust the plant. Spireas have a remarkable ability to regenerate from their root system, and within a few weeks you’ll see new shoots pushing up from the base and from the remaining stubs. To give it the best possible start, apply a balanced slow-release fertilizer around the base, water deeply, and lay down two to three inches of organic mulch to hold moisture and keep the soil temperature steady. By midsummer, you’ll likely be amazed at how far it’s come.
Essential Tools and Best Practices for Pruning Spirea
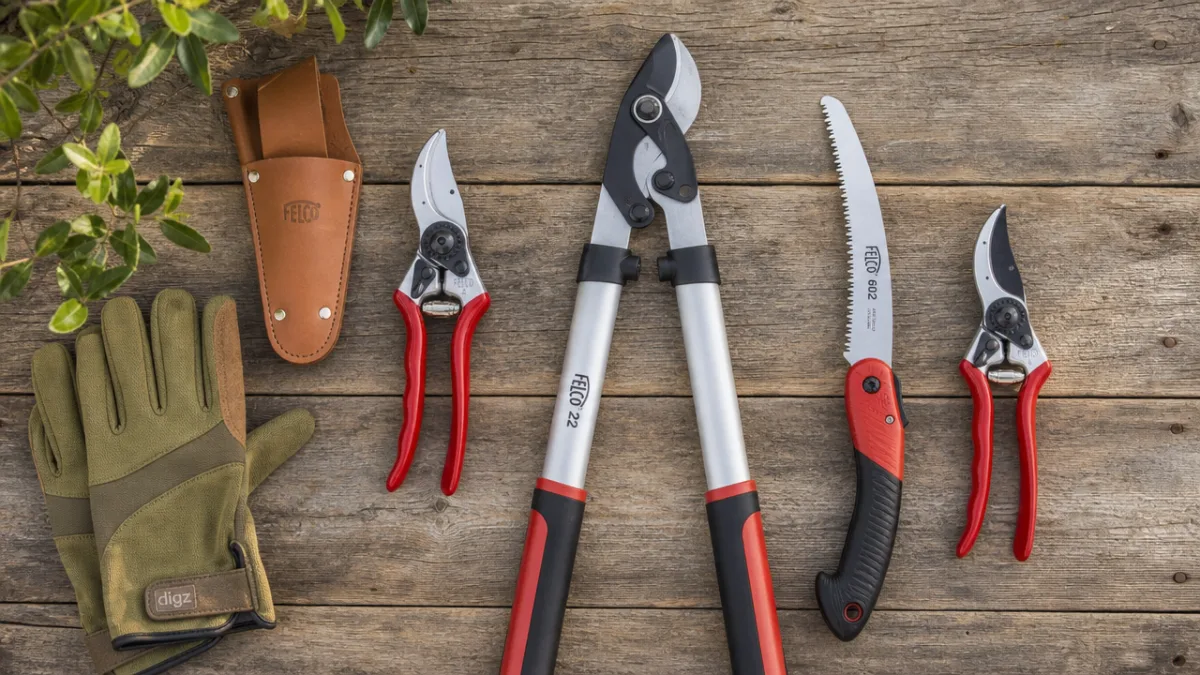
The right tools genuinely make a difference when it comes to pruning spirea — not just for your own comfort, but for the health of the plant. A good pair of bypass hand pruners is the most important thing you can have. They cut with a scissor-like action that produces clean, smooth cuts on stems up to about half an inch thick. Bypass pruners are a much better choice than anvil-style pruners, which crush the stem as they cut and can cause more tissue damage than necessary. For thicker, older canes during rejuvenation pruning, a pair of long-handled loppers will save your wrists and let you cut through tough wood cleanly without a lot of effort.
Tool hygiene is one of those things that’s easy to overlook but really does matter. Fungal spores and bacterial pathogens can hitch a ride on your pruner blades and travel from one plant to the next, potentially spreading disease through your whole garden without you realizing it. Before you start working on any shrub — and especially when switching from a plant that looks diseased to a healthy one — wipe your blades down with a disinfectant solution. A one-to-nine bleach-to-water mix works well, and so does seventy percent isopropyl alcohol. It takes maybe ten seconds and can save you a lot of headaches down the road.
A few general best practices are worth keeping in mind no matter which pruning method you’re using. Make your cuts at a slight angle — around forty-five degrees — just above a healthy bud or lateral branch. The angle lets water run off rather than pool on the cut surface, which lowers the risk of rot or fungal problems. Don’t prune when the plant is already stressed from drought, and steer clear of pruning in late summer or fall, since that can push new growth that won’t have time to harden off before the first frost. And when you do remove any diseased material, bag it up and put it in the trash rather than the compost bin — you don’t want those pathogens cycling back into your garden.
- Hand Pruners: Use bypass pruners for stems up to half an inch in diameter; clean blades before use and keep them sharp for smooth cuts.
- Loppers: Ideal for thick, woody canes during rejuvenation pruning; long handles provide extra leverage and reduce hand fatigue.
- Pruning Saw: Occasionally useful for the oldest, thickest canes at the base of very mature, heavily neglected shrubs.
- Gardening Gloves: Protect your hands from scratches and blisters; choose a pair that allows adequate dexterity for precise work.
- Disinfectant Solution: Always clean tools between plants to prevent the spread of disease; bleach or isopropyl alcohol both work effectively.
Seasonal Timing Guide and Aftercare for Pruned Spireas
Getting the timing right might be the single most important factor in whether your pruning efforts pay off with a spectacular bloom display or a quiet season of mostly green leaves. The key distinction to understand is the difference between spring-blooming and summer-blooming spireas, because these two groups flower in fundamentally different ways — and that dictates everything about when you should and shouldn’t pick up your pruners. Spring bloomers like bridal wreath (Spiraea prunifolia) and Vanhoutte spirea (Spiraea x vanhouttei) bloom on old wood, meaning the flower buds form on stems the plant grew the previous season. Prune those stems in late winter or early spring, and you’re cutting off that season’s entire flower show before it ever happens.
For spring-blooming spireas, the sweet spot is a two-to-four-week window right after they finish flowering, usually sometime in late spring or early summer depending on your location and the specific variety. At that point the bloom cycle is done, but there’s still plenty of growing season left for the shrub to put on new wood that will carry next year’s buds. You can remove as much old or woody growth as you like during this window without sacrificing this year’s flowers or next year’s display. Summer bloomers are much more forgiving on timing — since they bloom on new growth produced each season, you can cut them back in late winter or early spring without losing a single flower.
Once your pruning is done, a little aftercare goes a long way toward helping the shrub recover quickly and perform its best. Water deeply — you want moisture getting down eight to ten inches into the soil — and keep things consistently moist for the first few weeks while the plant is actively pushing out new roots and shoots. Work a balanced granular or shrub-specific fertilizer into the soil at the drip line following the package directions, then finish with a two-to-three-inch layer of organic mulch like shredded bark or composted wood chips around the base of the plant. That mulch will hold moisture, buffer soil temperature, and slowly improve your soil as it breaks down. Take good care of your spirea after pruning, and it will reward you with season after season of the kind of flowering display that’s made these tough, beautiful shrubs a fixture in home gardens for generations.








What do you think?
It is nice to know your opinion. Leave a comment.