










Stop Spending $$$ on Luxury Planters! Make Stunning DIY Versions Instead
Why Luxury Planters Are Overpriced (And What You’re Really Paying For)
Walk into any home décor boutique or scroll through a high-end garden center’s website, and you’ll quickly notice that planters have become one of the most aggressively marked-up items in the entire home and garden industry. A simple concrete pot that costs a retailer a few dollars to manufacture can easily sell for $80, $120, or even upward of $200 once it carries the right brand name or sits on the right shelf. The truth is, you are paying far more for perceived prestige and clever marketing than for any actual craftsmanship or material quality.
The materials used in most luxury planters — concrete, terracotta, fiberglass, and ceramic — are remarkably affordable in their raw forms. A bag of Portland cement costs a few dollars. A sheet of fiberglass resin doesn’t break the bank. What drives the price into the stratosphere is the labor markup, the retail overhead, the shipping costs for heavy items, and the simple fact that home décor brands know their customers are emotionally invested in making their spaces look beautiful. That emotional investment is the real product being sold.
Understanding this gap between production cost and retail price is genuinely empowering. Once you realize that the gorgeous fluted terracotta planter you’ve been eyeing for $150 can be replicated at home for under $15 in materials, the entire landscape of home decorating shifts. DIY planters are not a compromise — they are a smarter, more creative, and deeply satisfying alternative that puts you fully in control of size, color, texture, and finish.
The Best DIY Planter Materials You Probably Already Have
One of the most liberating discoveries in the world of DIY planters is that incredible results don’t require a shopping spree at a specialty craft store. Many of the best planter materials are already sitting in your home, garage, or recycling bin. Wooden crates, old colanders, plastic buckets, worn-out boots, galvanized tin cans, wicker baskets, and even cardboard tubes have all been transformed into genuinely beautiful planters by creative gardeners around the world. The key is learning to see potential rather than limitation.
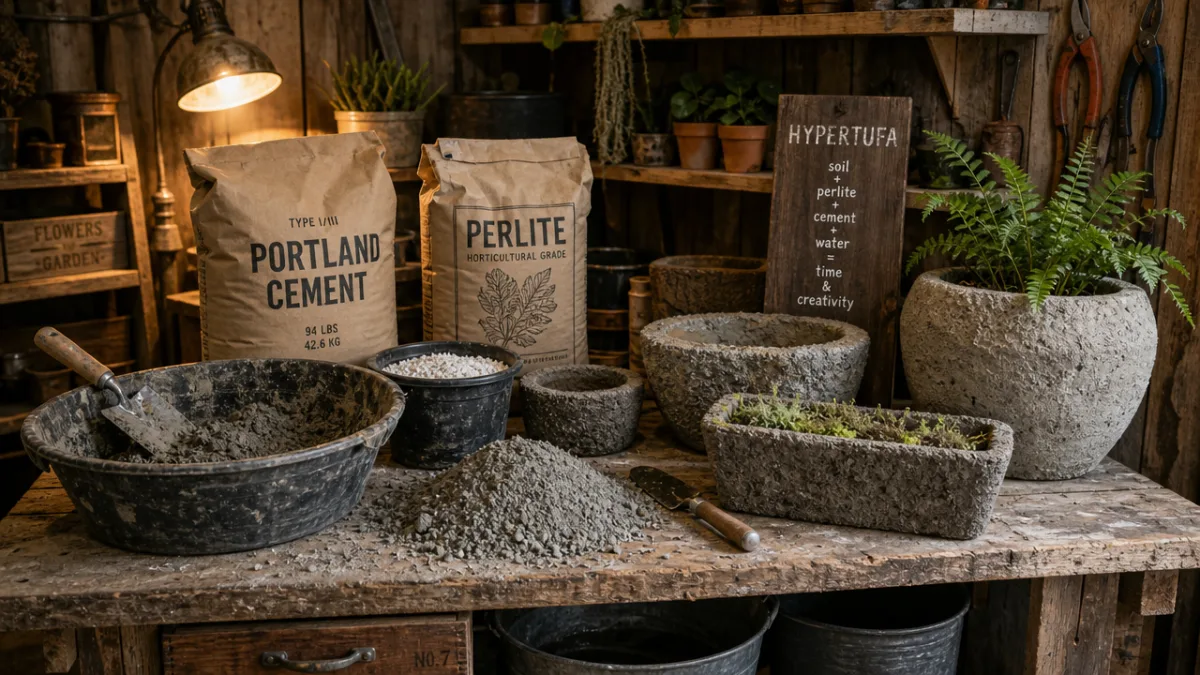
For those who want a more polished, intentional look, a short list of inexpensive materials opens up an enormous range of possibilities. Hypertufa — a mixture of Portland cement, peat moss, and perlite — creates a rustic, stone-like finish that looks wildly expensive. Air-dry clay is endlessly workable and surprisingly durable when sealed properly. Expanding foam spray can be carved and painted to mimic everything from weathered stone to aged bronze. Each of these materials costs a fraction of what you’d spend on a single boutique planter.
Paint and finish treatments deserve their own moment of recognition, because they are perhaps the single most powerful tool in the DIY planter toolkit. A can of spray paint in aged bronze, a tube of joint compound applied with a brush to create texture, a wash of diluted white paint for a limewashed effect — these simple techniques can transform a $2 plastic pot from the dollar store into something that looks custom-made. The surface treatment is often what separates a planter that looks homemade from one that looks like it came from an artisan studio.
Five Easy DIY Planter Projects for Any Skill Level
Whether you’ve never picked up a craft tool in your life or you’re a seasoned maker looking for a new weekend project, there is a DIY planter technique perfectly matched to your skill level. Starting simple doesn’t mean settling for less — some of the most beautiful planters come from the most straightforward techniques. The goal is always to create something you’re genuinely proud to display, and that goal is entirely achievable regardless of experience.
Here is a quick overview of five approaches organized from beginner to more ambitious, so you can find your perfect starting point and grow from there as your confidence builds.
- Painted Terracotta Makeover (Beginner): Purchase inexpensive plain terracotta pots from any garden center and transform them with chalk paint, geometric tape designs, or a simple limewash effect. Seal with outdoor Mod Podge or a clear acrylic sealer for weather resistance. Total cost per pot: $3–$6.
- Concrete Fabric Draping (Beginner–Intermediate): Dip an old cloth or burlap piece into a concrete slurry, drape it over an upturned bowl, and let it harden into a soft, organic planter shape. Each one is completely unique and looks like it costs hundreds of dollars.
- Hypertufa Trough (Intermediate): Mix Portland cement, peat moss, and perlite in equal parts with water until you get a thick, workable consistency. Press the mixture into a mold — even a cardboard box works — and allow it to cure for several weeks. The result is a beautifully aged, stone-like trough perfect for succulents or herbs.
- Upcycled Wooden Crate Planter (Beginner): Line a simple wooden crate with landscape fabric, fill with potting mix, and stain or paint the exterior for a chic farmhouse look. Add hairpin legs for an elevated, modern aesthetic that rivals anything sold in boutique home stores.
- Faux Stone Foam Planter (Intermediate): Carve expanding foam into a planter shape, then coat it with a mixture of cement, sand, and water. Once dry, paint with layered stone-colored acrylics for a result that’s shockingly realistic and weighs almost nothing.
Each of these projects can be completed in a single afternoon or weekend, requires minimal tools, and produces results that will genuinely impress guests who assume you shopped at an expensive boutique. More importantly, every single one of them gives you the freedom to customize size, color, and finish to match your exact space and aesthetic vision — something a mass-produced retail planter can never offer.
How to Achieve High-End Finishes on a Budget
The single biggest difference between a DIY planter that looks homemade and one that looks like a designer piece is the finish. Skilled makers know that the final surface treatment is where the magic happens, and the good news is that high-end finishes are entirely achievable with inexpensive, widely available materials. Understanding a few key techniques can permanently elevate everything you make, regardless of what the underlying material actually is.
Texture is your most powerful ally. Real luxury planters draw the eye because their surfaces have depth — they’re not flat and uniform. You can replicate this at home by applying joint compound, sand-mixed paint, or even crumpled plastic wrap to wet paint to create visual complexity. A technique called dry brushing, where you apply a small amount of a lighter paint color over a darker base using a nearly dry brush, instantly adds dimension and makes any surface look aged, weathered, and artisanal.
Color layering is equally important and often overlooked by beginners. Rather than applying a single coat of paint, professional-looking results come from building up multiple thin layers in slightly different but complementary shades. For a terracotta-inspired pot, you might start with a burnt orange base, add a wash of raw sienna, dry brush with a creamy beige, and finish with a subtle white highlight on the rim and raised edges. This multi-step process takes only a little extra time but produces results that are genuinely difficult to distinguish from expensive artisan ceramics.
Essential Finishing Supplies to Keep on Hand
- Chalk paint in a range of neutrals and earth tones
- Acrylic craft paint for detail work and dry brushing
- Premixed joint compound for adding texture
- Outdoor Mod Podge or clear acrylic sealer for weather protection
- Fine and medium grit sandpaper for smoothing and distressing
- Natural sea sponges for blending and adding organic texture
- Painter’s tape for crisp geometric designs
Sealing is the step most beginners skip, and it’s also the step that makes the difference between a planter that lasts one season and one that looks great for years. Always apply at least two coats of a weatherproof sealer to any planter that will live outdoors or be in contact with moist soil. For planters made from porous materials like hypertufa or painted terracotta, sealing the interior as well as the exterior will help prevent moisture from breaking down your work over time.
Drainage, Soil, and Plant Health: The Practical Side of DIY Planters
Creating a beautiful planter is only half the equation — the other half is making sure it actually supports healthy plant growth. This is an area where many enthusiastic makers stumble, because it’s easy to get so caught up in aesthetics that the functional requirements get overlooked. A planter without adequate drainage, no matter how gorgeous, can quickly become a death sentence for the plants inside it, turning a proud creative achievement into a source of frustration.
Drainage is the single most important functional element of any planter. Most plants — with the notable exception of certain bog or aquatic species — cannot tolerate sitting in waterlogged soil, which leads to root rot and rapid decline. When constructing DIY planters from solid materials like concrete or hypertufa, always plan for drainage holes from the start. Drilling drainage holes after the fact is possible but more difficult. For planters made from softer materials like wood or fabric, drainage typically happens naturally, but it’s worth adding a layer of coarse gravel at the bottom to improve drainage further.
Soil selection matters just as much as drainage, and the right mix depends entirely on what you plan to grow. A general-purpose potting mix works well for most flowering plants and vegetables, but succulents and cacti need a much more porous, gritty mix that drains almost instantly. Herbs appreciate a mix with added perlite for aeration. For statement tropical plants like monstera or bird of paradise, a rich mix with some added compost and moisture-retaining coir will keep them thriving. Understanding your plant’s needs before you fill the pot is a simple habit that dramatically improves your success rate.
Quick Reference: Soil Mixes by Plant Type
- Succulents and Cacti: 50% potting mix, 50% coarse sand or perlite for fast drainage
- Herbs and Vegetables: Standard potting mix with added perlite and slow-release fertilizer
- Tropical Houseplants: Rich potting mix with coir, perlite, and a handful of worm castings
- Flowering Annuals: High-quality general potting mix with moisture-retaining crystals for summer heat
- Trees and Shrubs: Mix of native soil and potting mix with added compost for nutrients and structure
It’s also worth thinking about the weight of your finished planter, especially if it will live on a balcony, elevated deck, or be moved seasonally. Concrete and hypertufa planters can be extraordinarily heavy once filled with soil, so plan ahead by placing them on wheeled plant dollies or positioning them permanently before filling. Lightweight alternatives like foam-based planters or fabric grow bags offer nearly all of the aesthetic appeal with a fraction of the weight, making them ideal for upper-floor outdoor spaces with structural load limits.
Displaying Your DIY Planters: Styling Tips for Maximum Impact
Even the most beautifully crafted planter can fall flat if it’s not displayed thoughtfully. Styling is the final, often underestimated step in the entire DIY planter journey, and it’s where your creative vision comes fully to life. The good news is that effective plant styling follows a few consistent principles that, once understood, make the process feel intuitive and genuinely enjoyable rather than intimidating.
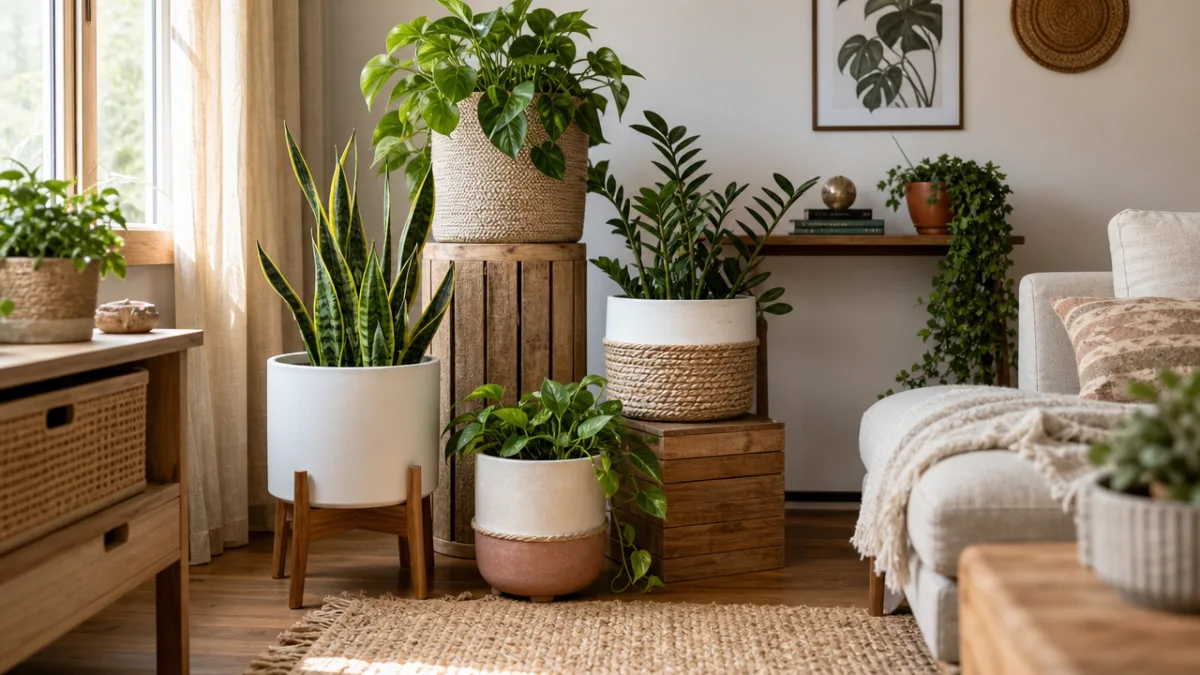
Grouping planters in odd numbers — threes, fives, or sevens — creates a naturally pleasing arrangement that the eye reads as dynamic and intentional. Vary the heights within any group by using plant stands, inverted pots, or stacked books to create visual levels. Contrast is your friend: pair a smooth, modern planter with a rustic textured one, or place a trailing plant next to an upright architectural specimen. These small decisions make an enormous difference in how polished and considered the overall display looks.
Think about your planters as part of a larger design story rather than isolated objects. A cluster of terracotta pots in warm, earthy tones feels cohesive and Mediterranean. A collection of matte black concrete planters reads as minimalist and contemporary. Matching your planter aesthetic to your existing décor — whether that’s cottagecore, industrial, coastal, or mid-century modern — creates a sense of intentionality that elevates the entire space and makes your DIY work look genuinely professional.
Styling Ideas for Different Spaces
- Entryway: A pair of matching tall planters flanking the front door creates a grand, welcoming statement. Try hypertufa columns or oversized painted terracotta for maximum impact.
- Living Room Shelf: Mix small painted pots in a cohesive color palette with trailing plants, air plants in wire cradles, and propagation vessels for a curated, layered look.
- Outdoor Patio: Layer a variety of planter heights and sizes across a corner of your patio, anchored by one large statement planter and surrounded by smaller coordinating pots.
- Kitchen Windowsill: A row of matching small upcycled tins or uniform terracotta pots planted with culinary herbs is both functional and beautifully decorative.
- Bedroom: A single large, beautifully finished planter with a dramatic plant like a snake plant or fiddle leaf fig creates a calm, spa-like focal point without cluttering the space.
Finally, remember that your DIY planters are a reflection of your own creativity and taste — and that is something no amount of money can buy from a store. When a guest admires a planter in your home and you get to say “I made that,” the pride and joy of that moment far outweighs the satisfaction of simply buying something beautiful. The DIY path asks a little more of you in time and effort, but it returns something genuinely priceless: a home that is truly, authentically yours.








What do you think?
It is nice to know your opinion. Leave a comment.