










Matchbook Mirror: A Creative DIY Project That Transforms Vintage Matchbooks Into Stunning Home Décor
What Is a Matchbook Mirror?
A matchbook mirror is one of those craft projects that feels almost too clever — it sits right at the intersection of nostalgia and modern home décor in a way that just works. The idea is beautifully simple: you collect vintage or decorative matchbook covers, arrange them in a mosaic pattern around a mirror frame, and end up with something that’s both functional and genuinely eye-catching. Every single matchbook brings its own little slice of history with it, so the finished piece is unlike anything you could ever buy off a shelf.
What makes this project so fun to look at is the sheer variety of matchbook designs out there. Mid-century supper clubs, roadside motels, novelty shops, grand hotel chains — businesses of every kind used matchbooks as tiny billboards for decades, which means each cover is essentially a miniature piece of graphic design history. When you bring 50 or 60 of them together on a mirror frame, you get this incredible tapestry of color, type, and illustration that feels completely alive.
And beyond how it looks, a matchbook mirror is a surprisingly personal thing to make. If you already collect matchbooks — from travels, family estates, flea markets, wherever — each one around that mirror carries a memory attached to it. Even if you’re starting fresh, there’s something genuinely addictive about hunting down the most interesting or colorful covers to bring your vision together. When it’s done, the mirror doesn’t just reflect the room. It reflects you.
The History of Matchbooks and Their Collectible Appeal
The matchbook as we know it was patented in 1892 by a man named Joshua Pusey, and within a few decades it had become one of the most common advertising tools around. Restaurants, hotels, bars, insurance companies, political campaigns — even funeral homes — all handed out custom matchbooks as a cheap and cheerful way to get their name in people’s pockets. By mid-century, production was in full swing, with intricate lithographic printing turning these little paper sleeves into tiny works of art, distributed by the millions.
The hobby of collecting them, which goes by the wonderful name of phillumeny, grew right alongside their popularity. Collectors chased rare covers, complete sets, unusual shapes, and books from notable historical moments — World’s Fairs, presidential inaugurations, famous ocean liners, iconic Hollywood spots. The graphic styles shifted with the times too, moving from ornate Victorian lettering to bold Art Deco geometry, then through cheerful mid-century modern and on into the psychedelic era of the ’60s and ’70s.
Today, vintage matchbooks are easy to find at antique stores, estate sales, flea markets, and online. While genuinely rare specimens will cost you, the everyday stuff — matchbooks from neighborhood diners, roadside motels, local businesses — often goes for just a few cents each. That affordability, combined with how visually rich they are, is exactly what makes them such a natural fit for a decoupage-style mirror project.
Materials and Tools You Will Need
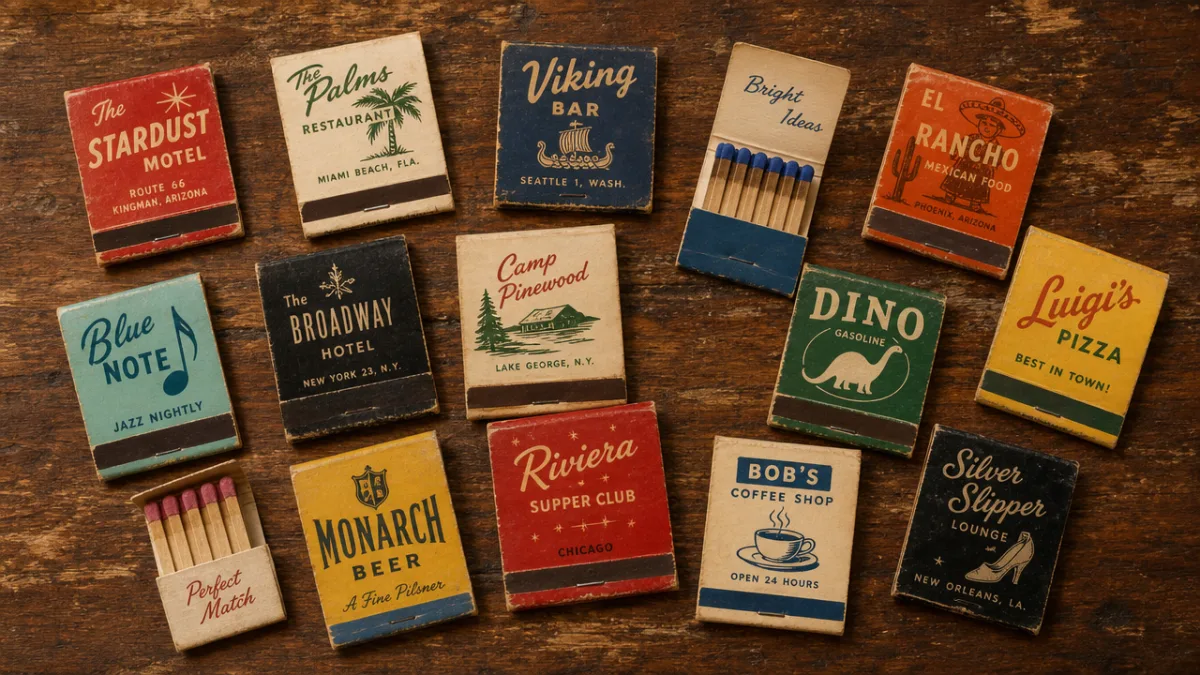
You don’t need much to get started, and a lot of what you do need is probably already around the house. The main thing, obviously, is a collection of matchbook covers. Most people find that having 40 to 60 on hand before you start is a good baseline — it gives you enough to play with layouts and work out color arrangements without suddenly running out mid-project. Go bigger if your frame is large.
Beyond the matchbooks, you’ll want a mirror with a solid, flat wooden frame — the wider the frame, the more display surface you have to work with. An unfinished wooden frame from a craft store is ideal since it takes adhesive so well, but a thrifted mirror with a wooden frame works just as nicely and often comes in more interesting shapes. You’ll also need a decoupage medium like Mod Podge (matte or gloss, your call), a foam brush for applying it, and a craft knife with a cutting mat for trimming covers to fit around corners and edges.
Here’s a full rundown of what you’ll typically need:
- One mirror with a flat wooden frame, at least 2 inches wide on each side
- 40 to 80 vintage or decorative matchbook covers, removed from the books and flattened
- Decoupage medium such as Mod Podge in matte or glossy finish, depending on your preference
- A foam brush and a soft-bristle paintbrush for detail work
- Craft scissors and a sharp craft knife with a self-healing cutting mat
- Sandpaper in 120 and 220 grit for surface preparation
- A ruler and pencil for planning your layout
- Optional: a clear polyurethane or varnish spray for extra durability and a professional finish
It’s worth spending a little time prepping your covers before you dive in. Carefully remove them from the matchbooks, cutting along the stapled spine if needed, then flatten each one under a heavy book for a few hours to get rid of any curl. As for the striking strips and leftover match heads — you can remove them for a cleaner look or keep them for authenticity. Honestly, both approaches look great; they just give you a slightly different feel in the end.
Step-by-Step Instructions for Creating Your Matchbook Mirror
Start by getting the frame surface ready. If you’re working with bare wood, give it a light sanding with 120-grit paper to open up the grain and help the adhesive grip, then wipe off the dust with a damp cloth and let it dry completely. If the frame already has paint or varnish on it, a quick pass with 220-grit paper to dull the surface is all you need. At this point, a lot of people like to paint the frame a neutral base color — it means any tiny gaps between covers will blend in instead of standing out in the finished piece.
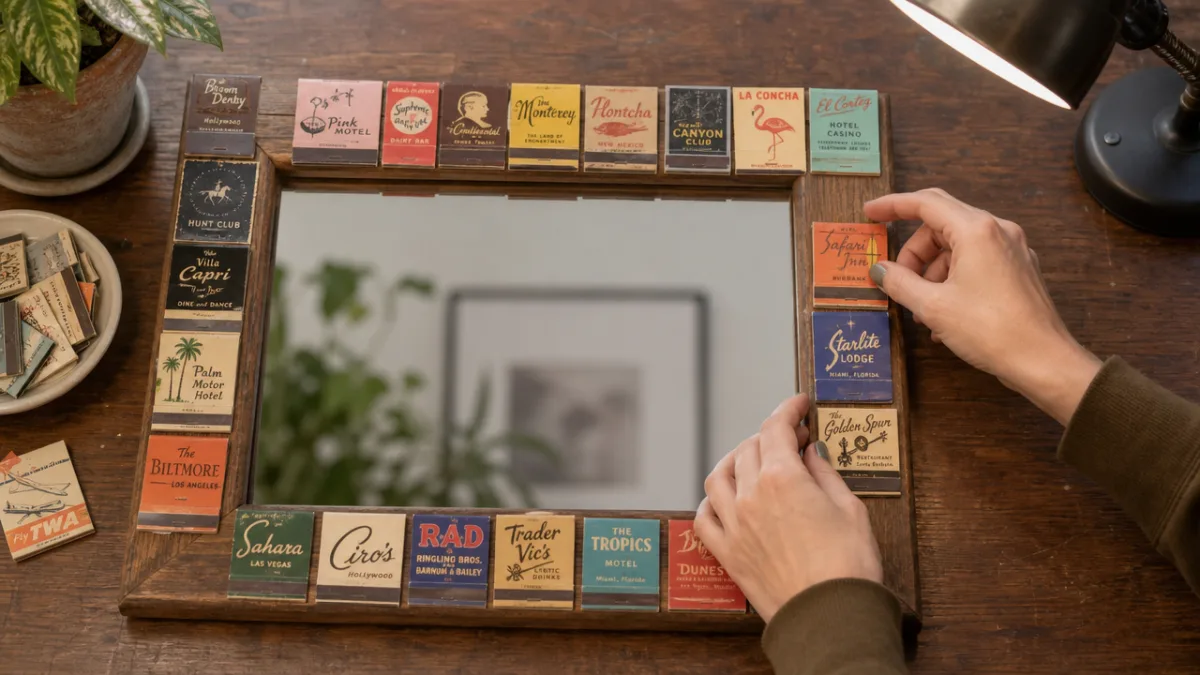
Then comes the fun part: figuring out your layout. Spread your flattened covers out on a flat surface next to the mirror and start playing with arrangements. You might go by color for a gradient look, mix everything up for a more eclectic collage, or pick covers that share a theme — a decade, a type of establishment, a geographic region. Step back and look at it from a few feet away before you commit to anything. Compositions that look great up close don’t always read the same way from across the room, and it’s much easier to rearrange now than after you’ve broken out the Mod Podge.
When you’re happy with the arrangement, start sticking things down. Work in small sections — brush a thin, even layer of decoupage medium onto the frame, press the cover firmly into place, and smooth out any bubbles from the center outward. Give each section a few minutes to tack up before moving on so nothing slides around. At the corners and edges, trim your covers with the craft knife so they either wrap cleanly around the frame edge or butt neatly up against the adjacent piece.
Once everything is in place and dry — give it an hour or two to be safe — apply a finishing coat of decoupage medium over the entire decorated surface. This seals everything, protects the printed covers, and pulls the whole thing together visually. Two to three finishing coats is the sweet spot, letting each one dry fully before adding the next. If the mirror is going somewhere with humidity, like a bathroom or kitchen, a light spray of clear polyurethane over the final coat will give you real peace of mind for the long haul.
Design Variations and Creative Approaches
One of the best things about this project is how much room it leaves for you to make it your own. The basic method — matchbook covers, adhesive, mirror frame — stays the same, but the design choices you make about color, theme, and arrangement can lead you somewhere completely different from the next person doing the exact same project. A mirror covered entirely in black-and-white matchbooks from classic New York City restaurants has a totally different energy from one packed with bright, chaotic covers from roadside diners across the Southwest, even though both used identical techniques.
Thematic curation is probably the approach that gives a finished mirror the strongest sense of identity. A travel-themed piece might pull only from hotels, airlines, and restaurants in one particular country or city, turning the mirror into a kind of souvenir. Food and drink enthusiasts might stick exclusively to bars and cocktail lounges. Others go all-in on a specific era — only 1950s covers, say — and end up with something that feels genuinely period-specific rather than just “vintage.” Whatever story you tell through your selections, that curatorial layer is what lifts the project from craft project to personal statement.
Color-blocking is another direction worth exploring, especially if you want something that reads as contemporary rather than nostalgic. Sort your covers into color families — reds and oranges here, blues and greens there — and arrange them in defined bands or quadrants around the frame. Done well, it creates a bold, almost geometric composition that looks deliberate and graphic rather than casually assembled. You’ll need a bigger collection to pull this off since you need enough of each color to actually fill the planned sections, but the results are striking and sit really comfortably in modern interiors.
Don’t overlook what the covers themselves bring to the table physically, either. Unlike flat paper, matchbook covers have a slight thickness and texture that adds real tactile interest to the surface. Some crafters leave a few covers partially folded rather than flattening them fully, which creates a subtle relief effect across the frame. Others go further and incorporate whole intact matchbooks — matches still inside — for maximum texture, though that takes a bit more care with the adhesive to make sure everything bonds properly.
Displaying Your Matchbook Mirror and Styling It in Your Home
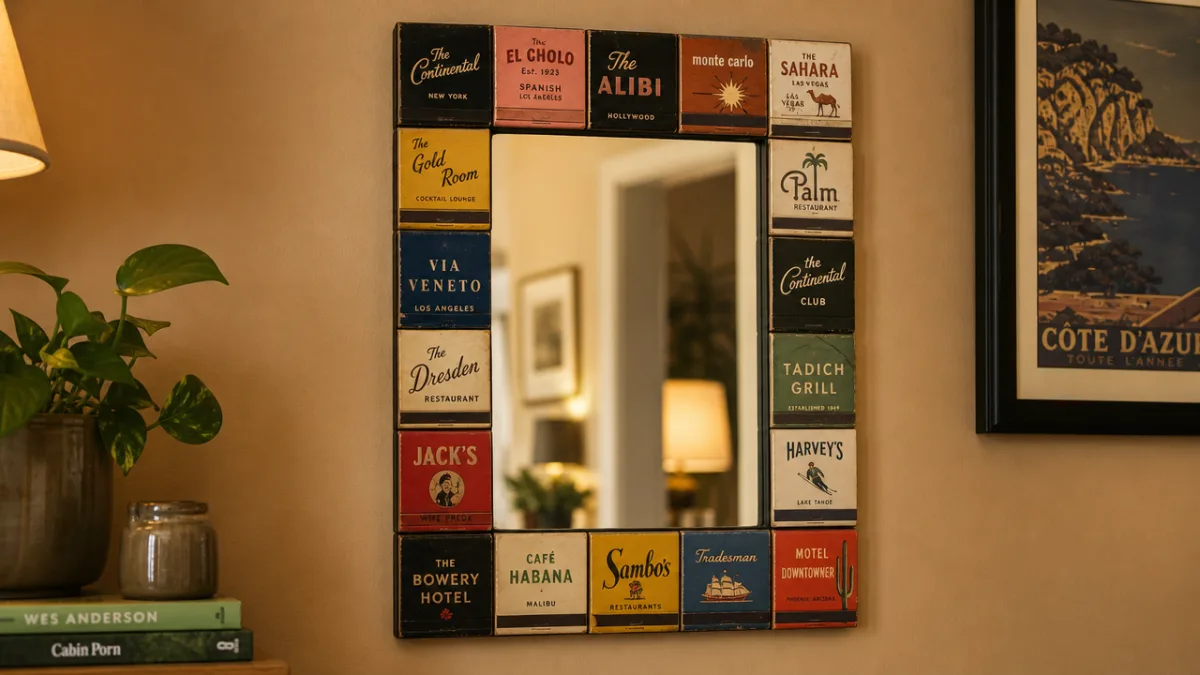
Where you hang the finished mirror matters more than you might think. Matchbook covers are full of small-scale detail — tiny type, little illustrations, intricate color work — so the mirror really comes alive in spots where people will naturally linger and look closely at it. An entryway, a powder room, the wall behind a bar cart, a reading nook — these kinds of intimate spaces let visitors actually discover the individual covers rather than just registering the piece as “decorative thing on the wall.”
Your surrounding décor should play a role in where you land. A travel-themed mirror with a warm, earthy palette fits right into the kind of layered, collected interior full of maps, vintage prints, wooden furniture, and objects picked up from different corners of the world. A more graphic, color-blocked mirror with a tighter color scheme can absolutely hold its own in a cleaner, more contemporary space — hung above a console table or in a streamlined bathroom, it works as a real statement piece without feeling out of place.
Lighting is worth thinking about too. The decoupage surface has a subtle sheen, and the covers themselves are packed with visual information — both of which benefit from directional light rather than flat overhead illumination. A nearby wall sconce or a picture light will catch the surface texture and make the colors and graphics pop in a way that generic overhead lighting just won’t. Aim for a warm bulb in the 2700K to 3000K range; it plays beautifully with the vintage quality of the covers and gives the whole piece a warm, inviting glow that flat daylight or cool lighting would kill.
Tips for Sourcing Matchbooks and Building Your Collection
For a lot of people, finding the matchbooks is genuinely the most enjoyable part of the whole thing. The hunt takes you to flea markets, antique fairs, estate sales, thrift stores, and the deep, winding rabbit warren of online vintage marketplaces, and every outing has the potential for a great find you weren’t expecting. Going in with at least a loose aesthetic goal — a color palette, an era, a geographic angle, or just “the most visually interesting covers I can find” — helps you make quick decisions and keeps you from ending up with a pile of covers that don’t really work together.
Online, eBay, Etsy, and specialist ephemera dealers are your best bets for bulk buying. Lots of 50 to 200 assorted matchbooks come up regularly and often at very reasonable prices, giving you a big inventory to sort through and pick your favorites from. When you’re buying in bulk online, look carefully at the listing photos to get a real sense of condition. Some older matchbooks have serious fading, water damage, or wear — which might actually be part of the charm you’re going for, or might not be. Know what you’re buying before it shows up.
Local sourcing has its own rewards that online shopping can’t replicate. Antique malls and flea markets often have paper ephemera dealers who know their stuff and can point you toward better sources or flag covers that are particularly worth your attention. Estate sales are a goldmine, especially in areas with a strong mid-century restaurant or hospitality history. And don’t underestimate your own home — old matchbooks have a way of turning up in junk drawers, cigar boxes, and the backs of closets in houses that have been around for a few decades.
As the collection grows, keep things organized by color, theme, or era so you can see at a glance what you have and what you still need. A shallow box or a set of clear plastic sleeves works well for this. Once you’ve got enough to start, lay everything out together and just look at it for a while before you begin planning your layout. When you see all the covers as a group, relationships between colors, type scales, and graphic styles start to emerge on their own — and those relationships will often suggest arrangements you never would have thought of when you were picking each one out individually.








What do you think?
It is nice to know your opinion. Leave a comment.