










How To Reface Kitchen Cabinets: An Affordable Cabinet Update On A Budget
What Is Cabinet Refacing and Why Should You Consider It?
Cabinet refacing is the process of updating the exterior surfaces of your existing kitchen cabinets without tearing them out and starting from scratch. Instead of a full renovation, you replace or cover the cabinet doors, drawer fronts, and visible frame surfaces with new materials that give your kitchen an entirely fresh, modern look. The underlying cabinet boxes remain in place, which is exactly what makes this approach so cost-effective and practical for homeowners who are happy with their cabinet layout but not their cabinet appearance.
The financial difference between refacing and replacing cabinets is genuinely significant. A full kitchen cabinet replacement can cost anywhere between $15,000 and $30,000 or more depending on the size of your kitchen and the materials you choose. Refacing, by contrast, typically runs between $1,500 and $9,000, and a dedicated DIYer who takes on the project themselves can bring that cost down to just a few hundred dollars in materials. That kind of savings is hard to ignore, especially when the visual results can be nearly identical to a full replacement when done well.
Beyond the cost savings, cabinet refacing is also a far less disruptive project than a full kitchen gut-renovation. You are not dealing with demolition, dumpsters, or weeks without a functional kitchen. Most refacing projects can be completed over a single weekend or spread across a few evenings, meaning your family’s daily routine is minimally affected. For busy households, this practical advantage is just as appealing as the money saved, making refacing one of the most sensible upgrades a homeowner can make to their kitchen space.
Assessing Your Cabinets: Are They a Good Candidate for Refacing?
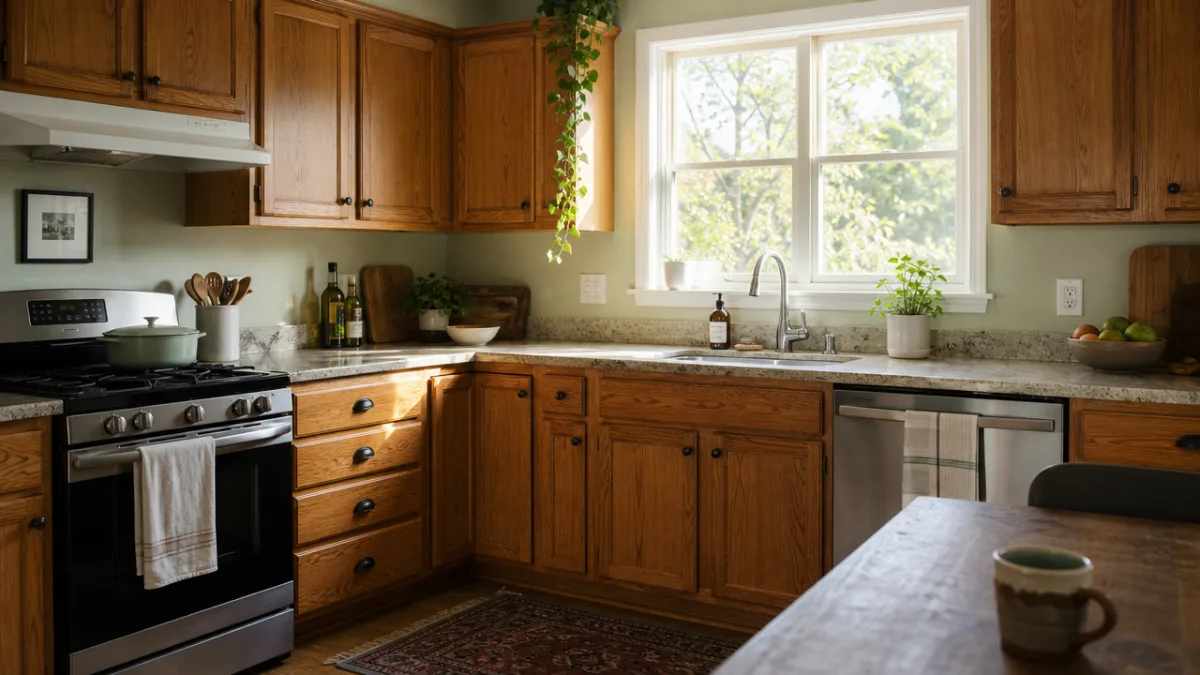
Before purchasing a single roll of veneer or a replacement door, you need to honestly evaluate the current condition of your cabinet boxes. Cabinet refacing works beautifully when the underlying structure is still solid, square, and free of water damage or rot. Open every cabinet, look inside the corners and along the bottom panels, and check for any signs of soft wood, mold, swelling, or structural instability. If the boxes themselves are in poor shape, refacing will only mask the problem temporarily, and you may end up spending money on a cosmetic fix that deteriorates quickly.
Check that your cabinet layout still works functionally for your household. Refacing preserves the existing configuration, so if you have always wished for more storage in a particular area, or if the placement of your cabinets simply does not suit your cooking habits, this is the moment to reconsider a full remodel instead. However, if your main complaints are purely aesthetic — the doors look dated, the finish is worn, or the style no longer matches your home’s decor — then refacing is almost certainly the right solution and an excellent use of your renovation budget.
Also consider the material of your existing cabinet boxes. Cabinets made from solid plywood or particleboard in good condition are both excellent candidates for refacing. Plywood accepts staples and adhesive reliably, while quality particleboard is equally stable. Avoid refacing if the particleboard has swelled from moisture exposure, as adhesives will not bond well to compromised surfaces and new doors may not hang level. Taking the time to do this initial assessment thoroughly will save you frustration and unexpected costs once the project is underway.
Gathering Your Materials and Tools for the Project
The materials you will need depend largely on the refacing method you choose. The two most common approaches for DIYers are peel-and-stick veneer sheets for the cabinet frames and new replacement doors for the front-facing elements. Veneer sheets are available in a wide range of wood grain finishes, solid colors, and even laminate styles, so there is something to suit virtually every design aesthetic. When purchasing veneer, always buy ten to fifteen percent more than your calculated measurements to account for cutting waste and any mistakes made during the application process.
For replacement cabinet doors and drawer fronts, you have several purchasing options. Home improvement stores like Home Depot and Lowe’s carry a standard selection of ready-to-paint or pre-finished cabinet doors in the most common sizes. Online retailers such as Barker Cabinet Doors or Conestoga Wood Specialties offer a much wider range of styles and custom sizing, often at surprisingly competitive prices. When ordering, measure your existing doors carefully and decide whether you want the new doors to match the original dimensions exactly or whether you would like to make any adjustments for a more updated look.
On the tool side, you will need a measuring tape, a utility knife with fresh blades, a J-roller or wallpaper smoother for pressing down veneer, a heat gun or hair dryer, sandpaper in a range of grits, wood filler, a level, a drill with bits sized for your chosen hardware, and painter’s tape. If you are painting any surfaces, you will also want a quality primer and cabinet-specific paint formulated for durability and a smooth finish. Having all of your tools organized and ready before you begin will make the workflow smoother and help you avoid frustrating mid-project supply runs.
Step-by-Step Process for Refacing Your Kitchen Cabinets
Begin the project by fully emptying your cabinets and removing all of the existing doors, drawer fronts, and hardware. Label each door and its corresponding cabinet opening with painter’s tape and a marker to keep track of sizing during the process. Once everything is removed, clean all cabinet frame surfaces thoroughly with a degreaser, as kitchen grease and grime will prevent veneer adhesive from bonding properly. Sanding the frame surfaces lightly with 120-grit sandpaper helps create a mechanical bond for the adhesive and ensures a more durable finish overall.
Next, apply the veneer sheets to the visible frame surfaces, starting with the larger horizontal pieces at the top and bottom before moving to the vertical stiles. Cut each piece slightly oversized, peel the backing, and press it firmly into place before trimming with your utility knife along the edges for a clean, precise finish. Use your J-roller to work out any air bubbles, pressing from the center outward. For peel-and-stick products, a gentle pass with a heat gun after application can dramatically improve adhesion and help the veneer conform to any slight surface irregularities without lifting at the edges.
Once the veneer is applied and trimmed, it is time to hang the new doors. Use a self-closing concealed hinge system for a clean, modern look, and take the time to read the installation instructions for your specific hinge brand carefully. Mount the hinge plates to the door first, then attach the door to the cabinet frame and use the hinge adjustment screws to dial in the alignment. Most modern hinges allow for three-axis adjustment, which makes it relatively easy to get every door perfectly level, evenly spaced, and flush with its neighbors even if your cabinets are not perfectly square.
- Remove all doors, drawers, and hardware and label each piece before setting aside.
- Degrease and lightly sand all cabinet frame surfaces before applying veneer.
- Apply veneer to horizontal surfaces first, then vertical stiles, trimming neatly as you go.
- Use a heat gun after application to improve adhesion and eliminate bubbles.
- Hang new doors using concealed hinges and adjust for level and even spacing.
- Attach drawer fronts with screws from inside the drawer box, shimming as needed for alignment.
- Install new hardware as the final step once all surfaces and doors are in their final position.

Choosing the Right Style, Finish, and Hardware
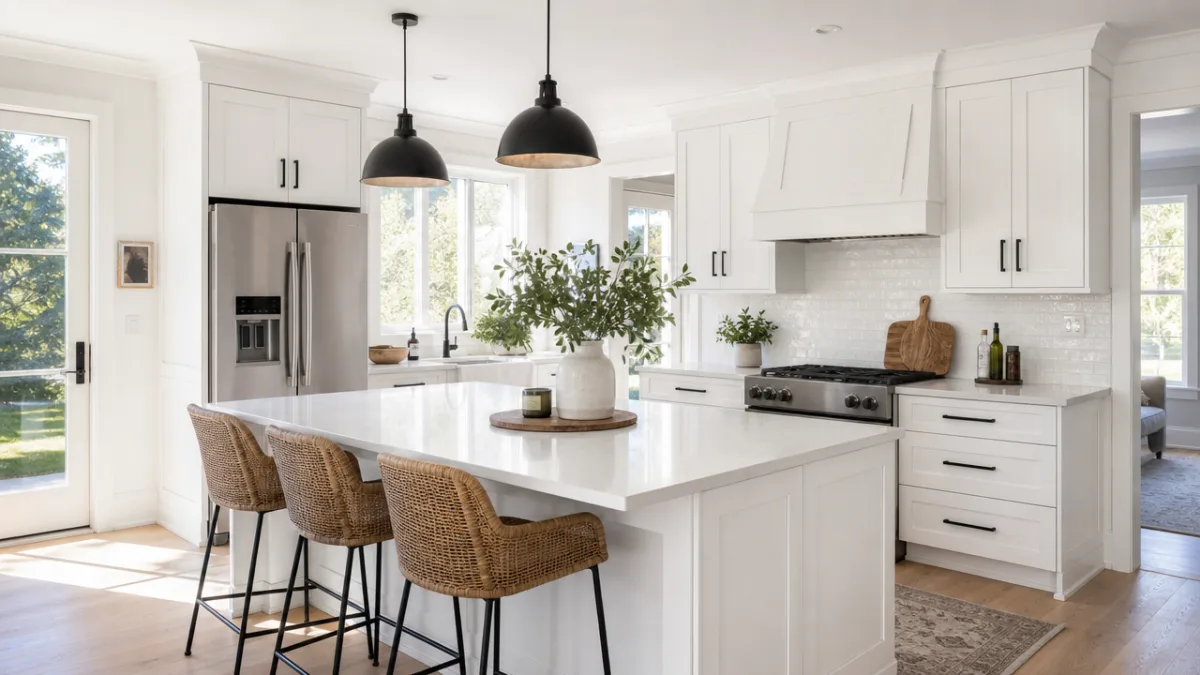
The style of cabinet door you select will largely define the final aesthetic of your kitchen, so this decision deserves careful thought. Shaker-style doors with their clean recessed panel construction have dominated kitchen design trends for well over a decade and remain the safest, most versatile choice for a timeless look. Flat-panel or slab-style doors lean toward a more contemporary, minimalist aesthetic that pairs beautifully with quartz countertops and modern fixtures. Raised-panel doors offer a more traditional feel and work well in farmhouse or transitional kitchens. Whatever style you choose, consistency is key — mixing door styles within the same kitchen rarely produces a cohesive result.
For finish options, you have the choice between pre-finished doors that arrive ready to hang, or unfinished doors that you prime and paint yourself. Pre-finished options save considerable time and often produce a more uniform result, especially for wood stain or thermofoil finishes that are difficult to replicate at home. However, painting unfinished doors yourself opens up a virtually unlimited color palette and can save a meaningful amount of money when ordering custom-sized doors. If you go the painting route, invest in a high-quality cabinet enamel or alkyd-based paint and use a mini foam roller for the smoothest possible application on flat panels.
Hardware is the jewelry of the kitchen and should never be treated as an afterthought. Replacing old brass or builder-grade hardware with brushed nickel, matte black, or unlacquered brass pulls and knobs is one of the fastest ways to modernize a kitchen’s appearance. Consider the scale of your hardware relative to your door size — a long bar pull on a tall upper cabinet door looks intentional and proportional, while a small knob on a large drawer front can look lost and underwhelming. Browse hardware online at retailers like Rejuvenation, Anthropologie, or even affordable options from Amazon to find a style that complements your chosen door profile without blowing your remaining budget.
Budget Breakdown and Tips for Saving Even More Money
Understanding where your money goes in a cabinet refacing project helps you make smarter purchasing decisions along the way. For a typical medium-sized kitchen with around twenty-five door and drawer fronts, you might expect to spend between $400 and $900 on replacement doors depending on size, style, and where you purchase them. Veneer sheets for the cabinet frames will likely run between $80 and $200 depending on your kitchen layout. New hinges, if you are replacing the full set, will add another $60 to $150. Hardware for the whole kitchen can range from $50 for basic options to $300 or more for premium pieces, and paint or primer adds another $40 to $80 to the total.
There are several genuinely effective strategies for trimming costs even further without sacrificing the quality of your results. Shopping end-of-season sales at home improvement stores can yield significant discounts on hardware. Ordering doors online and comparing prices across multiple retailers almost always beats in-store pricing. If some of your existing cabinet frames are in better cosmetic shape than others, you may not need to apply veneer everywhere — spot treating only the most visible or worn surfaces can cut your veneer costs substantially. Reusing your existing hinges is another cost saver, provided they are still in good working order and compatible with your new door thickness.
Consider also the tools you already own versus what you need to purchase or rent. A heat gun is an inexpensive investment that pays dividends on this project and many others around the home, while specialty tools like a professional brad nailer or spray gun can be rented rather than bought outright. Borrowing tools from friends or neighbors is another smart approach. And do not overlook the value of watching tutorial videos before you begin — understanding the process thoroughly before making your first cut or peeling your first veneer backing will prevent costly mistakes that require additional materials to correct.
- Compare prices across at least three online cabinet door retailers before placing your order.
- Only apply veneer to highly visible surfaces, skipping interior or rarely seen frame sections.
- Reuse existing hinges if they are in good condition and compatible with new door thickness.
- Shop for hardware at end-of-season sales or use discount codes from online retailers.
- Rent specialty tools rather than purchasing them for a one-time project.
- Watch step-by-step tutorial videos thoroughly before starting to minimize material waste.
Finishing Touches and Long-Term Maintenance
Once your doors are hung, your veneer is trimmed, and your hardware is installed, take a slow walk around the kitchen and look at everything from multiple angles and distances. Check for any veneer edges that are lifting, any doors that are not sitting flush, or any hardware that is not properly aligned. A tube of color-matched wood filler is invaluable at this stage for filling any small gaps or nicks in the veneer. Touch up any raw edges with a matching iron-on edge banding or a careful stroke of wood stain applied with a small brush for a polished, professional-looking finish that holds up over time.
If you painted any surfaces yourself, allow the paint to cure fully before closing the cabinet doors repeatedly or exposing the surfaces to steam and moisture. Most cabinet paints reach full hardness after about thirty days, even if they feel dry to the touch within hours of application. During this curing period, handle the doors gently and avoid scrubbing them with abrasive materials. After the curing period is complete, your painted surfaces will be significantly more durable and resistant to the everyday wear, splashes, and humidity that a kitchen environment demands from its surfaces.
For long-term maintenance, the key is gentle, consistent cleaning. Wipe cabinet surfaces down regularly with a soft, damp cloth to prevent grease and dust from building up, as heavy deposits are harder to remove and can eventually stain or dull the finish. Avoid harsh chemical cleaners or abrasive pads that can scratch veneer or painted surfaces. Tighten hinge screws periodically as they can work loose over time with regular use. If a veneer edge begins to lift at some point in the future, a small amount of contact cement applied with a toothpick and pressed firmly with a roller will re-secure it quickly and invisibly, extending the life of your refacing work for many more years to come.








What do you think?
It is nice to know your opinion. Leave a comment.